

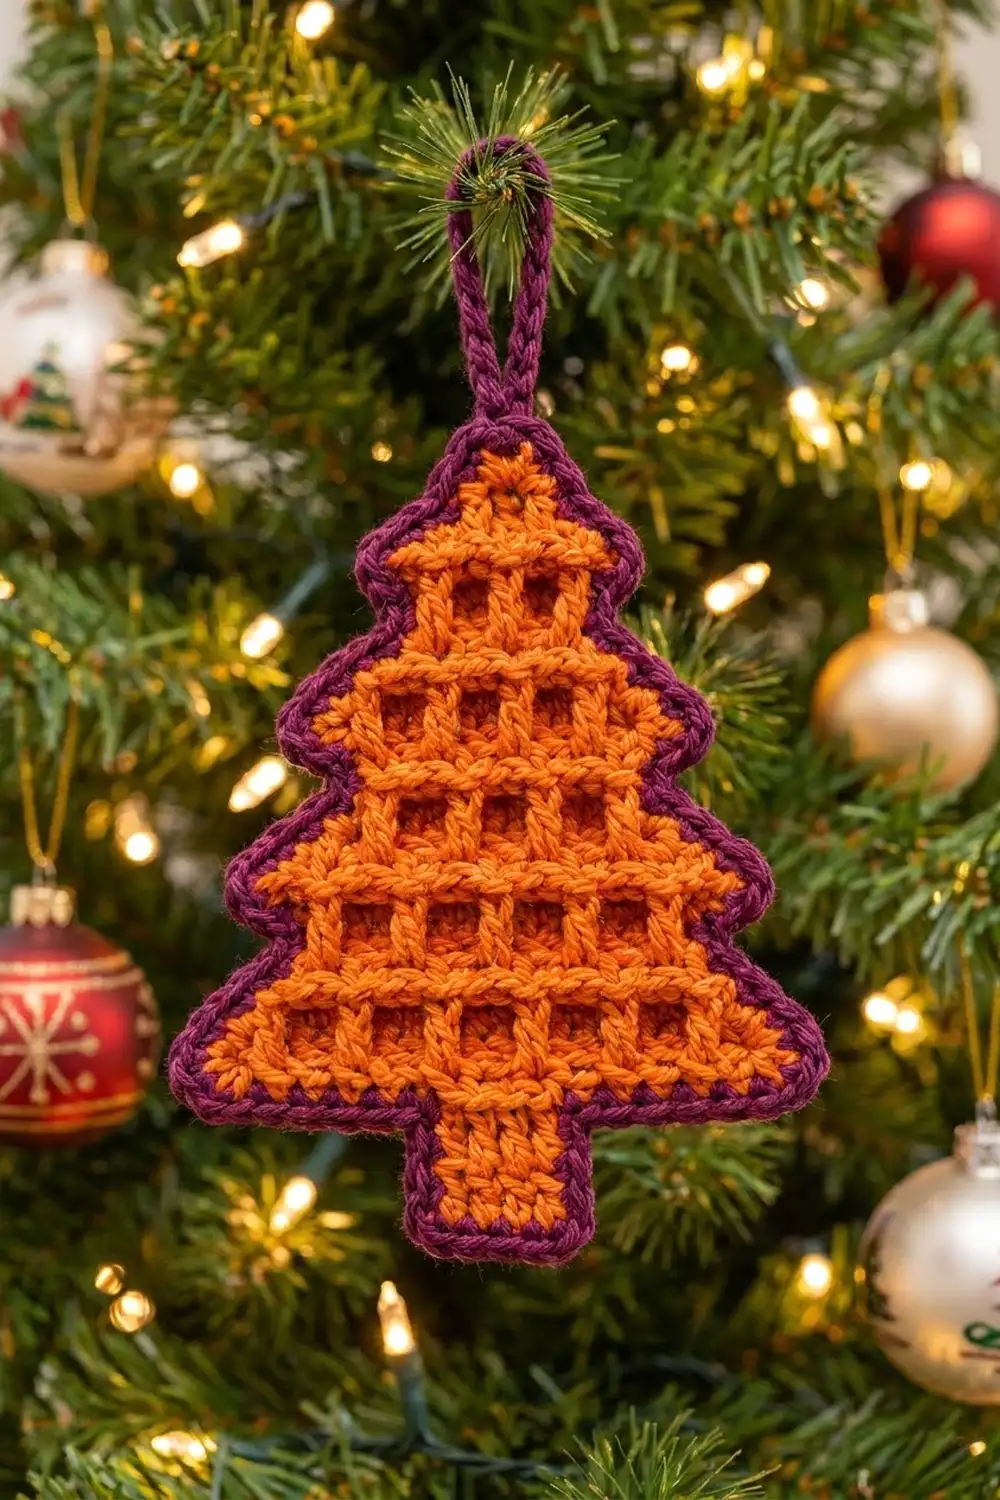
The Ember Lattice Tree is a flat Christmas tree ornament with a bold open-grid body. Short vertical posts and thick horizontal bars make rows of little square windows. Three stepped tiers rise to a solid point, and a short trunk sits underneath.
The body is pumpkin orange and the border is deep plum, with a matching plum loop for hanging. The two colors look warm and a little retro, so the ornament stands out against green branches and white lights. Make one as a gift tag, or make a dozen for the whole tree.
This pattern uses US crochet terms. The finished ornament measures 4.3 in (10.9 cm) wide and 5.7 in (14.5 cm) tall, not including the hanging loop.
You work the tree body flat in turned rows from the bottom edge up to the tip. You then add the trunk into the free loops of the foundation chain. Two rounds of plum border go around everything, and the hanging loop comes last.
Finished Size and Construction
- Finished size: 4.3 in (10.9 cm) wide × 5.7 in (14.5 cm) tall, plus a 1.75 in (4.4 cm) loop
- Skill level: Easy-intermediate
- Terminology: US crochet terms
- Yarn weight: DK (light worsted, #3)
- Hook: 3.5 mm (E-4)
- Number of pieces: 1
- Layout: Single flat motif; three tiers, tip and trunk worked as one piece
- Piece size before border: 3.8 in (9.7 cm) wide × 5.2 in (13.2 cm) tall
- Border depth: 0.25 in (0.6 cm) on every edge
Materials
Use a smooth DK yarn with good stitch definition. Cotton or a cotton blend shows the grid most clearly and stays crisp on the tree. Soft acrylic works too, but the windows will look a little rounder.
- Color A – Pumpkin Orange: 10 g (about 23 m)
- Color B – Plum: 5 g (about 12 m)
These amounts include a safety margin of about 20%.
Tools:
– 3.5 mm (E-4) crochet hook
– Yarn needle
– Scissors
– Stitch marker
– Ruler or tape measure
– Pins and a blocking mat or folded towel
– Spray bottle with water
Abbreviations (US Terms)
- ch – chain
- sl st – slip stitch
- sc – single crochet
- dc – double crochet
- sk – skip
- sp – space
- st(s) – stitch(es)
- sc2tog – single crochet 2 together
- sc3tog – single crochet 3 together
- rep – repeat
- RS – right side
Special stitch – Grid row: Grid rows alternate dc and ch-1 spaces. Each ch-1 sits over one skipped stitch. A ch-4 at the start of a grid row counts as the first dc plus the first ch-1. Every grid row in this pattern has an odd stitch count (dc + ch-1 sps), so it begins and ends with a dc.
Gauge and Checkpoints
Gauge: 20 sc and 20 sc rows = 4 in (10.2 cm). One sc row is 0.2 in (0.5 cm) tall. One grid row is 0.4 in (1.0 cm) tall.
This ornament is a single piece, so use Rows 1–5 as your test. Work them, then measure before you continue.
Checkpoints:
– After Row 2: 3.8 in (9.7 cm) wide, 0.6 in (1.5 cm) tall
– After Row 5: Row 5 is 3.4 in (8.6 cm) wide; the piece is 1.4 in (3.6 cm) tall
– After Row 9: Row 9 is 2.6 in (6.6 cm) wide; the piece is 2.6 in (6.6 cm) tall
– After Row 13: Row 13 is 1.4 in (3.6 cm) wide; the piece is 3.8 in (9.7 cm) tall
– After Row 16: body is 4.4 in (11.2 cm) tall
– After trunk: 5.2 in (13.2 cm) total height
If your piece is too big, go down to a 3.25 mm (D-3) hook. If it is too small, go up to a 3.75 mm (F-5) hook. Watch the grid rows in particular: if your dc stitches are tall, the windows stretch and the tree grows taller than it should.
Tree Body
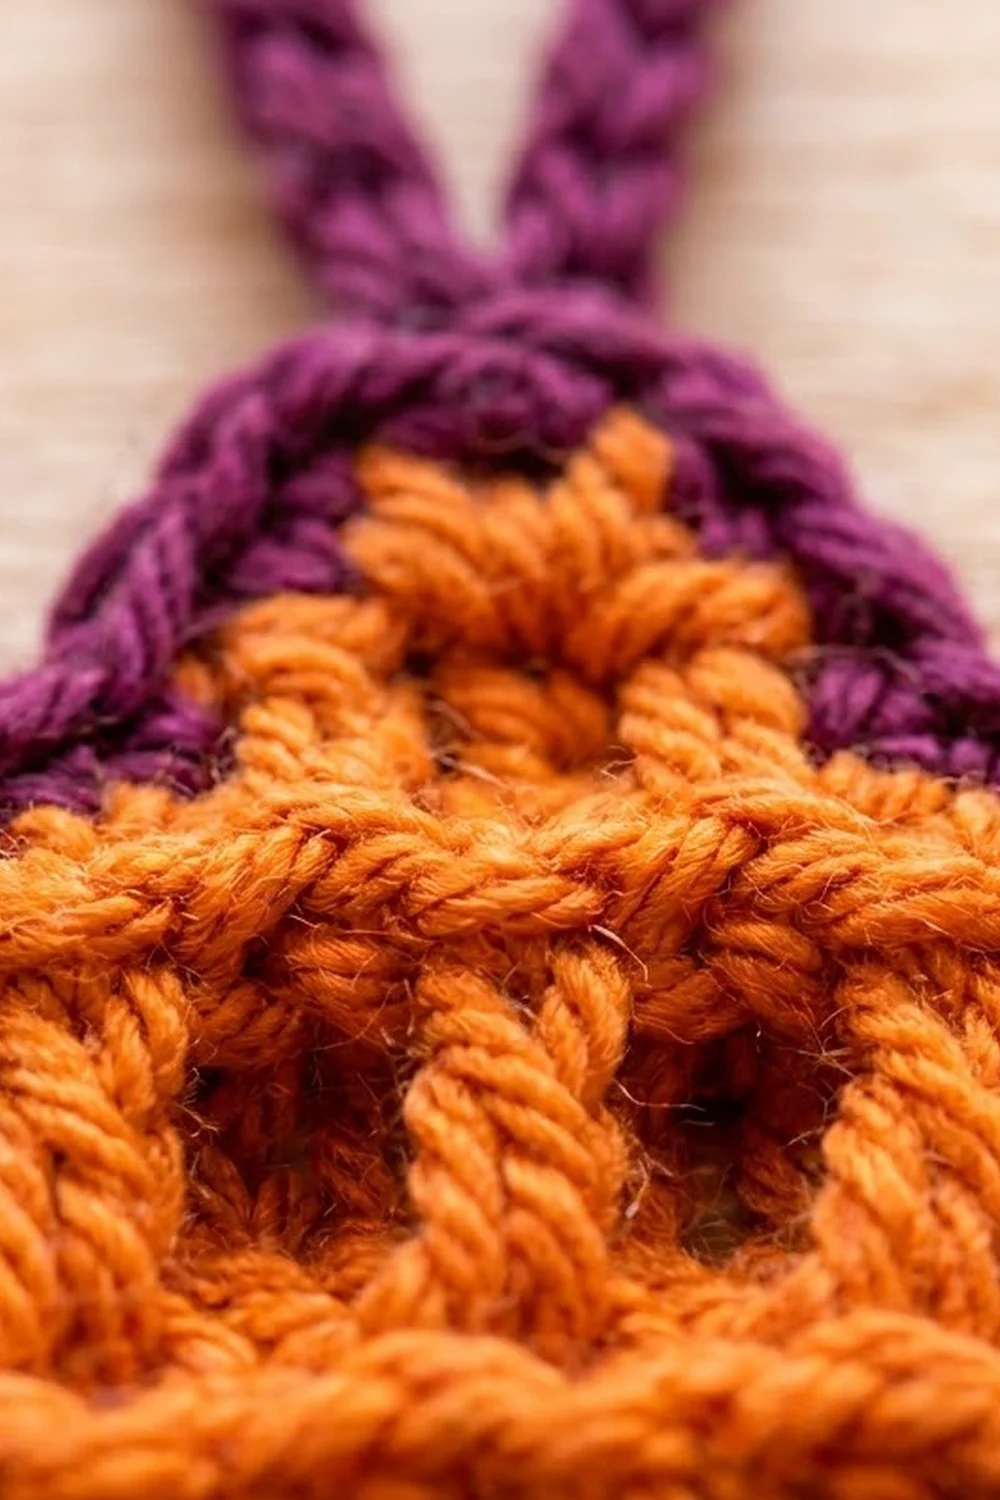
Use Color A. The stitch positions are numbered 1–19 across the foundation, and the grid posts always land on odd-numbered positions. Each decrease row moves in 2 stitches per side, so the posts stay stacked in straight columns from bottom to top.
Tier 1
Foundation: Ch 20.
Row 1 (RS): Sc in 2nd ch from hook and in each ch across, turn. (19 sc)
Row 2 (grid): Ch 4 (counts as dc + ch-1), sk next sc, dc in next sc, ch 1, sk next sc, dc in next sc; rep from * 7 more times, turn. (19 sts: 10 dc, 9 ch-1 sps)*
Row 3: Ch 1, sc in first dc, sc in each ch-1 sp and each dc across, ending with sc in ch-1 sp of turning ch and sc in 3rd ch of turning ch, turn. (19 sc)
Row 4 (grid, decrease): Sl st in first 3 sc, ch 4 (counts as dc + ch-1), sk next sc, dc in next sc, ch 1, sk next sc, dc in next sc; rep from * 5 more times. Leave the last 2 sc unworked and turn. (15 sts: 8 dc, 7 ch-1 sps)*
The slip stitches don’t count as stitches.
Row 5 (ledge row): Ch 1, 2 sc in first dc, sc in each ch-1 sp and each dc across to turning ch, sc in ch-1 sp of turning ch, 2 sc in 3rd ch of turning ch, turn. (15 + 2 = 17 sc)
Row 5 sticks out 1 stitch past Row 4 on each side. This ledge makes the tier notch.
Tier 2
Row 6 (grid, decrease): Sl st in first 2 sc, ch 4 (counts as dc + ch-1), sk next sc, dc in next sc, ch 1, sk next sc, dc in next sc; rep from * 5 more times. Leave the last sc unworked and turn. (15 sts: 8 dc, 7 ch-1 sps)*
Row 7: Ch 1, sc in each dc and ch-1 sp across, ending in the turning ch as in Row 3, turn. (15 sc)
Row 8 (grid, decrease): Sl st in first 3 sc, ch 4, sk next sc, dc in next sc, ch 1, sk next sc, dc in next sc; rep from * 3 more times. Leave the last 2 sc unworked and turn. (11 sts: 6 dc, 5 ch-1 sps)*
Row 9 (ledge row): Ch 1, 2 sc in first dc, sc in each st across, 2 sc in 3rd ch of turning ch, turn. (11 + 2 = 13 sc)
Tier 3
Row 10 (grid, decrease): Sl st in first 2 sc, ch 4, sk next sc, dc in next sc, ch 1, sk next sc, dc in next sc; rep from * 3 more times. Leave the last sc unworked and turn. (11 sts: 6 dc, 5 ch-1 sps)*
Row 11: Ch 1, sc in each st across, turn. (11 sc)
Row 12 (grid, decrease): Sl st in first 3 sc, ch 4, sk next sc, dc in next sc, ch 1, sk next sc, dc in next sc; rep from * 1 more time. Leave the last 2 sc unworked and turn. (7 sts: 4 dc, 3 ch-1 sps)*
Row 13: Ch 1, sc in each st across, turn. (7 sc)
Tip
Row 14: Ch 1, sc2tog, sc in next 3 sc, sc2tog, turn. (5 sc)
Row 15: Ch 1, sc2tog, sc in next sc, sc2tog, turn. (3 sc)
Row 16: Ch 1, sc3tog. (1 sc) Fasten off.
The body now measures 3.8 in (9.7 cm) across Rows 1–3 and 4.4 in (11.2 cm) tall.
Trunk
With the RS facing and the foundation edge at the top, count the free loops of the foundation chain. Find positions 8–12, which are the center 5 loops.
Row 1: Join Color A in the 8th free loop, ch 1, sc in same loop and in next 4 loops, turn. (5 sc)
Row 2: Ch 3 (counts as dc), dc in next 4 sc, turn. (5 dc)
Row 3: Ch 1, sc in each st across, working the last sc in top of ch-3. (5 sc) Fasten off.
The trunk is 1.0 in (2.5 cm) wide and 0.8 in (2.0 cm) tall. Weave in all Color A ends now, before you start the border.
Border
Border gauge: At 5 sts per inch, one sc covers 0.2 in (0.5 cm) of edge. So you work 1 sc into each sc row end and 2 sc into each grid or dc row end, because those rows are 0.4 in (1.0 cm) tall. Work 1 sc into each exposed stitch top, and 3 sc into each outer corner.
Round 1 (Color B)
Hold the piece RS facing with the tip at the top.
Tip: Join Color B in the Row 16 stitch and work 3 sc in that stitch. Place a marker in the middle sc of the 3.
First side, working down (28 sc):
– Row ends of Rows 15, 14 and 13: 1 sc each (3)
– Row end of Row 12: 2 sc (2)
– Exposed tops of Row 11: 2 sc, then 1 sc in its row end (3)
– Row end of Row 10: 2 sc (2)
– Ledge stitch of Row 9: 1 sc in its top, 1 sc in its row end (2)
– Row end of Row 8: 2 sc (2)
– Exposed tops of Row 7: 2 sc, then 1 sc in its row end (3)
– Row end of Row 6: 2 sc (2)
– Ledge of Row 5: 1 sc in top, 1 sc in row end (2)
– Row end of Row 4: 2 sc (2)
– Exposed tops of Row 3: 2 sc, then 1 sc in its row end (3)
– Row end of Row 2: 2 sc (2)
On the slip-stitch side of each decrease, the exposed tops are covered by slip stitches. Work each sc through both the slip stitch and the sc beneath it.
First bottom corner: 3 sc in the free loop of foundation position 1. This also covers the Row 1 row end. (3)
Bottom edge: Sc in free loops at positions 2–7. (6)
Trunk:
– Up the trunk side: 1 sc in the Row 1 end, 2 sc in the Row 2 end, 1 sc in the Row 3 end (4)
– Trunk bottom: 3 sc in the first st, sc in the next 3 sts, 3 sc in the last st (9)
– Down the other trunk side: 4 sc (4)
Bottom edge: Sc in free loops at positions 13–18. (6)
Second bottom corner: 3 sc in the free loop of position 19. (3)
Second side, working up (28 sc): Mirror the first side, working from the Row 2 end up to the Row 15 end.
Sl st to the first sc to join.
Round 1 total: 3 + 28 + 3 + 6 + 4 + 9 + 4 + 6 + 3 + 28 = 94 sc
Round 2 (Color B)
Ch 1. Sl st loosely in each sc around, working through both loops. (94 sl sts) Join with sl st to the first sl st. Do not fasten off.
This round gives the edge its corded look. Keep the slip stitches loose enough that the edge doesn’t pull in.
Why the math works: Each row-end count matches that row’s height at 5 sc per inch, so the border lies flat without ruffling or cupping. The 3-sc corners add the extra fabric needed to turn the outer points. The inner steps and the trunk junction take no corner increases, so they stay crisp. The finished size is 3.8 + 0.25 + 0.25 = 4.3 in (10.9 cm) wide and 5.2 + 0.25 + 0.25 = 5.7 in (14.5 cm) tall.
Hanging Loop
Sl st over to the marked middle sc at the tip. Ch 25, then sl st into the same tip stitch to close the loop. Sl st in each of the 25 chains back around the loop, then sl st into the tip stitch again. Fasten off and weave in the end through the border.
The doubled cord hangs about 1.75 in (4.4 cm) above the tip.
Final Blocking
- Weave in all remaining ends along the border, not across the grid windows.
- Lightly mist the ornament with water until it is damp but not soaked.
- Lay it RS up on the blocking mat.
- Pin the bottom corners 4.3 in (10.9 cm) apart.
- Pin the tip 5.7 in (14.5 cm) above the bottom of the trunk.
- Pin each ledge point outward so the tier notches look sharp.
- Gently square up each window with a fingertip so the posts run straight up and down.
- Pin the loop flat and straight above the tip.
- Leave the ornament to dry completely, about 4–6 hours, before you unpin it.
Final Quality-Control Checklist
- Body rows match the stated counts: 19, 19, 19, 15, 17, 15, 15, 11, 13, 11, 11, 7, 7, 5, 3, 1
- The grid posts line up in straight vertical columns
- Both sides show three clean ledge notches at Rows 5 and 9 and at the Row 11 step
- The trunk is centered on foundation positions 8–12
- Border Round 1 has 94 sc and Round 2 has 94 sl sts
- The finished ornament is 4.3 in (10.9 cm) × 5.7 in (14.5 cm)
- The loop is secure and centered at the tip
- No ends are visible inside the windows
Troubleshooting
The posts lean or drift sideways: You probably miscounted the slip stitches at the start of a decrease row. Use 3 slip stitches on grid decrease rows that follow a plain sc row, and 2 after a ledge row.
The windows look tall and stretched: Your dc stitches are too loose. Pull each dc snug, or try the shorter “linked” habit of not lifting the hook as you yarn over.
The border ruffles: Your sc is too loose, or you added extra stitches at the steps. Recount each side against the 28-sc list.
The border cups inward: Your Round 2 slip stitches are too tight. Redo the round more loosely, or go up 0.25 mm in hook size just for that round.
The trunk sits off-center: Count the foundation free loops again from both ends. Positions 8 and 12 should each have 7 loops on their outer side.
The tip is blunt: Pin it to a sharp point while blocking, and make sure the 3-sc tip group is centered on the Row 16 stitch.
Care
Hand wash in cool water and lay flat to dry, reshaping while damp. Store it flat or hanging, away from heavy ornaments that could crush the grid.
Final Notes
Your measurement chain runs like this. Gauge is 20 sc = 4 in (10.2 cm). That gives a 3.8 in (9.7 cm) wide base and a 4.4 in (11.2 cm) tall body. The trunk adds 0.8 in (2.0 cm), for 5.2 in (13.2 cm) before the border. A 0.25 in (0.6 cm) border on every side brings the finished ornament to 4.3 in (10.9 cm) × 5.7 in (14.5 cm). If you check the measurements at each checkpoint, the tree will come out the right size.
Happy crocheting!