

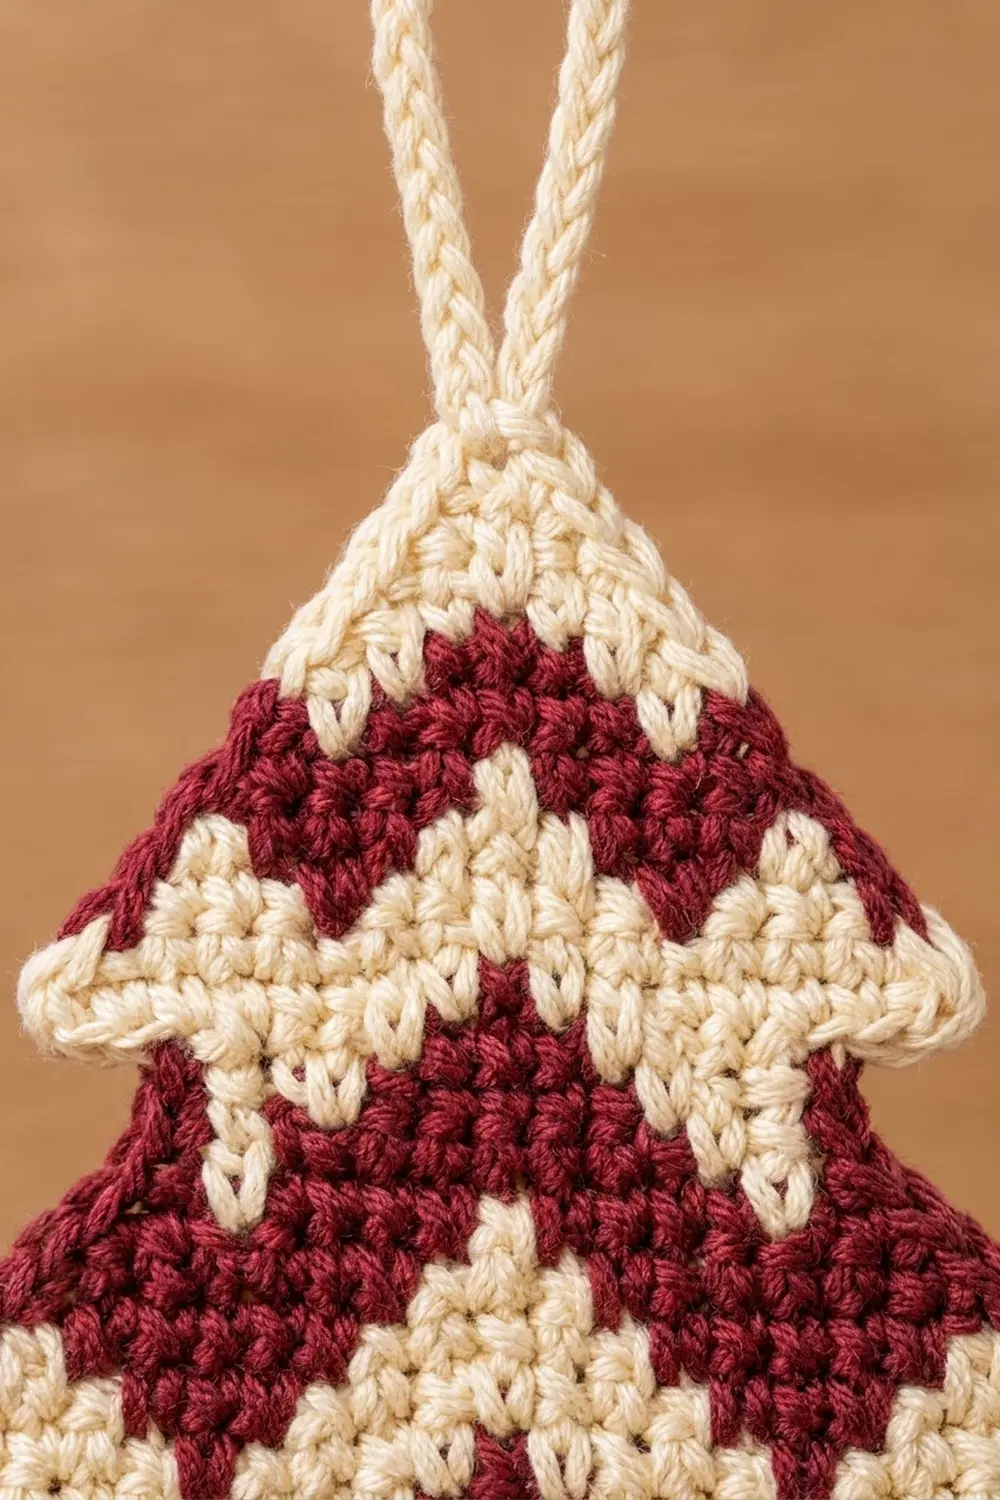
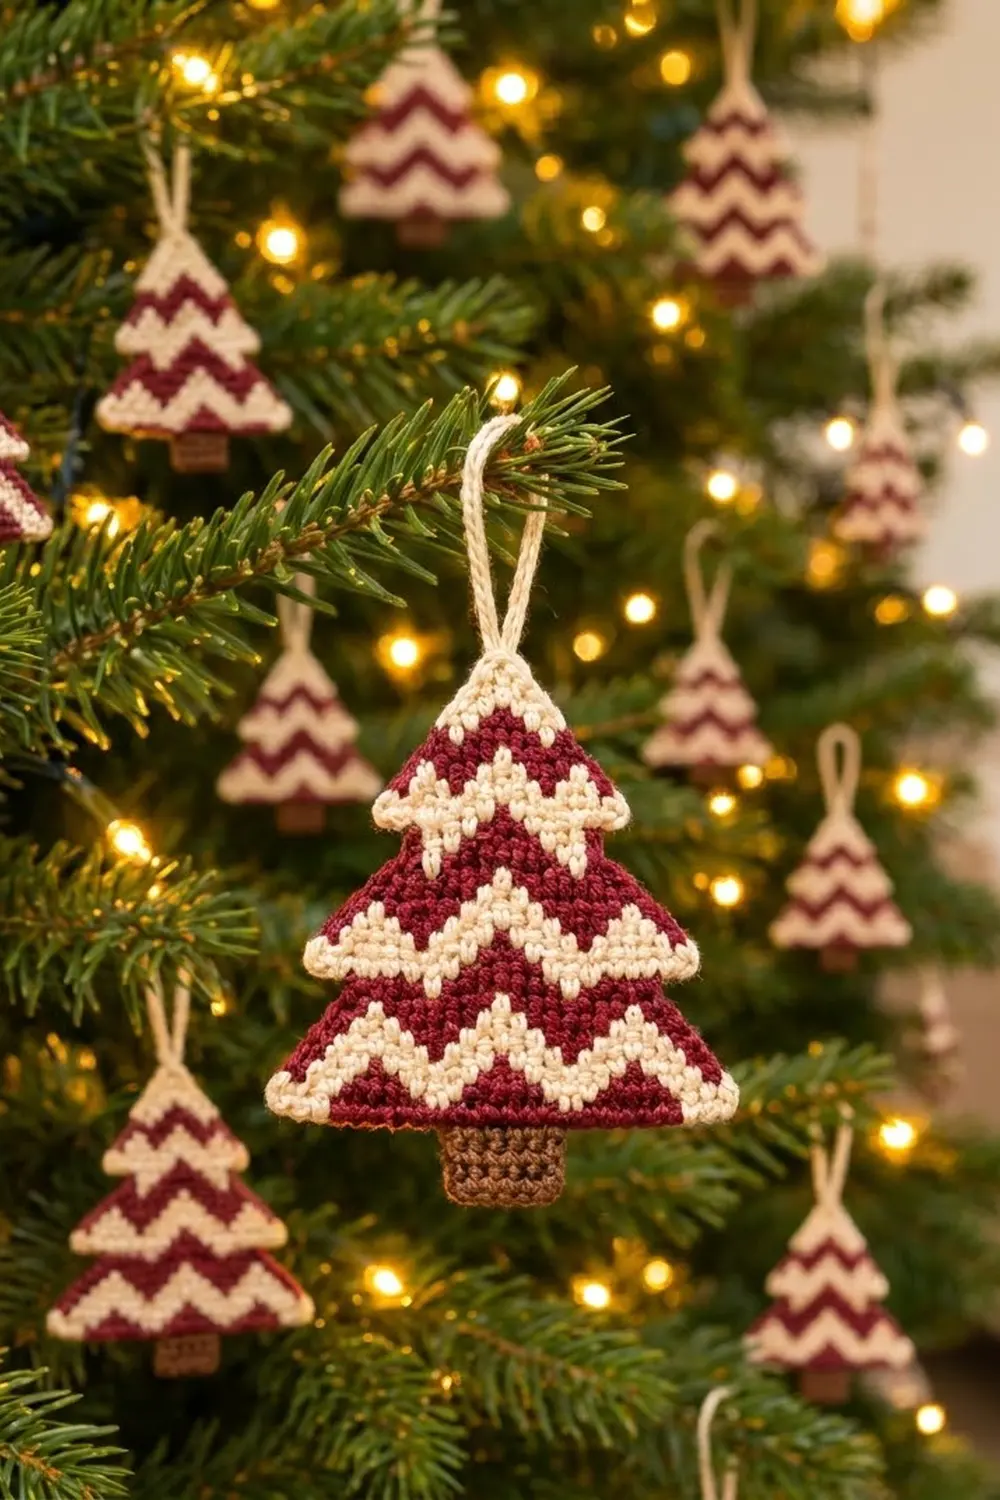
This little ornament is a flat, three-tier Christmas tree made in tapestry single crochet. The body is deep burgundy with bold cream zigzag bands across it. The tip is solid cream, and a short brown trunk sits centered under the bottom tier. A cream single crochet edging outlines every tier and ends in a cream hanging loop at the top.
The look is cozy and Scandinavian, like a knitted sweater turned into a tree. Each tier sticks out past the one above it, which gives the classic stacked-pine shape with a small ledge at every tier.
The pattern uses US crochet terms. The finished ornament measures about 4.8 in (12.2 cm) wide and 5.5 in (14.0 cm) tall, plus a hanging loop of about 1.25 in (3.2 cm).
You work the tree from the tip down in turned rows. Increases at both edges make each tier wider, and slip stitches across a few stitches step in for the next tier. The trunk is worked last into the center stitches of the final row. Then one round of cream edging outlines the tiers and forms the loop.
Finished Size and Construction
- Finished size: 4.8 in (12.2 cm) wide x 5.5 in (14.0 cm) tall, not counting the loop
- Skill level: Intermediate (tapestry color changes, shaping)
- Terminology: US crochet terms
- Yarn weight: Sport weight (#2) cotton or cotton blend
- Hook: 2.5 mm (US B/1 or C/2, depending on brand)
- Number of pieces: 1 (single flat ornament)
- Layout: Three stacked triangular tiers with a centered trunk
- Piece size before edging: 4.5 in (11.4 cm) wide x 5.3 in (13.5 cm) tall
- Edging depth: 1 round of sc, about 0.17 in (0.4 cm)
Materials
Choose a smooth, tightly plied cotton in sport weight. Mercerized cotton shows the zigzags crisply and holds the flat shape well. Avoid fuzzy or very soft yarns, because the carried strand will show through.
- Color B – Burgundy: about 6 g / 18 m (20 yd)
- Color C – Cream: about 6 g / 18 m (20 yd)
- Color T – Brown (trunk): about 2 g / 6 m (7 yd)
These amounts include about 25% extra for swatching and tails. One ball of each color makes a whole tree full of ornaments.
Tools:
– 2.5 mm crochet hook (or the size you need for gauge)
– 1 stitch marker (for the center stitch)
– Tapestry needle
– Scissors
– Pins and a blocking mat or folded towel
– Spray bottle with water
Abbreviations (US Terms)
- ch – chain
- sc – single crochet
- sl st – slip stitch
- st(s) – stitch(es)
- inc – 2 sc in the same stitch
- B / C / T – burgundy / cream / brown
- RS / WS – right side / wrong side
Special technique – tapestry sc: Lay the unused color along the top of the previous row and work your sc over it, so it’s hidden inside the stitch. To change color, work the last sc of the old color until 2 loops are left on the hook. Then yarn over with the new color and pull through. Keep the carried strand relaxed so the fabric stays flat.
Center stitch (d): Every row has an odd number of stitches, so it always has one center stitch. In this pattern, d is a stitch’s distance from that center stitch (the center is d0, its neighbors are d1, and so on). Keep a marker in the center stitch and move it down every row.
Gauge and Checkpoints
Gauge: 12 sc and 12 rows = 2 in (5.1 cm) in tapestry sc while carrying a second color.
Because the ornament is small, the first tier is your gauge swatch. Work Rows 1–9 and measure before you go on.
- After Row 9: 15 sts = 2.5 in (6.4 cm) wide; 9 rows = 1.5 in (3.8 cm) tall.
- After Row 18: 21 sts = 3.5 in (8.9 cm) wide; total height 3 in (7.6 cm).
- After Row 27: 27 sts = 4.5 in (11.4 cm) wide; total height 4.5 in (11.4 cm).
- After the trunk: total height 5.3 in (13.5 cm).
- After the edging: 4.8 in (12.2 cm) x 5.5 in (14.0 cm).
If Tier 1 is wider than 2.5 in (6.4 cm), go down 0.25 mm in hook size. If it’s narrower, go up 0.25 mm. If the width is right but the tier is too tall, carry the second strand a little more snugly. Tapestry sc gets taller when the carried strand is loose.
Tree Body
Work the rows back and forth. Start each row with ch 1 (doesn’t count as a stitch), then turn. For an increase row: inc in the first st, sc across to the last st, inc in the last st (+2 sts). Every tier follows the same rhythm: inc, inc, plain.
If a row isn’t listed as a band row, work it all in the color given while carrying the other color inside the stitches.
Tier 1 (Rows 1–9)
Start with C and leave a 6 in (15.2 cm) tail. Lay the B tail along the work so you can carry it from Row 1.
Row 1 (C): Ch 2, 3 sc in 2nd ch from hook. (3 sts)
Row 2 (C): Inc, sc 1, inc. (5 sts)
Row 3 (B): Inc, sc 3, inc. (7 sts)
Row 4 (B, plain): Sc in each st. (7 sts)
Row 5 (band, upper): Inc, sc 5, inc, in these colors: 2 C, 1 B, 3 C, 1 B, 2 C. (9 sts)
Row 6 (band, lower): Inc, sc 7, inc, in these colors: 1 C, 1 B, 3 C, 1 B, 3 C, 1 B, 1 C. (11 sts)
Row 7 (B, plain): Sc in each st. (11 sts)
Row 8 (B): Inc, sc 9, inc. (13 sts)
Row 9 (B): Inc, sc 11, inc. (15 sts)
The color sequences count the increase stitches. When an increase needs two colors, work the first sc in one color, then change color for the second sc in the same stitch.
Band rule: In an upper band row, use B on every stitch at d2, d6 and d10, and C everywhere else. In a lower band row, use B at d0, d4 and d8, and C everywhere else. Stacked together, these two rows make a 2-row cream zigzag that peaks at the center.
Tier 2 (Rows 10–18)
Row 10 (B, step row): Ch 1, turn, sl st in first 3 sts, sc in next 9 sts, leave last 3 sts unworked. (9 sts)
The 3 skipped stitches on each side form the ledge under Tier 1.
Row 11 (B): Inc, sc 7, inc. (11 sts)
Row 12 (band, upper): Inc, sc 9, inc, in these colors: 1 B, 3 C, 1 B, 3 C, 1 B, 3 C, 1 B. (13 sts)
Row 13 (band, lower, plain): Sc in each st, in these colors: 2 C, 1 B, 3 C, 1 B, 3 C, 1 B, 2 C. (13 sts)
Row 14 (B): Inc, sc 11, inc. (15 sts)
Row 15 (band, upper): Inc, sc 13, inc, in these colors: 2 C, 1 B, 3 C, 1 B, 3 C, 1 B, 3 C, 1 B, 2 C. (17 sts)
Row 16 (band, lower, plain): Sc in each st, in these colors: 1 B, 3 C, 1 B, 3 C, 1 B, 3 C, 1 B, 3 C, 1 B. (17 sts)
Row 17 (B): Inc, sc 15, inc. (19 sts)
Row 18 (B): Inc, sc 17, inc. (21 sts)
Checkpoint: 3.5 in (8.9 cm) wide and 3 in (7.6 cm) tall.
Tier 3 (Rows 19–27)
Row 19 (B, step row): Ch 1, turn, sl st in first 3 sts, sc in next 15 sts, leave last 3 sts unworked. (15 sts)
Row 20 (B): Inc, sc 13, inc. (17 sts)
Row 21 (band, upper): Inc, sc 15, inc, in these colors: 3 C, 1 B, 3 C, 1 B, 3 C, 1 B, 3 C, 1 B, 3 C. (19 sts)
Row 22 (band, lower, plain): Sc in each st, in these colors: 1 C, 1 B, 3 C, 1 B, 3 C, 1 B, 3 C, 1 B, 3 C, 1 B, 1 C. (19 sts)
Row 23 (B): Inc, sc 17, inc. (21 sts)
Row 24 (band, upper): Inc, sc 19, inc, in these colors: 1 C, 1 B, (3 C, 1 B) 5 times, 1 C. (23 sts)
Row 25 (band, lower, plain): Sc in each st, in these colors: (3 C, 1 B) 5 times, 3 C. (23 sts)
Row 26 (B): Inc, sc 21, inc. (25 sts)
Row 27 (B): Inc, sc 23, inc. (27 sts)
Fasten off B and cut C, leaving 6 in (15.2 cm) tails. Checkpoint: 4.5 in (11.4 cm) wide and 4.5 in (11.4 cm) tall. The tier bottoms are 15, 21 and 27 sts, so each tier is 6 sts (1 in / 2.5 cm) wider than the one above it.
Trunk
The trunk is centered on Row 27: 10 sts + 7 sts + 10 sts = 27 sts.
Row 1: With the last row facing, skip the first 10 sts and join T in the 11th st. Ch 1, sc in the same st and in the next 6 sts. (7 sts)
Rows 2–5: Ch 1, turn, sc in each st. (7 sts)
Fasten off. The trunk measures about 1.2 in (3.0 cm) wide and 0.8 in (2.0 cm) tall.
Border (Cream Edging and Loop)
Border gauge: One sc per row end and one sc per stitch. The body gauge is 6 sts and 6 rows per inch, so one sc per row end lies flat without ruffling or pulling in.
The edging goes around the tiers only. The trunk stays plain brown. The ledges are the 3 unworked (or slip-stitched) sts at each end of Rows 9 and 18.
Round 1 (C): With the bottom edge facing, join C in the 10th st of Row 27, next to the trunk. Ch 1.
First half (bottom to tip):
– Bottom edge: sc in sts 10 through 2, 3 sc in st 1 (outer corner). (12 sc)
– Tier 3 side: 1 sc in each row end of Rows 26–19. (8 sc)
– Tier 2 ledge: sc in the 3rd ledge st, sc in the 2nd ledge st, 3 sc in the outer ledge st. (5 sc)
– Tier 2 side: 1 sc in each row end of Rows 17–10. (8 sc)
– Tier 1 ledge: sc, sc, 3 sc in the outer st, as before. (5 sc)
– Tier 1 side: 1 sc in each row end of Rows 8–1. (8 sc)
Tip and loop: In the tip (the starting ch of Row 1), work sc, ch 16, sc. (2 sc + ch-16 loop)
Second half (tip to bottom): Mirror the first half. Work 8 sc down Tier 1, then 5 sc around the ledge (3 sc in the outer st first). Work 8 sc down Tier 2, then 5 sc around the ledge. Work 8 sc down Tier 3 and 3 sc in the outer bottom corner. Finish with sc in the next 9 sts, ending in st 18 next to the trunk. (46 sc)
Fasten off, leaving a tail.
Total: 46 + 2 + 46 = 94 sc, plus the ch-16 loop.
Why the math works: Each side has 9 rows per tier. The 3 sc in each outer corner cover the bottom row of that tier, which leaves 8 row ends per tier. Each ledge is 3 sts, and the 3 sc in its outer stitch turn the sharp corner without cupping. The bottom edge uses the 10 free sts on each side of the trunk, so nothing is skipped or worked twice. The edging adds one sc height, about 0.17 in (0.4 cm), on every side. That takes the width from 4.5 in (11.4 cm) to about 4.8 in (12.2 cm) and the height from 5.3 in (13.5 cm) to 5.5 in (14.0 cm).
Final Blocking
- Weave in all tails through same-color stitches on the WS. Run each tail one way and then back so it can’t slip out.
- Mist the ornament lightly with water until it’s damp but not wet.
- Lay it flat on a blocking mat, RS up.
- Pin the tip, the outer corner of each ledge on both sides, and the four corners of the trunk.
- Check the measurements: 4.8 in (12.2 cm) across the bottom tier and 5.5 in (14.0 cm) from the tip to the bottom of the trunk.
- Make sure the trunk sits straight under the center and the ledges are level from side to side.
- Straighten the loop and pin it flat.
- Let it dry completely before you unpin it.
Final Quality-Control Checklist
- Tier bottoms measure 15, 21 and 27 sts.
- All five zigzag bands peak at the center of the tree.
- No burgundy shows through cream stitches (or the other way around).
- The ledges are the same size on both sides.
- The trunk is 7 sts wide and centered, with 10 sts on each side.
- The edging count is 94 sc plus the loop.
- The ornament lies flat without cupping or ruffling.
- The loop is secure and centered at the tip.
Troubleshooting
The zigzags lean to one side. You’ve lost the center. Keep the marker in the center stitch, and check that every increase is in the first and last stitch.
Carried yarn peeks through. Tighten your tension a little and keep the carried strand at the back of the stitch. The darker color shows more, so take extra care when carrying B under C.
The tree cups or curls. The carried strand is too tight. Gently stretch the row after each color change, and block firmly.
The edging ruffles. Your rows are shorter than your stitches are wide. Skip 1 row end on each tier side.
The edging pulls in. Your rows are taller than expected. Add 1 sc on each tier side.
The ledges look uneven. Count the 3 skipped stitches carefully on the step rows, and work the slip stitches loosely.
Care
Hand wash in cool water with mild soap, press out the water with a towel, and dry flat. Store it flat or hanging, out of direct sunlight, to keep the burgundy rich.
Final Notes
The measurement chain is simple. A gauge of 6 sts and 6 rows per inch gives Tier 1 at 2.5 in (6.4 cm), Tier 2 at 3.5 in (8.9 cm) and Tier 3 at 4.5 in (11.4 cm). The trunk adds 0.8 in (2.0 cm), and the edging adds 0.17 in (0.4 cm) on each side. The finished ornament is 4.8 in (12.2 cm) by 5.5 in (14.0 cm). Check Tier 1 first, and the rest falls into place.
Happy crocheting!