

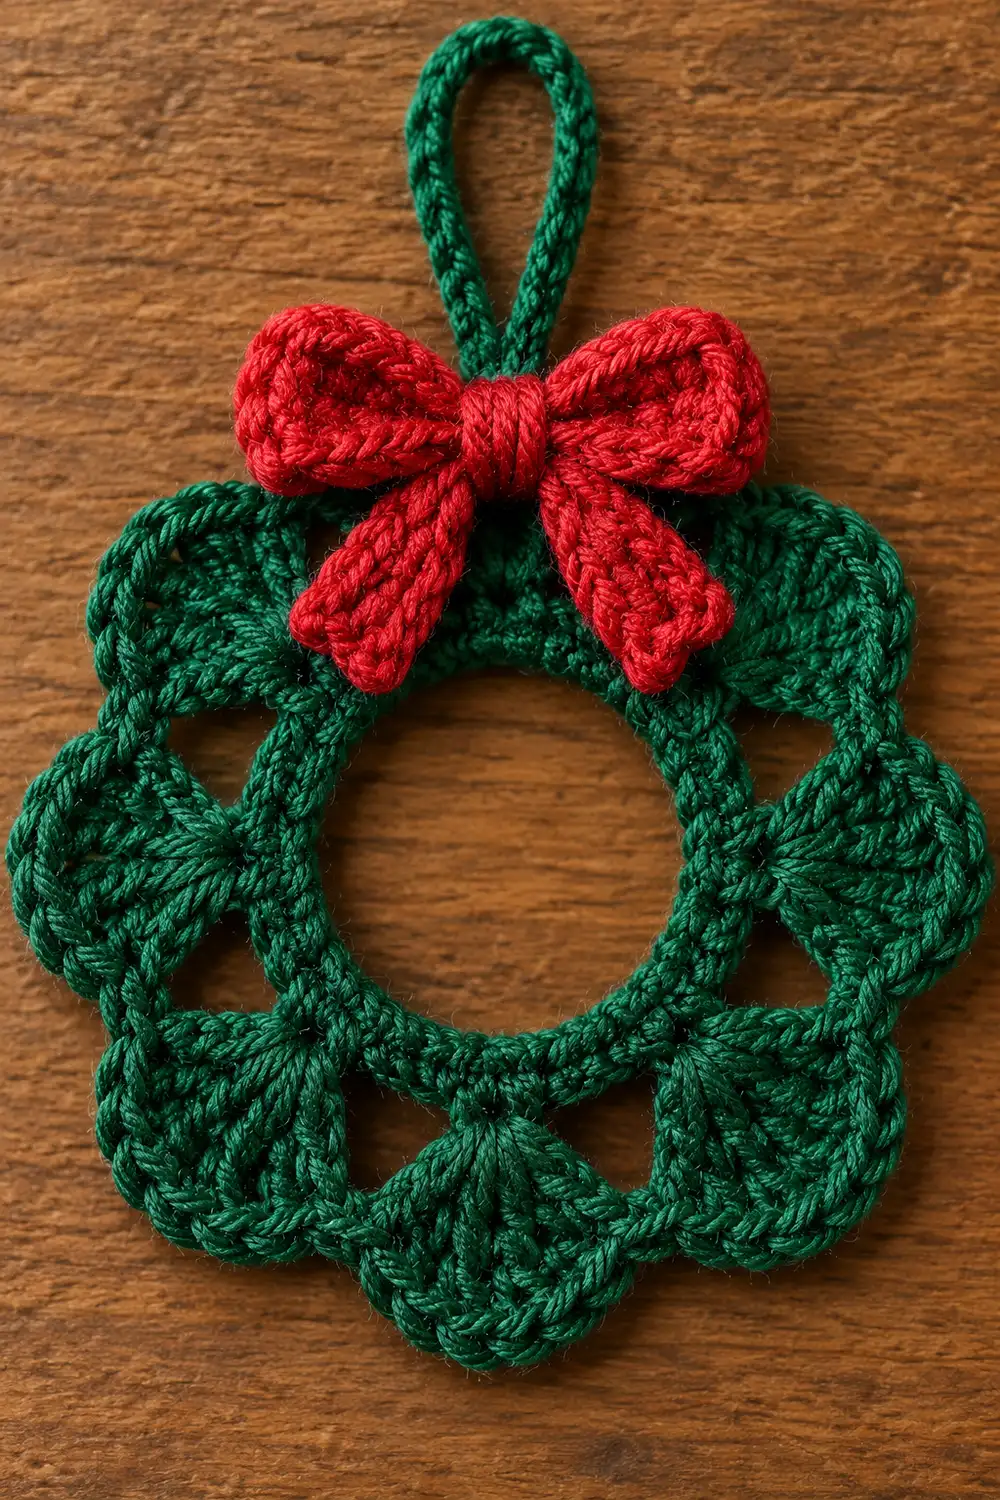
This little wreath is a single flat motif in forest green, finished with a red crocheted bow at the top center and a green chain loop for hanging. Eight evenly spaced shell fans form a scalloped outline, and open lacework between the rounds lets light and background show through.
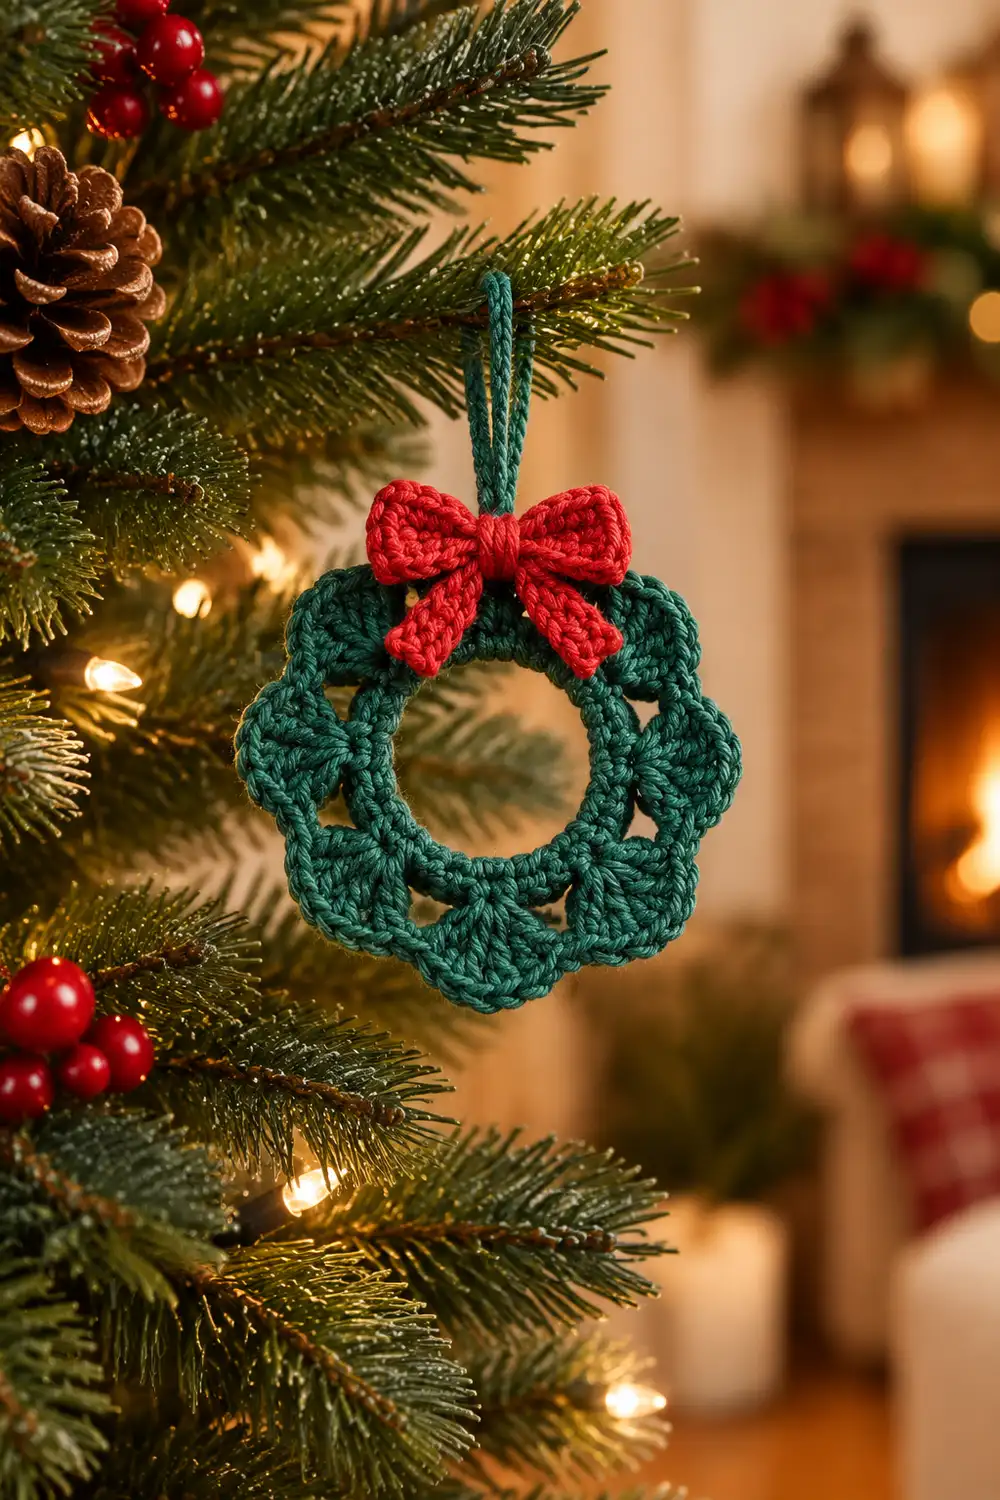
The style is classic and cozy, closer to a vintage doily than a puffy ornament. It lies flat and works well on a tree, a gift package, a door knob, or a card.
The pattern uses US crochet terms. The finished wreath measures 4.25 in (10.8 cm) across, with a 1.5 in (3.8 cm) open center.
Construction is simple. A chain ring forms the base. One double crochet round builds the solid inner ring. A round of chain arches creates the open lace. A shell round builds the eight fans, and a single crochet border tidies the scallops. The bow is made separately from three small red strips and sewn on. The hanging loop is worked directly onto the wreath.
Finished Size and Construction
- Finished size: 4.25 in (10.8 cm) diameter
- Center opening: 1.5 in (3.8 cm)
- Skill level: Easy (advanced beginner)
- Terminology: US crochet terms
- Yarn weight: Worsted (#4)
- Hook: 4.0 mm (G-6)
- Number of pieces: 1 wreath motif plus 1 bow (the bow is assembled from 3 small red strips). The hanging loop is worked onto the wreath, not made separately.
- Layout: Single circular motif, bow at top center, hanging loop rising above the bow
- Piece size: Wreath 4.25 in (10.8 cm); bow 1.75 in (4.4 cm) wide
- Size before border: 3.75 in (9.5 cm) after Round 4
- Border depth: 0.25 in (0.6 cm) on each side
Materials
Yarn: Choose a smooth worsted weight yarn. Cotton or a cotton blend gives the crispest shells and the clearest lace holes. Acrylic works too but may need a light stiffener to hold its shape.
- Forest green: 12 g / 24 m (wreath and hanging loop)
- Red: 6 g / 12 m (bow)
These quantities include a margin for your gauge swatch, weaving in ends, and sewing. The actual project uses a little less.
Tools:
- 4.0 mm (G-6) crochet hook
- Tapestry needle
- Scissors
- 1 stitch marker
- Rust-proof pins
- Foam blocking mat or folded towel
- Spray bottle with clean water
- Optional: fabric stiffener or diluted white glue
Abbreviations (US Terms)
- ch – chain
- sl st – slip stitch
- sc – single crochet
- dc – double crochet
- st(s) – stitch(es)
- sp – space
- sk – skip
- beg – beginning
- rep – repeat
- RS – right side
Special stitch:
- Shell – work 7 dc into the same chain space. The 4th dc is the center dc of the shell.
Gauge and Checkpoints
Base gauge: 18 sc and 20 rows = 4 in (10.2 cm) in rows of sc with a 4.0 mm hook.
Gauge matters less here than in a garment, but it decides whether the wreath lies flat. The best test is to make one wreath body first, through Round 2, and measure.
Checkpoints (measure flat, without stretching):
- After Round 2: 2.25 in (5.7 cm) across, center opening 1.5 in (3.8 cm)
- After Round 3: 2.75 in (7.0 cm) across
- After Round 4: 3.75 in (9.5 cm) across
- After Round 5 (border): 4.25 in (10.8 cm) across
If your piece is too big (more than 0.25 in / 0.6 cm over a checkpoint), go down to a 3.5 mm hook.
If your piece is too small, or the center ring is tight and cupping, go up to a 4.5 mm hook.
Stitch counts never change. Only the hook changes.
Wreath Body
Use forest green. Work in rounds with the RS facing you. Do not turn.
Round 1 (chain base): Ch 24. Sl st into the first ch to form a ring, taking care not to twist the chain.
Stitch count: 24 ch.
Round 2 (solid inner ring): Ch 3 (counts as first dc), dc in next ch, 2 dc in next ch. Dc in next 2 ch, 2 dc in next ch. Rep from * 7 more times. Join with sl st to top of beg ch-3.
Stitch count: 32 dc.
This is a growth round. Each of the 8 repeats works over 3 chains and makes 4 dc: 8 × 3 = 24 ch used, and 8 × 4 = 32 dc made. Work the dc into the chains themselves, not around the ring, so the chain base stays visible as a neat inner edge.
Checkpoint: 2.25 in (5.7 cm) across, 1.5 in (3.8 cm) opening.
Round 3 (lace arches): Ch 1 (does not count as a st). Sc in same st as join, ch 4, sk next 3 dc. Sc in next dc, ch 4, sk next 3 dc. Rep from * 6 more times. Join with sl st to first sc.
Stitch count: 8 sc and 8 ch-4 spaces.
Each repeat uses 4 dc (1 worked, 3 skipped): 8 × 4 = 32 dc. The ch-4 arches bridge the skipped stitches and create the open holes.
Checkpoint: 2.75 in (7.0 cm) across.
Round 4 (shell fans): Ch 1. Sc in same sc as join, Shell in next ch-4 sp. Sc in next sc, Shell in next ch-4 sp. Rep from * 6 more times. Join with sl st to first sc.
Stitch count: 8 shells (56 dc) and 8 sc = 64 sts.
Each shell sits centered over one lace arch, with an sc anchoring the valley between fans. Spread the 7 dc evenly across the arch as you work.
Checkpoint: 3.75 in (9.5 cm) across. Do not fasten off; continue to the Border.
Bow
Use red. The bow has three strips: a loop strip, a tail strip, and a center strip. Leave a 6 in (15.2 cm) tail at the end of each strip for sewing.
Loop strip:
- Row 1: Ch 17. Sc in 2nd ch from hook and in each ch across, turn. (16 sc)
- Rows 2–5: Ch 1, sc in each st across, turn. (16 sc)
Fasten off. The strip measures about 3.5 in (8.9 cm) long and 1 in (2.5 cm) tall.
Tail strip:
- Row 1: Ch 15. Sc in 2nd ch from hook and in each ch across, turn. (14 sc)
- Row 2: Ch 1, sc in each st across. (14 sc)
Fasten off. The strip measures about 3 in (7.6 cm) long and 0.4 in (1.0 cm) wide.
Center strip:
- Row 1: Ch 6. Sc in 2nd ch from hook and in each ch across, turn. (5 sc)
- Rows 2–3: Ch 1, sc in each st across, turn. (5 sc)
Fasten off. The strip measures about 1 in (2.5 cm) long and 0.6 in (1.5 cm) wide.
Shape the bow:
- Lay the loop strip flat, wrong side up. Fold both short ends to the center so they overlap by about 2 stitches. Whipstitch the overlap. You now have two dimensional loops, each about 0.9 in (2.3 cm) wide, for a total width of 1.75 in (4.4 cm).
- Pinch the center so the loops puff into a bow shape. Wrap red yarn tightly around the pinch 4 times and knot it at the back.
- Fold the tail strip into a shallow V. Place the point of the V behind the bow center so both tails angle down and outward. Tack it in place.
- Wrap the center strip around the pinch, covering the wrapped yarn, and sew its short ends together at the back.
Keep the long sewing tail from the center strip. You will use it to attach the bow to the wreath.
Border
Border gauge: The border is worked at the same gauge as the wreath body, with 1 sc placed into each existing dc. No change in tension is needed.
Since the wreath is round, the counts below are given per scallop, the circular equivalent of a side. There are 8 scallops.
Round 5 (scallop border): Continuing with green, sl st in same sc as join. Sc in next 3 dc, 2 sc in next dc (center dc of shell), sc in next 3 dc, sl st in next sc. Rep from * 7 more times, working the final sl st into the first sl st. Fasten off, leaving a 6 in (15.2 cm) tail.
Per scallop: 8 sc and 1 sl st = 9 sts.
Round total: 64 sc and 8 sl st = 72 sts.
This is a conversion round, not a growth round. Count it this way:
- Sc worked 1-per-dc: 7 per shell × 8 shells = 56 sc
- Extra sc added at the shell tips: 1 per shell × 8 shells = 8 sc
- Sc total: 56 + 8 = 64 sc
- Sl st worked 1-per-existing-sc: 8 sl st, one in each valley sc from Round 4
Why the math works:
- One sc per dc keeps each scallop the same length as its shell, so the fans keep their shape.
- The single extra sc at each tip adds just enough length where the outer curve is widest, so the edge does not cup.
- The sl st in each valley stays low and flat, which keeps the dip between scallops crisp and defined.
The border adds 0.25 in (0.6 cm) on each side: 3.75 in + 0.5 in = 4.25 in (9.5 cm + 1.3 cm = 10.8 cm).
Final Blocking
- Weave in ends. Weave in all green ends except the border tail. Keep the bow’s sewing tail.
- Dampen. Mist the wreath with water until evenly damp. For acrylic, steam it lightly instead, holding the iron above the yarn without touching it.
- Pin the circle. Pin the wreath flat on the mat to 4.25 in (10.8 cm). Place one pin at the tip of each of the 8 scallops, spacing them evenly like a clock face.
- Open the center. Pin the inner ring at 4 points so the opening measures 1.5 in (3.8 cm).
- Open the lace. Gently nudge each ch-4 arch so its hole is open and even.
- Optional stiffener. Brush on fabric stiffener now if you want a firm ornament.
- Dry fully. Leave the wreath pinned until it is completely dry, usually 6–12 hours.
- Choose the top. Unpin the wreath and pick one valley sl st as the top center.
- Add the hanging loop. Join green with a sl st in the top valley sl st. Ch 14, then sl st in the same st to form a loop. Work 18 sc into the loop and sl st into the base. Fasten off and weave in the end. The loop stands about 1.25 in (3.2 cm) tall.
- Attach the bow. Center the bow over the top valley, just in front of the hanging loop base. Use the center strip tail to sew through the wreath at the top of Round 2 and through Rounds 4–5. Make 3–4 secure passes, then weave in the end on the back.
Final Quality-Control Checklist
- The wreath measures 4.25 in (10.8 cm) across in every direction.
- The center opening is round and 1.5 in (3.8 cm) across.
- There are 8 scallops, each with 8 sc plus 1 valley sl st.
- All 8 lace holes are open and roughly equal in size.
- The wreath lies flat with no cupping or ruffling.
- The bow loops are even, 1.75 in (4.4 cm) across, and the tails angle evenly.
- The bow sits at top center, directly above the inner ring.
- The hanging loop is centered behind the bow and holds firm when tugged.
- No ends are visible from the front.
Troubleshooting
The wreath cups like a bowl. Your Round 4 shells are too tight. Go up 0.5 mm in hook size, or relax your tension on the dc.
The edge ruffles. Your stitches are too loose for the count. Go down 0.5 mm in hook size, or work the border sc more firmly.
Shells look lopsided. The Shell must go into the ch-4 space, not into a chain. Check that the 4th dc sits over the middle of the arch.
The center hole is too small. Make your Round 1 chains looser, or chain with a hook one size larger.
Lace holes close up. Re-block the wreath and pin each arch open while it dries.
The bow flops forward. Add a stitch at the bow’s back, anchoring the top of the loops to the wreath.
The hanging loop stretches. Pack the 18 sc firmly over the chain, or add a light coat of stiffener to the loop only.
Care
Spot clean or hand wash in cool water, then reshape and dry flat. If you used stiffener, re-block the wreath and re-stiffen it after washing.
Final Notes
The measurement chain is easy to track:
- Round 1: 24-ch base ring
- Round 2: 32 dc, 2.25 in (5.7 cm)
- Round 3: 8 lace arches, 2.75 in (7.0 cm)
- Round 4: 8 shells, 3.75 in (9.5 cm)
- Round 5: scallop border, finished at 4.25 in (10.8 cm)
The red bow and green hanging loop complete the ornament. If you hit each checkpoint, the wreath will lie flat with even fans and clean lace.
Optional idea: make several wreaths in different greens to hang as a set of tree ornaments.
Happy crocheting!