
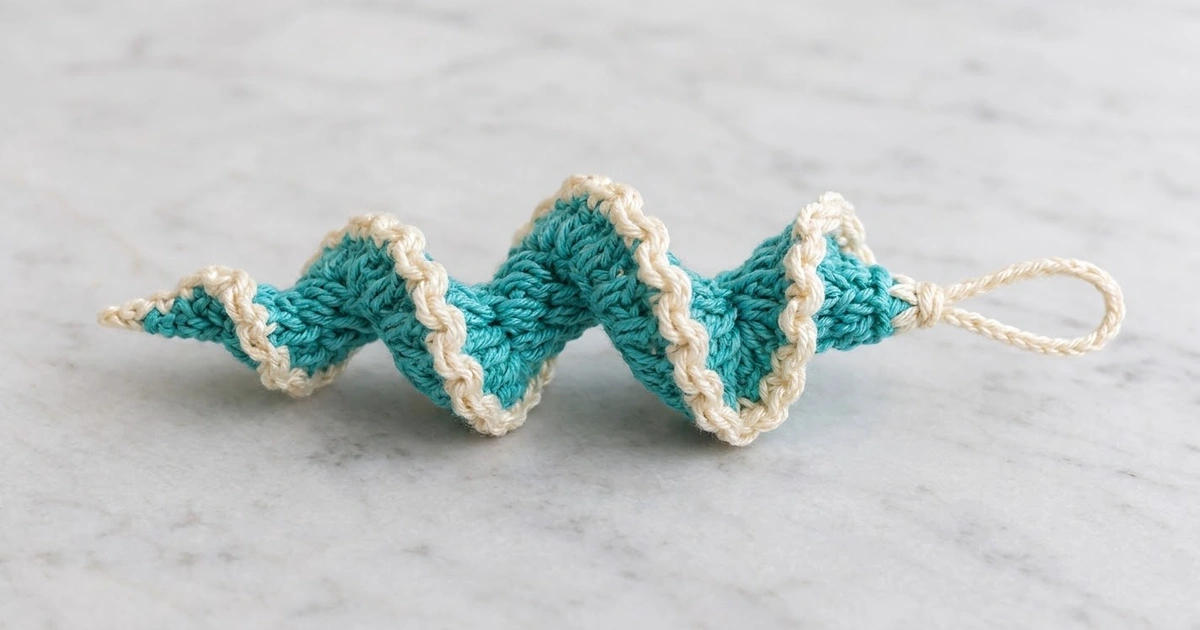
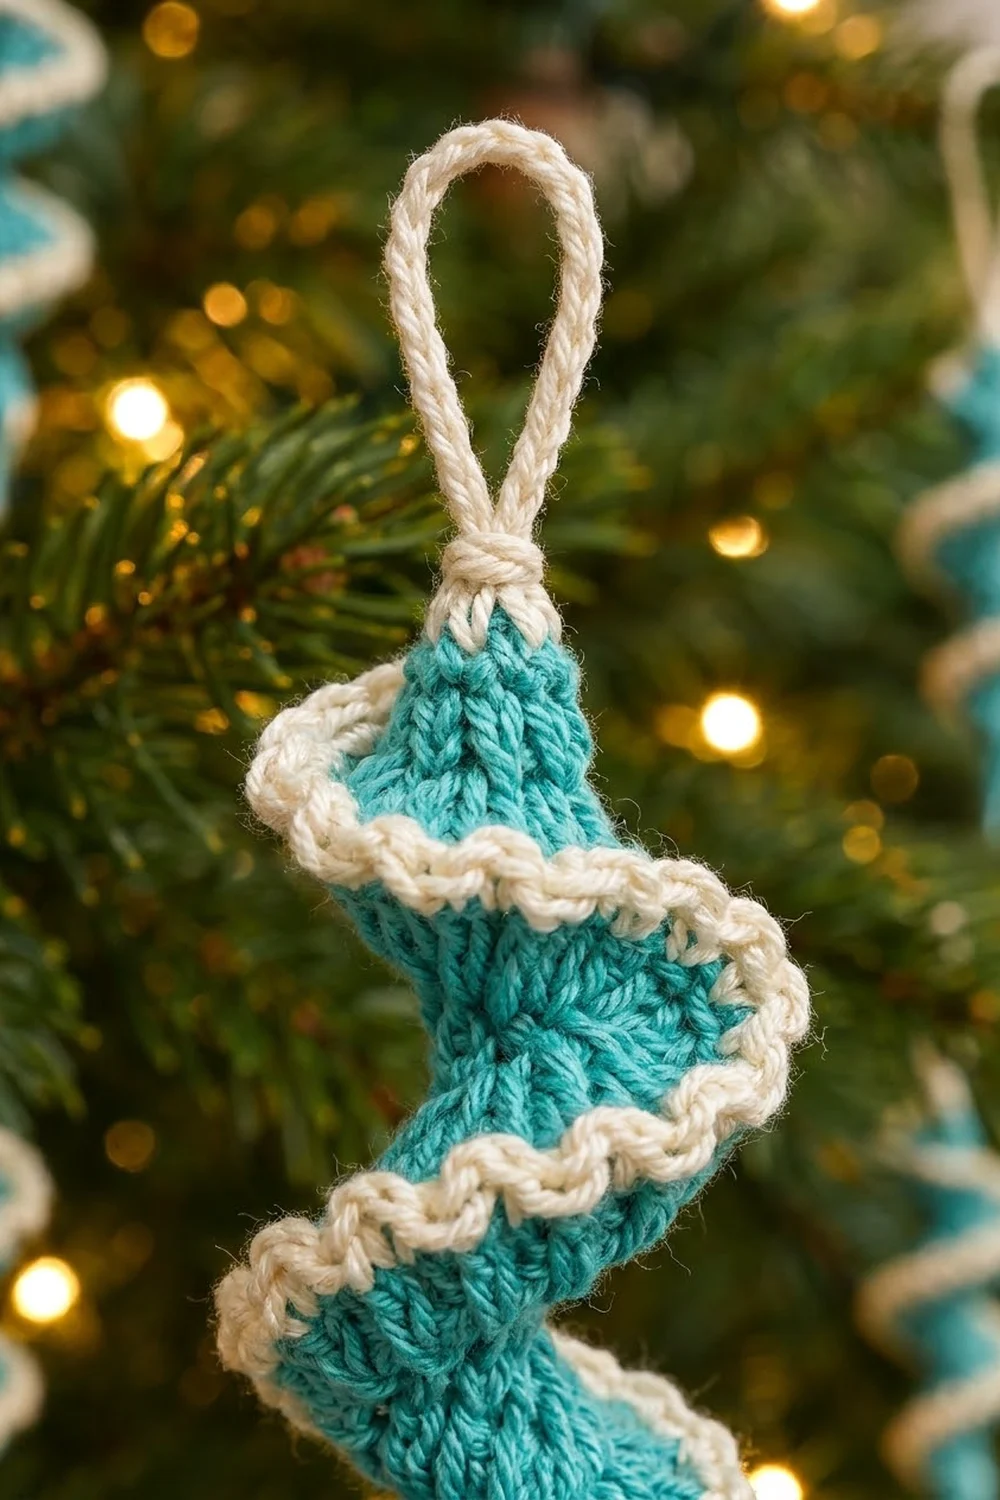
This spiral icicle ornament is one twisted strip of teal stitches with a beaded cream edge. It hangs from a firm cream loop and tapers from a full, swirling top to a sharp point. On a tree it catches the light the way real ice does, and it takes well under an hour to make.
The colors are simple: bright teal for the body and soft cream for the edge, collar and loop. The cream edge winds around the spiral in one unbroken line from tip to top, like the stripe on a candy cane.
This pattern uses US crochet terms. The finished ornament is about 5.5 in (14.0 cm) long without the loop, 7 in (17.8 cm) including the loop, and about 1.75 in (4.4 cm) across at the widest turn of the spiral.
The construction is short. You make a foundation chain, then work one row of graduated stitches with 2 or 3 stitches in every chain, going from single crochet at the tip to treble crochet at the top. Crowding that many stitches into the chain makes the strip twist by itself. A row of cream reverse single crochet trims the outer edge, the top is gathered, and a corded loop finishes the piece. If you can work basic stitches into a chain, you can make this ornament.
Finished Size and Construction
- Finished size: 5.5 in (14.0 cm) long without loop; 7 in (17.8 cm) with loop
- Widest spiral diameter: 1.75 in (4.4 cm)
- Skill level: Easy
- Terminology: US crochet terms
- Yarn weight: Worsted (weight 4)
- Hook: 4.0 mm (G-6)
- Number of pieces: 1 (one continuous strip, with the hanging loop worked directly onto it)
- Layout: Single ornament, no assembly
- Strip height before edging: 1 in (2.5 cm) at the treble end, 0.25 in (0.6 cm) at the tip
- Border depth: the cream edge adds 0.25 in (0.6 cm), so the top section measures 1.25 in (3.2 cm)
Materials
Choose a smooth, tightly plied worsted yarn. Cotton or a cotton blend gives the crispest spiral and the clearest beaded edge. Acrylic also works but relaxes more after blocking. Avoid fuzzy or very soft yarns, because they blur the stitches.
Pick two colors with strong contrast. The cream edge is what makes the spiral readable from across the room, so a pale teal with an off-white edge loses much of the effect.
- Teal (Color A): 8 g, about 15 m
- Cream (Color B): 5 g, about 9 m
These quantities include a margin of about 30% for your test strip and tails.
Tools:
– 4.0 mm (G-6) crochet hook
– 3.5 mm (E-4) hook, optional, for the edge if it flares
– Tapestry needle
– Scissors
– Spray bottle and a chopstick or pencil for blocking
– Ruler or tape measure
Abbreviations (US Terms)
- ch – chain
- sl st – slip stitch
- sc – single crochet
- hdc – half double crochet
- dc – double crochet
- tr – treble crochet
- rsc – reverse single crochet
- st(s) – stitch(es)
Special stitch – reverse single crochet (rsc), also called crab stitch: Working from left to right (if you crochet right-handed) without turning, insert the hook into the next stitch to the right, yarn over, pull up a loop, then yarn over and pull through both loops on the hook. Each rsc makes the twisted, beaded rope you see along the cream edge.
Gauge and Checkpoints
Gauge isn’t critical for an ornament, but it controls how tightly the spiral twists. Make one test strip first and compare it with these checkpoints.
To check, chain 31 with your chosen hook and measure the chain before you start Row 1. It takes two minutes and can save you redoing the whole strip.
- Foundation chain: 5 ch = 1 in (2.5 cm). The 31-ch foundation measures about 6.2 in (15.7 cm) relaxed.
- Stitch heights in Row 1: sc section 0.25 in (0.6 cm), dc section 0.75 in (1.9 cm), tr section 1 in (2.5 cm).
- After Row 1: the strip already curls into a loose corkscrew without any help.
- After Row 2: the edged top section is 1.25 in (3.2 cm) tall.
- Finished and blocked: 5.5 in (14.0 cm) long and 1.75 in (4.4 cm) across.
If your piece is too big, or the spiral is loose and open, your chain is too loose. Use a 3.5 mm (E-4) hook for the foundation chain only, then switch back to the 4.0 mm (G-6) hook for Row 1.
If your piece is too small, or Row 1 buckles so much that you can’t reach the chains, your chain is too tight. Use a 4.5 mm (7) hook for the foundation chain only.
Pattern
Foundation
With teal and the 4.0 mm (G-6) hook, leave an 8 in (20.3 cm) tail and ch 31.
The slipknot end of this chain becomes the top of the icicle, and the hook end becomes the tip. Keep the tail, because you’ll use it to gather the neck.
Row 1 – Graduated Spiral Row (Teal)
Work into the back bump of each chain for a cleaner lower edge. Do not turn at any point in this row.
- Tip section: 2 sc in the 2nd ch from hook, then 2 sc in each of the next 5 ch. (12 sc over 6 ch)
- Lower section: 2 hdc in each of the next 8 ch. (16 hdc over 8 ch)
- Middle section: 3 dc in each of the next 8 ch. (24 dc over 8 ch)
- Top section: 3 tr in each of the last 8 ch, ending in the slipknot ch. (24 tr over 8 ch)
Row 1 total: 76 sts (12 sc + 16 hdc + 24 dc + 24 tr), worked into 30 ch. The 1 skipped ch at the start makes up the rest of the 31-ch foundation.
Where one section meets the next, just switch to the new stitch in the next chain. You don’t need any transition stitches. The small step in height between sections disappears once the strip twists.
As you work, the strip will start to twist. Let it. The rising stitch height creates the taper from point to top, and the 2 or 3 stitches in each chain create the corkscrew. Keep your stitches relaxed. If you pull every stitch tight, the chain shortens and the spiral turns into a stiff knot.
Fasten off teal, leaving a 4 in (10.2 cm) tail at the top end.
Checkpoint: Lay the strip as flat as it will go. The top section should be about 1 in (2.5 cm) tall and the tip about 0.25 in (0.6 cm) tall.
Row 2 – Cream Beaded Edge
You are now at the top (left) end of the strip with the right side facing you. Do not turn.
- With cream, join with a sl st in the top of the last tr made.
- Ch 1.
- Work 1 rsc in each st along the top edge of Row 1, moving left to right back toward the tip. (76 rsc)
- Sl st into the side of the first sc at the tip.
- Fasten off, leaving a 4 in (10.2 cm) tail.
Row 2 total: 76 rsc (76 sts worked 1 per existing st + 0 extra sts).
Reverse single crochet feels awkward at first. Keep each loop slightly loose and turn your wrist so the hook points down into the next stitch. The rhythm comes after the first 10 or so stitches.
Checkpoint: The cream edge should sit as a raised rope along the outer curve. The edged top section now measures 1.25 in (3.2 cm).
Shaping the Tip
Thread the cream tip tail onto the tapestry needle. Weave it down through the last 2 or 3 sc at the tip, pulling gently so the point narrows to about 0.125 in (0.3 cm). Weave in the teal tip tail the same way and trim both.
Gathering the Neck
- Thread the 8 in (20.3 cm) teal foundation tail onto the needle.
- Run it in and out through the tops of the last 3 tr and the end of the foundation chain.
- Pull firmly so the top closes into a narrow neck about 0.4 in (1.0 cm) across.
- Knot securely and weave the tail down inside the spiral. Weave in the cream tail from the start of Row 2 the same way.
Hanging Loop and Collar (Cream)
- With cream, leave a 10 in (25.4 cm) tail and join with a sl st through the center of the gathered neck.
- Ch 16, then sl st in the same neck stitch to form a ring.
- Work 20 sc around the ch-16 ring, covering the chain completely.
- Sl st in the first sc. Fasten off and weave this end into the neck.
The covered loop stands about 1.5 in (3.8 cm) tall and has the firm, corded look shown on the finished ornament.
Collar: Thread the 10 in (25.4 cm) starting tail onto the needle. Wrap it snugly 5 times around the neck, just below the base of the loop, to form a neat cream band about 0.25 in (0.6 cm) deep. Pass the needle up under all the wraps, then down through the center of the neck and into the spiral. Trim.
Border
On this ornament, the border is the cream reverse single crochet edge worked in Row 2. Only one side is bordered: the long outer edge of the strip. The foundation-chain edge forms the core of the spiral and gets no border.
Border gauge: 1 rsc per Row 1 stitch. Over the tr section, that works out to 3 rsc per 0.2 in (0.5 cm) of foundation chain.
Border count per side: outer edge only = 12 (over sc) + 16 (over hdc) + 24 (over dc) + 24 (over tr) = 76 rsc.
Why the math works: Row 1 already contains all the fullness the spiral needs. If you added stitches in the edge, the outer curve would get longer and ripple instead of following the twist. If you skipped stitches, the edge would pull and flatten the corkscrew. Working exactly 1 rsc per stitch keeps the outer edge the same length as Row 1, so the cream rope lies smoothly along every turn. Reverse single crochet also sits a little tighter than regular sc, which helps the spiral hold its shape.
Final Blocking
- Lightly mist the ornament with water until it is damp, not wet.
- Slide a chopstick or pencil through the center of the spiral, along the foundation-chain edge.
- Spread the turns evenly along the stick so there are about 3.5 full turns from the tip to the neck.
- Gently pull the tip until the ornament measures 5.5 in (14.0 cm) from the neck to the point.
- Check that the widest turn, near the top, is about 1.75 in (4.4 cm) across.
- Let it dry completely on the stick, which takes at least several hours. Cotton dries firm and holds the twist best.
- Slide the stick out from the top. For acrylic yarn, a short burst of steam held 1 in (2.5 cm) above the piece sets the shape. Do not press it.
Final Quality-Control Checklist
- Row 1 has 76 sts: 12 sc, 16 hdc, 24 dc and 24 tr.
- Row 2 has 76 rsc, with no gaps or doubled stitches.
- The spiral has about 3.5 even turns.
- Length is 5.5 in (14.0 cm) without the loop and 7 in (17.8 cm) with it.
- The widest point is about 1.75 in (4.4 cm).
- The tip is sharp and no tail ends show.
- The neck is closed, with no hole at the top.
- The collar wraps lie side by side, not stacked.
- The loop is fully covered with 20 sc and stands about 1.5 in (3.8 cm) tall.
- All ends are woven in and trimmed.
Troubleshooting
The strip won’t twist. The chain is too loose or the stitches are too short. Use a smaller hook for the chain, and check that you worked 3 sts per ch in the dc and tr sections.
The spiral is tight and lumpy. The chain is too tight. Remake it with a larger hook.
The cream edge ripples. You added stitches. Recount to 76, or switch to a 3.5 mm (E-4) hook for Row 2.
The cream edge pulls the spiral flat. You skipped stitches. Recount and rework, keeping 1 rsc per stitch.
The turns are uneven. Your tension changed between sections. Spread the turns evenly again on the stick during blocking.
The sections show visible steps. That’s normal before blocking. Damp blocking on the stick smooths them out.
The tip is blunt. Weave the tip tail through more of the sc and pull firmly before trimming.
There’s a hole at the top. Run the teal tail through the neck a second time and pull tighter.
The loop flops sideways. Add 1 or 2 more sc around the ring so the chain is fully covered, and center the loop on the neck before you wrap the collar.
Care
Spot clean with cool water and mild soap, then reshape the ornament on a chopstick and let it dry. Store it flat or hanging, away from heavy ornaments that could crush the spiral.

Final Notes
The whole ornament depends on one chain of measurements. A 31-ch foundation at 5 ch per inch gives 6.2 in (15.7 cm). Row 1 packs 76 graduated stitches into that chain, rising from 0.25 in (0.6 cm) at the tip to 1 in (2.5 cm) at the top. Row 2 adds 76 rsc and 0.25 in (0.6 cm) of cream edge. The crowded stitches twist the strip into about 3.5 turns, which block to 5.5 in (14.0 cm) long and 1.75 in (4.4 cm) wide. The 1.5 in (3.8 cm) loop brings the total to 7 in (17.8 cm).
If any measurement is off, fix it at the earliest stage. A chain that is the wrong length can’t be corrected by the edge or by blocking, so always check the foundation first.
Make one, check it against these numbers, then make a whole flurry for the tree.
Happy crocheting!