

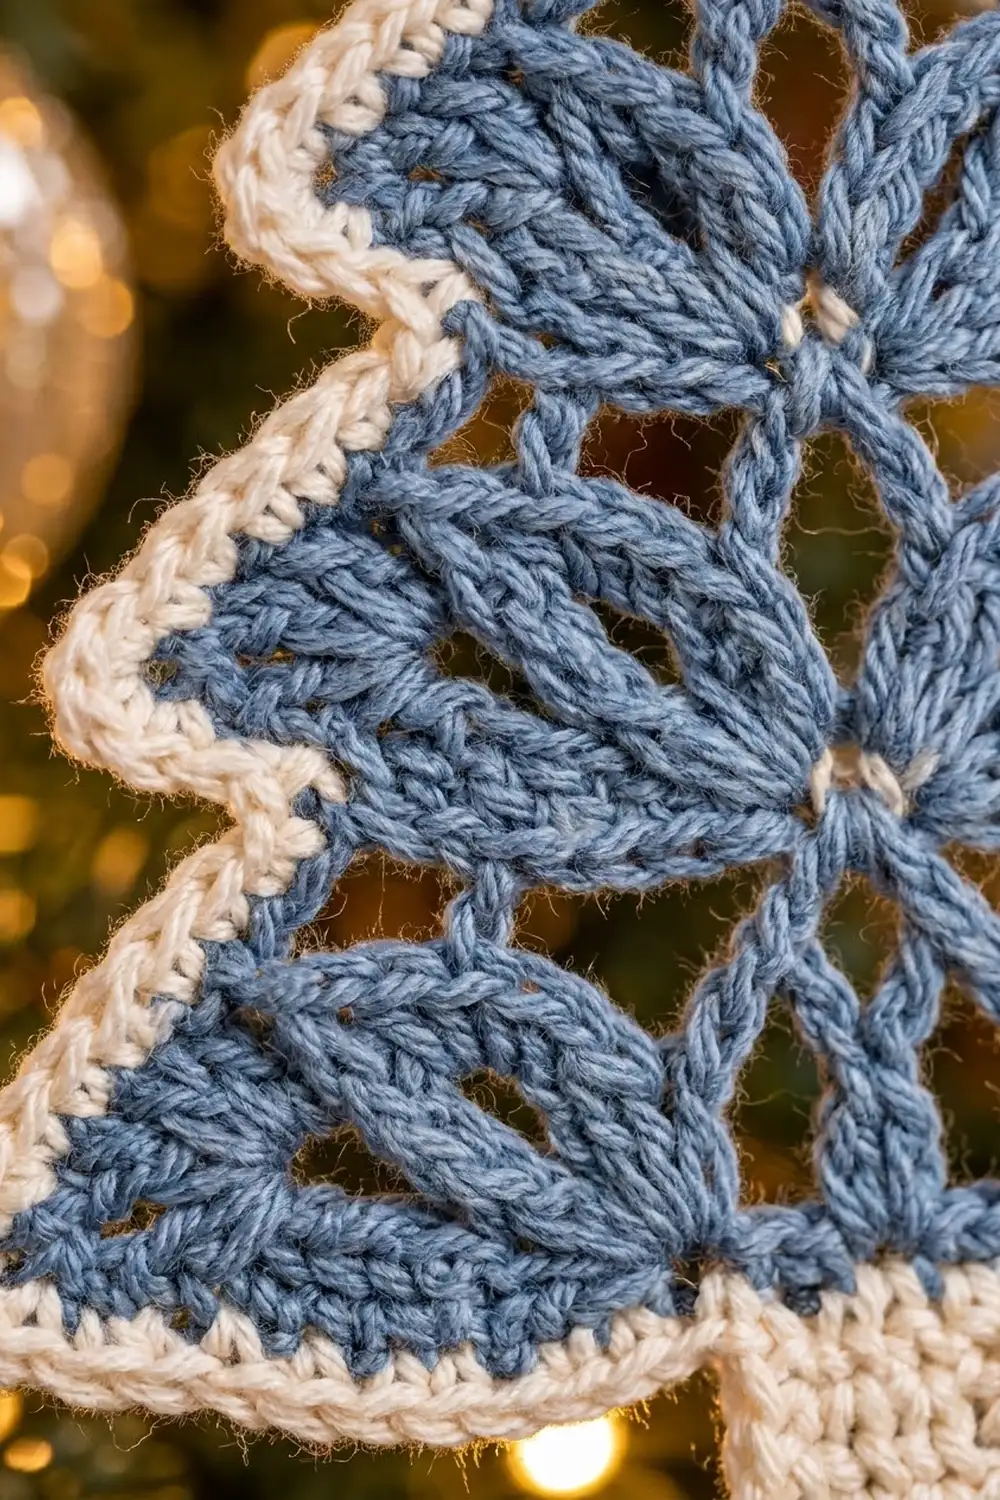
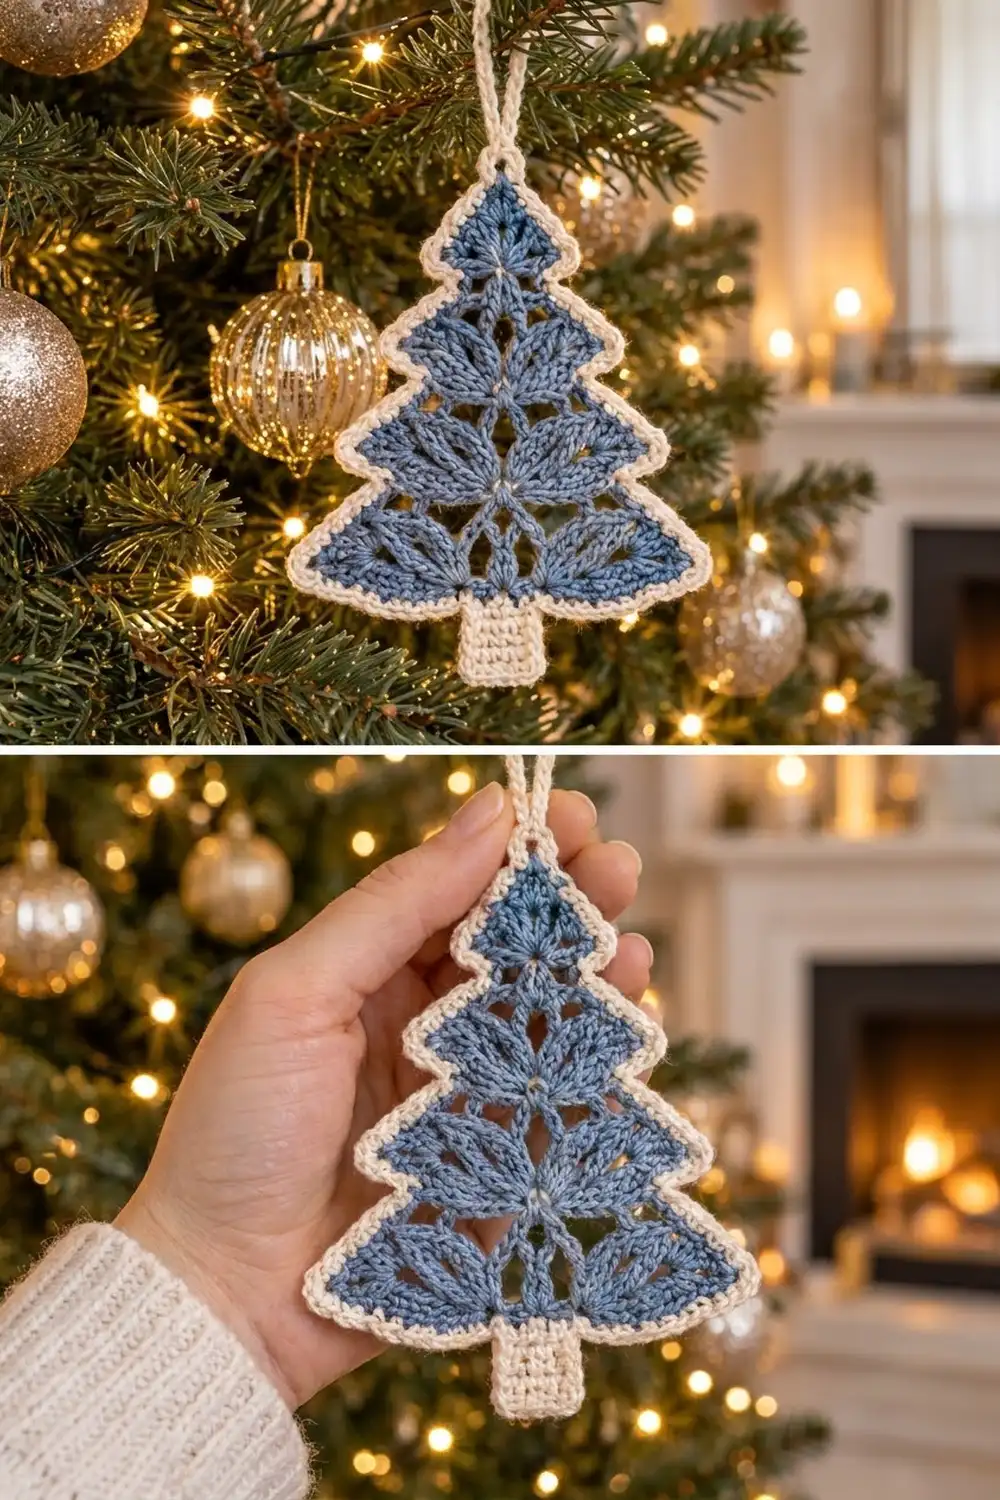
This Frosted Leaf Christmas Tree is a flat lace ornament with three stepped tiers, a pointed top and a small solid trunk. The tree body is worked in dusty denim blue. Pairs of oval leaf clusters open into V shapes inside each tier, so the tree looks frosted and delicate without being fussy to make.
A crisp cream single-crochet border outlines every step of the silhouette. A cream trunk and a chain hanging loop finish the piece. The two-color palette looks wintry and calm, and it sits well among gold baubles and warm string lights.
The pattern uses US crochet terms. The finished ornament is about 4.6 in (11.7 cm) wide and 5.6 in (14.2 cm) tall, including the trunk but not the hanging loop.
The blue tree is worked in rows from the top point down. Each tier grows by 4 stitches per row. At each new tier you step in by 2 stitches on each side, which makes the overhang. After that you work one border round in cream with the hanging loop built in, and then 6 short rows for the trunk.
Finished Size and Construction
- Finished size: 4.6 in (11.7 cm) wide × 5.6 in (14.2 cm) tall, not counting the loop
- Hanging loop: about 1.25 in (3.2 cm) tall
- Skill level: Easy-Intermediate
- Terminology: US crochet terms
- Yarn weight: DK / light worsted (3) cotton or cotton blend
- Hook: 3.5 mm (E-4)
- Number of pieces: 1, a single ornament with no joining
- Layout: one tree shape with the trunk attached
- Blue tree before border: 4.2 in (10.7 cm) wide × 4.0 in (10.2 cm) tall
- Border depth: 1 round of sc, about 0.2 in (0.5 cm)
- Trunk: 1.1 in (2.8 cm) wide × 1.2 in (3.0 cm) tall
Materials
Use a smooth, mercerized or matte DK cotton. Cotton holds the leaf clusters crisply and blocks flat. Avoid fuzzy or very stretchy yarns, because the lace and the stepped corners will lose definition.
- Color A, dusty denim blue: 8 g, about 20 m
- Color B, cream: 5 g, about 13 m
These quantities include a small safety margin. One 50 g ball of each color makes several ornaments.
Tools:
– 3.5 mm (E-4) crochet hook
– Tapestry needle
– Scissors
– Stitch markers (2)
– Blocking mat or folded towel, rustproof pins, and a spray bottle
Abbreviations (US Terms)
- ch: chain
- sl st: slip stitch
- sc: single crochet
- dc: double crochet
- st(s): stitch(es)
- sp: space
- tch: turning chain
- RS: right side
Special stitches
Leaf: Yo, insert hook in the indicated st or sp, yo and pull up a loop to full dc height, yo and draw through 2 loops. Repeat from * to * 2 more times in the same place (4 loops on hook). Yo and draw through all 4 loops. Each Leaf counts as 1 stitch.
V-Leaf: (Leaf, ch 1, Leaf) all in the same st or sp. This makes 3 stitches.
V-Leaf over 3: Skip 1 st, V-Leaf in the next st, skip 1 st. It uses 3 sts and makes 3 sts, so the stitch count does not change.
Counting rule: The ch-3 at the start of a row counts as 1 dc. Every ch-1 and every Leaf counts as 1 stitch.
Gauge and Checkpoints
Gauge in dc: 18 sts and 9 rows = 4 in (10.2 cm).
Gauge in sc: 18 sts and 20 rows = 4 in (10.2 cm).
Because the ornament is one small piece, Tier 1 works as your gauge test. Make Rows 1–3, lay the piece flat and measure it before you go on.
Checkpoints (blue only, before border):
– After Row 3 (Tier 1, 11 sts): 2.4 in (6.1 cm) wide at the base × 1.3 in (3.3 cm) tall
– After Row 6 (Tier 2, 15 sts): 3.3 in (8.4 cm) wide × 2.7 in (6.9 cm) tall overall
– After Row 9 (Tier 3, 19 sts): 4.2 in (10.7 cm) wide × 4.0 in (10.2 cm) tall overall
If your piece is too big: Change to a 3.25 mm hook, or keep your Leaf loops a little shorter.
If your piece is too small: Change to a 3.75 mm hook, and pull each Leaf loop up to full dc height before you finish the cluster.
A difference of 0.1 in (0.3 cm) is fine at Tier 1. A difference of 0.25 in (0.6 cm) or more grows to about 0.5 in (1.3 cm) by Row 9, so adjust before you continue.
Tree Body (Color A, Blue)
The tree is worked in rows from the top point down. Turn at the end of every row. Every row is symmetrical, so the instructions read the same from either side.
How the increases work: Each growth row begins with ch 3 and 2 dc in the first st, and ends with 3 dc in the top of the tch. That adds 2 sts at each end. The stitches in between are worked 1-for-1, so each growth row has 4 more stitches than the row before.
Tier 1
Row 1: With A, ch 4. Work 2 dc in the 4th ch from the hook. The skipped 3 ch count as 1 dc. Turn. (3 sts)
All three stitches grow from one chain, which makes the sharp top point.
Row 2: Ch 3, 2 dc in the first st, ch 1, skip the center dc, 3 dc in the top of the tch. Turn. (7 sts)
Row 3: Ch 3, 2 dc in the first st, dc in the next dc, skip the next dc, V-Leaf in the ch-1 sp, skip the next dc, dc in the next dc, 3 dc in the top of the tch. Turn. (11 sts)
The stitches in Row 3 are: 4 dc, Leaf, ch 1, Leaf, 4 dc. The first leaf pair opens downward and outward from the center.
Checkpoint: 2.4 in (6.1 cm) wide × 1.3 in (3.3 cm) tall.
Tier 2
Row 4 (step-in): Sl st in each of the first 3 sts. Ch 3 (counts as dc, worked from the 3rd st). Ch 1, skip the next dc, dc in the next Leaf, dc in the ch-1 sp, dc in the next Leaf, ch 1, skip the next dc, dc in the next dc. Leave the last 2 sts unworked. Turn. (7 sts)
The 2 unworked sts at each end of Row 3 become the overhanging corner of Tier 1. Place a marker in the outer unworked st on each side so you can find these ledges easily when you work the border.
Row 5: Ch 3, 2 dc in the first st, dc in the ch-1 sp, skip the next dc, V-Leaf in the center dc, skip the next dc, dc in the next ch-1 sp, 3 dc in the top of the tch. Turn. (11 sts)
Row 6: Ch 3, 2 dc in the first st, V-Leaf over 3, dc in the next Leaf, dc in the ch-1 sp, dc in the next Leaf, V-Leaf over 3, 3 dc in the top of the tch. Turn. (15 sts)
Row 6 has a leaf pair on each side of three center dc posts. Together with the pair above, these form the leafy flower in the middle of the tier.
Checkpoint: 3.3 in (8.4 cm) wide × 2.7 in (6.9 cm) tall overall.
Tier 3
Row 7 (step-in): Sl st in each of the first 3 sts, ch 3 (counts as dc). Dc in the next Leaf, ch 1, skip the next st, then dc in the next Leaf, ch 1, skip the center dc, dc in the next dc… Worked out stitch by stitch, Row 7 is:
Ch 3 in the 3rd st, dc in the next Leaf, ch 1 over the ch-1 sp, dc in the next Leaf, ch 1 over the next dc, dc in the center dc, ch 1 over the next dc, dc in the next Leaf, ch 1 over the ch-1 sp, dc in the next Leaf, dc in the next dc. Leave the last 2 sts unworked. Turn. (11 sts)
The stitches in Row 7 are: 2 dc, then (ch 1, dc) 4 times, then 1 dc. Move your markers to the outer unworked st of Row 6 on each side.
Row 8: Ch 3, 2 dc in the first st, dc in the next dc, dc in the ch-1 sp, dc in the next dc, skip the ch-1 sp, V-Leaf in the center dc, skip the ch-1 sp, dc in the next dc, dc in the ch-1 sp, dc in the next dc, 3 dc in the top of the tch. Turn. (15 sts)
Row 9: Ch 3, 2 dc in the first st, dc in the next dc, V-Leaf over 3, dc in each of the next 2 sts, dc in the ch-1 sp between the Leaves… Worked out stitch by stitch, Row 9 is:
Ch 3, 2 dc in the first st, dc in the next st, V-Leaf over 3, dc in the next st, dc in the next Leaf, dc in the ch-1 sp, dc in the next Leaf, dc in the next st, V-Leaf over 3, dc in the next st, 3 dc in the top of the tch. (19 sts)
The middle of Row 9 has 13 sts: 1 + 3 + 5 + 3 + 1. Add the 3 increase sts at each end and you get 19.
Fasten off A and weave in the ends.
Checkpoint: 4.2 in (10.7 cm) wide × 4.0 in (10.2 cm) tall.
Border (Color B, Cream)
Border gauge: One dc row-end is about 0.44 in (1.1 cm) tall. Two sc at 18 sts per 4 in (10.2 cm) measure the same 0.44 in, so 2 sc per row-end lies flat. Along the bottom, dc and sc are the same width in this yarn, so 1 sc per stitch keeps the edge exactly 4.2 in (10.7 cm) wide.
Each ch-1 at a corner gives the outer points room to turn without curling.
Border Round (RS facing):
- Top point: Join B with a standing sc in the starting chain at the top point. Ch 14, then sc in the same chain. (2 sc + 14-ch loop)
- Side A, Tier 1: Work 2 sc in each row-end of Rows 1–3. (6 sc) Then ch 1 for the tier tip.
- Ledge A1: Sc in each of the 2 sts left over from Row 3, working through or under the slip stitches on that side. (2 sc)
- Side A, Tier 2: Work 2 sc in each row-end of Rows 4–6. (6 sc) Then ch 1.
- Ledge A2: Sc in each of the 2 sts left over from Row 6. (2 sc)
- Side A, Tier 3: Work 2 sc in each row-end of Rows 7–9. (6 sc) Then ch 1 for the base corner.
- Bottom edge: Sc in each of the 19 sts of Row 9. (19 sc) Then ch 1 for the base corner.
- Side B, going up: Work 6 sc in the row-ends of Rows 9–7, 2 sc in the Row 6 ledge, ch 1, 6 sc in the row-ends of Rows 6–4, 2 sc in the Row 3 ledge, ch 1, and 6 sc in the row-ends of Rows 3–1.
- Join with a sl st to the first sc. Do not fasten off if you want to firm up the loop (optional step below).
Count per side (including that side’s ch-1 corners): 6 + 1 + 2 + 6 + 1 + 2 + 6 = 24 sts.
Round total: 2 (top) + 24 + 24 (sides) + 2 base-corner ch + 19 (bottom) = 71 sts. That is 65 sc plus 6 ch-1 corners, plus the 14-ch loop.
Loop (optional): Sl st into each of the 14 loop chains and join to the sc at the base of the loop. This firms the loop up and keeps it from twisting. Fasten off.
Why the math works: Each dc row-end gets 2 sc, which matches its height. Each ledge gets exactly 1 sc per unworked stitch, so the overhang keeps its true width of 0.4 in (1.0 cm). The bottom gets 1 sc per stitch. Nothing is stretched or crowded, and the border adds 0.2 in (0.5 cm) all around: 4.2 + 0.4 = 4.6 in (11.7 cm) wide, and 4.0 + 0.4 = 4.4 in (11.2 cm) tall for the tree.
Trunk (Color B, Cream)
Of the 19 bottom sc, the trunk is worked on the center 5. That leaves 7 sc on each side: 7 + 5 + 7 = 19.
Row 1: With the RS facing, join B in the 8th bottom sc, counting from either base corner. Ch 1, then sc in the same st and the next 4 sts. Turn. (5 sc)
Rows 2–6: Ch 1, sc in each st across. Turn. (5 sc)
Fasten off.
Trunk size: 5 sc = 1.1 in (2.8 cm) wide, and 6 rows = 1.2 in (3.0 cm) tall.
Total height: 4.4 in (11.2 cm) for the tree + 1.2 in (3.0 cm) for the trunk = 5.6 in (14.2 cm).
Final Blocking
- Weave in all the remaining ends. Hide the blue ends inside the dc posts and the cream ends inside the border.
- Spray the ornament until it is evenly damp but not dripping.
- Lay it on the mat with the RS up.
- Pin the top point first, then the two base corners 4.6 in (11.7 cm) apart.
- Pin the four tier tips, making sure the left and right sides match in height.
- Use a pin to open each leaf pair into a clean V, and nudge the ch-1 spaces open.
- Pin the trunk square and straight down from the center.
- Pull the hanging loop straight up and pin it.
- Let it dry completely, usually 4–6 hours. For a stiffer ornament, brush on a light fabric stiffener before drying.
Final Quality-Control Checklist
- [ ] Row counts: 3, 7, 11 / 7, 11, 15 / 11, 15, 19
- [ ] Each step-in leaves exactly 2 sts unworked per side
- [ ] All leaf pairs are open and point outward
- [ ] Border has 65 sc + 6 ch-1 corners + the 14-ch loop
- [ ] Bottom edge has 19 sc, and the trunk sits on sc 8–12
- [ ] Width is 4.6 in (11.7 cm)
- [ ] Height is 5.6 in (14.2 cm) without the loop
- [ ] Ornament lies flat with no ruffling or cupping
- [ ] All ends are secured and trimmed
Troubleshooting
The tree cups or curls inward. The border is too tight. Go up 0.25 mm for the border round only, or check that you worked 2 sc in every row-end.
The edges ruffle. You worked too many sc in the row-ends. Use exactly 2 per dc row-end.
The tiers look lopsided. You may have worked a different number of sl sts at the start of the step-in row than you left unworked at the end. It must be 2 unworked sts on each side.
The leaves look like flat lumps. Pull each loop up to full dc height before closing the cluster, and pin the V open when blocking.
The count is off after a growth row. Count the middle stitches. It should be 4 fewer than the new row’s total.
The trunk is off-center. Count 7 sc in from the base corner and start the trunk in the 8th.
The loop twists. Add the optional sl st row along the loop chains.
Care
Hand wash in cool water, press out the water in a towel, and dry flat. If the shape relaxes after storage, re-block it with steam or a light spritz.
Final Notes
The size depends on one simple chain of measurements. Gauge of 18 dc = 4 in (10.2 cm) gives Tier 1 a width of 2.4 in (6.1 cm), Tier 2 a width of 3.3 in (8.4 cm), and a blue tree of 4.2 in × 4.0 in (10.7 cm × 10.2 cm). The 0.2 in (0.5 cm) border brings it to 4.6 in × 4.4 in (11.7 cm × 11.2 cm). The 1.2 in (3.0 cm) trunk finishes it at 5.6 in (14.2 cm) tall. Check each stage as you go, and your ornament will hang flat, frosty and balanced.
Happy crocheting!