

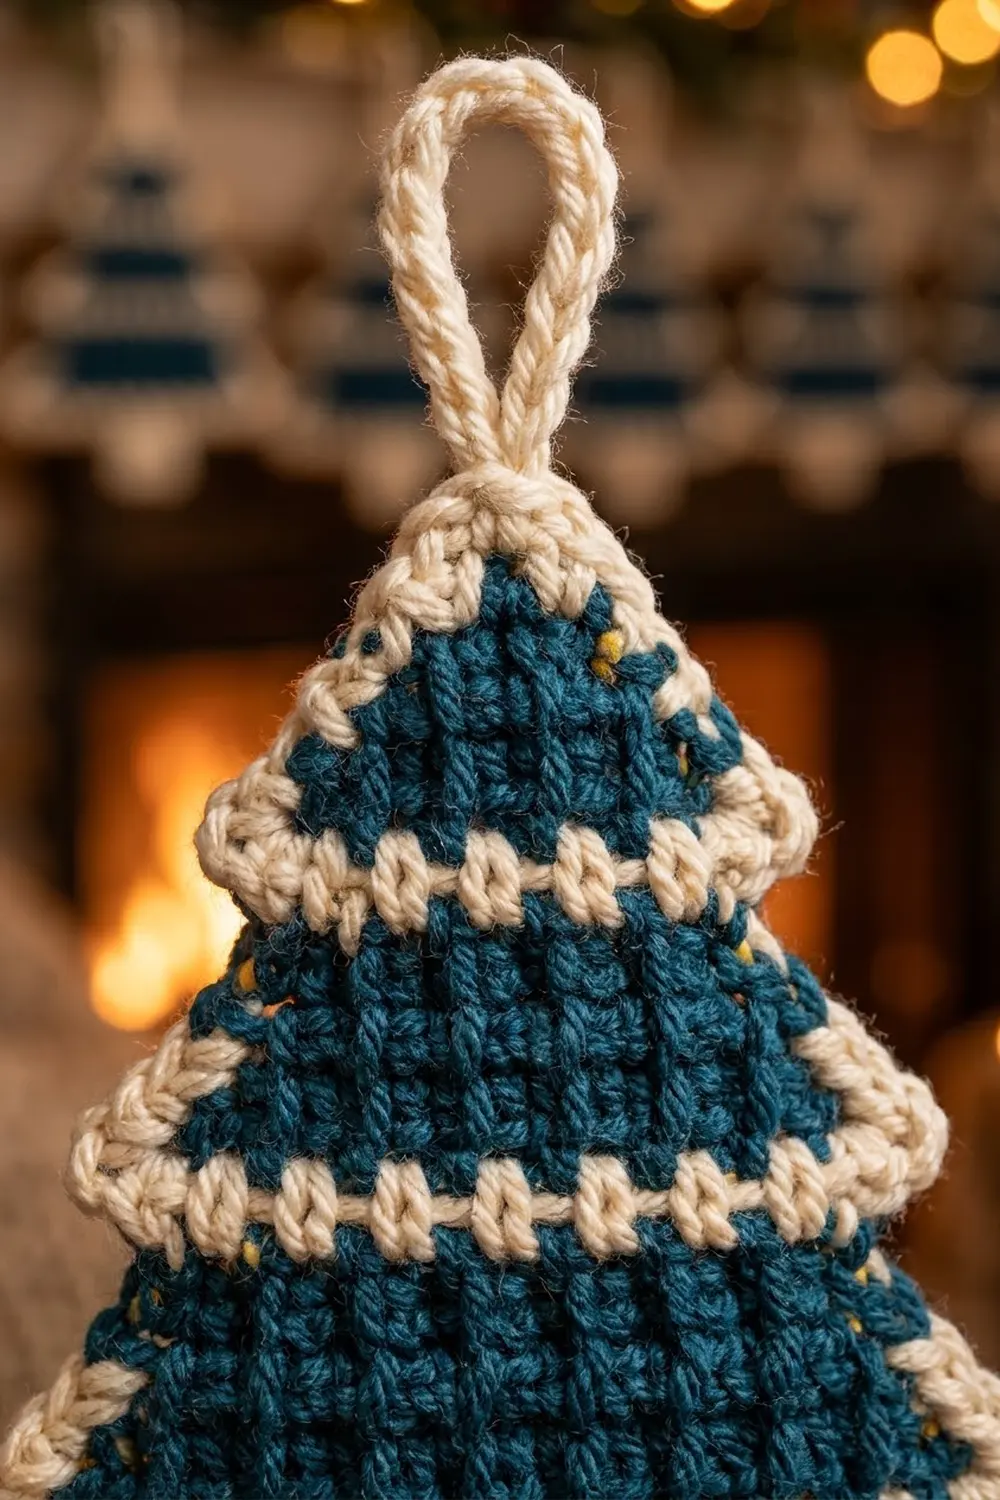
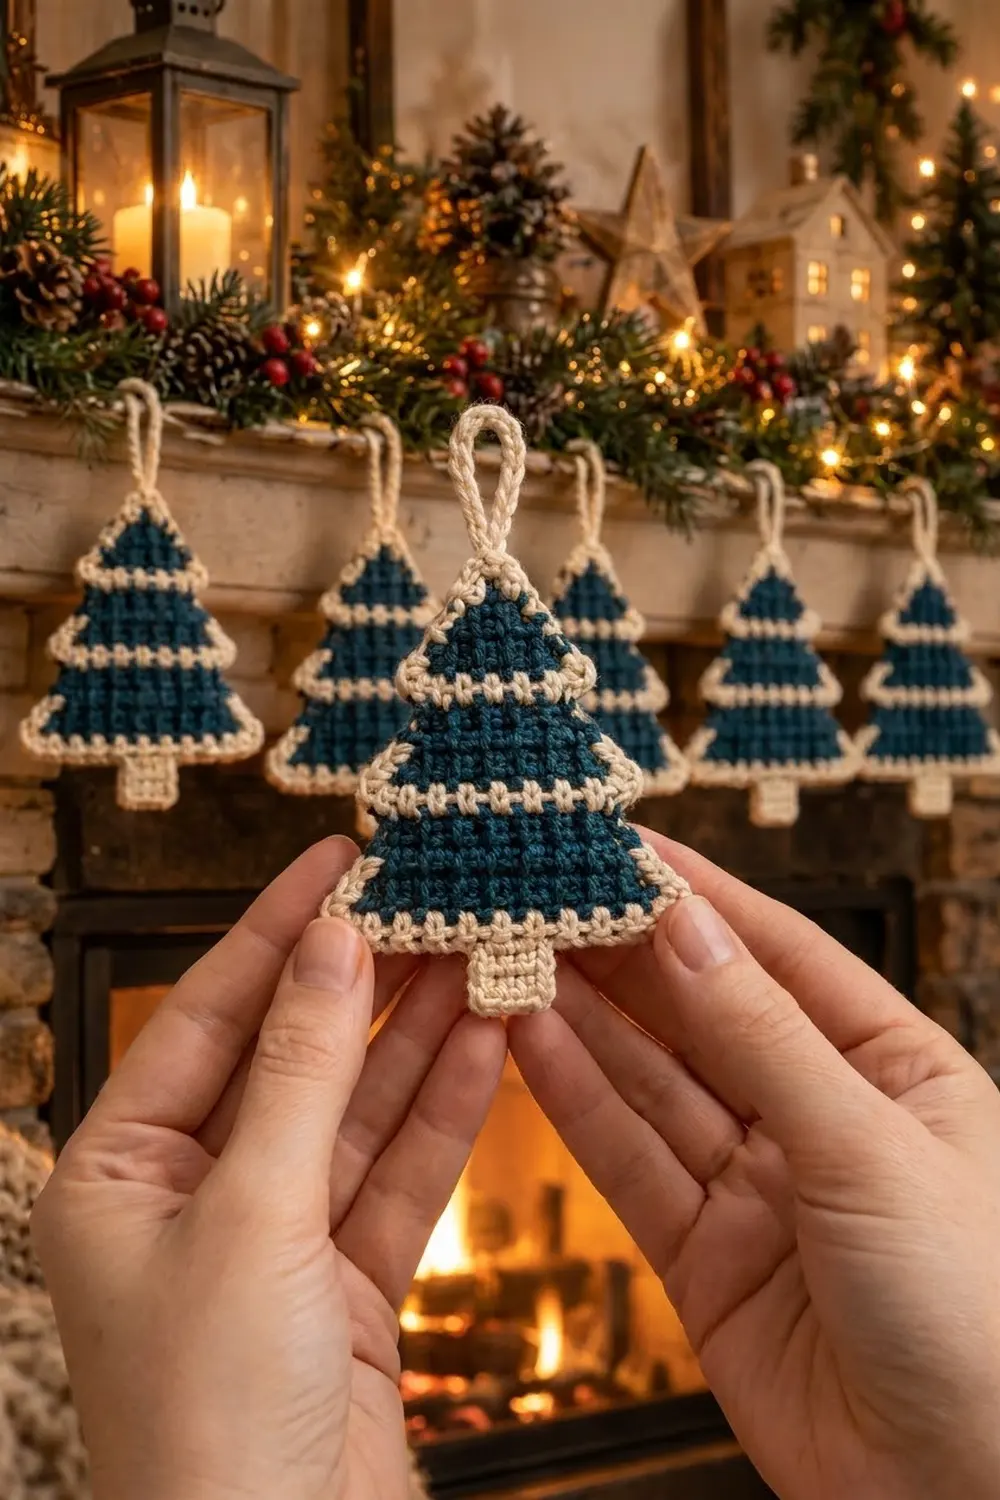
The Frosted Pine ornament is a small, flat Christmas tree made in deep teal-blue with crisp cream accents. It has three stacked tiers, and the cream bottom row of each upper tier sticks out past the tier below it. The result is a neat stepped silhouette that reads as “pine tree” from across the room.
The palette is just two colors: a dark teal for the branches and a soft cream for the stripes, outline, trunk, and hanging loop. The dense single crochet fabric gives a small woven-grid texture that looks tidy up close and holds its shape on a tree branch or a mantel garland.
This pattern uses US crochet terms. The finished tree body measures 4.2 in (10.7 cm) wide by 4.0 in (10.2 cm) tall. With the trunk, the ornament is 5.0 in (12.7 cm) tall, and with the hanging loop it is about 6.5 in (16.5 cm) overall.
You work the tree flat in rows from the tip down, increasing at the edges and changing to cream for each ledge row. The first row of each new tier skips the edge stitches, which leaves the ledge sticking out. One cream border round outlines everything and builds the loop at the tip. Finally, you add the trunk to the bottom border.
Finished Size and Construction
- Finished size: 4.2 in (10.7 cm) wide × 5.0 in (12.7 cm) tall without the loop; about 6.5 in (16.5 cm) tall with the loop
- Skill level: Easy / advanced beginner
- Terminology: US crochet terms
- Yarn weight: Worsted (#4)
- Hook: 4.0 mm (US G-6)
- Number of pieces: 1
- Layout: Single flat tree with three tiers, trunk at the bottom center, loop at the tip
- Tree body before border: 3.8 in (9.7 cm) wide × 3.6 in (9.1 cm) tall
- Border depth: about 0.2 in (0.5 cm) per edge
- Trunk: 1.1 in (2.8 cm) wide × 1.0 in (2.5 cm) tall
Materials
Yarn: Use a smooth worsted-weight yarn of about 200 m per 100 g. Cotton or a cotton blend gives the crispest stitch definition and the flattest finish. Soft acrylic also works and is easier on the hands. Avoid fuzzy or boucle yarns, because they hide the stepped edges.
- Color B (deep teal-blue): 8 g / about 16 m
- Color C (cream): 6 g / about 12 m
These quantities include a margin of roughly 30% for your gauge swatch and tails. One standard ball of each color makes a whole set of ornaments.
Tools:
- 4.0 mm (US G-6) crochet hook
- Tapestry needle
- Scissors
- 2 locking stitch markers
- Ruler or tape measure
- Blocking mat and rust-proof pins
- Spray bottle with water
Abbreviations (US Terms)
- ch – chain
- sc – single crochet
- sl st – slip stitch
- st(s) – stitch(es)
- sk – skip
- inc – 2 sc in the same stitch
- RS – right side
- B / C – Color B (teal) / Color C (cream)
Special technique – clean color change: Work the last sc before the change until 2 loops are on the hook. Yarn over with the new color and pull through. The finished stitch is the old color, and the turning chain is the new color.
Special technique – ledge stitch: In the first row of a new tier, you skip the first stitch and leave the last stitch unworked. These two cream stitches stay exposed and sit 1 stitch beyond the tier below. In this pattern, “ledge stitch” means one of those unworked stitches.
Gauge and Checkpoints
Gauge: 18 sc × 20 rows = 4 in (10.2 cm) in sc worked in rows. That is 4.5 sts and 5 rows per inch.
The ornament is small, so the tree itself can be your test piece. Work through Row 5, then measure.
Checkpoints:
- After Row 5: 9 sts, 2.0 in (5.1 cm) wide × 1.0 in (2.5 cm) tall
- After Row 11: 13 sts, 2.9 in (7.4 cm) wide × 2.2 in (5.6 cm) tall
- After Row 18: 17 sts, 3.8 in (9.7 cm) wide × 3.6 in (9.1 cm) tall
- After the border: 4.2 in (10.7 cm) wide × 4.0 in (10.2 cm) tall
If your piece is too big: Change to a 3.75 mm (US F-5) hook.
If your piece is too small: Change to a 4.5 mm (US 7) hook.
Keep the fabric firm. Loose single crochet makes the tiers curl and blurs the ledges.
Tree Body
Work in rows from the tip down. Ch 1 at the start of a row does not count as a stitch. Keep the same side facing as the RS throughout. Row 1 is the RS.
You can carry Color B loosely up the edge behind the cream stripe rows, because the border hides it. Cut Color C after each stripe and leave a 4 in (10.2 cm) tail.
Tier 1 (Top)
Row 1 (B): Ch 2, 3 sc in 2nd ch from hook. Turn. (3 sts) The ch at the base of these stitches is the tip ch, and the border uses it later.
Row 2 (B): Ch 1, inc in first st, sc in next st, inc in last st. Turn. (5 sts)
Row 3 (B): Ch 1, sc in each st across. Turn. (5 sts)
Row 4 (B): Ch 1, inc in first st, sc in next 3 sts, inc in last st. In the last st, change to C. Turn. (7 sts)
Row 5 (C, ledge row): Ch 1, inc in first st, sc in next 5 sts, inc in last st. In the last st, change to B. Turn. (9 sts) Cut C.
Checkpoint: 9 sts, 2.0 in (5.1 cm) wide.
Tier 2 (Middle)
Row 6 (B, step-in row): Ch 1, sk first st, sc in next 7 sts. Leave the last st unworked. Turn. (7 sts) The skipped st and the unworked st are the two ledge stitches of Row 5. Mark each one with a locking marker.
Row 7 (B): Ch 1, inc in first st, sc in next 5 sts, inc in last st. Turn. (9 sts)
Row 8 (B): Ch 1, sc in each st across. Turn. (9 sts)
Row 9 (B): Ch 1, inc in first st, sc in next 7 sts, inc in last st. Turn. (11 sts)
Row 10 (B): Ch 1, sc in each st across. In the last st, change to C. Turn. (11 sts)
Row 11 (C, ledge row): Ch 1, inc in first st, sc in next 9 sts, inc in last st. In the last st, change to B. Turn. (13 sts) Cut C.
Checkpoint: 13 sts, 2.9 in (7.4 cm) wide, 2.2 in (5.6 cm) tall from the tip.
Tier 3 (Bottom)
Row 12 (B, step-in row): Ch 1, sk first st, sc in next 11 sts. Leave the last st unworked. Turn. (11 sts) Move the markers to the two ledge stitches of Row 11, or use two more markers.
Row 13 (B): Ch 1, inc in first st, sc in next 9 sts, inc in last st. Turn. (13 sts)
Row 14 (B): Ch 1, sc in each st across. Turn. (13 sts)
Row 15 (B): Ch 1, inc in first st, sc in next 11 sts, inc in last st. Turn. (15 sts)
Row 16 (B): Ch 1, sc in each st across. Turn. (15 sts)
Row 17 (B): Ch 1, inc in first st, sc in next 13 sts, inc in last st. Turn. (17 sts)
Row 18 (B): Ch 1, sc in each st across. (17 sts) Fasten off B.
Checkpoint: 17 sts, 3.8 in (9.7 cm) wide × 3.6 in (9.1 cm) tall. Each upper ledge should stick out by 1 stitch, about 0.2 in (0.5 cm), on each side.
Border
Border gauge: Work 1 sc per row end along the sides. At this gauge, 5 rows per inch against 4.5 sts per inch gives a slight ease that keeps the edge flat rather than ruffled. At the corners and ledges, work extra stitches as written.
Round 1 (C): With RS facing, join C with a sc in the first st of Row 18. This is a bottom corner. Then work as follows.
Bottom edge: Work 2 more sc in the same st (3 sc in the corner), sc in next 15 sts, 3 sc in last st. (21 sts)
Side 1, working up toward the tip:
- Sc in each row end of Rows 18 to 12. (7 sts)
- Sc in the ledge stitch of Row 11, then 2 sc in the row end of Row 11. (3 sts)
- Sc in each row end of Rows 10 to 6. (5 sts)
- Sc in the ledge stitch of Row 5, then 2 sc in the row end of Row 5. (3 sts)
- Sc in each row end of Rows 4 to 2. (3 sts)
- Sc in the row end of Row 1. (1 st)
Side 1 total: 22 sts.
Tip and loop:
- Sc in the tip ch.
- Ch 16, then sl st in the same tip ch to form the loop.
- Work 24 sc into the ch-16 loop to cover it completely.
- Sl st in the tip ch, then sc in the tip ch again.
(2 border sts at the tip, plus the covered loop)
Side 2, working down: Repeat Side 1 in reverse:
- Sc in the row end of Row 1. (1 st)
- Sc in each row end of Rows 2 to 4. (3 sts)
- 2 sc in the row end of Row 5, then sc in the ledge stitch. (3 sts)
- Sc in each row end of Rows 6 to 10. (5 sts)
- 2 sc in the row end of Row 11, then sc in the ledge stitch. (3 sts)
- Sc in each row end of Rows 12 to 18. (7 sts)
Side 2 total: 22 sts.
Sl st to the first sc to join.
Round total: 21 + 22 + 2 + 22 = 67 sc, not counting the 24 loop sc. Do not fasten off yet if you want to go straight to the trunk. Otherwise, fasten off and weave in the ends.
Why the math works: Each side has 18 row ends, and each takes 1 sc, which is 18 sts. The two ledges add 2 sts each: the ledge stitch plus the second sc in the ledge row end. That is 4 more, so 18 + 4 = 22 per side. The bottom edge has 17 sts, and the 2 corner sts get 3 sc each instead of 1. That adds 4, so 17 + 4 = 21. The corner groups belong only to the bottom count and are not counted again in the side counts.
Checkpoint: The body measures 4.2 in (10.7 cm) wide × 4.0 in (10.2 cm) tall. The loop measures about 1.5 in (3.8 cm).
Trunk
The bottom edge has 21 border sts, numbered from the first corner group: sts 1 to 3 are the first corner, sts 4 to 18 are the straight edge, and sts 19 to 21 are the second corner. The center st is st 11, so the trunk uses sts 9 to 13.
Row 1 (C): With the bottom edge facing up and RS facing, join C with a sc in st 9. Sc in sts 10 to 13. Turn. (5 sts)
Rows 2–5 (C): Ch 1, sc in each st across. Turn. (5 sts)
Fasten off.
Checkpoint: The trunk measures 1.1 in (2.8 cm) wide × 1.0 in (2.5 cm) tall. The ornament is now 5.0 in (12.7 cm) tall without the loop.
Final Blocking
- Weave in all tails along matching colors. Run cream tails through the stripes or the border, and teal tails through the teal body.
- Spray the ornament until it is evenly damp but not dripping.
- Lay it RS up on the blocking mat.
- Pin the bottom corners 4.2 in (10.7 cm) apart.
- Pin the tip so the body measures 4.0 in (10.2 cm) tall.
- Pin out each ledge point so it sticks out sideways evenly on both sides.
- Pin the trunk straight and square, then pin the loop into a neat teardrop.
- Let it dry completely, then remove the pins.
- For extra stiffness, mist the dry ornament lightly with fabric stiffener and dry it flat again.
Final Quality-Control Checklist
- [ ] Body measures 4.2 in (10.7 cm) × 4.0 in (10.2 cm)
- [ ] Rows 5 and 11 are solid cream, with no teal showing at the color changes
- [ ] Both ledges stick out by the same amount on each side
- [ ] The border has 67 sc, with 22 on each side and 21 on the bottom
- [ ] The tip loop is fully covered with 24 sc
- [ ] The trunk is centered under the bottom tier and is 5 sts wide
- [ ] No carried strands show on the RS
- [ ] All tails are woven in and trimmed
Troubleshooting
Ledges don’t stick out: Make sure the step-in rows skip the first stitch and leave the last stitch unworked. Do not decrease there instead.
Edges ripple: You probably worked more than 1 sc into some row ends. Unpick back to the ledge and recount.
Edges pull in or the tree cups: Your border tension is tight. Work the border with a 4.5 mm (US 7) hook.
Teal shows in the cream stripe: Change color on the last yarn over of the previous row, not at the start of the stripe row.
Loop twists: Before covering the ch-16 loop, untwist the chain. Cover it with snug, evenly spaced sc.
Trunk sits off center: Recount the bottom border from the first st of the corner group, then rejoin at st 9.
Care
Hand wash in cool water and press out the excess water in a towel. Reshape the ornament and dry it flat, re-pinning the ledges if needed.
Final Notes
The measurement chain is short and easy to check:
- Gauge is 4.5 sts and 5 rows per inch.
- Row 18 has 17 sts and measures 3.8 in (9.7 cm) wide.
- After 18 rows, the body is 3.6 in (9.1 cm) tall.
- The 67-stitch border adds about 0.2 in (0.5 cm) per edge, which gives 4.2 in × 4.0 in (10.7 cm × 10.2 cm).
- The 5-row trunk adds 1.0 in (2.5 cm), for 5.0 in (12.7 cm) total.
If each checkpoint matches, the finished tree will match too. Make one for a tree branch, or make a few to hang along the mantel.
Happy crocheting!