

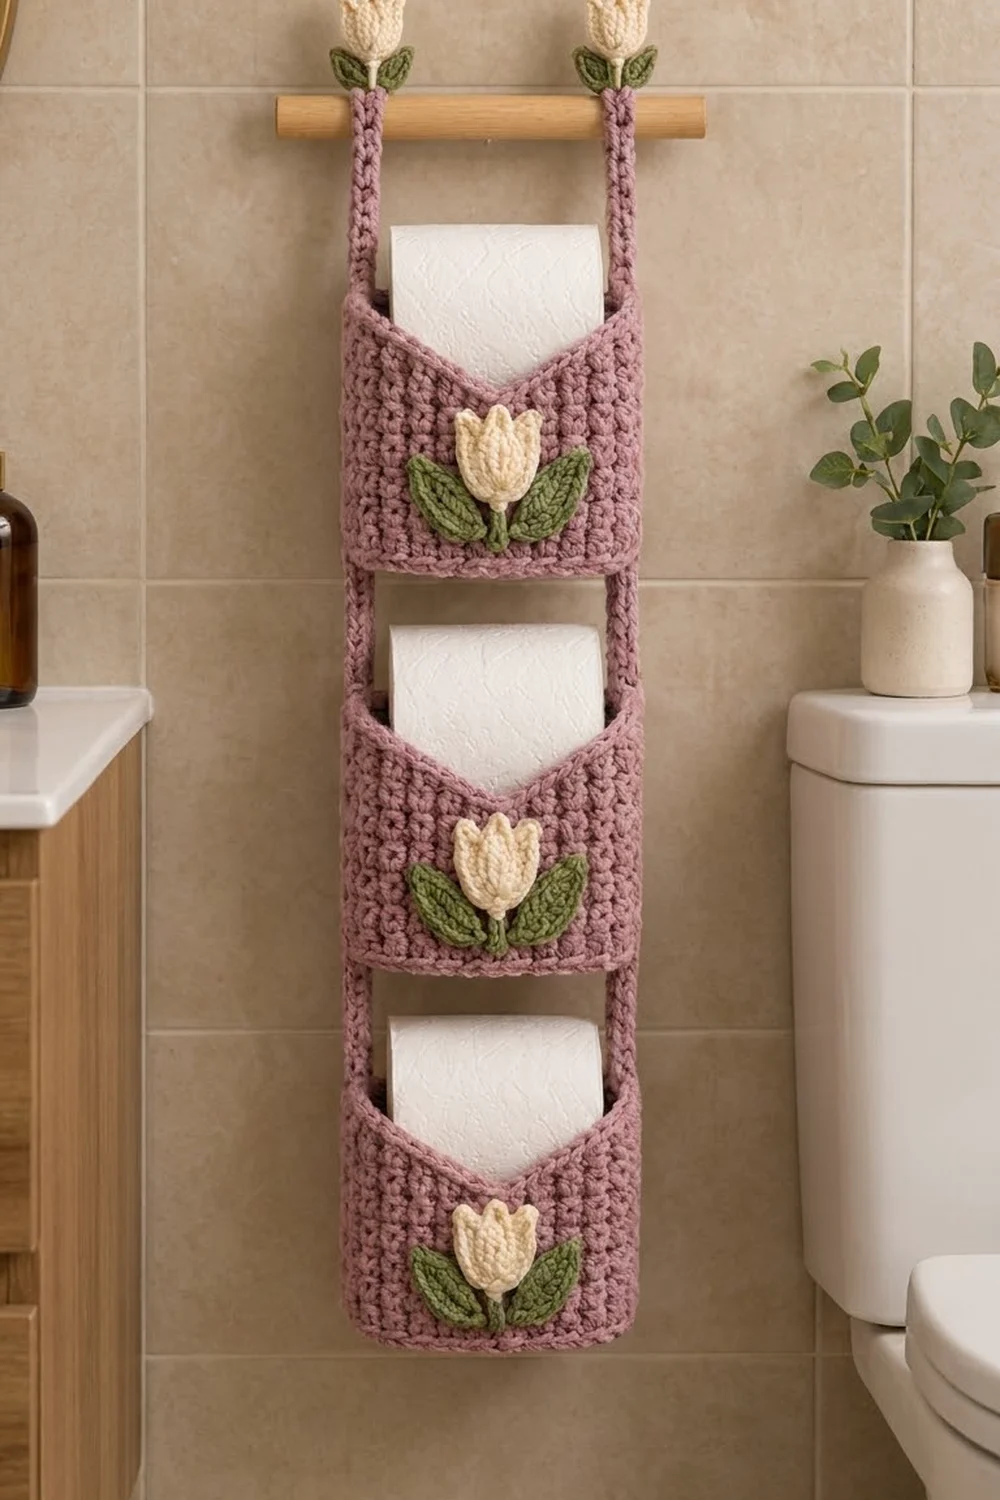
This hanging toilet paper holder has three V-topped pockets, one above the other, on a long back panel. Each pocket holds one roll. A cream tulip with two sage leaves sits in the center of each pocket front, and two mauve cords loop over a wooden dowel, each ending in a small tulip.
The main color is dusty mauve, worked in dense single crochet that gives a soft, pebbly texture. Cream is used for the tulips and sage green for the leaves and stems. The style is cottage-modern: practical and quietly floral.
The pattern uses US crochet terms. The finished holder measures 7 in (17.8 cm) wide and 21 in (53.3 cm) tall, not counting the cords.
Here’s how it’s built. You crochet a flat back panel and three flat pockets, each shaped with two decreasing wings. Then you sew on the appliqués, sew each pocket’s bottom edge to the panel with corner pleats, and work a two-round border that joins the pocket sides as it goes.
Finished Size and Construction
- Finished size: 7 in × 21 in (17.8 × 53.3 cm), cords excluded
- Skill level: Easy-intermediate
- Terminology: US
- Yarn weight: Aran / heavy worsted (#4)
- Hook: 5 mm (H-8)
- Number of pieces: 24 (1 back panel, 3 pockets, 2 cords, 3 tulips, 6 leaves, 3 stems, 2 mini tulips, 4 mini leaves)
- Layout: 3 pockets stacked vertically on one panel
- Back panel: 21 sts × 80 rows = 6 in × 20 in (15.2 × 50.8 cm)
- Pocket: 31 sts = 8.9 in (22.6 cm) wide; 5 in (12.7 cm) tall at the sides, 3.5 in (8.9 cm) at the V center
- Size before border: 6 in × 20 in (15.2 × 50.8 cm)
- Border depth: 2 rounds = 0.5 in (1.3 cm) per edge
Materials
Choose a smooth cotton or cotton blend in Aran weight, about 170 m per 100 g. Cotton holds its shape well in a bathroom.
- Mauve (MC): 150 g / 255 m
- Cream (CC1): 25 g / 43 m
- Sage green (CC2): 25 g / 43 m
These quantities include a margin of roughly 30%.
Tools:
- 5 mm (H-8) hook
- Tapestry needle
- Stitch markers (at least 6)
- Wooden dowel, 10 in (25.4 cm) long and 0.5 in (1.3 cm) thick
- Rust-proof pins and a blocking mat
- Measuring tape and scissors
Abbreviations (US Terms)
- ch – chain
- sl st – slip stitch
- sc – single crochet
- hdc – half double crochet
- dc – double crochet
- tr – treble crochet
- st(s) – stitch(es)
- MR – magic ring
- RS / WS – right side / wrong side
Special stitches:
- sc3tog (single crochet 3 together): [insert hook in next st, yarn over, pull up a loop] 3 times, yarn over, pull through all 4 loops. This removes 2 sts.
- Picot: ch 2, sl st in 2nd ch from hook.
Gauge and Checkpoints
Gauge: 14 sc × 16 rows = 4 in (10.2 cm).
Make the back panel first because it works as your gauge swatch. Check these measurements as you go:
- Panel, after Row 16: 6 in × 4 in (15.2 × 10.2 cm)
- Panel, finished: 6 in × 20 in (15.2 × 50.8 cm)
- Pocket, after Row 14: 8.9 in × 3.5 in (22.6 × 8.9 cm)
- Pocket, finished: 5 in (12.7 cm) tall at the sides
- After border: 7 in × 21 in (17.8 × 53.3 cm)
If your piece is too big, use a hook 0.5 mm smaller. If it’s too small, go up 0.5 mm. Stitch gauge sets the width and row gauge sets the height, so check both.
Back Panel (make 1, MC)
Ch 22.
Row 1 (RS): Sc in 2nd ch from hook and in each ch across, turn. (21 sts)
Rows 2–80: Ch 1 (does not count as a st), sc in each st across, turn. (21 sts)
Fasten off.
Place markers at Rows 1, 27, and 53. These are the pocket bottoms. Each pocket covers 20 rows, which leaves 6-row gaps of 1.5 in (3.8 cm) between pockets and 8 open rows of 2 in (5.1 cm) at the top.
Pocket (make 3, MC)
Body
Ch 32.
Row 1 (RS): Sc in 2nd ch from hook and in each ch across, turn. (31 sts)
Rows 2–14: Ch 1, sc in each st across, turn. (31 sts)
Checkpoint: 8.9 in × 3.5 in (22.6 × 8.9 cm). Don’t fasten off.
First Wing
Work over sts 1–15 only. St 16 is the V center and stays unworked.
Row 15: Ch 1, sc in next 12 sts, sc3tog, turn. (13 sts)
Row 16: Ch 1, sc3tog, sc in next 10 sts, turn. (11 sts)
Row 17: Ch 1, sc in next 8 sts, sc3tog, turn. (9 sts)
Row 18: Ch 1, sc3tog, sc in next 6 sts, turn. (7 sts)
Row 19: Ch 1, sc in next 4 sts, sc3tog, turn. (5 sts)
Row 20: Ch 1, sc3tog, sc in next 2 sts. (3 sts)
Fasten off.
Second Wing
Join MC in st 17 of Row 14, on the center side of the V.
Row 15: Ch 1, sc3tog over sts 17–19, sc in next 12 sts, turn. (13 sts)
Row 16: Ch 1, sc in next 10 sts, sc3tog, turn. (11 sts)
Row 17: Ch 1, sc3tog, sc in next 8 sts, turn. (9 sts)
Row 18: Ch 1, sc in next 6 sts, sc3tog, turn. (7 sts)
Row 19: Ch 1, sc3tog, sc in next 4 sts, turn. (5 sts)
Row 20: Ch 1, sc in next 2 sts, sc3tog. (3 sts)
Don’t fasten off.
Each wing loses 2 sts per row at the center edge, so the V runs almost from corner to corner while the outer edges stay straight.
Top Rim
Sl st along the V: 3 sts across the wing top, then 1 in each of the 6 row ends down the slope, 1 in the unworked st 16, 1 in each of the 6 row ends up the other slope, and 1 in each of the 3 sts across the second wing top. (19 sl sts)
Fasten off. This makes the firm rim along each V.
Tulip Appliqués
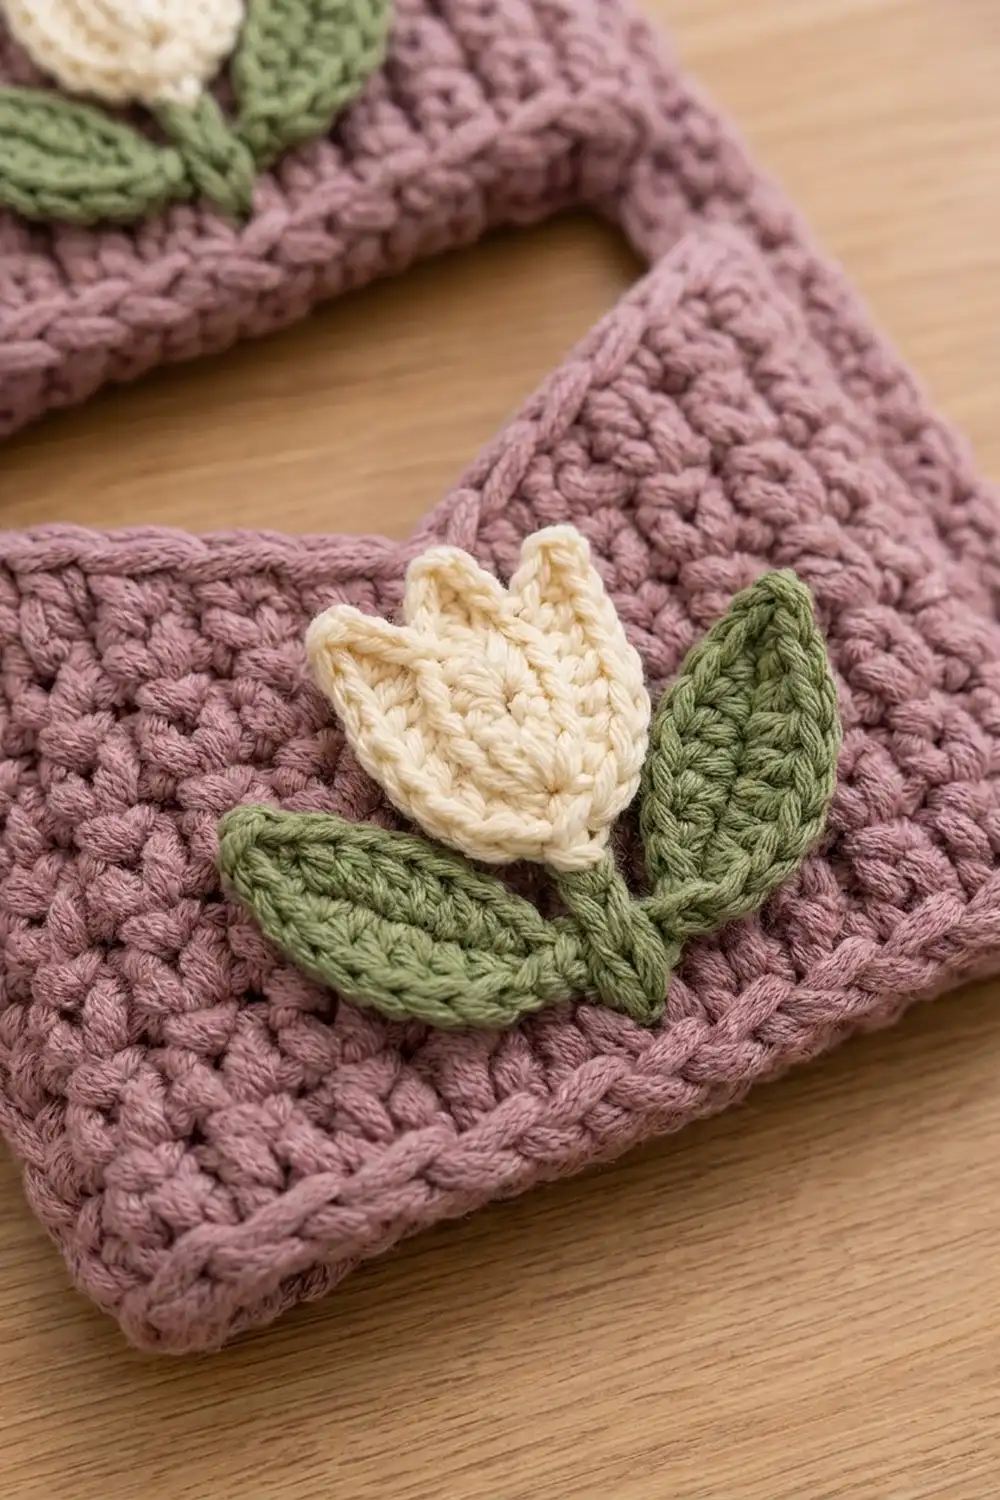
Large Tulip (make 3, CC1)
Rnd 1: MR, ch 1, 6 sc in ring, sl st to first sc. (6 sts)
Rnd 2: Ch 1, 2 sc in each st, sl st to first sc. (12 sts)
Rnd 3 (petals): Sl st in next st.
– Side petal: hdc in next st, (dc, picot, dc) in next st, hdc in next st.
– Center petal: dc in next st, (tr, picot, tr) in next st, dc in next st.
– Side petal: hdc in next st, (dc, picot, dc) in next st, hdc in next st.
– Sl st in each of last 2 sts. (12 sts worked: 1 + 9 + 2)
Fasten off and leave a 12 in (30.5 cm) tail. The tulip measures about 1.75 in × 2 in (4.4 × 5.1 cm), with a round cup and a taller center petal.
Large Leaf (make 6, CC2)
Ch 8.
Rnd 1: Working in the back bumps, sc in 2nd ch from hook, hdc in next ch, dc in next 2 ch, hdc in next ch, sc in next ch, (sc, ch 2, sc) in last ch (this is the tip). Working along the opposite side of the chain: sc in next ch, hdc in next ch, dc in next 2 ch, hdc in next ch, sc in next ch, sl st in first sc. (14 sts + ch-2 tip)
The leaf is a pointed oval of about 1.75 in × 0.75 in (4.4 × 1.9 cm).
Stem (make 3, CC2)
Ch 5. Sl st in 2nd ch from hook and in each of the next 3 ch. (4 sl sts; about 1 in / 2.5 cm)
Mini Tulip (make 2, CC1)
Rnd 1: MR, ch 1, 6 sc in ring, sl st to first sc. (6 sts)
Rnd 2: Sl st in next st, (hdc, dc, hdc) in next st, (dc, tr, dc) in next st, (hdc, dc, hdc) in next st, sl st in each of last 2 sts. (6 sts worked; about 1 in / 2.5 cm)
Mini Leaf (make 4, CC2)
Ch 5. Sc in 2nd ch from hook, hdc in next ch, dc in next ch, sl st in last ch. (4 sts; about 1 in / 2.5 cm)
Hanging Cords (make 2, MC)
Ch 41.
Row 1: Sc in 2nd ch from hook and in each ch across. (40 sts)
Row 2: Without turning, sl st in each loop along the opposite side of the chain. (40 sl sts)
The cord twists slightly and measures about 11.4 in (29.0 cm).
Make All Pieces
| Color | Pieces |
|---|---|
| Mauve (MC) | 1 back panel, 3 pockets, 2 cords |
| Cream (CC1) | 3 large tulips, 2 mini tulips |
| Sage (CC2) | 6 large leaves, 3 stems, 4 mini leaves |
Layout (RS facing):
 cord + mini tulip        cord + mini tulip
+---------------------------------------+  Row 80
|        open (Rows 73–80)              |
|  \      POCKET 3 (Rows 53–72)      /  |
|        gap (Rows 47–52)               |
|  \      POCKET 2 (Rows 27–46)      /  |
|        gap (Rows 21–26)               |
|  \      POCKET 1 (Rows 1–20)       /  |
+---------------------------------------+  Row 1
Appliqué placement: Sew the appliqués on while each pocket is still flat. Center the stem on st 16, running from Row 2 to Row 6. Sew the tulip cup just above it, with the petal tips near Row 13. Add one leaf on each side of the stem, angled up and outward. Whipstitch around all the edges.
Joining
Bottom edge: Lay a pocket RS up on the panel, with its foundation chain on the marked row. The pocket has 31 sts and the panel has 21. Fold a 5-st inward pleat (1.4 in / 3.6 cm) at each bottom corner, which leaves 31 − 10 = 21 sts. Whipstitch the pocket’s bottom to the panel row stitch for stitch, going through all pleat layers.
Sides: Pin the pocket’s 20 row ends to the 20 panel rows it covers. The border will join them.
Tension: Keep the whipstitch snug but not tight so the seam doesn’t pucker. The pleats let the pocket bulge forward around a roll.
Checkpoint: The panel edges still measure 6 in × 20 in (15.2 × 50.8 cm).
Border (MC)
Border gauge: 3.5 sc per inch along stitches; 7 sc per 8 row ends.
Each corner is a 3-sc group, and its middle sc is the corner stitch. The per-side counts below include both corner stitches.
Rnd 1: With RS facing, join in the top right corner st.
– Corner: 3 sc in that st.
– Top: sc in the next 19 sts, then 3 sc in the last st (corner).
– Left side: sc in next 7 row ends, skip 1, repeat 10 times (70 sc). Where a pocket overlaps, go through both the pocket and panel row ends to join them.
– Bottom corner: 3 sc in the first foundation st.
– Bottom: sc in the next 19 sts, catching Pocket 1’s edge, then 3 sc in the last st (corner).
– Right side: work as for the left side (70 sc).
– Sl st to the first sc.
Top 23 · Bottom 23 · Each side 74 · Total 190 sts
Rnd 2: Ch 1, sc in each st, working 3 sc in each corner middle sc. Sl st to the first sc.
Top 25 · Bottom 25 · Each side 76 · Total 198 sts
Fasten off.
Why the math works: The gauge works out to 3.5 sts and 4 rows per inch, so 7 sc per 8 rows matches it exactly. That means 80 rows take 70 sc and the sides stay flat. The top and bottom keep all 21 sts. Each corner adds 2 sts per round, so the corners turn without cupping. Two rounds add 0.5 in (1.3 cm) on every edge, giving 7 in × 21 in (17.8 × 53.3 cm).
Cords: Sew one end of each cord to the WS at a top corner, overlapping it 1 in (2.5 cm). Pass the cord over the dowel from front to back. Fold the free end into a 1 in (2.5 cm) loop and sew it closed. Sew a mini tulip and two mini leaves over each loop base.
Final Blocking
- Lightly mist the holder with water. Don’t soak it.
- Pin it RS up to 7 in × 21 in (17.8 × 53.3 cm).
- Put a roll or a rolled towel in each pocket to shape it.
- Pin each V rim so the two slopes are straight and even.
- Flatten the tulips and leaves and pin the petal tips.
- Let it dry fully, then hang it from the dowel.
Final Quality-Control Checklist
- Panel is 21 sts × 80 rows
- Pockets are 31 sts wide and 20 rows tall at the sides
- Each wing ends with 3 sts, and each rim has 19 sl sts
- Pleats are 5 sts each and the bottom seams lie flat
- Border Rnd 1 has 190 sts and Rnd 2 has 198 sts
- Holder measures 7 in × 21 in (17.8 × 53.3 cm)
- Tulips are centered on st 16
- Cords are the same length and the holder hangs level
Troubleshooting
- Lopsided V: Each wing needs exactly 6 rows ending in 3 sts.
- Rippled sides: You’re adding too many sts. Keep to 7 sc per 8 row ends.
- Border pulls in: Use a hook 0.5 mm larger for the border.
- Pocket too tight for a roll: Make the pleats 4 sts each and ease the extra 2 sts into the seam.
- Tulip cups: Work Rnd 2 more loosely.
- Holder hangs crooked: Make the two cord loops the same length.
Care
Hand wash in cool water with mild soap, press out the water, and lay flat to dry. Reshape the pockets around a roll while the holder is damp.
Final Notes
Every measurement here comes from one gauge: 14 sc × 16 rows = 4 in (10.2 cm). It gives a 6 in × 20 in (15.2 × 50.8 cm) panel and pockets 8.9 in (22.6 cm) wide. The pleats bring each pocket back to 21 sts, and the border brings the holder to 7 in × 21 in (17.8 × 53.3 cm). Check your gauge early and count at each checkpoint.
Happy crocheting!