

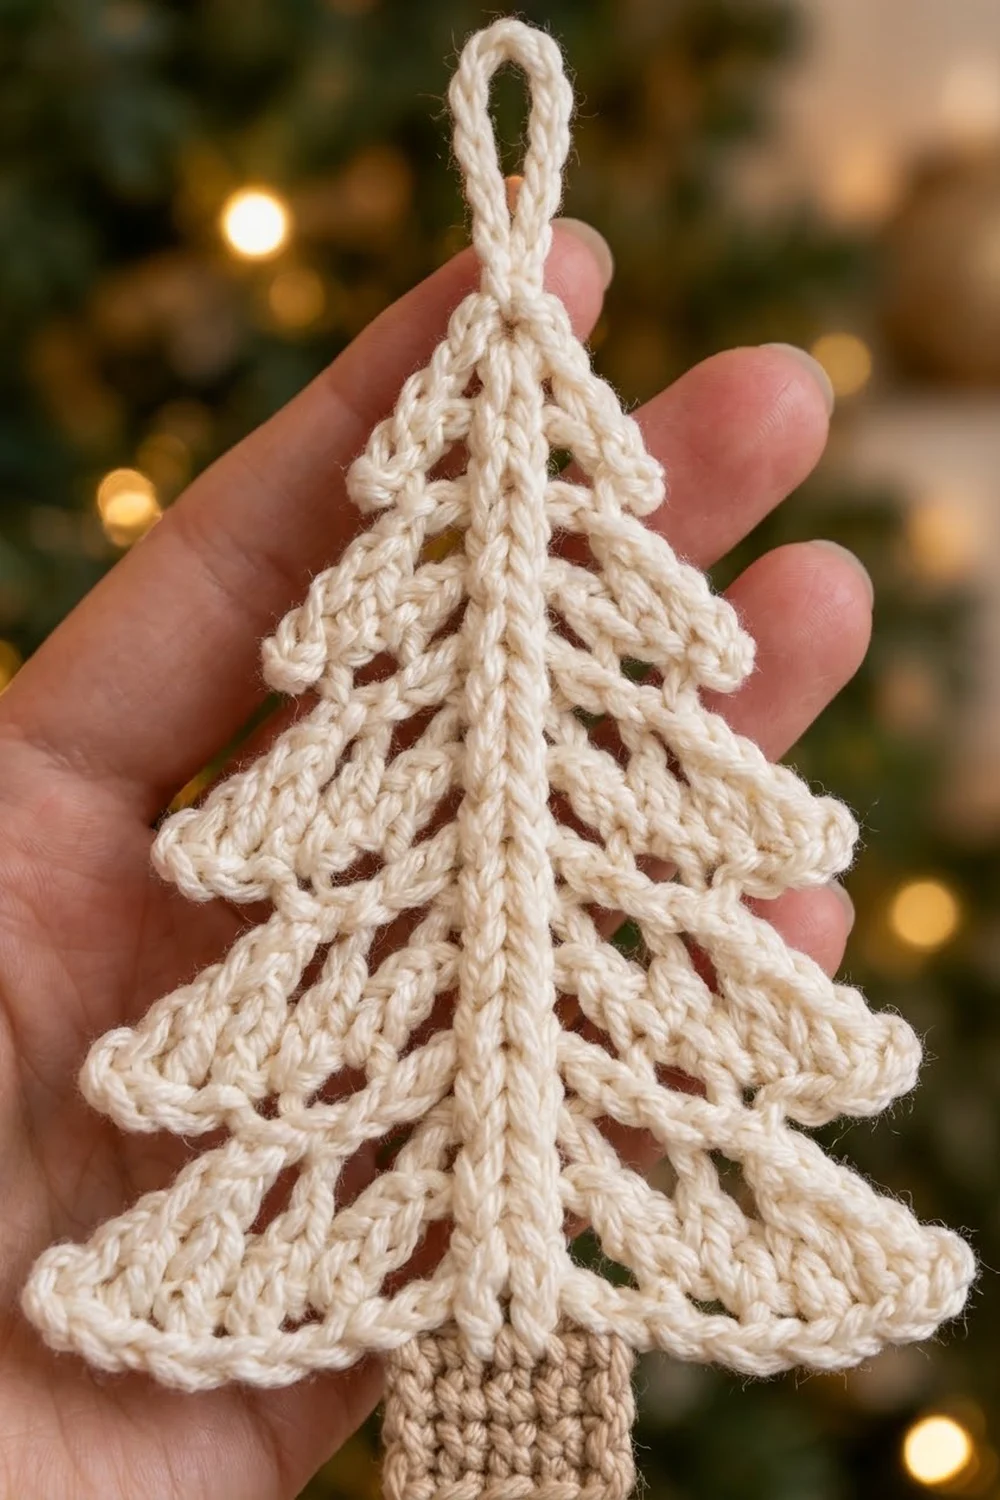
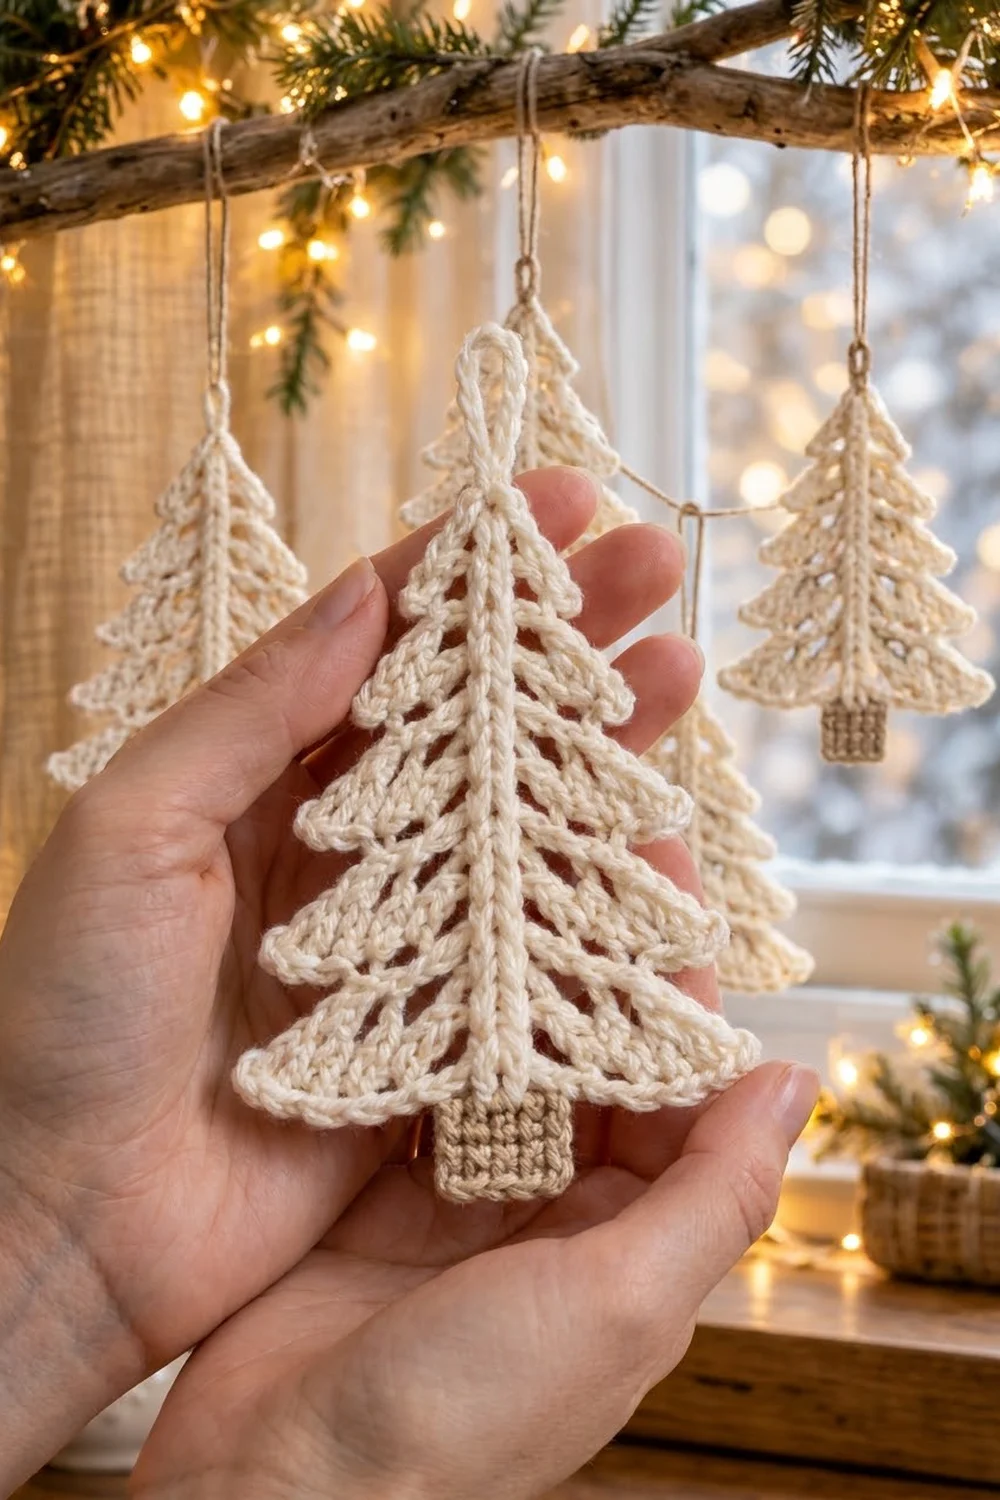
The Frosted Pine is a lacy, flat Christmas tree ornament. It has six tiers of open spoke stitches, each tier ending in a curled single-crochet edge, so the outline steps out like real pine branches. A raised center spine runs from the trunk to the tip and turns into a sturdy hanging loop.
The tree is soft cream and the small square trunk is light tan. The look is calm, natural and Scandinavian, so it suits a real tree, a window branch or a gift tag.
This pattern uses US crochet terms. The finished ornament measures about 4.1 in (10.4 cm) wide and 5.0 in (12.7 cm) tall, plus a 1.5 in (3.8 cm) hanging loop.
You work the tree in one piece from the top down. You start with a three-stitch tip, then make each tier with two rows: a spoke row of double treble stitches, then an edge row of single crochet. Next you add the tan trunk to the bottom edge, and finish with a surface slip-stitch spine and the hanging loop.
Finished Size and Construction
- Finished size: 4.1 in (10.4 cm) wide × 5.0 in (12.7 cm) tall, not counting the loop
- Height with loop: 6.5 in (16.5 cm)
- Skill level: Easy-intermediate
- Terminology: US crochet terms
- Yarn weight: Sport weight (2), cotton or cotton blend
- Hook: 2.75 mm (C-2)
- Number of pieces: 1 (single ornament)
- Layout: Single flat piece, tip at top, trunk at bottom
- Piece size: 4.1 in (10.4 cm) × 5.0 in (12.7 cm)
- Size before border: The tree body is 4.1 in (10.4 cm) × 4.3 in (10.9 cm) before the trunk and spine are added
- Border depth: 1 single-crochet edge row built into each tier, 0.14 in (0.4 cm)
Materials
Use a smooth, mercerized or matte cotton in sport weight. Cotton shows the spoke stitches clearly and holds its shape after blocking. Avoid fuzzy yarns, because they hide the open gaps.
- Color A, Cream: 10 g, about 31 m (tree body, spine, hanging loop)
- Color B, Light Tan: 3 g, about 9 m (trunk)
Tools:
- 2.75 mm (C-2) crochet hook
- Tapestry needle
- Scissors
- Stitch marker
- Blocking mat and rustproof pins
- Spray bottle with water
- Ruler or tape measure
These quantities include a small safety margin for the gauge swatch and weaving in ends.
Abbreviations (US Terms)
- ch – chain
- sl st – slip stitch
- sc – single crochet
- dtr – double treble crochet
- sp – space
- st(s) – stitch(es)
- tch – turning chain
- RS / WS – right side / wrong side
Special stitches:
- Double treble (dtr): Yarn over twice, insert hook in the stitch, yarn over and pull up a loop (5 loops on hook). Then [yarn over, pull through 2 loops] 4 times.
- Surface slip stitch: Hold the yarn behind the work. Insert the hook from front to back through the fabric, pull up a loop, and draw it through the loop on your hook. Repeat to make a raised chain line on the RS.
Gauge and Checkpoints
Gauge: 14 sc × 14 rows = 2 in (5.1 cm), so 7 sc = 1 in (2.5 cm). One dtr row is 0.55 in (1.4 cm) tall. One full tier (dtr row plus sc row) is about 0.69 in (1.8 cm).
Before you commit, work one complete ornament as your test piece and check it at each stage:
- After Row 3 (Tier 1): 9 sc, about 1.3 in (3.3 cm) wide
- After Row 7 (Tier 3): 17 sc, about 2.4 in (6.1 cm) wide; 2.2 in (5.6 cm) from the tip
- After Row 11 (Tier 5): 25 sc, about 3.6 in (9.1 cm) wide; 3.6 in (9.1 cm) from the tip
- After Row 13 (Tier 6): 29 sc, about 4.1 in (10.4 cm) wide; 4.3 in (10.9 cm) from the tip
- After the trunk: total height 5.0 in (12.7 cm)
If your tree is too big, go down to a 2.5 mm hook. If it is too small, go up to a 3.0 mm hook. If only the height is off, check how tall your dtr stitches are: pull each loop up to its full height without yanking it.
Pattern: Tree Body
Use Color A (cream). Each spoke row is a RS row and each edge row is a WS row. The ch-5 at the start of every spoke row counts as 1 dtr.
Row 1 (WS, tip): Ch 2, 3 sc in 2nd ch from hook. Turn. (3 sc)
Tier 1
Row 2 (RS, spokes): Ch 5 (counts as dtr), ch 1, dtr in next sc, ch 1, dtr in last sc. Turn. (3 dtr, 2 ch-1 sps)
Row 3 (WS, edge): Ch 1, 3 sc in first dtr, sc in ch-1 sp, sc in next dtr, sc in ch-1 sp, 3 sc in top of tch. Turn. (9 sc: 3 + 1 + 1 + 1 + 3)
Tiers 2–6: How the rows work
Every spoke row is worked only into the center stitches of the edge row above it. The outer stitches stay unworked, which makes the stepped tier outline. In the formulas, k is the tier number.
- Spoke row: Sl st in each of the first (k + 1) sc. The last of these sl sts sits in the first stitch you will work. Ch 5 (counts as dtr), then [ch 1, dtr in next sc] 2k times. Leave the last k sc unworked. Turn. (2k + 1 dtr)
- Edge row: Ch 1, 3 sc in first dtr, [sc in ch-1 sp, sc in next dtr] (2k − 1) times, sc in last ch-1 sp, 3 sc in top of tch. Turn. (4k + 5 sc)
Each dtr plus its ch-1 takes up about twice the width of one base stitch, so the spoke row fans out and slants the spokes outward. The 3-sc groups at each end form the curled branch tips.
Tier 2
Row 4 (RS): Sl st in each of first 3 sc, ch 5, [ch 1, dtr in next sc] 4 times. Leave last 2 sc unworked. Turn. (5 dtr)
Row 5 (WS): Ch 1, 3 sc in first dtr, [sc in ch-1 sp, sc in next dtr] 3 times, sc in last ch-1 sp, 3 sc in top of tch. Turn. (13 sc)
Tier 3
Row 6 (RS): Sl st in each of first 4 sc, ch 5, [ch 1, dtr in next sc] 6 times. Leave last 3 sc unworked. Turn. (7 dtr)
Row 7 (WS): Ch 1, 3 sc in first dtr, [sc in ch-1 sp, sc in next dtr] 5 times, sc in last ch-1 sp, 3 sc in top of tch. Turn. (17 sc)
Checkpoint: 2.4 in (6.1 cm) wide, 2.2 in (5.6 cm) tall.
Tier 4
Row 8 (RS): Sl st in each of first 5 sc, ch 5, [ch 1, dtr in next sc] 8 times. Leave last 4 sc unworked. Turn. (9 dtr)
Row 9 (WS): Ch 1, 3 sc in first dtr, [sc in ch-1 sp, sc in next dtr] 7 times, sc in last ch-1 sp, 3 sc in top of tch. Turn. (21 sc)
Tier 5
Row 10 (RS): Sl st in each of first 6 sc, ch 5, [ch 1, dtr in next sc] 10 times. Leave last 5 sc unworked. Turn. (11 dtr)
Row 11 (WS): Ch 1, 3 sc in first dtr, [sc in ch-1 sp, sc in next dtr] 9 times, sc in last ch-1 sp, 3 sc in top of tch. Turn. (25 sc)
Checkpoint: 3.6 in (9.1 cm) wide, 3.6 in (9.1 cm) tall.
Tier 6
Row 12 (RS): Sl st in each of first 7 sc, ch 5, [ch 1, dtr in next sc] 12 times. Leave last 6 sc unworked. Turn. (13 dtr)
Row 13 (WS): Ch 1, 3 sc in first dtr, [sc in ch-1 sp, sc in next dtr] 11 times, sc in last ch-1 sp, 3 sc in top of tch. (29 sc)
Fasten off Color A.
Stitch-count check: In each tier, the spoke row uses 2k + 1 stitches of the previous edge row, which has 4(k − 1) + 5 = 4k + 1 stitches. That leaves (4k + 1 − (2k + 1)) ÷ 2 = k unworked stitches on each side, which matches the instructions.
Pattern: Trunk
Use Color B (light tan). Row 13 runs along the bottom of the tree, and the trunk is centered on it. Count 12 sc in from either edge and place a marker in the 13th sc. Sc 13 through 17 are the 5 center stitches; sc 15 is the exact middle.
Row 1 (RS): Join Color B in the marked sc. Ch 1, sc in same st and in next 4 sc. Turn. (5 sc)
Rows 2–5: Ch 1, sc in each sc across. Turn. (5 sc each row)
Fasten off. The trunk measures 0.7 in (1.8 cm) × 0.7 in (1.8 cm), which brings the ornament to 5.0 in (12.7 cm) tall.
Pattern: Center Spine and Hanging Loop
Use Color A (cream), with the RS facing.
Spine: Pull up a loop in the center sc (sc 15) of Row 13, just above the trunk. Surface slip stitch straight up the center dtr of each tier: 3 sl sts along each dtr and 1 sl st through each edge row. That is about 4 sl sts per tier, 24 in total. Then work 1 more sl st through the tip in Row 1.
This raised line gives the braided center spine. Keep the stitches loose enough that the tree stays flat.
Hanging loop: From the tip, ch 24 and sl st back into the tip to form a loop. Work 30 sc over the chain loop, working around the chain rather than into it, then sl st into the tip. Fasten off.
The covered loop stands about 1.5 in (3.8 cm) tall and matches the thick cord look of the spine.
Border: Built-In Tier Edging
This ornament has no separate border round. The sc edge row of each tier acts as the border, giving each branch a firm outline and a curled tip.
Border gauge: 7 sc = 1 in (2.5 cm), one sc row deep, 0.14 in (0.4 cm).
Counts per side: Each edge row has 1 center sc. Each side has 2k sc, which includes the 3-sc corner group at the outer end (its 2 extra sts are part of that count). Total = 2 × (2k + 2) + 1 = 4k + 5.
- Tier 1: 4 per side + center = 9 sc
- Tier 2: 6 per side + center = 13 sc
- Tier 3: 8 per side + center = 17 sc
- Tier 4: 10 per side + center = 21 sc
- Tier 5: 12 per side + center = 25 sc
- Tier 6: 14 per side + center = 29 sc
Wait, check the formula against the list: 2 × (2k + 2) + 1 gives 4k + 5, and for Tier 6 that is 2 × 14 + 1 = 29. Each side count above is 2k + 2.
Why the math works: Each edge row grows by exactly 4 sc per tier, 2 per side. Two of those come from the extra dtr + ch-1 pair on each side, and the 3-sc corner groups stay fixed. The bottom edge is 29 sc ÷ 7 sc per inch = 4.1 in (10.4 cm), which matches the finished width.
Final Blocking
- Weave in all ends along the back of the spine and trunk.
- Spray the ornament until it is evenly damp, not dripping.
- Lay it RS up on the blocking mat.
- Pin the tip and the base of the trunk so the spine is straight and 5.0 in (12.7 cm) long.
- Pin each pair of tier tips level, gently pulling each 3-sc corner outward and slightly up so it curls.
- Open the spokes evenly so the gaps line up on both sides.
- Measure the bottom tier: 4.1 in (10.4 cm).
- Let it dry completely before unpinning. For crisp tips, mist with light spray starch.
Final Quality-Control Checklist
- Edge-row counts are 9, 13, 17, 21, 25 and 29 sc.
- Spoke-row counts are 3, 5, 7, 9, 11 and 13 dtr.
- Both sides of each tier have the same number of spokes.
- The trunk is centered, 5 sc wide and 5 rows tall.
- The spine is straight and runs through the center dtr of every tier.
- The hanging loop is fully covered and firmly attached.
- Size is 4.1 in (10.4 cm) × 5.0 in (12.7 cm), plus a 1.5 in (3.8 cm) loop.
- All ends are woven in and hidden.
Troubleshooting
Tree leans to one side: You probably skipped a sl st at the start of a spoke row. Count the k + 1 sl sts again.
Tier tips flatten instead of curling: Check that you made 3 sc into each end stitch, then pin the tips upward while blocking.
Spokes look crowded: Make sure there is a ch-1 between every pair of dtr, and pull each dtr up to its full height.
Spine puckers the fabric: Your surface sl sts are too tight. Redo them with a hook one size larger.
Trunk is off center: Count again so that 12 sc remain on each side of the 5 trunk stitches.
Loop flops: Pack the sc more firmly over the chain, or add 2–4 more sc.
Care
Hand wash in cool water with mild soap, press out the water in a towel, and dry flat, reshaping the tips. Store flat or hang it so the tiers do not crease.
Final Notes
The measurement chain is short and easy to check. At a gauge of 7 sc per inch, the six edge rows grow from 9 to 29 sc, ending at 4.1 in (10.4 cm) wide. Six tiers of about 0.69 in (1.8 cm) each, plus the tip row, make a 4.3 in (10.9 cm) body. The 0.7 in (1.8 cm) trunk brings the tree to 5.0 in (12.7 cm), and the 1.5 in (3.8 cm) loop brings it to 6.5 in (16.5 cm). Once your first tree matches these numbers, every tree after it will match too.
Happy crocheting!