

The Frosted Pine Tree Ornament is a small flat tree with a soft, wintry look. Its tall stitches in light dusty blue form four stacked tiers, and thin cream ridges between them look like snow on the branches. A cream border in crab stitch gives it a beaded edge, and a cream trunk and hanging loop finish it off.
The colors are just pale blue and warm cream, so it looks calm and Scandinavian. It suits a white tree, a window branch, or a gift tag. Make a few and hang them in a row for a simple seasonal display.
This pattern uses US crochet terms. The finished ornament measures about 4.5 in (11.4 cm) wide and 5.6 in (14.2 cm) tall, not counting the hanging loop.
You work the tree flat from the bottom up in rows of alternating colors, decreasing at both ends of every row. Then you add the trunk into the foundation chain, work a two-round cream border around the whole outline, and chain a hanging loop at the tip.
Finished Size and Construction
- Finished size: 4.5 in (11.4 cm) wide × 5.6 in (14.2 cm) tall, loop not included
- Skill level: Easy (advanced beginner)
- Terminology: US crochet terms
- Yarn weight: Worsted (#4), cotton or cotton blend
- Hook: 4.0 mm (G-6)
- Number of pieces: 1
- Layout: Single flat triangle with an attached trunk
- Piece size before border: 3.75 in (9.5 cm) wide at the base × 4.85 in (12.3 cm) tall including the trunk
- Tree body only: 3.75 in (9.5 cm) wide × about 3.75 in (9.5 cm) tall
- Trunk: 1.25 in (3.2 cm) wide × 1.1 in (2.8 cm) tall
- Border depth: about 0.375 in (1.0 cm) on every edge
- Hanging loop: hangs about 4.5 in (11.4 cm) above the tip
Materials
Yarn: Use a smooth worsted-weight cotton or cotton blend. Cotton shows tall stitches clearly and stays flat after blocking. Acrylic also works, but it can make the tall stitches look slightly fuzzy.
- Color A, light dusty blue: 6 g, about 10 m (11 yd)
- Color B, cream: 9 g, about 15 m (16 yd)
These amounts are for one ornament and include a margin of about 20% for tails and swatching. For a set of three, plan on 18 g (30 m) of blue and 27 g (45 m) of cream.
Tools:
- 4.0 mm (G-6) crochet hook
- Tapestry needle
- Scissors
- Stitch marker
- Blocking mat and rust-proof pins
- Spray bottle with water
Abbreviations (US Terms)
- ch: chain
- sl st: slip stitch
- sc: single crochet
- sc2tog: single crochet 2 together
- tr: treble crochet
- st(s): stitch(es)
- rev sc: reverse single crochet (crab stitch)
Special stitches:
- tr2tog (treble 2 together): *Yarn over twice, insert hook in next st, pull up a loop, [yarn over, pull through 2 loops] twice; repeat from * once more (3 loops on hook), yarn over and pull through all 3 loops. Counts as 1 st.
- tr3tog (treble 3 together): Work as tr2tog, but repeat the bracketed part across 3 sts (4 loops on hook), then yarn over and pull through all 4 loops. Counts as 1 st.
- rev sc (crab stitch): Work from left to right (right-handed). Insert hook in the next st to the right, pull up a loop, yarn over and pull through both loops. This makes the beaded, twisted edge.
Gauge and Checkpoints
Gauge: 16 sc and 18 sc rows = 4 in (10.2 cm). One row of tr is about 0.7 in (1.8 cm) tall.
The ornament is small, so you can use the first tree as your gauge test. Check it at each stage:
- After Row 1: 15 sc should measure 3.75 in (9.5 cm) across.
- After Row 4: the piece should be about 1.9 in (4.8 cm) tall.
- After Row 8: the body should be about 3.75 in (9.5 cm) tall from the foundation to the tip.
- After the trunk: total height should be about 4.85 in (12.3 cm).
- After the border: about 4.5 in (11.4 cm) wide × 5.6 in (14.2 cm) tall.
If your piece is too big, go down one hook size, to 3.75 mm. If it is too small, go up one hook size, to 4.5 mm. If only the blue tiers are too tall, pull each tr’s first loop up to hook height and keep it there, without lifting it extra.
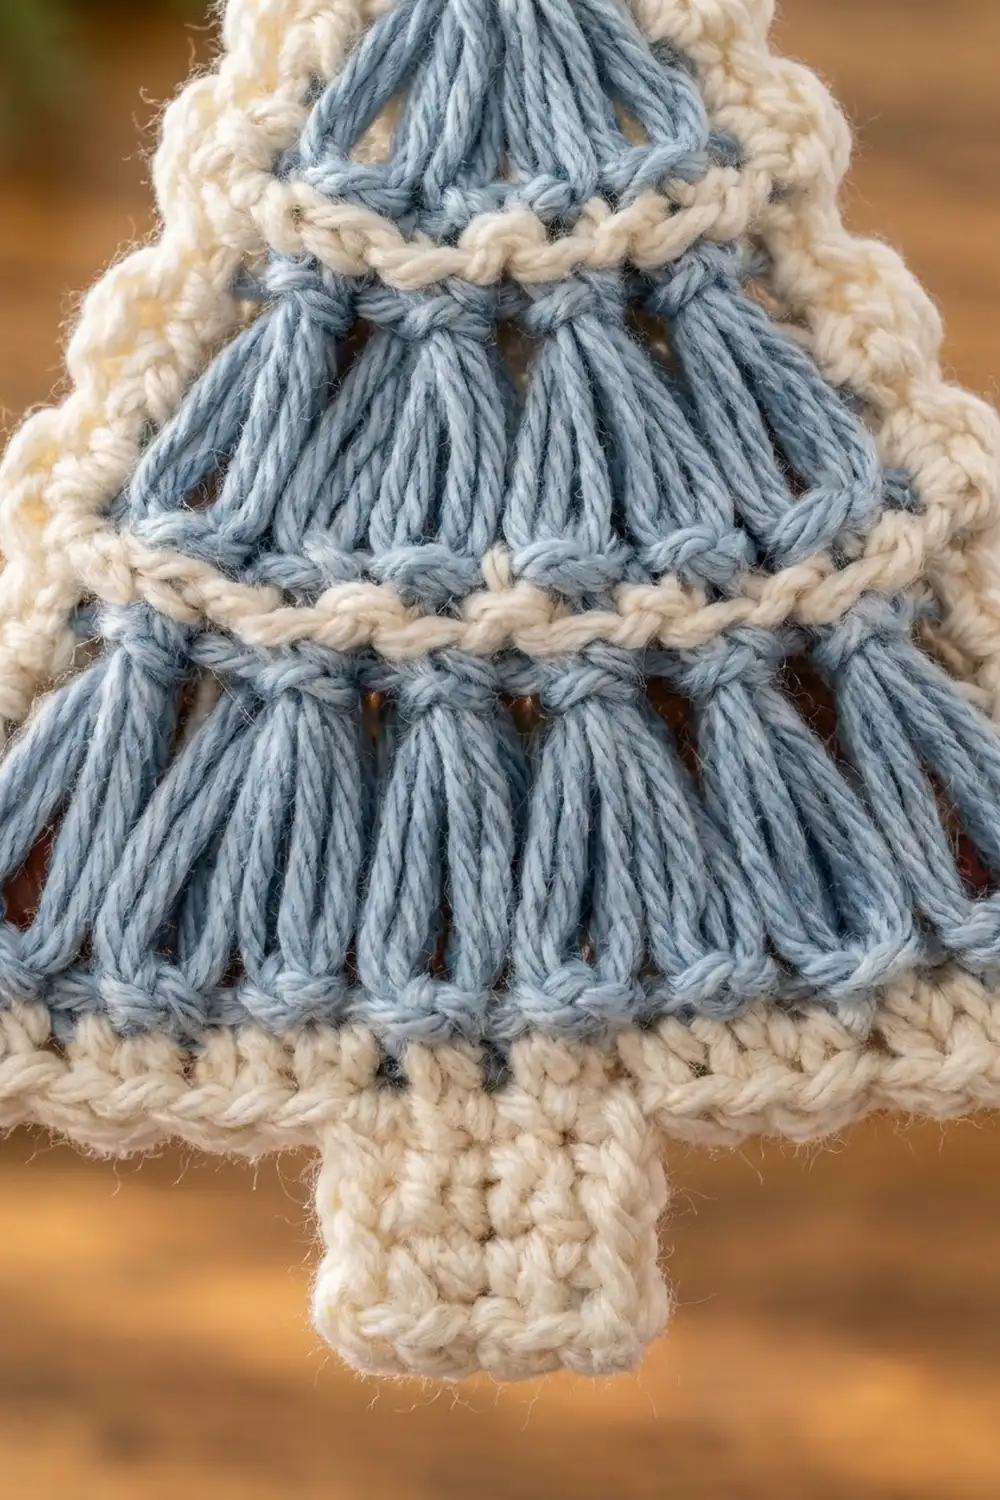
Tree Body
You work the body in turned rows and change color every row. Cut each color when you finish a row and leave a 4 in (10.2 cm) tail. In Border Round 1, you will work over these tails so you don’t have to weave many ends.
Turning chains do not count as stitches in this pattern.
Row 1 (Color B, cream): Ch 16. Sc in the 2nd ch from the hook and in each ch across. Fasten off. (15 sc)
Checkpoint: 3.75 in (9.5 cm) wide.
Row 2 (Color A, blue): Turn. Join A in the first st. Ch 3, tr2tog over the first 2 sts, tr in each of the next 11 sts, tr2tog over the last 2 sts. Fasten off. (13 sts: 1 tr2tog + 11 tr + 1 tr2tog)
This is the bottom tier. The decreases at each end lean inward, and that starts the sloped sides.
Row 3 (Color B): Turn. Join B in the first st. Ch 1, sc2tog, sc in each of the next 7 sts, sc2tog. Fasten off. (9 sc)
Wait to check the count first. Row 2 has 13 sts, and sc2tog uses 2 of them at each end. That leaves 9 sts in the middle: 2 + 9 + 2 = 13. So the correct row is:
Row 3 (corrected) (Color B): Turn. Join B in the first st. Ch 1, sc2tog, sc in each of the next 9 sts, sc2tog. Fasten off. (11 sc: 1 + 9 + 1)
Row 4 (Color A): Turn. Join A. Ch 3, tr2tog, tr in each of the next 7 sts, tr2tog. Fasten off. (9 sts: 1 + 7 + 1)
Checkpoint: about 1.9 in (4.8 cm) tall.
Row 5 (Color B): Turn. Join B. Ch 1, sc2tog, sc in each of the next 5 sts, sc2tog. Fasten off. (7 sc: 1 + 5 + 1)
Row 6 (Color A): Turn. Join A. Ch 3, tr2tog, tr in each of the next 3 sts, tr2tog. Fasten off. (5 sts: 1 + 3 + 1)
Row 7 (Color B): Turn. Join B. Ch 1, sc2tog, sc in the next st, sc2tog. Fasten off. (3 sc: 1 + 1 + 1)
Row 8 (Color A): Turn. Join A. Ch 3, tr3tog over all 3 sts. Fasten off. (1 st)
This tr3tog is the top tier. Its three legs fan out from one point and make the tip of the tree.
Stitch count summary: 15, 13, 11, 9, 7, 5, 3, 1. Every row is 2 sts shorter than the row below, so both sides slope at the same angle.
Checkpoint: about 3.75 in (9.5 cm) tall and 3.75 in (9.5 cm) wide at the base.
Trunk
You work the trunk into the free loops on the underside of the foundation chain, across the middle 5 sts.
Hold the tree upside down with the foundation chain at the top. Count the 15 free loops from right to left and place a marker in loop 6.
Row 1 (Color B): Join B in the marked loop (loop 6). Ch 1, sc in the same loop and in each of the next 4 loops. (5 sc)
That uses loops 6 through 10, so 5 loops stay free on each side (loops 1–5 and 11–15).
Rows 2–5: Ch 1, turn, sc in each st across. (5 sc)
Fasten off. Checkpoint: the trunk is 1.25 in (3.2 cm) wide × 1.1 in (2.8 cm) tall, and the whole piece is about 4.85 in (12.3 cm) tall.
Border
Border gauge: use the same 16 sc = 4 in (10.2 cm). The border has two rounds and adds about 0.375 in (1.0 cm) to every edge.
Work over the color tails along the side edges as you go, and trim them after Round 2.
Round 1 (Color B): Join B in the top of the tr3tog at the tip. Ch 1. Work as follows:
- Tip: 3 sc in the top of the tr3tog. (3)
- Right slope: work into the row ends from Row 8 down to Row 1. Make 3 sc into each tr row end and 1 sc into each sc row end. That is Row 8 (3), Row 7 (1), Row 6 (3), Row 5 (1), Row 4 (3), Row 3 (1), Row 2 (3), Row 1 (1). (16)
- Bottom right corner: 3 sc in foundation loop 15. (3)
- Bottom edge, right side: sc in loops 14, 13, 12, and 11. (4)
- Trunk right side: 1 sc in each trunk row end. (5)
- Trunk bottom: 3 sc in the first st, sc in the next 3 sts, 3 sc in the last st. (9)
- Trunk left side: 1 sc in each trunk row end. (5)
- Bottom edge, left side: sc in loops 5, 4, 3, and 2. (4)
- Bottom left corner: 3 sc in loop 1. (3)
- Left slope: work into the row ends from Row 1 up to Row 8, using the same 1-and-3 pattern. (16)
Sl st to the first sc. (68 sc)
Check the total: 3 + 16 + 3 + 4 + 5 + 9 + 5 + 4 + 3 + 16 = 68.
Round 2 (Color B): Ch 1. Work rev sc in each st around. Sl st to the first rev sc. (68 rev sc) Do not fasten off.
Hanging loop: Sl st along the edge to the middle sc of the 3 tip stitches. Ch 40, then sl st into the same tip stitch. To make a firmer cord, sl st into each ch around the loop, then sl st into the tip again. Fasten off and weave in the end.
Why the math works:
- Slopes: The body is 3.75 in (9.5 cm) wide and 3.75 in (9.5 cm) tall, so each slope is about 4.2 in (10.7 cm) long. There are 16 sc along each slope, plus half of each corner group. That gives about 17 sts, which is 4.25 in (10.8 cm) at gauge. The edge fits the slope without ruffling or cupping.
- Bottom edges: Each side has 4 free loops and you work 4 sc into them, which is an exact 1-to-1 match.
- Trunk: The trunk is 5 sts wide, and you work 1 sc into each of the 5 rows on each side. Sc row ends sit close to sc stitch width, so this lies flat.
- Corners: Each 3-sc corner group turns the corner without pulling it in.
- Round 2: Rev sc goes 1-to-1 into Round 1, so it keeps the same 68 sts.
Final Blocking
- Weave in any remaining ends along the cream border, on the back.
- Lay the ornament face down on the blocking mat.
- Pin it to 4.5 in (11.4 cm) wide at the base and 5.6 in (14.2 cm) from the trunk bottom to the tip.
- Put one pin at the tip and one at each bottom corner, and keep the two slopes straight and equal.
- Pin the trunk square so its corners are at right angles.
- Spray until it is evenly damp, but not soaked.
- Gently spread each blue tier sideways so the tall stitches stand apart.
- Leave it pinned until completely dry, usually 6–8 hours.
- Unpin it and hang it by the loop to check that it hangs straight.
Final Quality-Control Checklist
- Body rows count 15, 13, 11, 9, 7, 5, 3, 1.
- There are 4 blue tiers and 4 cream ridges.
- The trunk is centered, with 5 free loops on each side.
- The trunk is 5 sts wide and 5 rows tall.
- Border Round 1 has 68 sc, and Round 2 has 68 rev sc.
- Both slopes are the same length.
- Finished size is 4.5 in (11.4 cm) × 5.6 in (14.2 cm).
- No color tails are visible on the front.
- The hanging loop is centered at the tip.
Troubleshooting
The tree leans to one side: You may have skipped a decrease at one end. Count each row against the summary and redo the row where the count first goes wrong.
The edges ruffle: You have too many sc along the slopes. Use 2 sc in each tr row end instead of 3.
The edges cup or pull in: You have too few sc along the slopes. Make sure you are working 3 sc into each tr row end.
The trunk is off-center: Recount the foundation loops. The trunk must start in loop 6.
The crab stitch twists unevenly: Keep your loops loose and work at the same steady pace all the way around.
The blue tiers look sparse: Go down one hook size for the blue rows only.
Care
Hand wash in cool water and lay flat to dry. Reshape and re-pin if needed, then store the ornament flat so the loop doesn’t stretch.
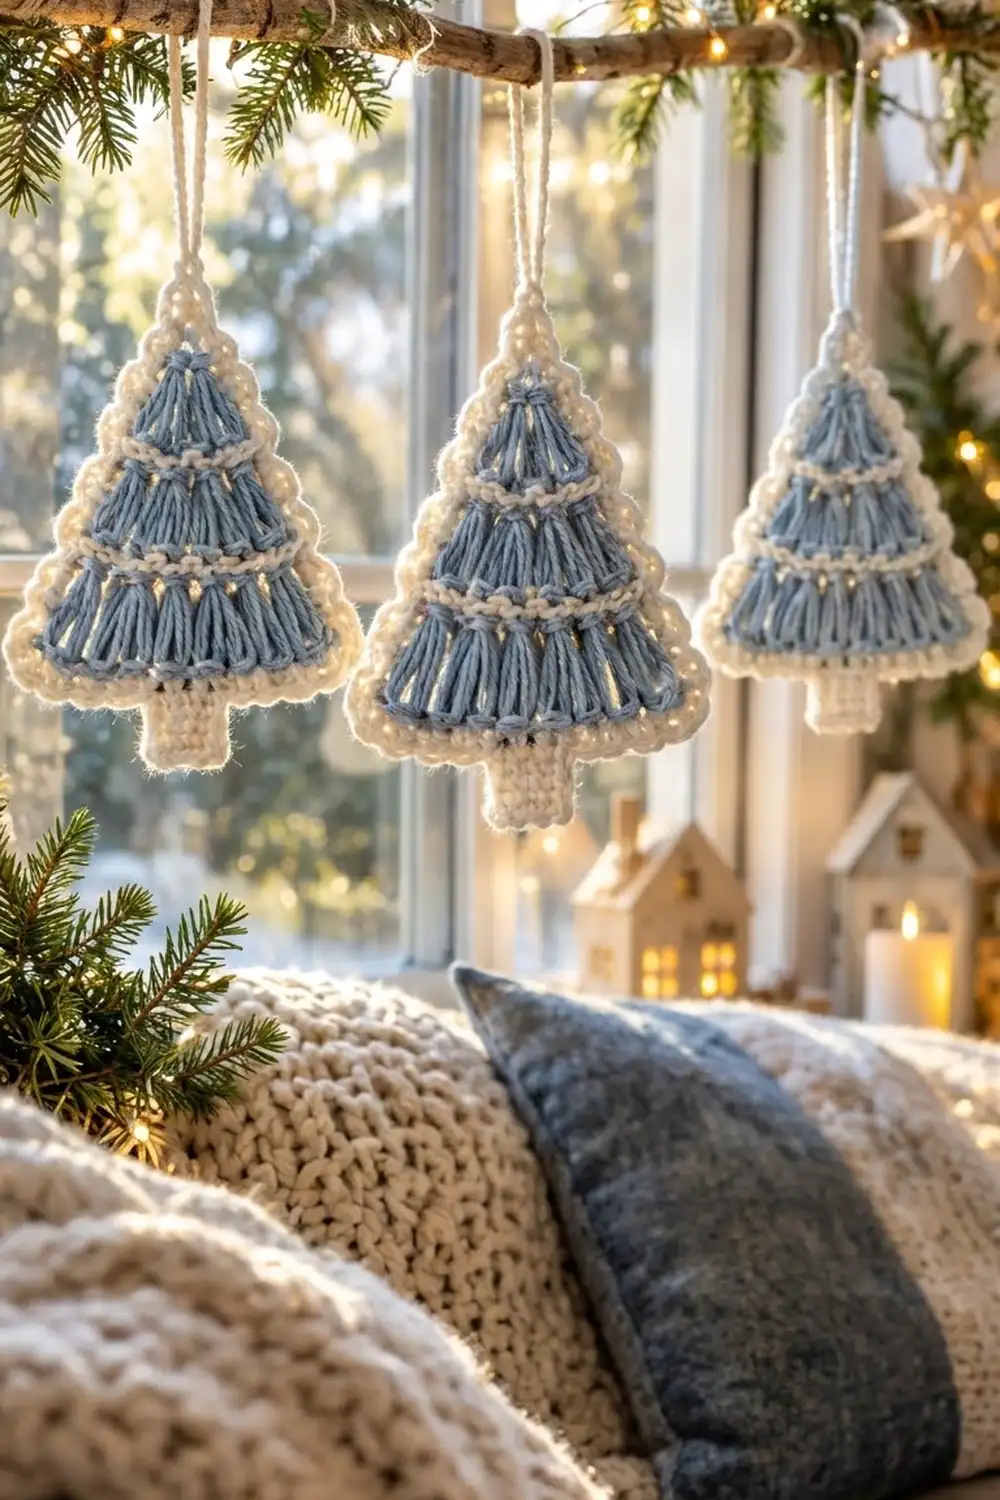
Final Notes
Here is how the measurements build on each other:
- Fifteen foundation stitches give a 3.75 in (9.5 cm) base.
- Eight rows, each 2 sts shorter than the last, make a body about 3.75 in (9.5 cm) tall.
- A 5-stitch trunk brings the height to 4.85 in (12.3 cm).
- The 68-stitch border adds 0.375 in (1.0 cm) on every side, for a finished size of 4.5 in (11.4 cm) × 5.6 in (14.2 cm).
If you check each stage as you go, every Frosted Pine tree will come out the same size.
Happy crocheting!