

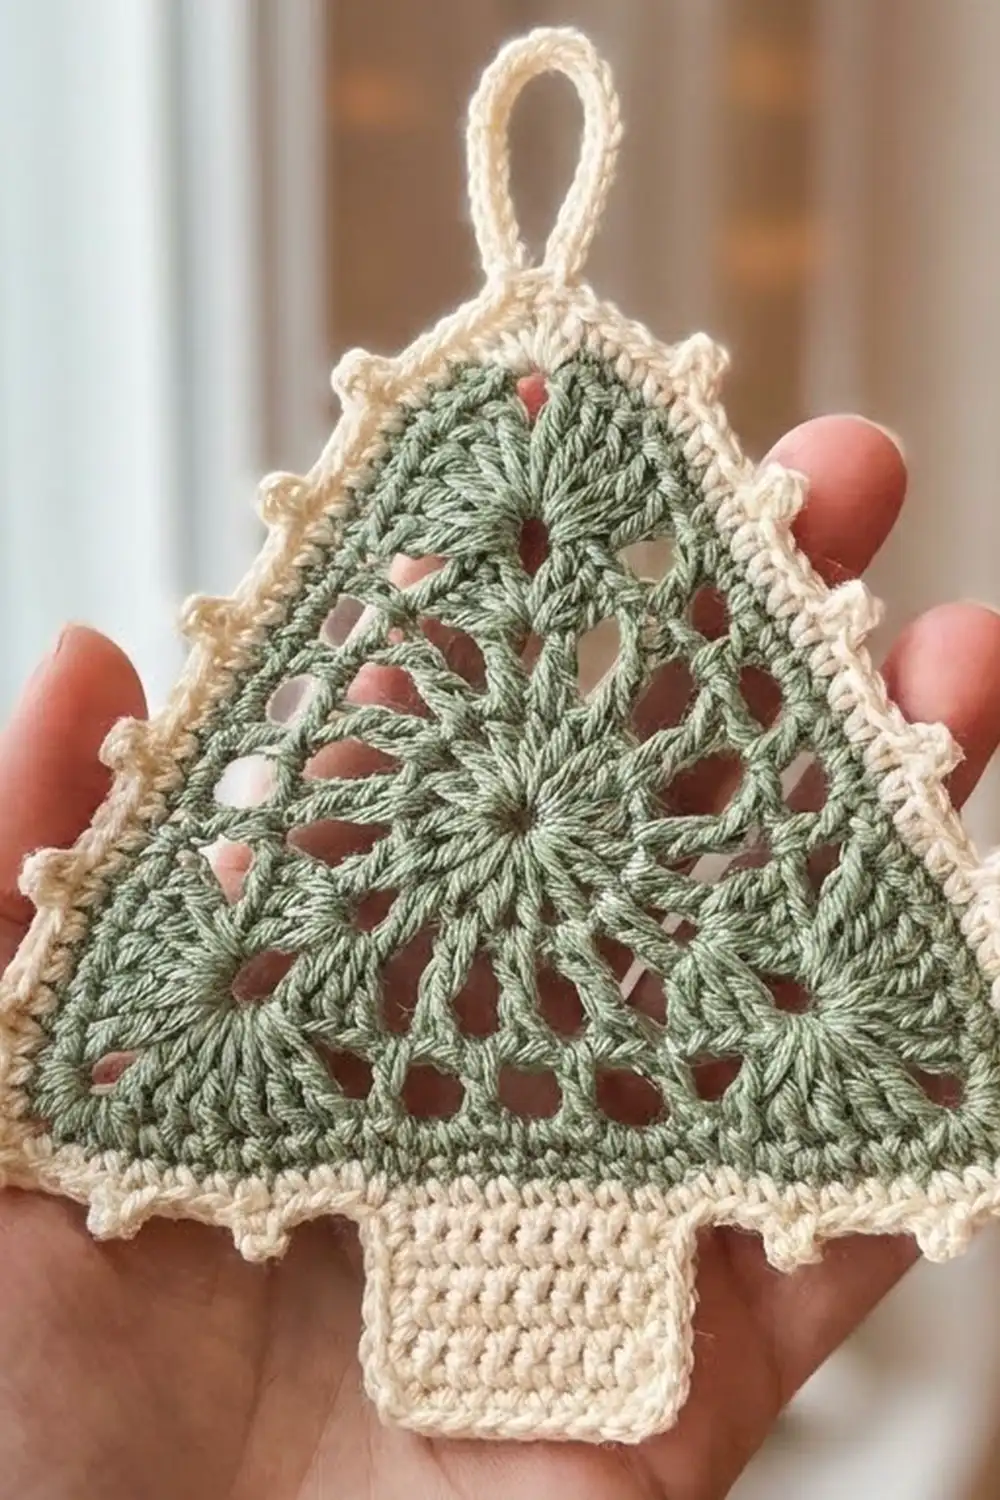
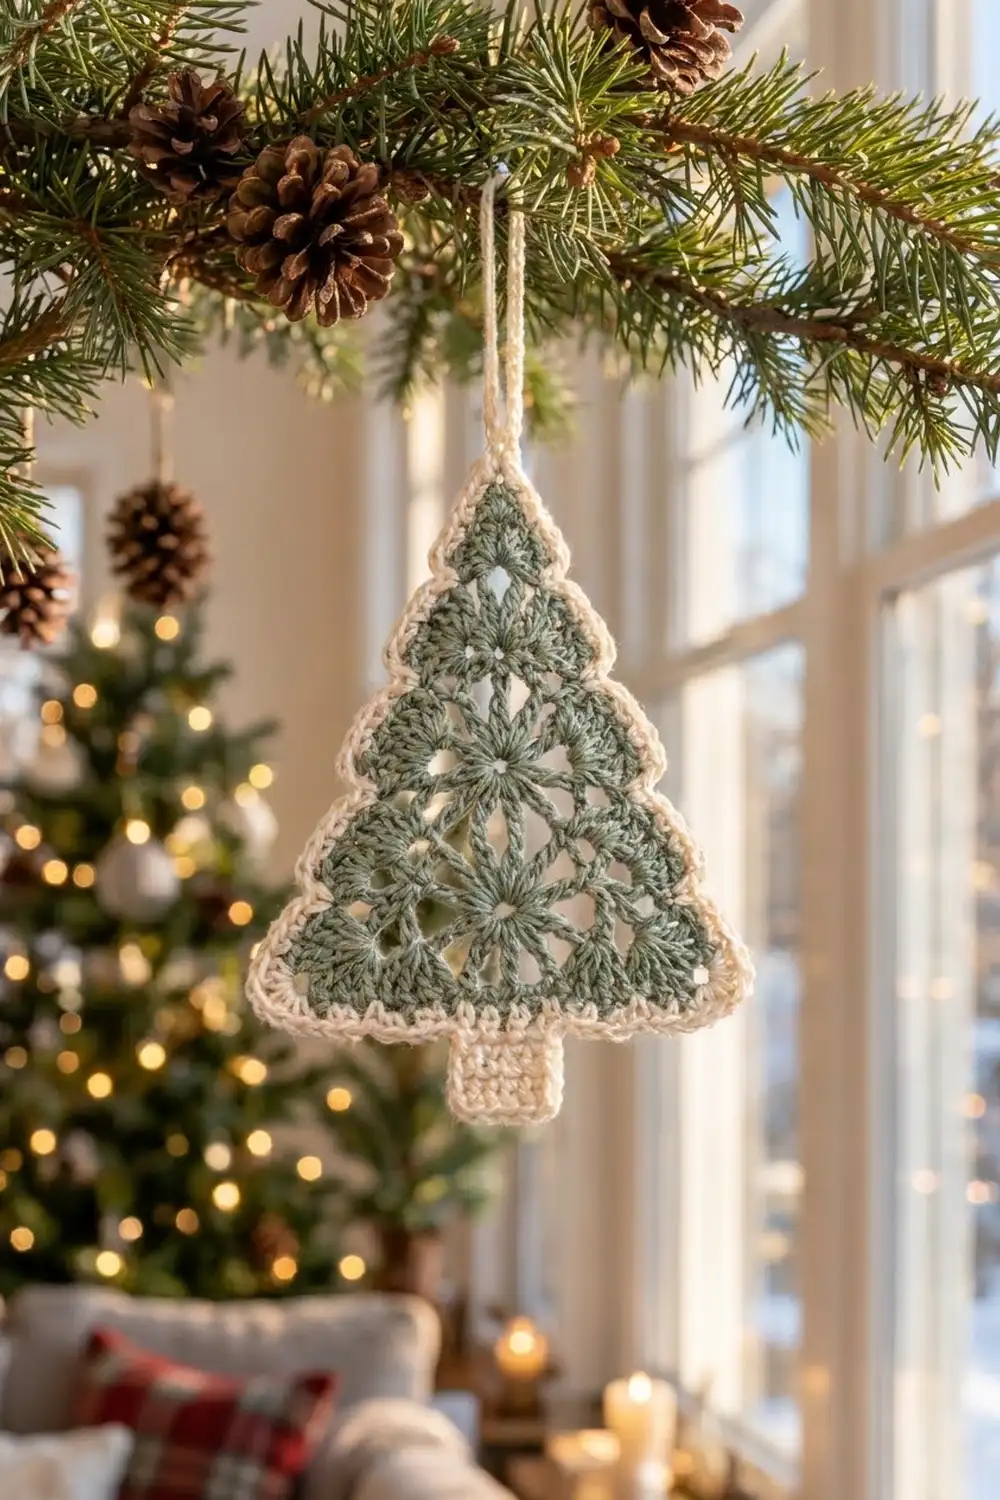
This small tree is a lacy, openwork Christmas ornament in soft sage green with a warm cream edge. A starburst sits at its center and fanned shell corners fill the three points. A ring of open chain spaces lets light through when the ornament hangs on a branch or in a window.
The cream border does the decorative work. A bumpy crab-stitch edge frames the green lace. Small points on each slanted side break the outline into three gentle tiers, like a stacked fir tree. A solid cream trunk and a sturdy hanging loop finish the piece.
The pattern uses US crochet terms. The finished ornament is about 4 in (10.2 cm) wide at the base and 4.5 in (11.4 cm) tall from tip to trunk. The hanging loop adds 2 in (5.1 cm), for 6.5 in (16.5 cm) overall.
You make the whole ornament in one piece:
- Start with a magic ring and grow a wheel of spokes.
- Shape the wheel into a triangle and add one lace round.
- Work a cream border round.
- Crochet the trunk in rows straight off the bottom edge.
- Work a crab-stitch round around everything, then add the loop last.
Finished Size and Construction
- Finished size: 4 in (10.2 cm) wide x 4.5 in (11.4 cm) tall, not counting the loop
- Hanging loop: 2 in (5.1 cm) tall
- Skill level: Easy to intermediate
- Terminology: US crochet terms
- Yarn weight: DK / light (#3), cotton or cotton blend
- Hook: 3.5 mm (E-4)
- Number of pieces: 1 (a single ornament, no joining)
- Layout: One triangular tree with the trunk and loop worked onto it
- Piece size: 4 in (10.2 cm) x 4.5 in (11.4 cm)
- Size before border: sides about 3.5 in (8.9 cm), height about 3 in (7.6 cm)
- Border depth: about 0.25 in (0.6 cm), two rounds
Materials
Choose a smooth cotton in DK weight, either mercerized or matte. Cotton holds the lace open and keeps the points crisp after blocking. A yarn with about 110 m per 50 g matches the amounts below.
- Sage green: 10 g, about 22 m
- Cream: 6 g, about 13 m
These amounts are for one ornament. They include about 25 percent extra for your test tree and tails. For a set of three, triple them.
Tools:
- 3.5 mm (E-4) crochet hook
- Tapestry needle
- Scissors
- 2 stitch markers
- Blocking mat and rustproof pins
- Spray bottle with water
- Ruler or tape measure
Abbreviations (US Terms)
- ch – chain
- sl st – slip stitch
- sc – single crochet
- hdc – half double crochet
- dc – double crochet
- sk – skip
- sp(s) – space(s)
- st(s) – stitch(es)
- RS – right side
- rev sc – reverse single crochet (crab stitch)
Special stitch – reverse single crochet (rev sc): Work from left to right (if you are right-handed). Insert the hook into the next stitch to the right, yarn over and pull up a loop. Yarn over again and draw through both loops. This makes a twisted, beaded edge.
Gauge and Checkpoints
Gauge in sc is 20 sc and 22 rows to 4 in (10.2 cm). Exact gauge is not critical for an ornament, but it sets the final size and how open the lace looks.
Make one complete tree before you start a set. Check these sizes with the piece laid flat and not stretched:
- After Round 1: a circle about 1 in (2.5 cm) across
- After Round 2: a circle about 1.75 in (4.4 cm) across
- After Round 3: triangle sides about 2.5 in (6.4 cm)
- After Round 5: triangle sides about 3.5 in (8.9 cm)
- After the border and trunk: 4 in (10.2 cm) wide x 4.5 in (11.4 cm) tall
If your tree is more than 0.25 in (0.6 cm) too big, use a hook one size smaller. If it is too small, or the center cups, use a hook one size larger. If only the border ruffles, work the border with a hook 0.5 mm smaller.
Tree Body (Sage Green)
Leave a 6 in (15.2 cm) tail and keep the RS facing throughout. The ch-3 at the start of a round counts as a dc.
Round 1: Make a magic ring. Ch 3, then work 11 dc into the ring. Pull the ring closed and sl st to the top of the ch-3. (12 dc)
This round is the central starburst.
Round 2: Ch 4 (counts as dc + ch 1). Dc in the next st, ch 1; repeat from * 10 more times. Sl st to the 3rd ch of the starting ch-4. (12 dc, 12 ch-1 sps)
These are the open spokes of the wheel.
Round 3 (shapes the triangle): Sl st into the first ch-1 sp. Ch 3, then work (2 dc, ch 2, 3 dc) in the same sp for the first corner.
- Hdc in the next ch-1 sp, sc in the next ch-1 sp, hdc in the next ch-1 sp, then (3 dc, ch 2, 3 dc) in the next ch-1 sp; repeat from * once more.
- Hdc in the next ch-1 sp, sc in the next ch-1 sp, hdc in the next ch-1 sp.
- Sl st to the top of the ch-3.
(27 sts: 9 sts per side between the corner ch-2 sps, plus 3 ch-2 corner sps)
This round uses all 12 spaces from Round 2: 3 for corners and 3 on each side. The fanned 3-dc groups make the shell corners. The shorter hdc–sc–hdc steps pull the circle flat into a triangle.
Round 4: Sl st in the next 2 dc and into the corner ch-2 sp. Ch 3, then work (dc, ch 2, 2 dc) in the same sp.
- Dc in each of the next 9 sts, then (2 dc, ch 2, 2 dc) in the next corner ch-2 sp; repeat from * once more.
- Dc in each of the last 9 sts.
- Sl st to the top of the ch-3.
(39 dc: 13 dc per side between the corner ch-2 sps, plus 3 ch-2 corner sps)
Each side has 2 + 9 + 2 = 13 dc.
Round 5 (lace round): Sl st in the next dc and into the corner ch-2 sp. Ch 3, then work (dc, ch 2, 2 dc) in the same sp.
- Ch 1, sk the next st, [dc in the next st, ch 1, sk the next st] 6 times, then (2 dc, ch 2, 2 dc) in the next corner ch-2 sp; repeat from * once more.
- Ch 1, sk the next st, [dc in the next st, ch 1, sk the next st] 6 times.
- Sl st to the top of the ch-3. Fasten off and weave in the tail.
(30 dc, 21 ch-1 sps, 3 ch-2 corner sps)
Between two corner sps, each side now has 10 dc and 7 ch-1 sps, which is 17 positions in all. The skip pattern fits because 1 skipped st + 6 x (1 dc + 1 skipped st) = 13, exactly the 13 sts of Round 4.
Checkpoint: Lay the triangle flat. Each side should be about 3.5 in (8.9 cm) and the height about 3 in (7.6 cm).
Border Round 1 (Cream)
Border gauge: about 5 sc per 1 in (2.5 cm), the same as your sc gauge. Because the border sits outside the green, each edge is about 3.75 in (9.5 cm) long. That length takes 19 sc per side, so the border lies flat.
Round 1: With the RS facing, join cream with a sl st in any corner ch-2 sp. Ch 1, then work (sc, ch 2, sc) in the same sp.
- Sc in each dc and each ch-1 sp across the side to the next corner, then (sc, ch 2, sc) in the corner ch-2 sp; repeat from * once more.
- Sc in each dc and each ch-1 sp across the last side.
- Sl st to the first sc and fasten off.
Count: Each side gets 17 sc, one in each of its 17 positions (10 dc + 7 ch-1 sps). Add 1 corner sc at each end for 19 sc per side. That 19 already includes the side’s two corner sc. Total: 3 x 19 = 57 sc, plus 3 ch-2 corner sps.
Pick the corner that will be the top of the tree. Mark the 7th and 13th sc on each slanted side, counting the top corner sc as sc 1. These are your tier points.
Trunk (Cream, Worked in Rows)
Turn the tree so the bottom side is at the top, with the RS facing. Count the 19 sc of the bottom side, with the corner sc on the right as sc 1. The center 5 sc are sc 8 to 12.
Row 1: Join cream with a sl st in sc 8. Ch 1, then sc in the same st and in each of the next 4 sts. (5 sc)
Rows 2–5: Ch 1, turn, sc in each st across. (5 sc)
Fasten off. Before the edging, the trunk is about 1 in (2.5 cm) wide and 0.9 in (2.3 cm) long. The crab-stitch round brings its length to 1 in (2.5 cm).
Border Round 2 (Crab-Stitch Edge with Tiers)
This round makes the textured outline and the three-tier shape, and it edges the trunk.
Round 2: With the RS facing, join cream with a sl st in the top corner ch-2 sp. Ch 1. Work rev sc from left to right:
- Top corner: (rev sc, ch 2, rev sc) in the corner ch-2 sp.
- First slanted side: Rev sc in each of the 19 sc. At each marked tier point (the 7th and 13th sc), work (rev sc, ch 2, rev sc) in that st in place of a single rev sc.
- Bottom corner: (rev sc, ch 2, rev sc) in the corner ch-2 sp.
- Bottom side, first part: Rev sc in each of the 7 sc between the corner and the trunk.
- Trunk: Rev sc in each of the 5 row ends down one side of the trunk. Work 2 rev sc in the first st of Row 5, rev sc in the next 3 sts, and 2 rev sc in the last st. Then rev sc in each of the 5 row ends up the other side.
- Bottom side, second part: Rev sc in each of the remaining 7 sc.
- Bottom corner: (rev sc, ch 2, rev sc) in the corner ch-2 sp.
- Second slanted side: Work it like step 2, with tier picots at the marked 13th and 7th sc.
Sl st to the first rev sc and fasten off.
Count: One rev sc per existing stitch gives 19 + 19 (slanted sides) + 14 (bottom side) + 15 (trunk: 5 + 5 row ends + 5 sts) = 67. The extra stitches are 4 at tier points + 6 at corners + 2 at the trunk corners = 12. Total: 67 + 12 = 79 rev sc, plus 4 ch-2 tier picots and 3 ch-2 corner picots.
Why the math works: This round keeps the same one-for-one ratio as Border Round 1. It adds texture without changing the edge length. Extra stitches go only at points, where an outward angle needs more fabric. The tier picots stick out while the stitches beside them stay snug, so the outline reads as three stepped tiers.
Hanging Loop
Join cream with a sl st in the top corner ch-2 picot. Ch 24, then sl st in the same picot to form a ring. Ch 1, work 32 sc into the ring and sl st to the first sc. Fasten off, leaving a 6 in (15.2 cm) tail. Weave the tail down through the top corner twice so the loop stands upright. The loop is about 2 in (5.1 cm) tall.
Final Blocking
- Weave in all ends through stitches of the same color, on the back of the work.
- Spray the ornament with water until it is damp but not dripping.
- Lay it RS up on the blocking mat.
- Pin the three corner picots first. The base should be 4 in (10.2 cm) wide and the tip 3.5 in (8.9 cm) above the bottom edge.
- Pin each of the 4 tier picots slightly outward to sharpen the steps.
- Pin the trunk square, 1 in (2.5 cm) wide and 1 in (2.5 cm) long.
- Gently open each ch-1 space with a fingertip so the lace sits evenly.
- Pin the loop into a teardrop shape. Let everything dry completely before you remove the pins.
For a stiffer ornament, spray it with light fabric starch before it dries.
Final Quality-Control Checklist
- Round 1 has 12 dc and the ring is pulled tight
- Round 3 has 9 sts per side and 3 corner sps
- Round 4 has 13 dc per side
- Round 5 has 10 dc and 7 ch-1 sps per side
- Border Round 1 has 19 sc per side, 57 in all
- The trunk is 5 sc wide and 5 rows long, centered on sc 8 to 12
- Border Round 2 has 79 rev sc, 4 tier picots and 3 corner picots
- The size is 4 in (10.2 cm) x 4.5 in (11.4 cm), plus a 2 in (5.1 cm) loop
- All ends are woven in and can’t be seen from the RS
Troubleshooting
The center cups or ripples. The Round 1 stitches don’t suit the ring. Check that you have exactly 12 dc, then try a hook 0.5 mm larger or smaller.
The triangle looks round. The corner shells are too short. Make sure each corner is (3 dc, ch 2, 3 dc), and keep the hdc–sc–hdc steps snug.
Round 5 doesn’t end evenly. Recount Round 4. Each side needs exactly 13 dc for the skip pattern to fit.
The border ruffles. Use a hook 0.5 mm smaller for both border rounds. Check that you have 19 sc per side and no more.
The border pulls in or the corners curl. Your sc is too tight. Use a hook 0.5 mm larger for the border only.
The trunk is off-center. Recount the bottom side from the corner sc. The trunk must start in sc 8 and end in sc 12.
The tiers don’t show. Pin the tier picots firmly outward when blocking, and keep the rev sc beside them even.
Care
Hand wash in cool water with mild soap. Press the water out in a towel and dry flat, reshaping the points, then store the ornament flat between tissue paper.
Final Notes
All the measurements build on each other. The 1 in (2.5 cm) starburst grows to a 1.75 in (4.4 cm) wheel, which becomes a 2.5 in (6.4 cm) triangle and then opens into 3.5 in (8.9 cm) lace sides. The 19-sc border round frames each edge at 3.75 in (9.5 cm). The 5-stitch trunk adds 1 in (2.5 cm) below, and the crab-stitch round sets the final 4 in (10.2 cm) x 4.5 in (11.4 cm) outline with its three tiers.
Check your counts at each stage and every tree will come out the same. They work as ornaments or gift toppers, or as a whole window full of sage and cream trees.
Happy crocheting!