

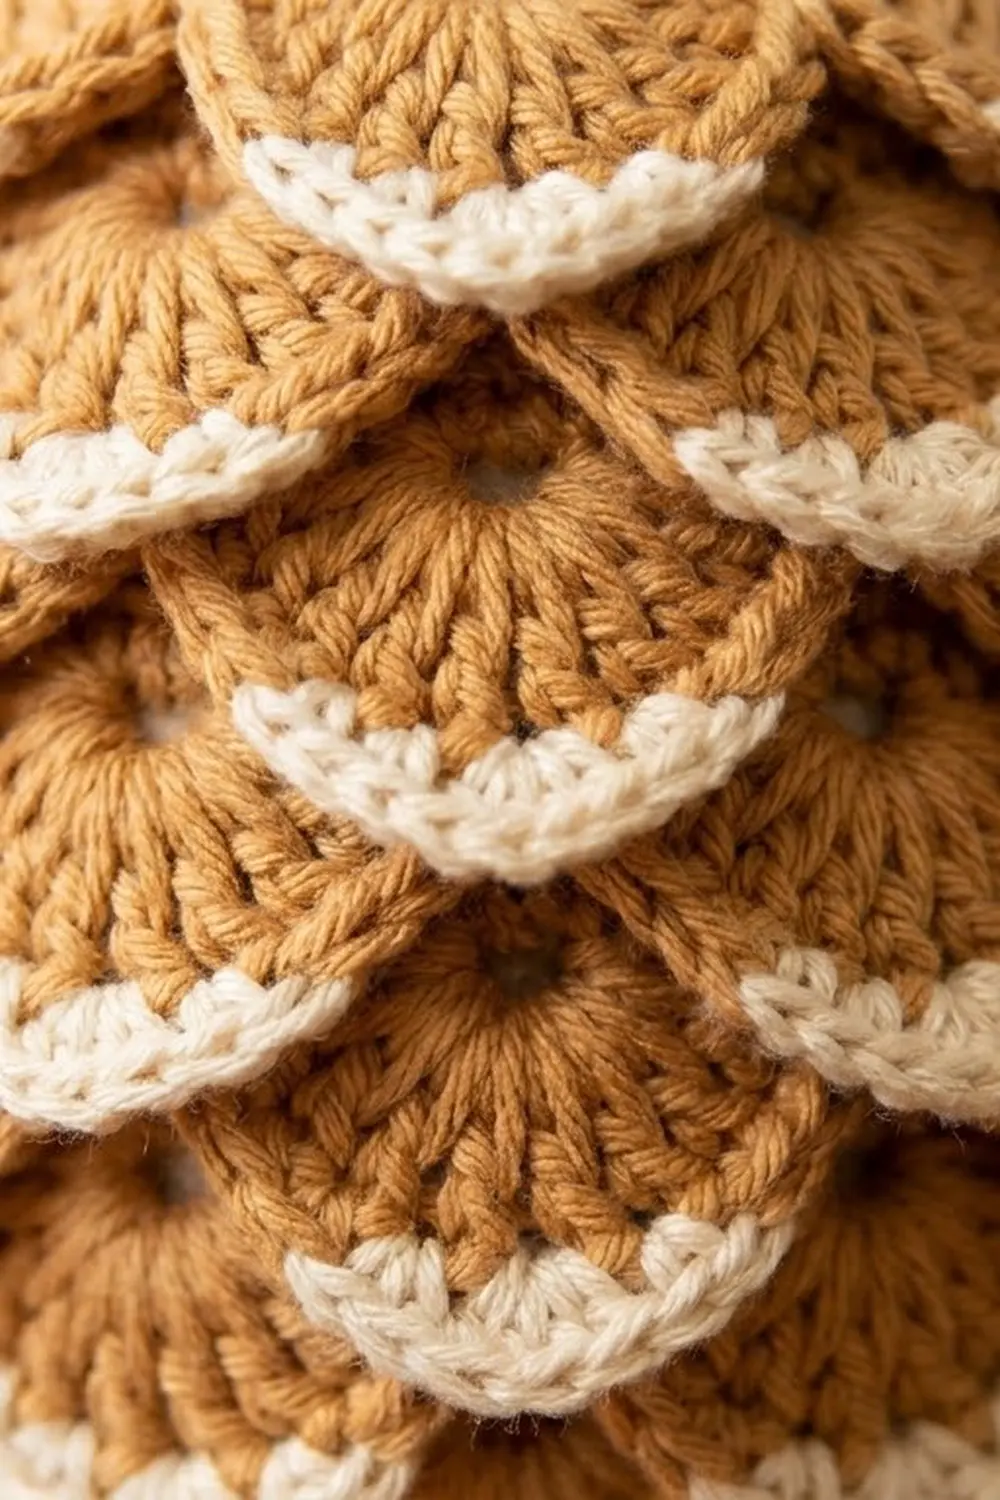
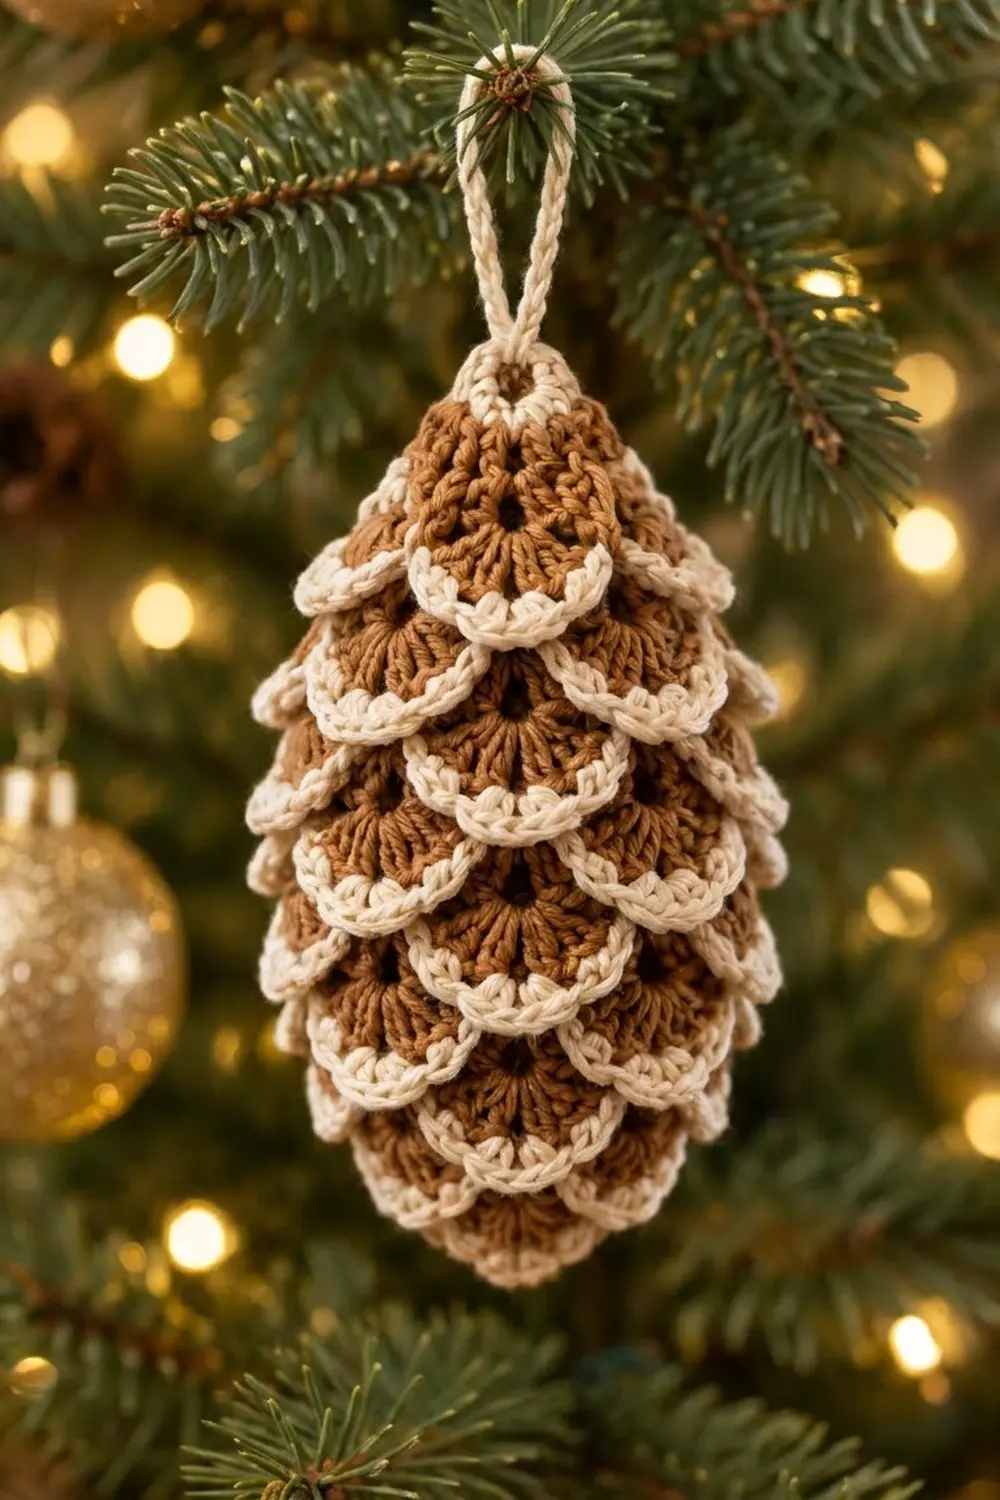
This little pinecone ornament has tiers of fan-shaped scales stacked around a soft, stuffed core. Each scale is a small open fan in warm caramel tan, with a cream scalloped edge that looks like a dusting of frost. A thin cream loop at the top lets it hang from a branch.
It uses just two colors: caramel tan for the core and the fan bodies, and soft cream for the edging and the loop. The look is rustic and natural, and it suits a tree, a gift package, or a wreath.
The pattern uses US crochet terms. The finished ornament is about 3.5 in (8.9 cm) tall without the loop and 2.5 in (6.4 cm) wide at its widest point. The loop adds about 1.5 in (3.8 cm).
You start by crocheting a teardrop-shaped core in the round from the top down, and you stuff it before closing. Next you make 28 separate fan scales in two sizes and edge each one in cream. Then you sew the scales to the core in eight overlapping tiers, starting at the bottom, and finish with the loop.
Finished Size and Construction
- Finished size: 3.5 in (8.9 cm) tall x 2.5 in (6.4 cm) wide, plus a 1.5 in (3.8 cm) loop
- Skill level: Easy-intermediate (simple stitches, many repeats, careful sewing)
- Terminology: US crochet terms
- Yarn weight: DK / light worsted (CYC 3) cotton or cotton blend
- Hook: 3.0 mm (US C/2 or D/3)
- Number of pieces: 30 (1 core, 9 small scales, 19 large scales, 1 hanging loop)
- Layout: 8 tiers of scales around the core, with 3 or 4 scales per tier
- Piece size: Large scale 1.5 in (3.8 cm) wide x 1 in (2.5 cm) deep; small scale 1.25 in (3.2 cm) wide x 0.75 in (1.9 cm) deep
- Scale size before border: Large 1.25 in (3.2 cm) wide; small 1 in (2.5 cm) wide
- Border depth: about 0.25 in (0.6 cm) of cream scallops on each scale
Materials
Use a smooth DK-weight cotton. Cotton has crisp stitch definition, so the open spokes and the cream scallops stay sharp. A soft acrylic also works, but the scales will look rounder and less defined.
- Color A, caramel tan: 20 g (about 45 m / 49 yd)
- Color B, cream: 18 g (about 40 m / 44 yd)
These quantities include a margin of about 25 percent for test pieces, tails, and sewing.
Tools:
- 3.0 mm crochet hook
- Blunt tapestry needle
- About 3 g polyester fiberfill
- 8 removable stitch markers
- Scissors
- Ruler or tape measure
- Large-head pins
- Spray bottle with water
Abbreviations (US Terms)
- ch – chain
- sl st – slip stitch
- sc – single crochet
- hdc – half double crochet
- dc – double crochet
- inc – 2 sc in the same stitch
- dec – sc 2 together (an invisible decrease is recommended: work through the front loops only of the next 2 sts)
- MR – magic ring
- sp(s) – space(s)
- st(s) – stitch(es)
- RS – right side
Special stitch – Shell: 5 dc in the same stitch. One shell makes one cream scallop.
Gauge and Checkpoints
Core gauge: 22 sc and 24 rounds = 4 in (10.2 cm), worked in sc in the round. That is 5.5 sts and 6 rounds per 1 in (2.5 cm).
Make one large scale before anything else. It’s the fastest way to check whether your scales will fit the tiers.
Checkpoint 1 – large scale after Row 2: 1.25 in (3.2 cm) across the tan fan.
Checkpoint 2 – large scale after border: 1.5 in (3.8 cm) wide and 1 in (2.5 cm) deep, measured from the ring to the tip of the middle scallop.
Checkpoint 3 – core after Rnd 11: 4.4 in (11.2 cm) around, or about 2.2 in (5.6 cm) across when pressed flat.
Checkpoint 4 – finished core: 3.2 in (8.1 cm) long and about 1.4 in (3.6 cm) thick when stuffed.
Too big? Go down 0.25 mm to 0.5 mm in hook size. If the scales are too big, they crowd each tier and flare outward.
Too small? Go up 0.25 mm to 0.5 mm. If the scales are too small, the tan core shows in the gaps between them.
Keep the core fabric tight so the stuffing can’t show through. You can use a hook 0.5 mm smaller for the core than for the scales.
Core
Work in continuous spiral rounds with Color A. Do not join the rounds. Mark the first stitch of each round.
Rnd 1: In MR, 6 sc. Pull the ring closed. (6 sts)
Rnd 2: [Sc 1, inc] 3 times. (9 sts)
Rnd 3: [Sc 2, inc] 3 times. (12 sts)
Rnd 4: Sc in each st around. (12 sts)
Rnd 5: [Sc 3, inc] 3 times. (15 sts)
Rnd 6: Sc in each st around. (15 sts)
Rnd 7: [Sc 4, inc] 3 times. (18 sts)
Rnd 8: Sc in each st around. (18 sts)
Rnd 9: [Sc 5, inc] 3 times. (21 sts)
Rnd 10: Sc in each st around. (21 sts)
Rnd 11: [Sc 6, inc] 3 times. (24 sts)
Check Checkpoint 3.
Rnds 12–16: Sc in each st around. (24 sts in each round)
Rnd 17: [Sc 2, dec] 6 times. (18 sts)
Rnd 18: [Sc 1, dec] 6 times. (12 sts)
Stuff the core firmly into a teardrop shape: narrow at the top, fullest through Rnds 11–16, and rounded at the bottom.
Rnd 19: Dec 6 times. (6 sts)
Fasten off, leaving a 6 in (15.2 cm) tail. Weave the tail through the front loops of the last 6 sts, pull it tight, and hide it inside the core.
Increasing every second round gives the core its long, tapered top. The three quick decrease rounds give it a rounded bottom.
Mark the tier rounds: Place a marker in Rnds 3, 5, 7, 9, 11, 13, 15, and 17, all in a line on the same side of the core. These are the rounds where you will sew the scales.
Small Scale
Make 9. Work flat in Color A. Leave an 8 in (20.3 cm) starting tail at the magic ring. This is your sewing tail.
Row 1 (RS): In MR, ch 3 (counts as hdc + ch 1), [hdc, ch 1] 3 times, hdc. Pull the ring nearly closed, leaving a small hole about 0.125 in (0.3 cm) wide. Turn. (5 hdc, 4 ch-1 sps)
Row 2: Ch 1, sc in first hdc, [sc in next ch-1 sp, sc in next hdc] 4 times, working the last sc into the 2nd ch of the turning ch. (9 sc)
Count check: 1 + (4 x 2) = 9 sc.
Fasten off Color A. The small scale is now 1 in (2.5 cm) wide.
Large Scale
Make 19. Work flat in Color A, again leaving an 8 in (20.3 cm) starting tail at the ring.
Row 1 (RS): In MR, ch 5 (counts as dc + ch 2), [dc, ch 2] 3 times, dc. Pull the ring nearly closed, leaving a hole about 0.125 in (0.3 cm) wide. Turn. (5 dc, 4 ch-2 sps)
Row 2: Ch 1, sc in first dc, [2 sc in next ch-2 sp, sc in next dc] 4 times, working the last sc into the 3rd ch of the turning ch. (13 sc)
Count check: 1 + (4 x 3) = 13 sc.
Fasten off Color A. Check Checkpoint 1.
The ch-2 spaces between the five dc spokes leave four open windows in each fan, so the scale looks like a lacy sunburst.
Border (Cream Scalloped Edge)
Every scale gets the same edging in Color B, worked only along the curved Row 2 edge. Leave the two short straight sides plain. The tier above hides them.
Border gauge: Each scallop uses 4 sts of Row 2 and measures about 0.5 in (1.3 cm) wide and 0.25 in (0.6 cm) deep.
Border Row, small scale: With RS facing, join Color B with a sl st in the first sc of Row 2. Ch 1, sc in the same st, skip 1 st, shell in next st, skip 1 st, sc in next st, then repeat from * to * once more. The last sc lands in the 9th (final) sc. Fasten off. (2 scallops: 3 sc + 10 dc = 13 sts)
Border Row, large scale: With RS facing, join Color B with a sl st in the first sc of Row 2. Ch 1, sc in the same st, skip 1 st, shell in next st, skip 1 st, sc in next st, then repeat from * to * 2 more times. The last sc lands in the 13th (final) sc. Fasten off. (3 scallops: 4 sc + 15 dc = 19 sts)
Why the math works: Each repeat (skip, shell, skip, sc) uses exactly 4 sts of Row 2, and the opening sc uses 1 more. So the curved edge needs (4 x scallops) + 1 sts:
- Small: (4 x 2) + 1 = 9, which matches Row 2.
- Large: (4 x 3) + 1 = 13, which matches Row 2.
The edging starts and ends with an sc in the corner sts of Row 2. This keeps both ends of the scalloped edge from curling.
Check Checkpoint 2. Weave in the Color B tails on the wrong side, and keep the Color A ring tail for sewing.
Hanging Loop
With Color B, ch 25. Sc in the 2nd ch from the hook and in each ch across. (24 sc)
Fasten off, leaving a 6 in (15.2 cm) tail. The strip measures about 3 in (7.6 cm) and folds into a 1.5 in (3.8 cm) loop.
Make All Pieces
- Core: 1 (Color A)
- Small scales: 9 (Color A body, Color B border)
- Large scales: 19 (Color A body, Color B border)
- Hanging loop: 1 (Color B)
Tier layout (top to bottom):
Tier 1  Rnd 3   (12 sts)  S  S  S       = 3 small
Tier 2  Rnd 5   (15 sts)  S  S  S       = 3 small
Tier 3  Rnd 7   (18 sts)  L  L  L       = 3 large
Tier 4  Rnd 9   (21 sts)  L  L  L  L    = 4 large
Tier 5  Rnd 11  (24 sts)  L  L  L  L    = 4 large
Tier 6  Rnd 13  (24 sts)  L  L  L  L    = 4 large
Tier 7  Rnd 15  (24 sts)  L  L  L  L    = 4 large
Tier 8  Rnd 17  (18 sts)  S  S  S       = 3 small
Small: 3 + 3 + 3 = 9. Large: 3 + 4 + 4 + 4 + 4 = 19. Total: 28 scales.
Joining
Method: Whipstitch each scale to the core with its Color A ring tail. Place the ring point on the tier round, with the scallops hanging down.
Order: Work from the bottom up, starting with Tier 8 and ending with Tier 1. That way, each new tier covers the seams of the tier below it.
Stitch-to-stitch logic: Count the core stitches between ring points:
- Tier 1 (12 sts, 3 scales): 1 scale every 4 sts
- Tier 2 (15 sts, 3 scales): 1 scale every 5 sts
- Tiers 3 and 8 (18 sts, 3 scales): 1 scale every 6 sts
- Tier 4 (21 sts, 4 scales): spacing of 5, 5, 5, 6 sts
- Tiers 5–7 (24 sts, 4 scales): 1 scale every 6 sts
Shift each tier half a spacing (2 to 3 sts) from the tier below it, so that every scale sits over a gap. Pin a whole tier before you sew.
How to sew: Anchor the ring point with 2 small stitches. Then whipstitch the top 0.5 in (1.3 cm) of each straight side to the core. Leave the lower part and the scallops free so they lift slightly.
Tension advice: Pull each stitch just snug. If you pull hard, the core dimples and the scales tip inward. To hide a tail, push the needle through the core, bring it out on the other side, and trim it close.
Size checkpoint: The joined ornament should measure 3.5 in (8.9 cm) tall and 2.5 in (6.4 cm) wide. Tier 1 should fully cover the top of the core, and Tier 8 should hang about 0.5 in (1.3 cm) below the closed bottom.
Attach the loop: Fold the strip in half and sew both ends to the top of the core, in the center of Tier 1. Pass the needle through the core 2 or 3 times so the loop holds securely.
Final Blocking
- Mist the ornament lightly until the scales are damp, not soaked.
- Curve each scale gently around the core with your fingertips.
- Fan out the 5 dc of each cream scallop evenly.
- Straighten the tan spokes so the open windows show.
- Hang the ornament by its loop, or stand it in a small glass, and let it dry completely.
- Measure again: 3.5 in (8.9 cm) tall, 2.5 in (6.4 cm) wide.
Final Quality-Control Checklist
- The core is firm and teardrop-shaped, and no stuffing shows.
- All 28 scales are there: 9 small and 19 large.
- Small scales have 2 scallops each, and large scales have 3.
- Each tier is evenly spaced and offset from the tier below.
- No tan core shows between the scales.
- The loop is centered and secure.
- All tails are hidden inside the core.
Troubleshooting
Scales cup or curl. Row 2 is too tight. Use a hook one size larger for the scales, or block them with more water.
Scallops ruffle. Your dc are too loose. Use a smaller hook for the border, or work 4 dc shells.
Gaps between scales. Your scales are smaller than the checkpoint size. Re-space the tier, or add 1 scale to it.
Lumpy core. Before sewing on any scales, roll the core between your palms to spread the stuffing evenly.
Ornament leans. The loop is off-center. Move it to the center of Rnd 1.
Care
Spot clean with cool water and mild soap, then reshape the scales and air dry. Store the ornament in a box so the scales don’t get crushed.
Final Notes
Each measurement leads to the next. A large scale is 1.25 in (3.2 cm) wide after Row 2 and 1.5 in (3.8 cm) after its cream border. At its widest round of 24 sts, the core is 4.4 in (11.2 cm) around, and the finished core is 3.2 in (8.1 cm) long. Eight staggered tiers of 28 scales, spaced by stitch count, bring the ornament to 3.5 in (8.9 cm) tall and 2.5 in (6.4 cm) wide, with a 1.5 in (3.8 cm) loop on top.
Make one, then make a whole set for your tree. Happy crocheting!