

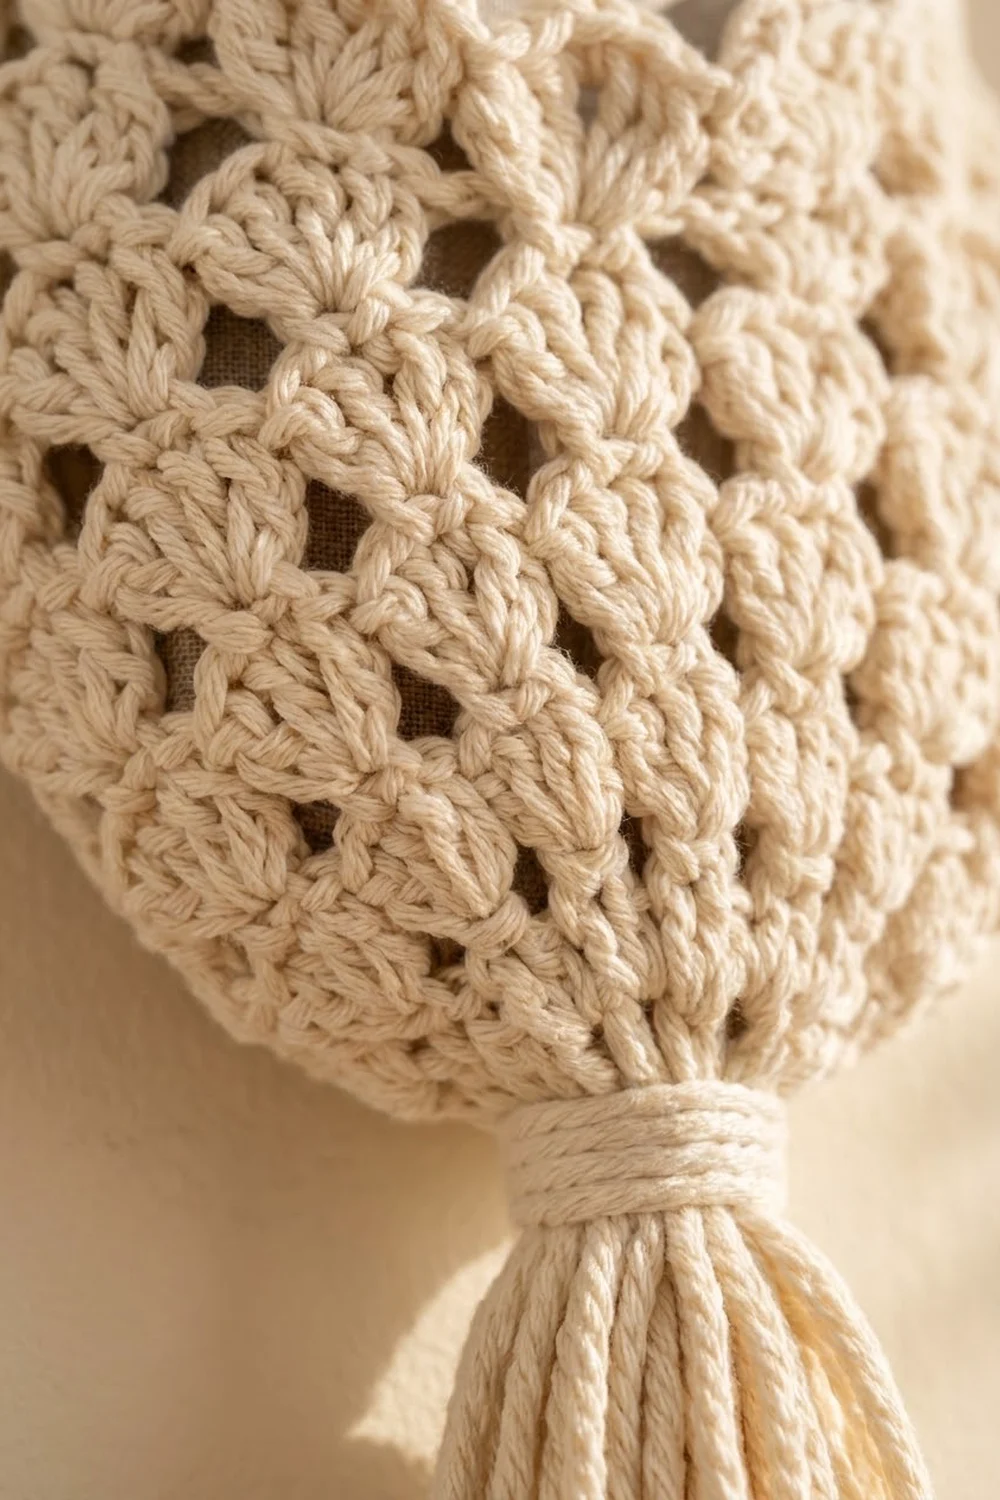
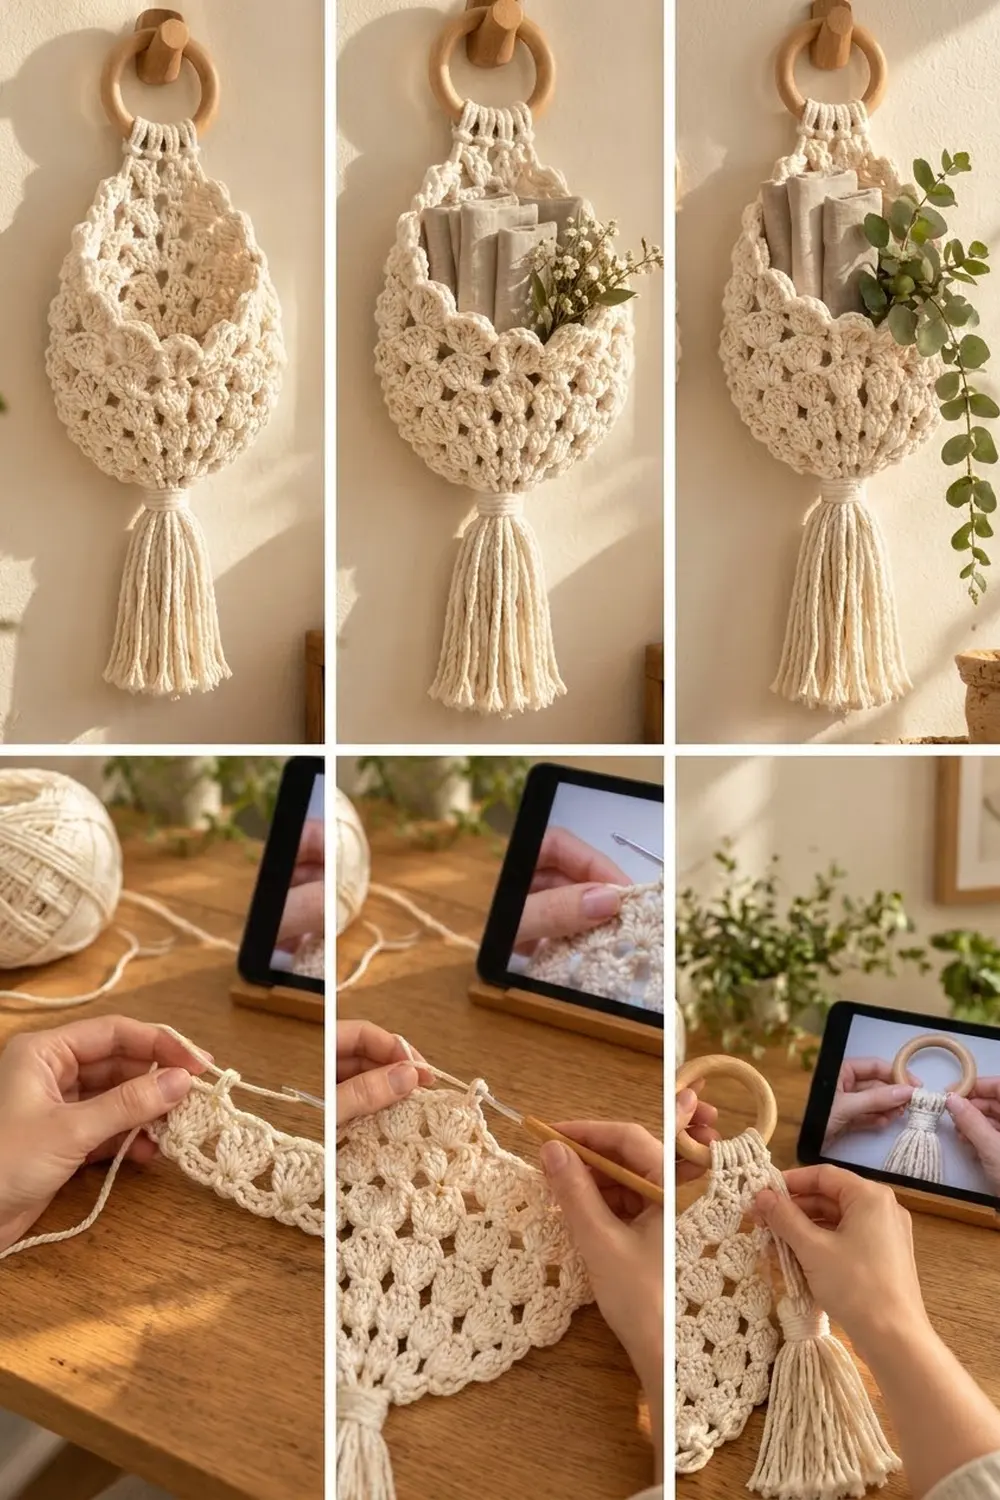
The Cottage Shell Hanging Wall Pocket is a soft teardrop pouch made for the wall. Rows of fan-shaped shells give it a light, lacy look, and small diamond gaps open up between the fans. A scalloped front rim, a wooden ring and a full tassel at the bottom point finish it off.
The pocket is all one color, a warm cream cotton. That keeps the look natural and calm, and it suits cottage, boho and Scandinavian rooms. Fill it with napkins, dried flowers, a hairbrush, mail or small craft tools.
This pattern uses US crochet terms. The finished pocket is about 7 in (17.8 cm) wide and 10.75 in (27.3 cm) tall from the bottom point to the top of the tab. The tassel adds 5.5 in (14.0 cm) below.
The construction is simple. You start at the bottom point with a small solid dc circle, change to shells and work 10 shell rounds as a tube. Then the back half continues in shrinking rows, and an edging round runs around the whole opening. Last, you crochet a short tab, attach the ring with chain loops and add the tassel.
Finished Size and Construction
- Finished size: 7 in (17.8 cm) wide × 10.75 in (27.3 cm) tall, not counting ring or tassel
- Overall hanging length: about 20.75 in (52.7 cm) from the top of the ring to the tip of the tassel
- Skill level: Easy (advanced beginner)
- Terminology: US
- Yarn weight: Worsted (#4) cotton
- Hook: 5.0 mm (H-8)
- Number of pieces: 1 (worked in one piece; the tassel is added at the end)
- Layout: Single pocket, front and back worked as one tube
- Front height: 7.25 in (18.4 cm) from bottom point to top of rim
- Size before border: 7 in (17.8 cm) wide × 9.5 in (24.1 cm) tall at the back
- Border depth: 0.25 in (0.6 cm), 1 round of sc
Materials
Choose a smooth, firm 100% cotton or cotton blend in worsted weight. Cotton shows the shells clearly and holds the pocket’s shape when it’s full. Avoid stretchy acrylic, because the pocket will sag under weight.
- Cream: 150 g, about 255 m (279 yd), including the tassel
Quantities include a margin of about 15% for your gauge swatch and small differences in tension.
Tools:
– 5.0 mm (H-8) crochet hook
– 3 in (7.6 cm) natural wooden ring
– Tapestry needle
– Stitch markers (at least 2)
– Scissors
– Tape measure
– Piece of cardboard 6 in (15.2 cm) tall, for the tassel
– Rust-proof pins and a folded towel for blocking
Abbreviations (US Terms)
- ch – chain
- sl st – slip stitch
- sc – single crochet
- dc – double crochet
- MR – magic ring
- st(s) – stitch(es)
- sk – skip
- RS – right side
Special stitch – Shell: 5 dc in the same stitch. The center dc of a shell is its 3rd dc.
Shell repeat: 1 sc + 1 shell. Shell rounds are counted in repeats.
Gauge and Checkpoints
Gauge: 14 dc and 8 dc rows = 4 in (10.2 cm). In single crochet, 14 sc and 16 sc rows = 4 in (10.2 cm). In shell pattern, 7 shell repeats = 8 in (20.3 cm) measured flat.
Before starting the pocket, work Rounds 1–4 as a test. This small circle is your best gauge check.
Checkpoints:
– After Round 4: the circle measures 4 in (10.2 cm) across.
– After Round 14: the tube, laid flat, is 7 in (17.8 cm) wide and 7 in (17.8 cm) tall from the bottom point.
– After Back Row 5: the back measures 9.5 in (24.1 cm) from the bottom point.
– After the tab: the body measures 10.75 in (27.3 cm) from the bottom point.
If your piece is too big, go down half a hook size. If it’s too small, go up half a hook size. Change hooks rather than tension; forcing tighter shells makes them curl.
Pattern
Base (Bottom Point)
Round 1: Make a MR. Ch 3 (counts as dc), 11 dc in ring. Sl st to top of ch-3. Pull the ring tight. (12 dc)
Round 2: Ch 3 (counts as dc), dc in same st, 2 dc in each st around. Sl st to top of ch-3. (24 dc)
Round 3: Ch 3, dc in same st, dc in next st, 2 dc in next st, dc in next st; repeat from * around. Sl st to top of ch-3. (36 dc)
Round 4: Ch 3, dc in same st, dc in next 2 sts, 2 dc in next st, dc in next 2 sts; repeat from * around. Sl st to top of ch-3. (48 dc)
Check that the circle measures 4 in (10.2 cm) across.
Shell Body (Worked in Rounds)
Round 5 (conversion round): Ch 1, sc in same st, sk 1, shell in next st, sk 1, sc in next st; repeat from * 11 more times, ending with sk 1. Sl st to first sc.
This round turns the 48 dc into 12 groups of 4 sts. Each group gives 1 sc + 1 shell, so the round has 12 sc + 12 shells (60 dc) = 72 sts.
Round 6: Sl st in next 3 sts (2 dc of the first shell, then the center dc). Ch 1, sc in the same center dc, shell in next sc, sc in center dc of next shell; repeat from * around, ending with shell in last sc. Sl st to first sc. (12 sc + 12 shells = 72 sts)
Each new shell sits on an sc of the round below, and each new sc sits in the center of a shell. This offset is what creates the staggered fans and the small diamond gaps.
Rounds 7–14: Repeat Round 6. Each round has 12 sc + 12 shells = 72 sts.
Don’t fasten off. Lay the tube flat and check: it should be 7 in (17.8 cm) wide and 7 in (17.8 cm) tall from the bottom point.
Mark the Front and Back
Flatten the tube so there’s 1 sc of Round 14 at each side fold. Mark the sc at the side where your yarn is as A and the sc at the other side as B. There should be 6 shells on each half. Pick the half with the neatest stitches as the front. The other half is the back.
Back Panel (Worked in Rows)
The back narrows by half a repeat at each side in every row, giving the curved, stepped top.
Row 1 (RS): Sl st over to the center dc of the first back shell next to A. Ch 1, sc in that center dc, shell in next sc, sc in center dc of next shell; repeat from * 4 more times. Turn. (5 shells + 6 sc = 31 sts)
Row 2: Sl st in first sc and next 2 dc. Ch 1, sc in center dc of the first shell, shell in next sc, sc in center dc of next shell; repeat from * 3 more times. Turn. (4 shells + 5 sc = 25 sts)
Row 3: Work as Row 2, repeating from * 2 more times. Turn. (3 shells + 4 sc = 19 sts)
Row 4: Work as Row 2, repeating from * 1 more time. Turn. (2 shells + 3 sc = 13 sts)
Row 5: Work as Row 2, working the * repeat once only. (1 shell + 2 sc = 7 sts) Fasten off.
The back should now measure 9.5 in (24.1 cm) from the bottom point. Each row adds about 0.5 in (1.3 cm), so 5 rows add 2.5 in (6.4 cm).
Border (Edging Round)
The border is a single round of sc around the whole top opening. It firms up the front scallops and smooths the stepped back edges.
Border gauge: 14 sc = 4 in (10.2 cm), so each sc is about 0.29 in (0.7 cm) wide.
Edging Round (RS): Join yarn in sc A. Ch 1, then:
- Front: sc in A, sc in each of the 5 dc of the next shell, sc in next sc; repeat from * 5 more times, ending with sc in B. (37 sc)
- First back side: sc in each of the next 2 unworked dc. Then work 13 sc up the stepped row ends: 3 sc along each of Rows 1, 3 and 5 and 2 sc along each of Rows 2 and 4. (15 sc)
- Top: sc in each of the 7 sts of Row 5. (7 sc)
- Second back side: work 13 sc down the row ends in the same 3-2-3-2-3 order (now Rows 5, 4, 3, 2, 1), then sc in each of the last 2 unworked dc before A. (15 sc)
Sl st to first sc. Total: 37 + 15 + 7 + 15 = 74 sc. Don’t fasten off yet if you’d like to go straight into the tab. Otherwise fasten off and join again later.
Why the math works:
– Front: 6 shells × 5 dc = 30, plus 7 sc (including A and B) = 37. One sc per stitch follows each shell’s curve, so the scallops stay rounded instead of getting pulled flat.
– Back sides: Each row step rises about 0.5 in (1.3 cm) and moves in about 0.57 in (1.4 cm), so each step is about 0.76 in (1.9 cm) long along the diagonal. Five steps come to about 3.8 in (9.7 cm). 13 sc at 0.29 in (0.7 cm) each come to about 3.7 in (9.4 cm). That’s a close match, so the edge lies flat without ruffling or pulling.
– Top: The 7 stitches of Row 5 match the 7 sc of the tab.
Tab and Ring
Tab Row 1 (RS): Join yarn in the first of the 7 top edging sc (or sl st over to it). Ch 1, sc in same st and next 6 sts. Turn. (7 sc)
Tab Rows 2–4: Ch 1, sc in each st across. Turn. (7 sc)
The tab adds 1 in (2.5 cm). The body now measures 10.75 in (27.3 cm) from the bottom point.
Ring Row: Hold the wooden ring behind the tab. Sl st in the first st, ch 10, pass the chain through the ring from front to back and sl st in the same st again. Sl st in next 2 sts, ch 10, pass through ring, sl st in same st; repeat from * 2 more times. (4 chain loops, in sts 1, 3, 5 and 7)
Fasten off. The loops hold the ring about 1.5 in (3.8 cm) above the tab.
Tassel
- Wrap yarn 16 times around the 6 in (15.2 cm) cardboard. Cut along the bottom edge to get 16 strands, each 12 in (30.5 cm) long.
- Fold the bundle in half. With your hook, pull the fold through the bottom point (around the posts of Round 1) to form a loop, then pull the ends through the loop to secure it.
- Wrap a separate 20 in (50.8 cm) length of yarn tightly around the bundle 0.75 in (1.9 cm) below the point, about 8 times. Tie off and thread the ends down into the tassel.
- Trim the strands evenly to 5.5 in (14.0 cm) below the bottom point. Comb the strands gently with your fingers or a comb to separate the plies.
Final Blocking
- Weave in all ends along the inside of the pocket, through solid stitches rather than across gaps.
- Soak the pocket in cool water for 10 minutes. Press out the water gently; don’t wring it.
- Roll it in a towel to remove extra water.
- Fill the pocket with a folded hand towel so it lies flat and keeps its teardrop shape.
- Pin it to 7 in (17.8 cm) wide and 10.75 in (27.3 cm) tall.
- Pin each front scallop into a smooth curve and open the diamond gaps slightly.
- Lightly dampen the tassel and hang it straight so the strands dry flat.
- Leave it to dry completely, usually 24 hours, before removing the pins and towel.
Final Quality-Control Checklist
- Round 4 measures 4 in (10.2 cm) across.
- Every shell round has 12 shells and 12 sc.
- Shells sit on sc and sc sit in shell centers, so the fans are staggered.
- The back has 5 rows going down from 5 shells to 1.
- The edging round has exactly 74 sc.
- Six even scallops are visible across the front rim.
- The tab is 7 sc wide and 4 rows tall.
- All 4 chain loops are the same length and the ring hangs level.
- The tassel is wrapped tightly and trimmed evenly to 5.5 in (14.0 cm).
- The pocket hangs straight, without twisting.
Troubleshooting
The base cups or ruffles. Check your counts in Rounds 2–4 (24, 36 and 48 dc). Ruffling means your gauge is too loose, so go down a hook size.
The shells look crowded or don’t line up. Make sure every shell goes into an sc and every sc goes into the center (3rd) dc of a shell.
The tube is twisting. Move your marker up every round. The start point shifts half a repeat each time, so check that every round has 12 repeats.
The back edges ripple. You’ve worked too many sc up the row ends. Use exactly 13 per side in the 3-2-3-2-3 order.
The back edges pull in. Your sc are too tight, or you’ve worked fewer than 13. Loosen up a little at the row ends.
The pocket tilts on the wall. The ring loops aren’t the same length. Undo them and chain exactly 10 for each.
The tassel is sparse. Add 4 more strands, or use 24 strands for a fuller look.
Care
Hand wash in cool water with mild soap, and lay flat to dry, filled with a towel to keep the shape. Don’t tumble dry. Heat can shrink cotton and make the tassel frizz.
Final Notes
The measurements build step by step:
– The 4 in (10.2 cm) base gives 48 dc.
– Those turn into 12 shell repeats, a tube 7 in (17.8 cm) wide.
– Ten shell rounds bring the front to 7 in (17.8 cm).
– Five back rows bring the back to 9.5 in (24.1 cm).
– The 74-stitch edging adds 0.25 in (0.6 cm).
– The 4-row tab brings the finished body to 10.75 in (27.3 cm).
If you check the size at each checkpoint, your pocket will hang neatly, keep its shape and show off every scallop.
Happy crocheting!