

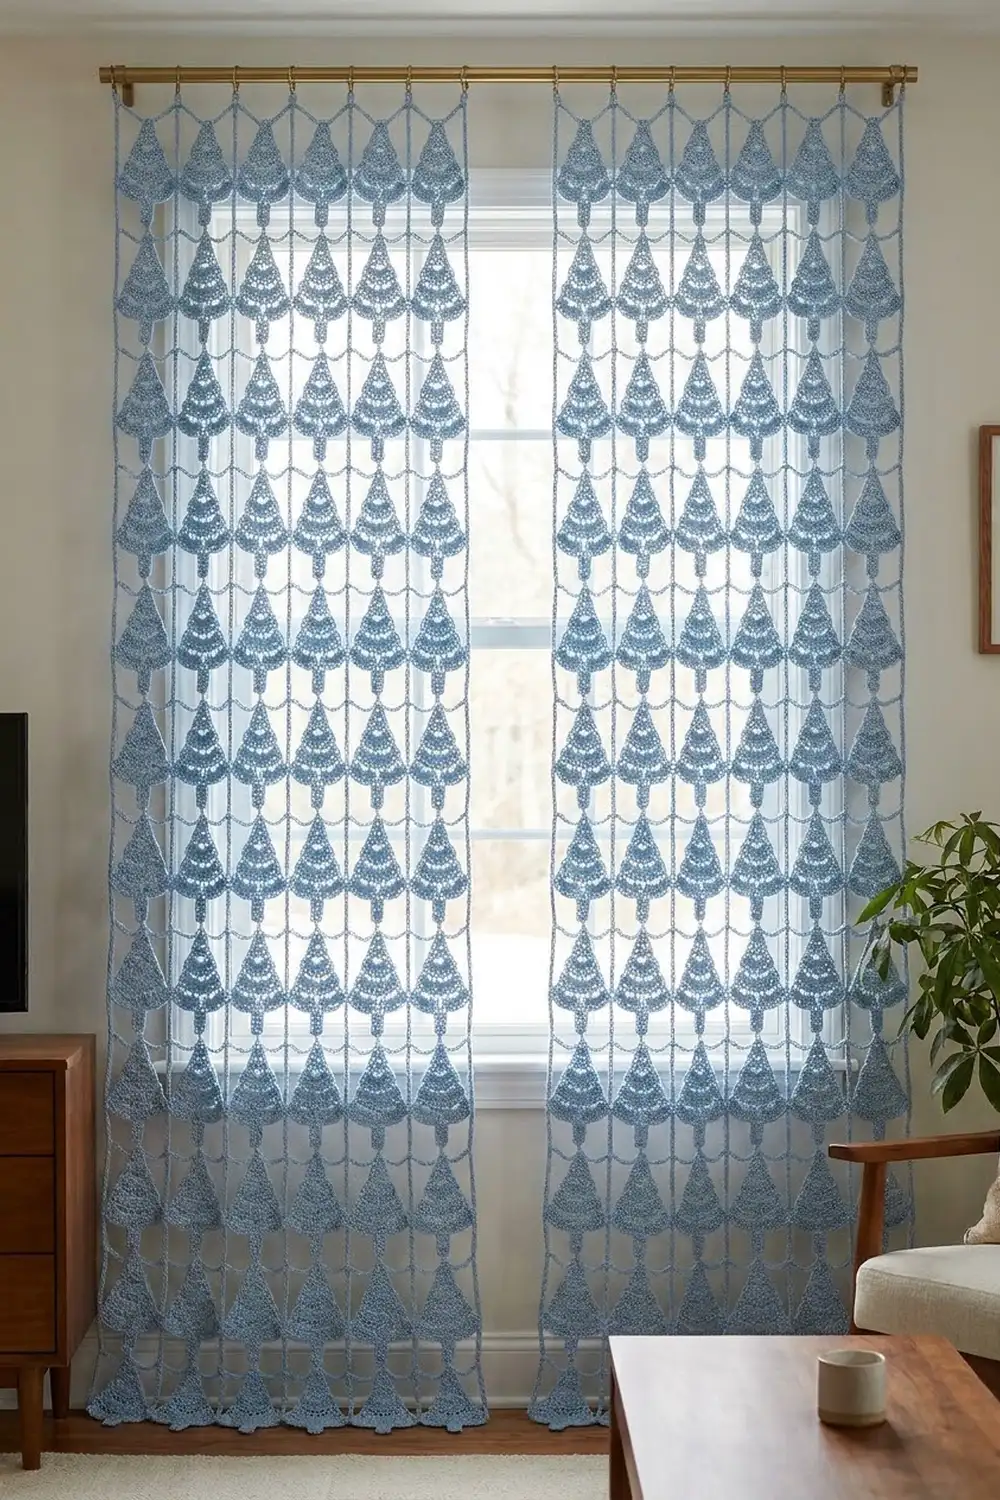
This curtain panel is a lattice of small layered Christmas trees, all worked in one soft powder blue. Each tree has four tiers of scalloped shells. The tiers get wider toward the bottom and overlap like the boughs of a pine, and a short rectangular trunk hangs below. Chain cords connect the trees in neat columns and rows, so light comes through every gap.
The look is calm and wintry. Because the panel is a single color, the texture does all the work. It suits a window all through the cold months, not only at Christmas.
The pattern uses US crochet terms. One finished panel measures 40 in (101.6 cm) wide and 84.8 in (215.4 cm) long from the top of the header band to the bottom of the lowest trunks, not counting the rod loops. Make two panels to dress a window as a pair.
Each tree is crocheted flat in rows from the tip down. Every tier’s shells are worked into front loops, so they stand out as a separate layer. You join the trees as you go, building the panel from the bottom row up. Last, you work a solid header band with rod loops and hang it onto the top row of trees.
Finished Size and Construction
- Finished panel size: 40 in x 84.8 in (101.6 cm x 215.4 cm), excluding rod loops
- Skill level: Intermediate
- Terminology: US
- Yarn weight: DK (light worsted, #3), cotton or cotton blend
- Hook: 3.5 mm (US E-4)
- Number of pieces: 112 trees per panel (224 for a pair), plus 1 header band per panel
- Layout: 8 columns x 14 rows of trees per panel
- Piece size: one tree is 4 in (10.2 cm) wide at the shells x 4.2 in (10.7 cm) tall from tip to trunk bottom
- Size before border: 38.9 in x 82.2 in (98.8 cm x 208.8 cm)
- Border depth: a 0.8 in (2.0 cm) header band plus 1.8 in (4.6 cm) hanger cords, with rod loops about 2 in (5.1 cm) tall above
Materials
Yarn: Use a smooth DK cotton or cotton blend. Cotton keeps the shells crisp and hangs straight without stretching too much. Avoid fuzzy yarns, because they blur the scallops. The amounts below assume about 110 m per 50 g (2.2 m per gram).
- Light powder blue: 550 g (1,210 m) per panel, or 1,100 g (2,420 m) for a pair
One tree, including its connector cords and tails, uses about 8 m (3.6 g). The header band uses about 30 m (14 g). These quantities include a margin of about 30% for gauge swatches, tails, and differences between dye lots. Buy all your yarn from the same dye lot.
Tools:
- 3.5 mm (US E-4) crochet hook
- Tapestry needle
- Locking stitch markers
- Measuring tape
- Rust-proof pins and a large blocking surface
- Spray bottle
- Scissors
Abbreviations (US Terms)
- ch – chain
- sl st – slip stitch
- sc – single crochet
- dc – double crochet
- st(s) – stitch(es)
- sp – space
- FLO – front loop only
- RS / WS – right side / wrong side
Special stitch – Shell: 5 dc worked into the same stitch.
Shell repeat: On a shell row, each repeat is (skip 1 st, shell in next st, skip 1 st, sl st in next st). A row of 4k + 1 stitches holds exactly k shells.
Gauge and Checkpoints
Gauge: 22 sc and 25 rows = 5 in (12.7 cm) in sc worked flat with a 3.5 mm hook. That is 4.4 sts and 5 rows per inch.
Before you make 112 trees, test one complete tree and measure it at these points:
- After Row 3: 5 sts, about 1.1 in (2.8 cm) wide
- After Row 7: 9 sts, about 2 in (5.1 cm) wide
- After Row 11: 13 sts, about 3 in (7.6 cm) wide
- After Row 15: 17 sts, about 3.9 in (9.9 cm) wide, and 2.4 in (6.1 cm) from tip to Row 15
- After Row 16: the shells flare to about 4 in (10.2 cm) wide and hang about 0.6 in (1.5 cm) below Row 15
- Finished tree: 4.2 in (10.7 cm) from tip to trunk bottom
If your tree is too big, go down 0.25–0.5 mm in hook size. If it’s too small, go up by the same amount. An error of 0.1 in (0.3 cm) per tree grows to 0.8 in (2.0 cm) across a row and 1.4 in (3.6 cm) down a column.
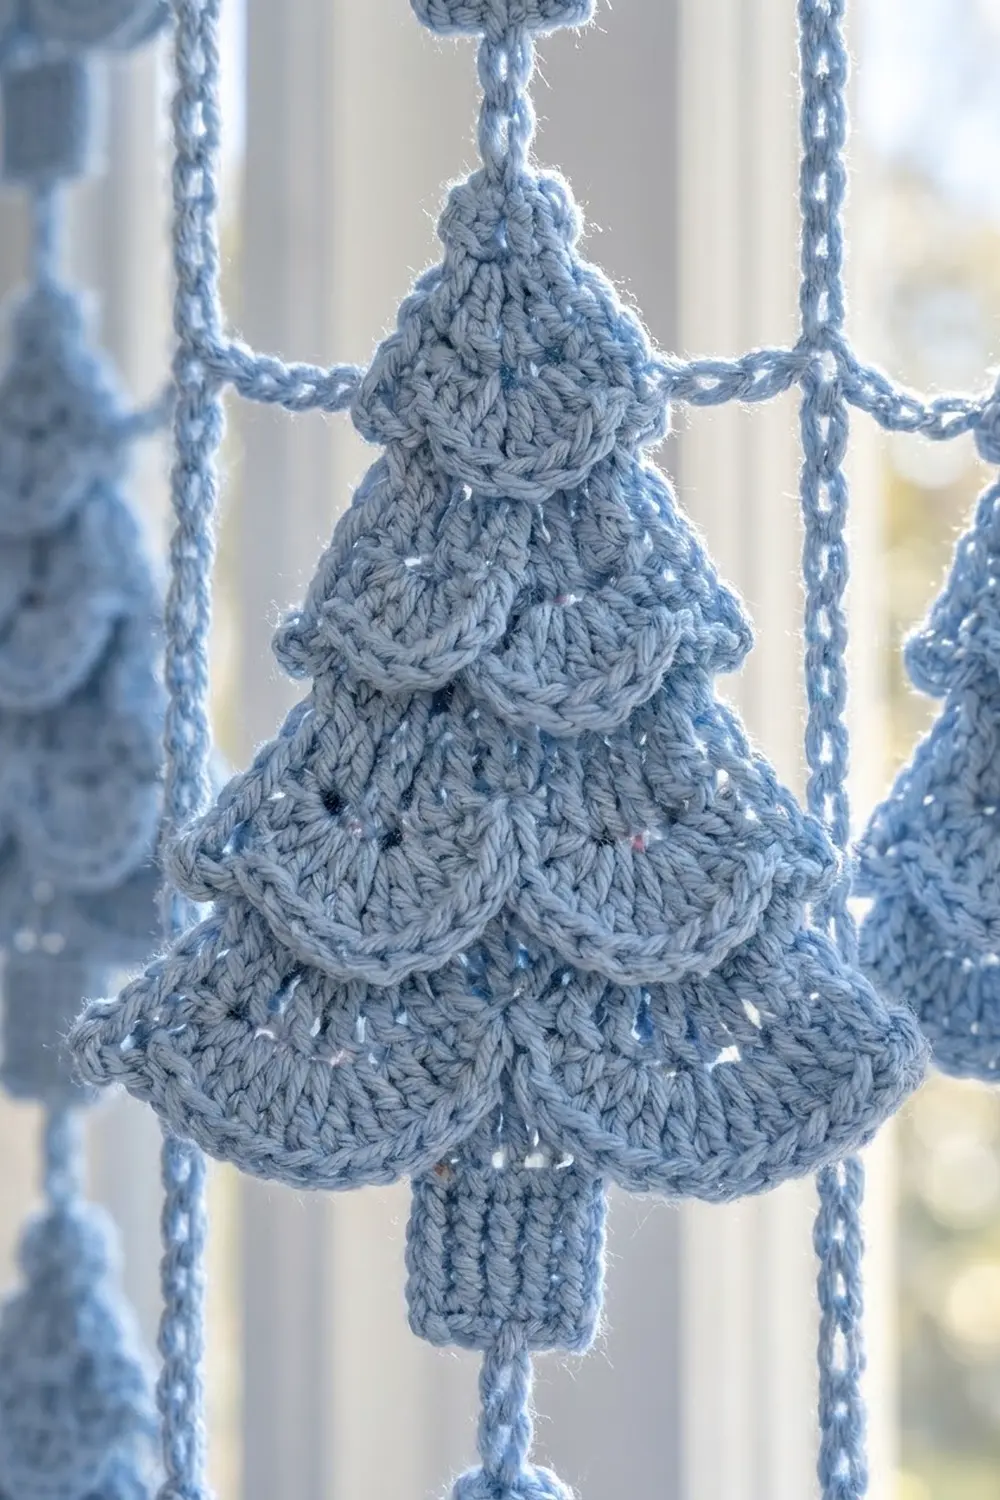
Tree Motif
Shell rows (Rows 4, 8, 12 and 16) are always worked into front loops. Each row after a shell row goes behind the shells and into the unused loops of the row before the shell row. Shell rows don’t add height. They hang down as flaps over the next tier, which creates the stacked bough effect.
Turn at the end of every row. A ch 1 at the start of a row doesn’t count as a stitch. Even-numbered rows are worked with the RS facing, which keeps all the shells on the same side.
Tier 1
Row 1 (WS): Leave a 6 in (15.2 cm) tail. Ch 2, 3 sc in 2nd ch from hook. (3 sts) The chain you worked into is the tree tip.
Row 2 (RS): Ch 1, turn. 2 sc in first st, sc in next st, 2 sc in last st. (5 sts)
Row 3: Ch 1, turn. Sc in each st across. (5 sts)
Row 4 (RS, shell row): Turn. Working in FLO: sl st in first st, skip 1, shell in next st, skip 1, sl st in last st. (1 shell)
Tier 2
Row 5: Turn. Working behind the shell into the unused loops of Row 3: ch 1, 2 sc in first st, sc in next 3 sts, 2 sc in last st. (7 sts)
Row 6: Ch 1, turn. Sc in each st across. (7 sts)
Row 7: Ch 1, turn. 2 sc in first st, sc in next 5 sts, 2 sc in last st. (9 sts)
Row 8 (shell row): Turn. Working in FLO: sl st in first st, work the shell repeat 2 times. (2 shells)
Tier 3
Row 9: Turn. Working into the unused loops of Row 7: ch 1, 2 sc in first st, sc in next 7 sts, 2 sc in last st. (11 sts)
Row 10: Ch 1, turn. Sc across. (11 sts)
Row 11: Ch 1, turn. 2 sc in first st, sc in next 9 sts, 2 sc in last st. (13 sts)
Row 12 (shell row): Turn. Working in FLO: sl st in first st, work the shell repeat 3 times. (3 shells)
Tier 4
Row 13: Turn. Working into the unused loops of Row 11: ch 1, 2 sc in first st, sc in next 11 sts, 2 sc in last st. (15 sts)
Row 14: Ch 1, turn. Sc across. (15 sts)
Row 15: Ch 1, turn. 2 sc in first st, sc in next 13 sts, 2 sc in last st. (17 sts) When you join trees, the horizontal connector is worked here, before Row 16 (see Joining).
Row 16 (shell row): Turn. Working in FLO: sl st in first st, work the shell repeat 4 times. (4 shells) Fasten off.
Check the shell math: 5, 9, 13 and 17 are all 4k + 1, so each shell row ends with a sl st exactly in its last stitch.
Trunk
Hold the tree with the WS facing. Row 15 has 17 unused loops. Count to the 7th one, so that 6 loops are left free on each side of the trunk.
Row 1: Join yarn in the unused loop of the 7th st. Ch 1, sc in the same st and in the next 4 unused loops. (5 sts)
Rows 2–9: Ch 1, turn. Sc across. (5 sts)
The trunk is 1.1 in (2.8 cm) wide and 1.8 in (4.6 cm) long, and about 1.2 in (3.0 cm) of it shows below the shells. In the bottom row of trees, fasten off here. In every other row, the trunk ends with a vertical connector.
Make All Pieces
Each panel has 112 trees: 8 columns x 14 rows. A pair needs 224 trees. There is one color, so all 550 g (1,210 m) per panel is light powder blue.
Each tree is completed and joined in one sitting, starting with the bottom row. Lay the panel out on a large flat surface. Rows are numbered from the top (Row 1) to the bottom (Row 14):
[ Header band: 176 sts, 8 rod loops ]
  |     |     |     |     |     |     |     |    hangers (ch 8)
  T  -  T  -  T  -  T  -  T  -  T  -  T  -  T    Row 1 (top)
  |     |     |     |     |     |     |     |    vertical cords (ch 8)
  T  -  T  -  T  -  T  -  T  -  T  -  T  -  T    Row 2
  :     :     :     :     :     :     :     :
  T  -  T  -  T  -  T  -  T  -  T  -  T  -  T    Row 14 (bottom, made first)

  T = tree   - = horizontal cord (ch 5)   | = vertical cord (ch 8)
Work order: Row 14 first, then Row 13, and so on up to Row 1. Within each row, start with tree 1 and work toward tree 8.
Joining
Every connector is a chain cord, reinforced with sl sts worked back along the chain.
Horizontal connector (at Row 15): Trees 2 to 8 in each row join to the tree beside them. Before Row 16 of the current tree, lay the previous tree flat, WS up, next to the end of Row 15 you just finished. Ch 5, then sl st into the unused loop of the first st of Row 15 on the previous tree. Sl st in each of the 5 ch back toward the current tree. Turn and work Row 16 as written.
The cord links the two outermost stitches of the bottom tier. It fills the 5-stitch gap that turns each 17-stitch tree into a 22-stitch, 5 in (12.7 cm) column module. The Row 16 shells hang in front of the cord, so it barely shows.
Vertical connector (end of trunk): For trees in Rows 13 to 1, finish Trunk Row 9 and don’t fasten off. Ch 8, then sl st through the tip (the Row 1 starting chain) of the tree directly below. Sl st in each of the 8 ch back up, sl st into the last trunk row, and fasten off. The cord is 1.8 in (4.6 cm) long, so each tree starts 6 in (15.2 cm) below the one above it.
Tension: Make your chains with the same tension as your sc. If a cord is too tight, the trees pucker and tilt. If it’s too loose, rows sag and columns drift.
Checkpoints:
- Row 14 alone measures 38.9 in (98.8 cm) from the first tree’s outer corner to the last tree’s outer corner.
- With Rows 14 and 13 joined, it’s 10.2 in (25.9 cm) from a Row 13 tip to the Row 14 trunk bottom.
- The finished lattice of 14 rows measures 38.9 in x 82.2 in (98.8 cm x 208.8 cm).
If the pitch from tip to tip in a column drifts away from 6 in (15.2 cm), change the next cords by 1 ch.
Border (Header Band)
Border gauge: the same as the trees, 22 sc and 25 rows = 5 in (12.7 cm).
Row 1: Ch 177. Sc in 2nd ch from hook and in each ch across. (176 sts)
Rows 2–4: Ch 1, turn. Sc across. (176 sts) The band is now 40 in x 0.8 in (101.6 cm x 2.0 cm).
Row 5 (loop row): Ch 1, turn. Sc in next 7 sts, ch 18, skip 8 sts, sc in next 7 sts. Repeat from * 8 times in total. (112 sc and 8 ch-18 loops)
Row 6: Ch 1, turn. Sc in next 7 sts, 24 sc in the ch-18 sp, sc in next 7 sts. Repeat from * 8 times in total. (38 sts per module, 304 sts) Fasten off.
Hangers: Hold the band with the foundation edge at the bottom. Count it off as 8 modules of 22 stitches each. In the center of each module (between sts 11 and 12, 33 and 34, and so on up to 165 and 166), join yarn around the foundation chain. Ch 8, sl st through the tip of the Row 1 tree below, sl st in each of the 8 ch back up, sl st into the band, and fasten off.
Why the math works: Each column module is 22 sts. That’s the 17-stitch bottom tier plus the 5-stitch horizontal cord. One side of the band starts with 8 modules x 22 sts = 176 sts, and no extra stitches are added at any seam. The 8 trees and 7 cords add up to 8 x 17 + 7 x 5 = 171 sts. The other 5 sts form a half-gap of 2.5 sts at each end, so the band overhangs the outer trees evenly.
In Row 5, each module is worked as 7 + 8 skipped + 7 = 22 sts. The skipped stitches are sts 8 to 15, centered on 11.5, so each rod loop sits directly over its hanger and its column of trees. The total length is 0.8 in band + 1.8 in hanger + 82.2 in lattice = 84.8 in (215.4 cm).
Final Blocking
- Weave in all the ends inside the trunks and the backs of the tiers, never across the open gaps.
- Lay the panel flat on towels or blocking mats, RS up.
- Mist it evenly until it is damp but not soaked.
- Pin the header to a straight 40 in (101.6 cm) line.
- Working one row at a time, pin each tree tip and trunk so that columns are 5 in (12.7 cm) apart and rows are 6 in (15.2 cm) apart.
- Use your fingers to shape each shell into a rounded fan, overlapping the tier below it.
- Let the panel dry completely. Then hang it for a day so it settles.
Final Quality-Control Checklist
- All 112 trees have 4 tiers with 1, 2, 3 and 4 shells
- All shells face the RS
- Each trunk is centered, with 6 free loops on each side
- Every horizontal cord is 5 ch and every vertical cord is 8 ch
- Columns are 5 in (12.7 cm) apart and rows are 6 in (15.2 cm) apart
- The header has 176 sts at its base, with 8 loops centered over the columns
- The panel is 40 in x 84.8 in (101.6 cm x 215.4 cm)
- All ends are woven in securely
Troubleshooting
- Some shells sit on the back: a shell row was worked on an odd row. Check that you turned at the end of every row.
- The tiers lie flat instead of layered: you worked the row after a shell row into the shell row itself. Work it into the unused loops of the row before the shell row.
- The trunk is off-center: recount the unused loops of Row 15 and join in the 7th.
- Trees tilt sideways: the horizontal cords are too tight. Rework them with a looser chain.
- The panel is too long: take 1 ch out of each vertical cord. That shortens a 14-row panel by about 3 in (7.6 cm).
- The header ruffles: your band gauge is looser than your tree gauge. Rework it with a smaller hook.
Care
Hand wash in cool water with a mild detergent, roll the panel in a towel to remove the water, and dry it flat. While it’s still slightly damp, rehang it so the cords straighten out.
Final Notes
Everything in this curtain depends on one measurement chain. A 17-stitch tree is 3.9 in (9.9 cm) wide. Add a 5-chain cord to get a 22-stitch, 5 in (12.7 cm) module. Eight modules make a 176-stitch, 40 in (101.6 cm) header. In the other direction, each 4.2 in (10.7 cm) tree plus its 1.8 in (4.6 cm) cord gives a 6 in (15.2 cm) row pitch. The 14 rows of trees, the hanger cords and the header band make 84.8 in (215.4 cm). If your test tree is right, the rest of the panel will be too.
Happy crocheting!