

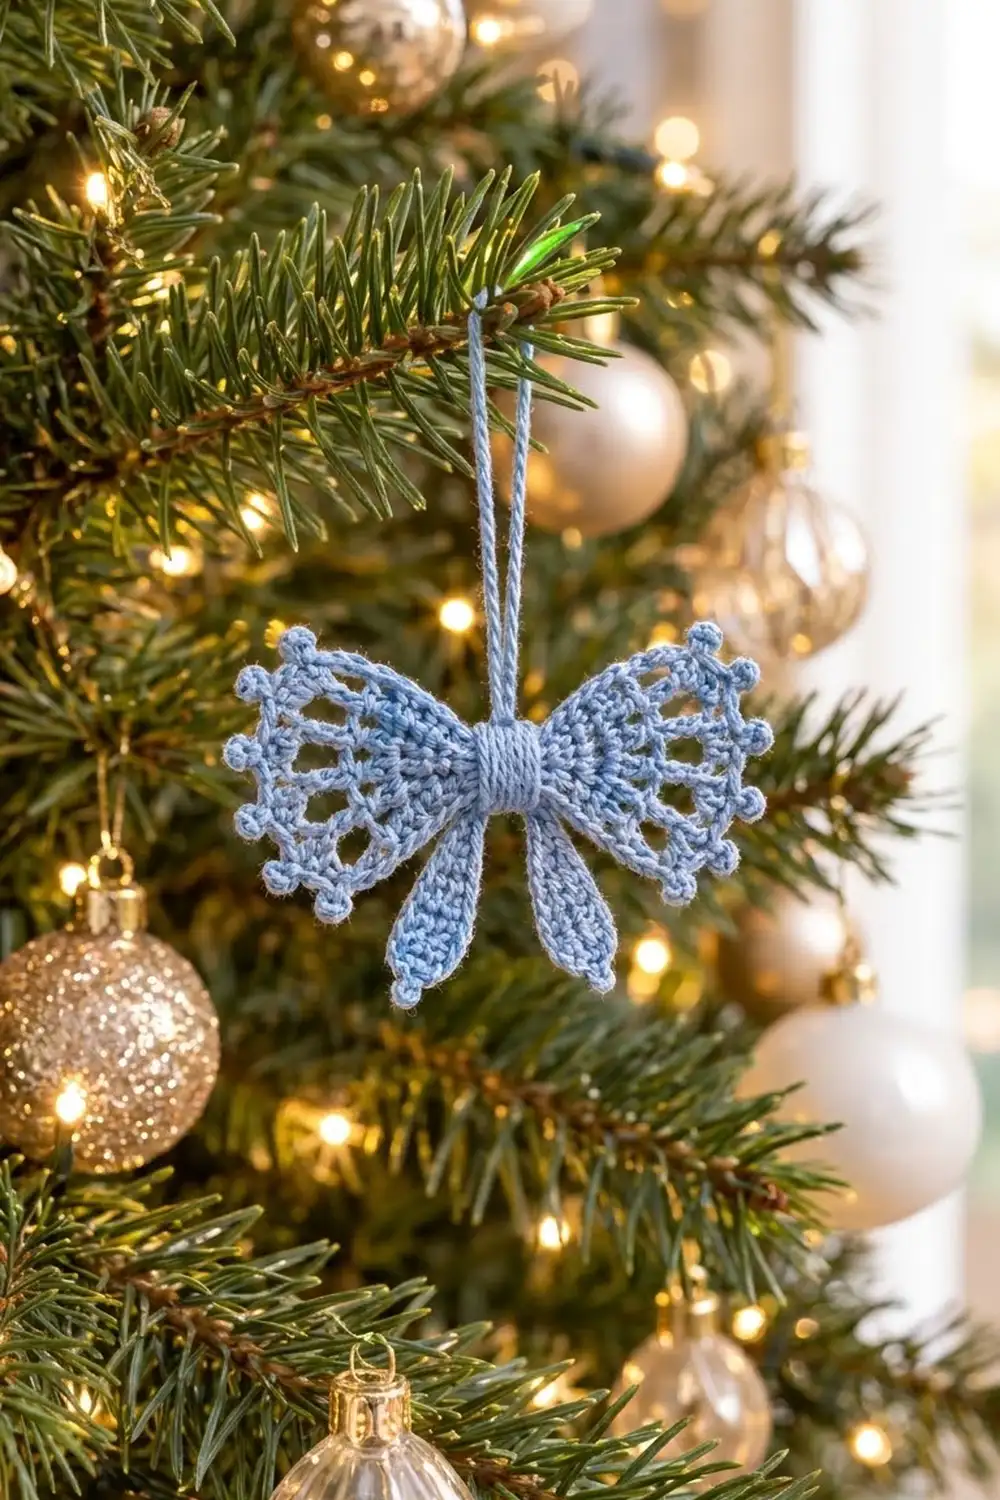
The Frosted Lace Bow is a small, delicate Christmas ornament made from two open fan wings, two slim tails, a wrapped center knot and a twisted hanging loop. The wings have lace spokes that spread out from the center and a row of tiny picots that look like frost on a windowpane.
This sample uses one powder blue cotton thread. It looks calm and wintry against green branches and gold baubles. Any smooth, light color works well; ivory, silver gray and pale pink are good choices.
The pattern uses US crochet terms. The finished bow measures about 3 in (7.6 cm) wide and 2.25 in (5.7 cm) tall, plus a 1.75 in (4.4 cm) hanging loop.
Construction is simple. You crochet each wing as a small fan in rows, starting from its point, then add a picot edging. You make two tails in the round around a chain, crochet a tiny center square and twist a cord for the loop. To finish, you overlap the pieces, sew them together and wrap the center.
Finished Size and Construction
- Finished size: 3 in (7.6 cm) wide x 2.25 in (5.7 cm) tall, plus 1.75 in (4.4 cm) loop
- Skill level: Easy-intermediate
- Terminology: US crochet terms
- Yarn weight: Size 3 crochet cotton thread or fingering-weight mercerized cotton (Super Fine, 1)
- Hook: 2.25 mm (US B-1)
- Number of pieces: 6 (2 wings, 2 tails, 1 center square, 1 twisted loop)
- Layout: Wings side by side with their points overlapping at the center; tails hanging below in a V; square on the front; loop on the back
- Wing size: 1.6 in (4.1 cm) from point to picot tips, 1.75 in (4.4 cm) across the outer edge
- Wing size before edging: 1.25 in (3.2 cm) from point to Row 4
- Edging depth: about 0.3 in (0.8 cm) including picots
- Tail size: 1.4 in (3.6 cm) long x 0.5 in (1.3 cm) wide
- Center square: 0.5 in x 0.5 in (1.3 cm x 1.3 cm)
Materials
Choose a smooth, tightly plied mercerized cotton. It shows the lace spokes crisply, blocks well and holds its shape on the tree. Avoid fuzzy or very soft acrylic, which blurs the picots.
- Powder blue (only color): 8 g, about 27 m (29.5 yd), for one ornament
This amount includes extra for the gauge swatch, sewing tails, the wrapped center and the twisted loop. One 50 g ball makes about six ornaments.
Tools:
- 2.25 mm (US B-1) crochet hook
- Tapestry needle with a small eye
- Sharp scissors
- Rust-proof pins and a foam blocking mat
- Spray bottle with water, or liquid starch for a firmer finish
- Ruler or measuring tape
Abbreviations (US Terms)
- ch – chain
- sl st – slip stitch
- sc – single crochet
- hdc – half double crochet
- dc – double crochet
- st(s) – stitch(es)
- sp – space
- rnd – round
- picot – ch 3, sl st in the 3rd ch from hook. This makes a small round bump.
Special note: In the wings, the beginning ch-3 counts as a dc, the beginning ch-4 counts as dc + ch 1 and the beginning ch-5 counts as dc + ch 2.
Gauge and Checkpoints
Gauge: 10 sc and 10 sc rows = 1 in (2.5 cm). Make the center square first and use it as your gauge swatch. It should measure 0.5 in x 0.5 in (1.3 cm x 1.3 cm).
Next, finish one whole wing before you start the second. Measure it flat from the starting point at these checkpoints:
- After Row 2: 0.6 in (1.5 cm)
- After Row 4: 1.25 in (3.2 cm)
- After edging: 1.6 in (4.1 cm) to the picot tips, 1.75 in (4.4 cm) across the outer edge
If your piece is too big: go down to a 2.0 mm hook, or tighten your dc by pulling the first loop snug.
If your piece is too small: go up to a 2.5 mm hook. A difference of 0.1 in (0.3 cm) is fine. This is an ornament, so the two wings only need to match each other.
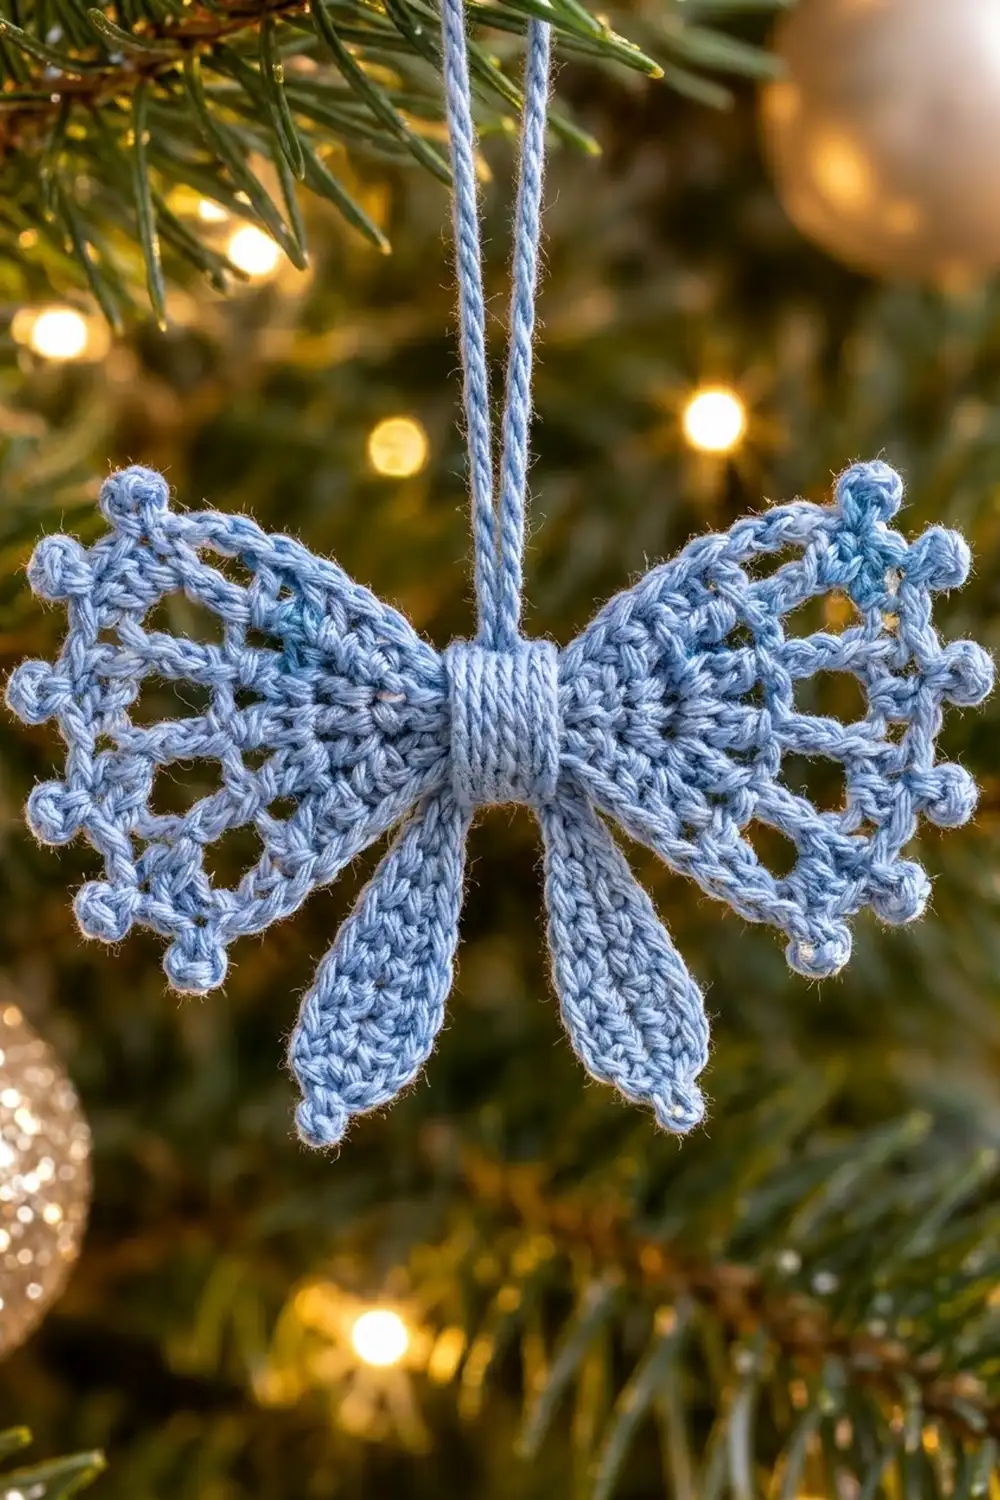
Wings (Make 2)
Each wing is a small fan worked in rows. The starting chain becomes the narrow point at the bow center.
Row 1: Ch 4, 4 dc in the 4th ch from hook. Turn. (5 dc; the skipped ch-3 counts as the first dc)
Row 2 (growth): Ch 3 (counts as dc), dc in the same st, 2 dc in each of the next 3 dc, 2 dc in the top of the turning ch. Turn. (10 dc)
Row 3 (lace): Ch 4 (counts as dc + ch 1), [dc in next dc, ch 1] 8 times, dc in top of the turning ch. Turn. (10 dc, 9 ch-1 sps)
Row 4 (lace): Ch 5 (counts as dc + ch 2), [dc in next dc, ch 2] 8 times, dc in the 3rd ch of the turning ch-4. Turn. (10 dc, 9 ch-2 sps)
Rows 3 and 4 create the open spokes. Each ch space widens the fan without adding stitches, so the wing flares out while the spoke count stays at 10.
Do not fasten off. Go straight into the edging (see Border).
Tails (Make 2)
Each tail is worked in the round around a foundation chain. The first ch you make becomes the wide top, and the end next to the hook becomes the pointed tip.
Foundation: Ch 10.
Rnd 1: Work into the back bump of the chain, starting in the 2nd ch from hook: sl st, sc in next 2 ch, hdc in next 3 ch, dc in next 2 ch, 4 dc in the last ch. Rotate and work along the other side of the chain: dc in next 2 ch, hdc in next 3 ch, sc in next 2 ch, sl st in the last ch. Join with sl st to the first sl st. (20 sts: 8 + 4 + 8)
Rnd 2 (trim): Ch 1, sc in each of the first 8 sts, 2 sc in each of the next 4 dc, sc in each of the next 8 sts. (24 sc = 20 worked 1-per-stitch + 4 extra) Ch 2, sl st in the first sc to form the pointed tip.
Fasten off, leaving a 6 in (15.2 cm) tail for sewing. Each tail should measure 1.4 in (3.6 cm) long and 0.5 in (1.3 cm) at its widest point.
Center Square (Make 1)
Foundation: Ch 6.
Row 1: Sc in the 2nd ch from hook and in each ch across. Turn. (5 sc)
Rows 2–5: Ch 1, sc in each sc across. Turn. (5 sc)
Fasten off, leaving a 12 in (30.5 cm) tail. You will use this long tail to sew on the square and wrap the center. The square measures 0.5 in x 0.5 in (1.3 cm x 1.3 cm).
Twisted Loop (Make 1)
Cut a 16 in (40.6 cm) length of thread. Fold it in half and knot the ends together. Hold the knot in place, then twist the strand clockwise until it kinks back on itself when you relax it. Fold the twisted strand in half and let the two halves twist around each other.
You now have a cord about 3.5 in (8.9 cm) long. Knot the loose ends together. When folded in half as a hanger, it stands about 1.75 in (4.4 cm) tall.
Make All Pieces
For one ornament, all in powder blue:
- Wings: 2
- Tails: 2
- Center square: 1
- Twisted loop: 1
Layout grid, front view:
        [ Loop ]
[ Wing ]  [ Square ]  [ Wing ]
       [ Tail ] [ Tail ]
The wings face outward and their points meet under the square. The tails sit behind the square, angled slightly apart in a V. The loop is attached to the back of the center.
Joining
Lay both wings face up with their points facing each other. Overlap the points by 0.2 in (0.5 cm) so the two Row 1 fans sit on top of each other. With a scrap of thread, whipstitch through both layers, working 3–4 stitches through the foundation chains.
Place the two tails behind the joined points, wide dc ends up and crossing slightly. Angle each tail tip about 0.25 in (0.6 cm) outward. Tack each tail top to the back of the overlapped wing points with 2–3 small stitches.
Center the square on the front so it covers the overlap. Using its long tail, sew one stitch at each corner through all layers.
Now wrap the center. Pass the long tail around the square and all layers, front to back, 12 times. Keep each wrap next to the last so they lie flat and vertical. Pull firmly enough to pinch the center to about 0.5 in (1.3 cm) high, but not so hard that the wings buckle. Secure the thread on the back with two small knots.
Fold the twisted loop in half and place its knotted ends on the back of the center. Sew them down with 4–5 stitches hidden behind the wraps.
Size checkpoint: the assembled bow should measure 3 in (7.6 cm) wide and 2.25 in (5.7 cm) tall, plus the 1.75 in (4.4 cm) loop.
Border: Picot Edging (Wings)
Work this edging on each wing right after Row 4, before assembly. The tails already have their own trim round (Rnd 2), and the center square gets wrapped, so only the wings get this border.
Border gauge: each sc in the edging covers about 0.06 in (0.2 cm) of the curved edge, and each picot stands about 0.1 in (0.3 cm) above the edge. The edging adds about 0.3 in (0.8 cm) of depth including picots.
Edging, outer edge: Ch 1, (sc, picot) in the first dc. [(Sc, picot, sc) in next ch-2 sp, sc in next dc, 2 sc in next ch-2 sp, sc in next dc] 4 times. (Sc, picot, sc) in the last ch-2 sp, (sc, picot) in the last dc. (28 sc, 7 picots)
Edging, first straight side: Rotate to work along the row ends. Work 2 sc in each of the 4 row ends down to the point. (8 sc) Sl st in the foundation chain at the point.
Edging, second straight side: Work 2 sc in each of the 4 row ends back up to the outer edge. (8 sc) Join with sl st to the first sc. Fasten off and weave in the end.
Total per wing: 44 sc (28 + 8 + 8) and 7 picots.
Why the math works: Row 4 has 10 dc and 9 ch-2 spaces. Each dc gets 1 sc (10 sc) and each ch-2 space gets 2 sc (18 sc), so the outer edge has 28 sc. Picots sit at both corners and in the 1st, 3rd, 5th, 7th and 9th spaces, giving 7 evenly spaced bumps. Each straight side gets 2 sc in each of its 4 dc row ends, for 8 sc. That matches the height of the dc rows, so the sides stay flat instead of ruffling.
Final Blocking
- Weave in all remaining ends. The center wrap and loop are already secured.
- Mist the ornament with water, or dip it in a light starch solution and press out the excess in a towel.
- Lay it face up on the blocking mat.
- Pin the bow to 3 in (7.6 cm) wide, with each wing’s outer edge 1.75 in (4.4 cm) across.
- Open each lace spoke with a pin so the ch spaces look even.
- Pin each picot outward into a round bump.
- Pin the tails straight, pointing down and slightly apart, with the tips about 1.25 in (3.2 cm) below the center.
- Let it dry completely, for at least 6 hours, before you remove the pins.
Final Quality-Control Checklist
- Both wings have 10 dc spokes, 44 edging sc and 7 picots.
- Both wings measure 1.6 in (4.1 cm) from point to picot tips.
- The tails match: 24 sc in Rnd 2 and 1.4 in (3.6 cm) long.
- The center square is 0.5 in (1.3 cm) and fully covered by neat, flat wraps.
- The bow is 3 in (7.6 cm) wide and 2.25 in (5.7 cm) tall.
- The loop is secure and centered, with no stitching visible on the front.
- All ends are woven in and trimmed.
Troubleshooting
The wing cups instead of lying flat: your ch spaces are too short or tight. Loosen the chains in Rows 3–4 or go up a hook size.
The outer edge ruffles: you have too many stitches or loose chains. Check that the outer edge has exactly 28 sc, and tighten your ch-2 spaces.
The picots disappear: make sure you sl st into the 3rd ch from hook to close each picot. Pin them out during blocking.
The tails curl: block them with starch and pin them straight while they dry.
The wings don’t match: count the spokes and edging stitches on both wings. Redo the edging on the larger wing with tighter tension.
The center looks bulky: use fewer wraps (8–10), or keep the wing overlap at 0.2 in (0.5 cm).
Care
Spot clean, or hand wash gently in cool water, then reshape and pin flat to dry. Store flat in tissue paper to protect the picots.
Final Notes
Every measurement in this bow builds on the one before it. Your 0.5 in (1.3 cm) gauge square confirms your tension. Each wing reaches 1.25 in (3.2 cm) after Row 4 and 1.6 in (4.1 cm) after the picot edging. Two wings overlapped by 0.2 in (0.5 cm) make a 3 in (7.6 cm) bow, and the 1.4 in (3.6 cm) tails bring the height to 2.25 in (5.7 cm). Add the 1.75 in (4.4 cm) twisted loop and your ornament is ready for the tree.
Happy crocheting!