

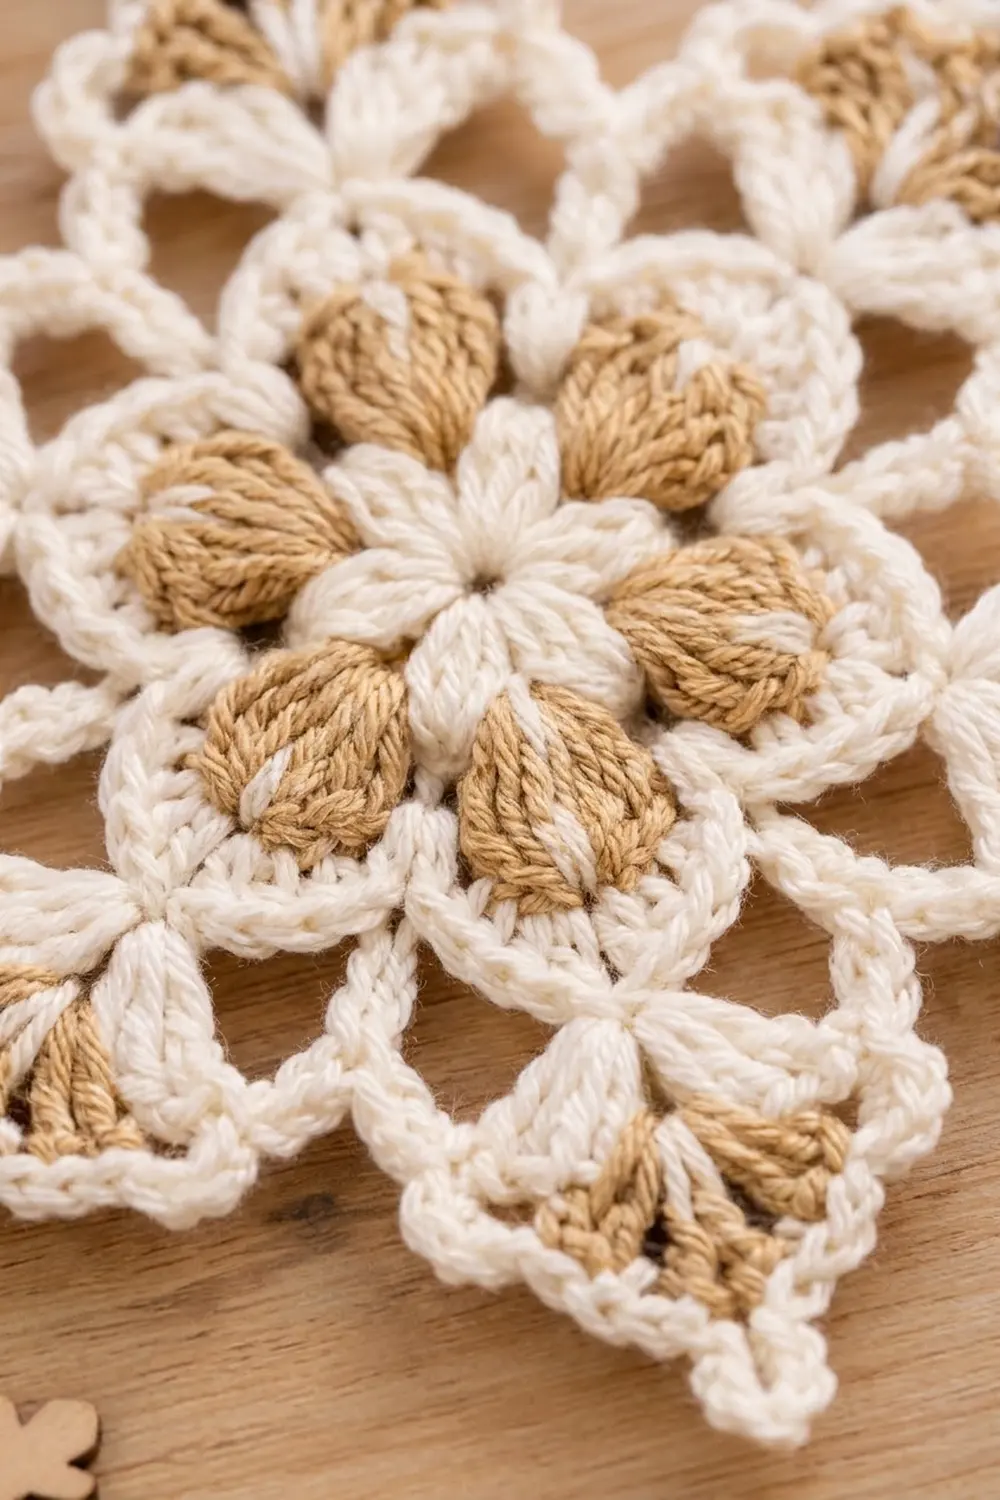
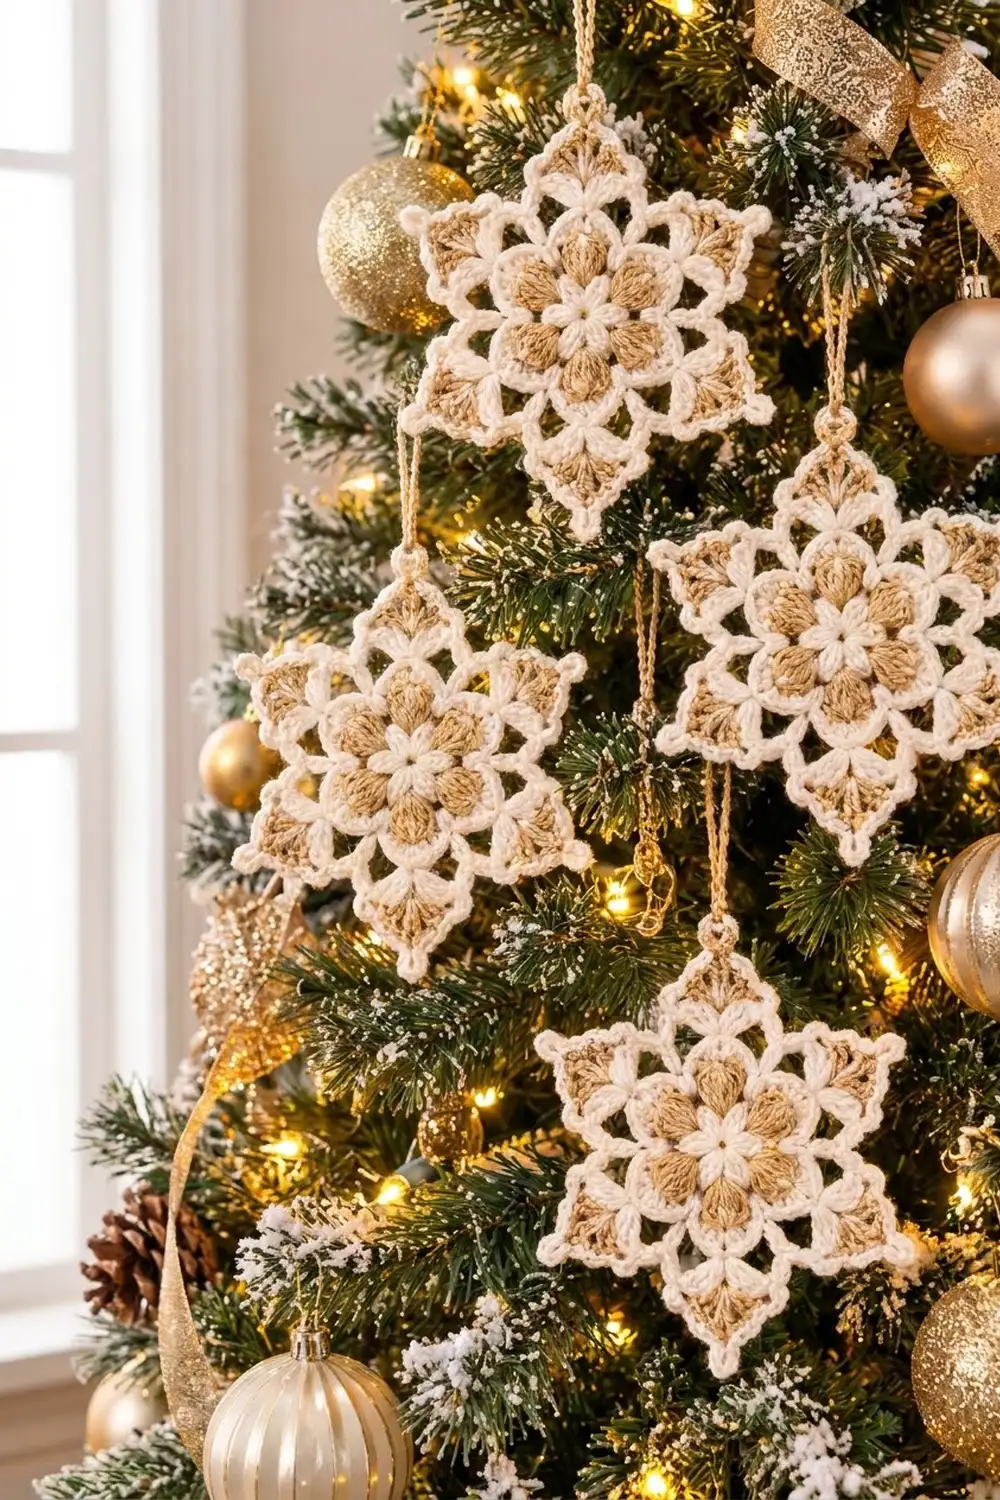
The Gilded Frost Snowflake is a single six-pointed motif in creamy white and warm golden tan. A small cream flower sits at the center, ringed by six plump tan puff petals, and six lacy points radiate outward, each filled with a tan fan and outlined in crisp cream single crochet.
The two-color palette gives it a soft, vintage holiday look that pairs well with gold baubles, natural wood, and white lights. It hangs beautifully on a tree, sits nicely on a wrapped gift, and works up quickly enough to make a whole set in an evening or two.
This pattern is written in US crochet terms. The finished snowflake measures 5.5 in (14.0 cm) from tip to opposite tip, not counting the hanging loop, and about 4.75 in (12.1 cm) across the valleys.
Construction is simple: you work one piece in the round from a magic ring, nine rounds total, alternating between the two colors. There is no sewing, no joining of separate motifs, and no stiffener required, although light starch is optional for a crisper finish.
Finished Size and Construction
- Finished size: 5.5 in (14.0 cm) tip to tip; about 4.75 in (12.1 cm) across the valleys
- Skill level: Easy-intermediate
- Terminology: US crochet terms
- Yarn weight: DK / light worsted (#3), mercerized cotton
- Hook: 3.5 mm (E/4)
- Number of pieces: 1 (one single motif)
- Layout: Single six-pointed snowflake worked in the round
- Piece size: 5.5 in (14.0 cm) tip to tip
- Size before border: 5 in (12.7 cm) tip to tip after Round 8
- Border depth: about 0.25 in (0.6 cm) at each tip
Materials
Choose a smooth mercerized cotton or cotton blend in DK weight. Cotton shows stitch definition clearly, holds the points sharply, and blocks flat. Acrylic also works, but the snowflake will look softer and the tips may curl. Avoid fuzzy or brushed yarns, which hide the puffs and the lacy loops.
For the colors, pick a true cream or ivory rather than bright white, and a golden tan, camel, or light caramel for the contrast. The two shades should be close in value but clearly different, so the puffs and fans read as soft gold rather than brown.
- Color A, Cream: 12 g / about 30 m (33 yd)
- Color B, Golden Tan: 6 g / about 15 m (16 yd), including the hanging loop
Quantities are for one snowflake and include a margin of roughly 20% for swatching, color-change tails, and weaving in ends.
Tools:
- 3.5 mm (E/4) crochet hook
- Tapestry needle
- Scissors
- Stitch marker
- Ruler or tape measure
- Blocking mat or folded towel and rustproof pins
- Optional: spray starch
Abbreviations (US Terms)
- ch – chain
- sl st – slip stitch
- sc – single crochet
- hdc – half double crochet
- dc – double crochet
- sk – skip
- sp(s) – space(s)
- st(s) – stitch(es)
- MR – magic ring
Special stitch – Puff: (Yo, insert hook in the indicated space, yo and pull up a loop to about 0.5 in / 1.3 cm tall) 4 times, for 9 loops on the hook. Yo and pull through all 9 loops, then ch 1 to lock. The closing ch 1 does not count as a separate stitch.
Standing sc: With a slip knot on the hook, insert the hook in the indicated stitch, yo, pull up a loop, yo, and pull through both loops. This starts a new color cleanly without a joining chain.
Gauge and Checkpoints
Exact gauge is not critical for an ornament, but it controls the final size and how cleanly the points sit. Make one test snowflake first and measure at each checkpoint before making a set.
- After Round 1: 1 in (2.5 cm) across
- After Round 3 (cream flower): 1.75 in (4.4 cm) across
- After Round 5 (puff ring): 2.5 in (6.4 cm) across, puff tip to puff tip
- After Round 6: 2.75 in (7.0 cm) across
- After Round 7: 3.75 in (9.5 cm) across the chain loops
- After Round 8: 5 in (12.7 cm) tip to tip
- After Round 9: 5.5 in (14.0 cm) tip to tip
If your flower is larger than 1.75 in (4.4 cm) after Round 3, go down to a 3.25 mm (D/3) hook. If it is smaller, or the center cups, go up to a 3.75 mm (F/5) hook. Fix gauge at the flower stage, because every later round multiplies any difference.
Measure the unblocked work lying flat, without stretching. Blocking adds very little to cotton, so the unblocked numbers should already be close.
Pattern
Color change notes: You fasten off after Rounds 3, 5, 7, and 8, then start each new color with a standing sc or a sl st. Leave 4 in (10.2 cm) tails and weave each one into stitches of the same color.
Round 1 – Center (Color A)
With A, make a MR. Ch 3 (counts as the first dc), then work 11 dc into the ring. Pull the ring tight and sl st to the top of the beginning ch-3.
Stitch count: 12 dc.
Round 2 – Petal Base (Color A)
Ch 1, sc in the same st as the join, ch 3, sk next dc. *Sc in next dc, ch 3, sk next dc; repeat from * 4 more times. Sl st to the first sc.
Stitch count: 6 sc and 6 ch-3 sps.
Round 3 – Cream Flower (Color A)
Sl st into the first ch-3 sp. Ch 1, then work (sc, hdc, dc, hdc, sc) in the same sp and in each remaining ch-3 sp around. Sl st to the first sc. Fasten off A.
Stitch count: 30 sts (6 petals of 5 sts each).
The flower should lie flat with six rounded petals. The center dc of each petal anchors the next round.
Round 4 – Puff Foundation (Color B)
With B, make a standing sc in the center dc of any petal. *Ch 4, sc in the center dc of the next petal; repeat from * 4 more times, ch 4, sl st to the first sc.
Stitch count: 6 sc and 6 ch-4 sps.
Each ch-4 sp now sits behind the gap between two cream petals.
Round 5 – Tan Puff Petals (Color B)
Ch 1. *Sc in next sc, (hdc, puff, hdc) in next ch-4 sp; repeat from * 5 more times. Sl st to the first sc. Fasten off B.
Stitch count: 24 sts (6 sc, 12 hdc, 6 puffs).
The puffs point outward like teardrops, set between the cream petals. Nudge each one to center it in its space.
Round 6 – Cream Outline (Color A)
With A, make a standing sc in any sc of Round 5. Sc in next hdc, 3 sc in the top of the puff, sc in next hdc. *Sc in next sc, sc in next hdc, 3 sc in the top of the puff, sc in next hdc; repeat from * 4 more times. Sl st to the first sc.
This is a conversion round: 24 sts worked 1-per-stitch, plus 2 extra sc at each of the 6 puffs.
Stitch count: 24 + 12 = 36 sc.
Each 3-sc group forms a small rounded peak over a puff, giving every tan petal a clean cream frame.
Round 7 – Chain Loops (Color A)
Sl st in the next 3 sc so you land on the center sc of the first 3-sc group. Ch 1, sc in the same st. *Ch 7, sk next 5 sc, sc in the center sc of the next 3-sc group; repeat from * 4 more times. Ch 7, sk the last 5 sc, and sl st to the first sc. Fasten off A.
Stitch count: 6 sc and 6 ch-7 sps.
Each ch-7 loop spans from one puff to the next. The points will form between the puffs, directly in line with the cream flower petals.
Round 8 – Tan Point Fans (Color B)
With B, make a standing sc in any sc of Round 7. *In the next ch-7 sp work (2 dc, ch 1, 2 dc, ch 3, 2 dc, ch 1, 2 dc), then sc in the next sc; repeat from * around. On the last repeat, replace the final sc with a sl st to the first sc. Fasten off B.
Stitch count: 48 dc and 6 sc (54 sts), plus 12 ch-1 sps and 6 ch-3 tip sps.
Each point now holds 8 tan dc fanned around a ch-3 tip. The sc between the points pulls each valley in tightly, which gives the snowflake its six-pointed shape. If the dc look gappy, push them together along the chain.
Checkpoint: The snowflake should measure 5 in (12.7 cm) tip to tip. This is your size before the border.
Border
Border Gauge
The border is one round of cream sc, worked 1 sc per dc and 1 sc per ch-1 sp. It is about 0.25 in (0.6 cm) deep, which takes the snowflake from 5 in (12.7 cm) to 5.5 in (14.0 cm) tip to tip.
Round 9 – Cream Edging (Color A)
With A, join with a sl st in any ch-3 tip sp. Ch 1.
(2 sc, ch 3, 2 sc) in the ch-3 tip sp. Along the first side of the point: sc in next 2 dc, sc in the ch-1 sp, sc in next 2 dc. Sk the sc between the points. Along the second side of the next point: sc in next 2 dc, sc in the ch-1 sp, sc in next 2 dc. Repeat from * to * 5 more times. Sl st to the first sc. Fasten off A.
Counts per point:
- Tip: 4 sc plus a ch-3 picot
- Each side: 5 sc (2 + 1 + 2)
- Total per point: 4 + 5 + 5 = 14 sc
Stitch count: 84 sc and 6 ch-3 picots.
Why the Math Works
Each point in Round 8 has 2 sides of 5 working spots (2 dc, 1 ch-1 sp, 2 dc). Five sc per side gives 10 sc along the sides of every point. The tip adds 4 sc, for 14 per point, and 6 points × 14 = 84 sc total. Skipping the valley sc keeps the inner corner sharp instead of adding bulk. The ch-3 picot adds length at the tips without crowding them.
Hanging Loop (Color B)
With B, join with a sl st in the ch-3 picot of any one point. Ch 18, then sl st into the same picot. Fasten off and weave in. The loop is about 2.5 in (6.4 cm) long.
Final Blocking
- Weave in all ends through same-color stitches on the back, so no tan shows through the cream.
- Soak the snowflake in cool water for a few minutes, then press the water out in a towel. Do not wring.
- Lay it face up on a blocking mat.
- Pin the 6 tip picots first, evenly spaced on a 5.5 in (14.0 cm) circle.
- Pin each valley so the measurement across the valleys is about 4.75 in (12.1 cm).
- Shape the puffs and the cream flower petals with your fingertips.
- For a crisp ornament, mist with spray starch.
- Let it dry fully, at least several hours, before unpinning.
Final Quality-Control Checklist
- Round 1 has 12 dc and the ring is closed tight.
- The cream flower has 6 even petals of 5 sts each.
- There are 6 tan puffs, each centered between two cream petals.
- Round 6 has 36 sc, with a 3-sc peak over each puff.
- Round 7 has 6 ch-7 loops.
- Each point in Round 8 has 8 dc around a ch-3 tip.
- Round 9 has 84 sc and 6 picots.
- The snowflake measures 5.5 in (14.0 cm) tip to tip.
- The hanging loop is secure and about 2.5 in (6.4 cm) long.
- All ends are woven in invisibly.
Troubleshooting
The center cups or ruffles. The MR may be loose, or your Round 1 dc may be too short. Retighten the ring. If the cream flower ruffles, go down one hook size.
The puffs lean or look flat. Pull up every puff loop to the same height and lock each puff firmly with the ch 1. Push each puff to the front with your fingertip.
The points look rounded. Keep the ch-3 tip in Round 8 snug, and make sure you skipped the valley sc in Round 9. Pin the tips when blocking.
Tan shows through the cream edging. Weave B ends into tan stitches only, and work each Round 9 sc through the full top of the dc.
The snowflake twists or won’t lie flat. Check that each point has exactly 8 dc and that every ch-7 loop has 7 chains. One short loop pulls the whole motif out of shape.
The hanging loop stretches. Work the 18 chains firmly, or go down one hook size for the loop only.
The snowflake is too big. Tighten the ch-7 loops in Round 7, or change to a smaller hook and start again from Round 1.
The snowflake is too small. Use a larger hook. Another option is to make the Round 7 loops ch 8 and work (2 dc, ch 2, 2 dc, ch 3, 2 dc, ch 2, 2 dc) in Round 8. Round 9 counts stay the same: work 1 sc into each ch-2 sp.
Care
Hand wash in cool water with mild soap, press dry in a towel, and reshape flat. Re-starch if needed, and store flat in tissue between seasons.
Final Notes
The size chain is simple. A 1 in (2.5 cm) center grows to a 1.75 in (4.4 cm) flower, then a 2.5 in (6.4 cm) puff ring, a 2.75 in (7.0 cm) cream outline, a 3.75 in (9.5 cm) loop round, and a 5 in (12.7 cm) snowflake before the border. The cream edging finishes it at 5.5 in (14.0 cm) tip to tip.
If your first snowflake matches these numbers, the rest of your set will match too. Make one for a gift tag, or a dozen for the tree.
Happy crocheting!