

The Golden Ginkgo Fan Ornament is a small, single-piece ornament shaped like a ginkgo leaf. A cream fan of long puff stitches spreads out from a gold hanging cord. Gold lines run between the puff columns like leaf veins, and a gold picot border with a soft notch in the center outlines the scalloped lower edge.
The palette is warm cream and mustard gold, so it suits a natural, cozy tree with candlelight. Hang one alone, or make several and scatter them across the branches. Each ornament is a separate piece. Nothing is joined to anything else.
This pattern uses US crochet terms. The finished leaf is about 5 in (12.7 cm) wide and 2.75 in (7.0 cm) tall, not counting the hanger. The hanger adds about 2.5 in (6.4 cm), for a total hanging length of about 5.25 in (13.3 cm).
Construction is simple. Work the cream fan in four turned rows from a magic ring. Add gold surface slip stitch veins over the five inner spoke columns, then work two gold border rounds. Finish with a chain hanging loop that is wrapped tightly just above the leaf.
Finished Size and Construction
- Finished size: 5 in (12.7 cm) wide x 2.75 in (7.0 cm) tall, plus a 2.5 in (6.4 cm) hanger
- Skill level: Easy-intermediate (puff stitches, surface slip stitch)
- Terminology: US crochet terms
- Yarn weight: Worsted (#4), cotton or cotton blend
- Hook: 4.5 mm (US 7)
- Number of pieces: 1
- Layout: One fan-shaped leaf, opening about 140 degrees, with the point at the top
- Piece size before border: 4.5 in (11.4 cm) wide x 2.25 in (5.7 cm) tall
- Border depth: about 0.25 in (0.6 cm) on every edge
Materials
Choose a smooth worsted cotton or cotton blend with good stitch definition. It makes the puffs look plump and keeps the gold veins crisp. Fuzzy yarns blur the texture and make the puffs harder to pull through. The quantities below assume a yarn of about 180 m (197 yd) per 100 g.
- Color A, cream: 12 g, about 22 m (24 yd), for the fan
- Color B, mustard gold: 10 g, about 18 m (20 yd), for the veins, border, hanger, and wrap
Both quantities include a margin for swatching and tails. One ornament actually uses about 8 g of cream and 6 g of gold.
Tools:
- 4.5 mm (US 7) crochet hook
- Tapestry needle
- Scissors
- 2 stitch markers
- Rust-proof pins and a blocking mat
- Spray bottle with water
- Optional: fabric stiffener, for an ornament that stays flat
Abbreviations (US Terms)
- ch – chain
- sl st – slip stitch
- sc – single crochet
- hdc – half double crochet
- dc – double crochet
- sc3tog – single crochet 3 together
- sp – space
- st(s) – stitch(es)
- RS / WS – right side / wrong side
Puff stitch (puff): (Yo, insert hook in indicated st or sp, yo, pull up a loop to about 0.5 in / 1.3 cm tall) 3 times, giving 7 loops on hook. Yo, pull through all 7 loops, then ch 1 to close. The closing ch does not count as a stitch. Each puff counts as 1 st.
Picot: Ch 3, sl st in 3rd ch from hook.
Surface slip stitch: With the yarn held behind the work, insert the hook from front to back between stitches, yo, and pull a loop through the fabric and through the loop on the hook.
Gauge and Checkpoints
Gauge is not critical for an ornament. It does affect how flat the fan lies, though, so make one fan before you plan a batch.
Base gauge: dc rows and puff rows are each about 0.6 in (1.5 cm) tall. The sc/hdc/dc edging row is about 0.45 in (1.1 cm) tall.
Checkpoints: measure from the center of the ring straight down to the edge.
- After Row 1: radius 0.6 in (1.5 cm)
- After Row 2: radius 1.2 in (3.0 cm)
- After Row 3: radius 1.8 in (4.6 cm)
- After Row 4: radius 2.25 in (5.7 cm). The corner-to-corner width is 4.5 in (11.4 cm).
- After the border: 5 in (12.7 cm) wide x 2.75 in (7.0 cm) tall
If your fan is too big or ruffles a lot, go down to a 4 mm (US G-6) hook and pull the puff loops up a little shorter. If it is too small or cups upward, go up to a 5 mm (US H-8) hook. The stitch counts stay the same either way.
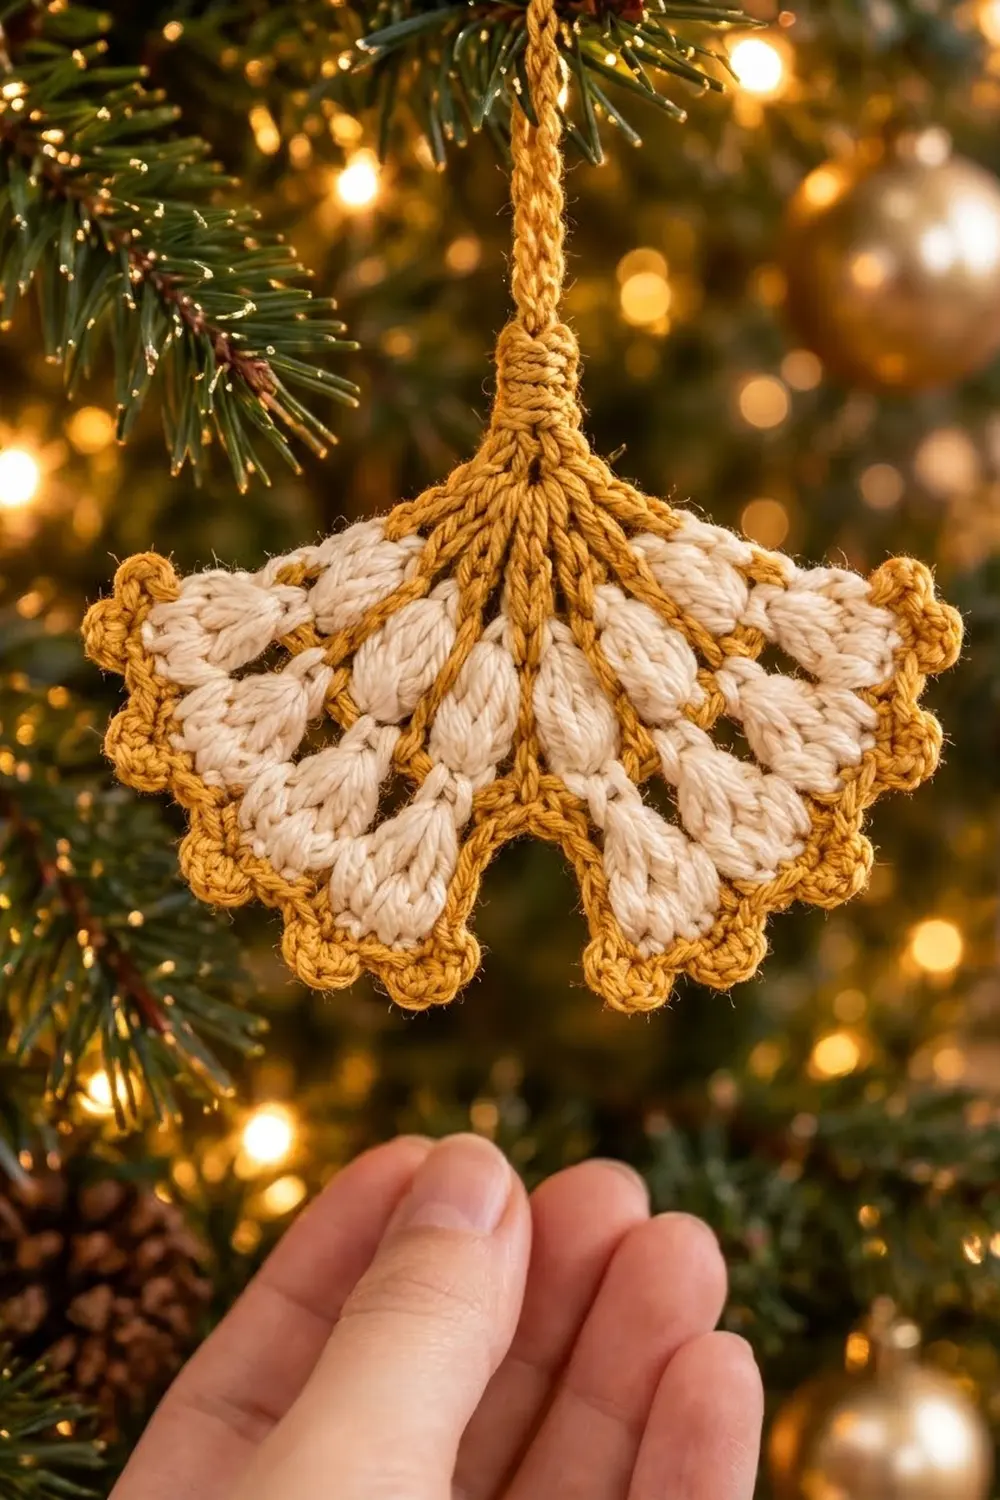
Fan (Color A, Cream)
Work in turned rows. Every row is worked across the whole fan, from one straight edge to the other. The ch-3 at the start of each dc row counts as a dc.
The fan has 7 dc “spokes”: the two edge stitches plus 5 inner spokes. These separate 6 wedges of puff stitches. Every row keeps the spokes lined up. That is how the gold veins get a straight column to follow.
Row 1 (RS): Make a magic ring. Ch 3 (counts as dc), [puff in ring, dc in ring] 6 times. Pull the ring closed firmly. Turn.
Count: 7 dc + 6 puffs = 13 sts.
Row 2: Ch 3 (counts as dc), (puff, ch 1, puff) in next puff, dc in next dc; repeat from * 5 more times, placing the last dc in the top of the turning ch-3. Turn.
Count: 7 dc + 12 puffs + 6 ch-1 sps = 25 sts.*
Each wedge now holds puff, ch-1 sp, puff.
Row 3: Ch 3 (counts as dc), puff in next puff, ch 1, puff in next ch-1 sp, ch 1, puff in next puff, dc in next dc; repeat from * 5 more times, placing the last dc in the top of the turning ch-3. Turn.
Count: 7 dc + 18 puffs + 12 ch-1 sps = 37 sts.*
Each wedge now holds 5 sts: puff, ch-1 sp, puff, ch-1 sp, puff.
Row 4 (edging row, conversion): Ch 1 (does not count as a st). Sc in first dc, hdc in next puff, dc in next ch-1 sp, dc in next puff, dc in next ch-1 sp, hdc in next puff, sc in next dc; repeat from * 5 more times, placing the last sc in the top of the turning ch-3. Fasten off.
Count: 37 sts worked 1-per-existing-st + 0 added = 37 sts (7 sc + 12 hdc + 18 dc).*
The sc–hdc–dc–dc–dc–hdc–sc shape turns each wedge into a small rounded scallop, and each spoke becomes a low sc dip. Number the Row 4 stitches 1 to 37. The spoke sc are at positions 1, 7, 13, 19, 25, 31, and 37. Place a marker in st 19, which is the center spoke and the future notch.
Checkpoint: radius 2.25 in (5.7 cm), width 4.5 in (11.4 cm). Weave in the cream tails now, before you add the gold.
Gold Veins (Color B)
With the RS facing, you will work a surface slip stitch line along each of the 5 inner spokes (Row 4 positions 7, 13, 19, 25, 31). The two edge spokes will be covered by the border.
- Hold the gold yarn behind the fan. Insert the hook in the center of the magic ring, then pull up a loop, leaving a 4 in (10.2 cm) tail.
- Work surface slip stitches straight down the chosen dc column: 2 sl sts along each of Rows 1–3, then 1 sl st into the Row 4 sc. That is 7 surface sl sts.
- Cut the yarn, pull the end through to the WS, and leave a tail.
- Repeat for the remaining 4 spokes.
Keep the slip stitches loose. They should sit on top of the fabric without drawing it in. If the fan starts to pucker along a vein, pull out that line and redo it with longer loops. Weave the vein tails into the gold lines on the WS.
Border (Color B, Gold)
Border gauge: sc along the curved edge matches the Row 4 stitches one-for-one, about 8 sc per 1.75 in (4.4 cm). Along the straight side edges, 2 sc per dc row-end and 1 sc per sc row-end keep the sides flat.
Round 1
With the RS facing, join gold in st 1 of Row 4 (the outer corner on the right).
- Corner 1: 3 sc in st 1. (3 sts)
- Right lobe: sc in sts 2–17. (16 sts)
- Notch: sc3tog over sts 18, 19, 20. (1 st)
- Left lobe: sc in sts 21–36. (16 sts)
- Corner 2: 3 sc in st 37. (3 sts)
- Left side edge, working in row-ends toward the ring: 1 sc in the Row 4 row-end, then 2 sc in each of the Rows 3, 2, and 1 row-ends. (7 sts)
- Point: sc in the center of the magic ring. (1 st)
- Right side edge, working away from the ring: 2 sc in each of the Rows 1, 2, and 3 row-ends, then 1 sc in the Row 4 row-end. (7 sts)
Sl st in the first sc to join.
Round 1 count: 3 + 16 + 1 + 16 + 3 + 7 + 1 + 7 = 54 sts.
Why the math works: Row 4 has 37 sts. The two corners use 2 of them (sts 1 and 37) and the notch uses 3 (sts 18–20), which leaves 32 for the lobes, or 16 per lobe. The corners turn 1 st into 3, which gives a crisp angle. The sc3tog takes 3 sts down to 1 and pulls the center in, creating the ginkgo notch. Each side has 1 + 2 + 2 + 2 = 7 sc, so both sides match exactly.
Checkpoint: the notch should form a clear V, and the sides should lie straight.
Round 2 (Picot Edge)
Sl st into the center sc of Corner 1. Ch 1 (does not count as a st). Then:
- Corner 1 center: (sc, picot, sc) in the same st. (2 sc, 1 picot)
- Corner 1, 3rd st: sc. (1 sc)
- Right lobe: [sc in next st, picot, sc in next st] 8 times. (16 sc, 8 picots)
- Notch: sl st in the sc3tog. (1 sl st)
- Left lobe: [sc in next st, picot, sc in next st] 8 times. (16 sc, 8 picots)
- Corner 2: sc in the 1st st, (sc, picot, sc) in the center st, sc in the 3rd st. (4 sc, 1 picot)
- Left side: sc in each of the 7 sts. (7 sc)
- Point: sc. (1 sc)
- Right side: sc in each of the 7 sts. (7 sc)
- Corner 1, 1st st: sc. (1 sc)
Sl st in the first sc to join.
Round 2 count: 55 sc + 1 sl st + 18 picots.
Why the math works: each lobe has 16 sts, which divides evenly into 8 two-stitch picot repeats. Each corner adds 1 extra sc and 1 picot in its center stitch. The 54 Round 1 sts plus 2 corner increases make 56 base sts: 55 sc plus the 1 sl st at the notch. The plain sc on the sides keeps the upper edges smooth, as on a real ginkgo leaf, while the picots give the lower edge its bumpy outline.
Do not fasten off. Sl st along the right side to the Point sc.
Checkpoint: 5 in (12.7 cm) wide x 2.75 in (7.0 cm) tall.
Hanger and Stem Wrap (Color B)
- From the Point sc, ch 40.
- Sl st back into the same Point sc to form a loop. Fasten off and weave the tail into the border.
- Cut an 18 in (45.7 cm) length of gold. Hold the two strands of the chain loop together. Starting 0.5 in (1.3 cm) above the leaf point, wrap the yarn tightly around both strands 7 or 8 times, working downward toward the leaf.
- Thread both ends of the wrapping yarn onto the needle, pass them up under the wraps, and trim them flush.
The loop should stand about 2.5 in (6.4 cm) above the leaf. The wrap makes a small, neat stem knot where the veins meet.
Final Blocking
- Weave in all the remaining tails along stitches of the same color.
- Spray the ornament until it is damp but not dripping.
- Lay it RS up on the blocking mat.
- Pin the point first. Then pin the two outer corners so the piece measures 5 in (12.7 cm) between them.
- Pin the notch so the V is 2.75 in (7.0 cm) below the point.
- Pin each picot slightly outward to open the scallops.
- Press each puff gently with a fingertip so it sits rounded and even.
- Let it dry completely, at least 6 hours. If you want a firmer ornament, brush on fabric stiffener while the piece is still pinned and let it dry again.
Final Quality-Control Checklist
- [ ] Row stitch counts: 13, 25, 37, 37
- [ ] 6 puff wedges, with 1, 2, and 3 puffs in Rows 1, 2, and 3
- [ ] 5 gold veins, straight and centered on the spokes, with no puckering
- [ ] Border Round 1 has 54 sts, and the notch is centered on st 19
- [ ] Border Round 2 has 18 picots, 8 on each lobe and 1 at each corner
- [ ] Both side edges are straight and the same length
- [ ] The hanger wrap is tight and the ends are hidden
- [ ] Final size is 5 in (12.7 cm) x 2.75 in (7.0 cm)
- [ ] No tails show on either side
Troubleshooting
The puffs look flat or uneven: pull every loop up to the same height before the final yo. Pulling the loops a little taller helps.
The fan cups like a bowl: the edge is too tight. Go up a hook size, or check that each ch-1 space really got its ch.
The fan ruffles: the edge is too loose, or the puffs are too wide. Go down a hook size.
The veins wander: before you start each vein, mark the spoke column with a strand of contrasting yarn.
The notch is too shallow: check that the sc3tog is centered on st 19. Block the V with a pin.
The hanger twists: wet-block the loop and pin it straight, or wrap it more tightly.
Care
Hand wash gently in cool water, press out the water in a towel, and dry flat with the shape pinned. If you used stiffener, spot clean only.
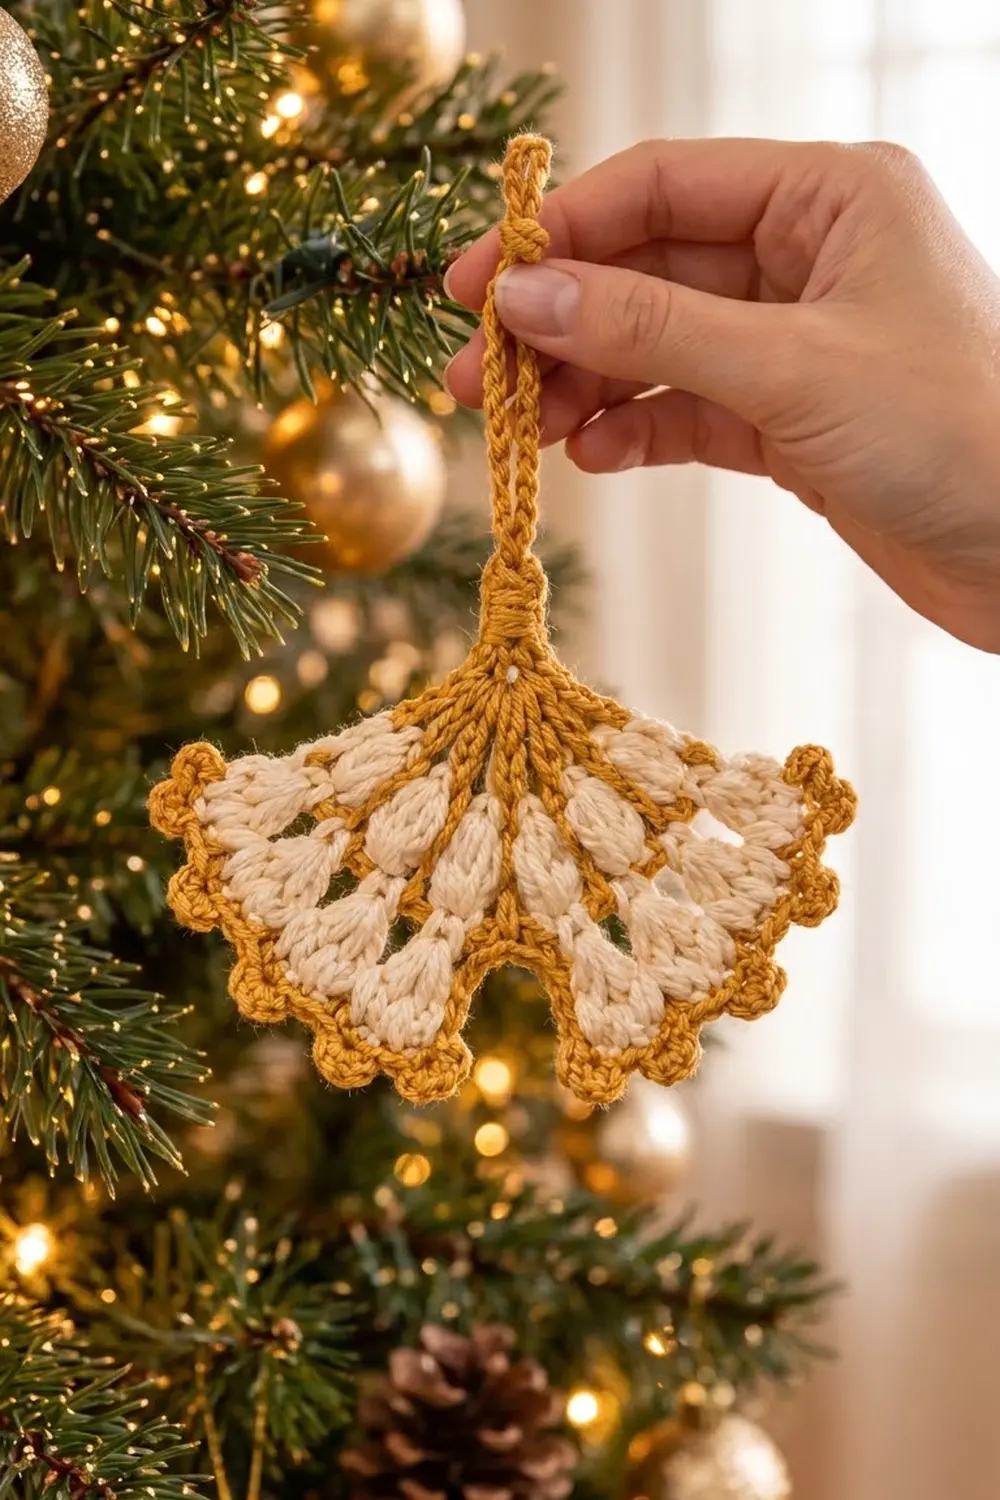
Final Notes
Here is the measurement chain. Four rows of 13, 25, 37, and 37 sts make a 4.5 in (11.4 cm) by 2.25 in (5.7 cm) fan. Gold veins follow the 5 inner spokes. Border Round 1 builds 54 sts with a centered notch, Round 2 adds 18 picots, and the finished leaf measures 5 in (12.7 cm) by 2.75 in (7.0 cm), with a 2.5 in (6.4 cm) wrapped hanger above it. Check each step against its checkpoint and every ornament in your batch will match.
Happy crocheting!