

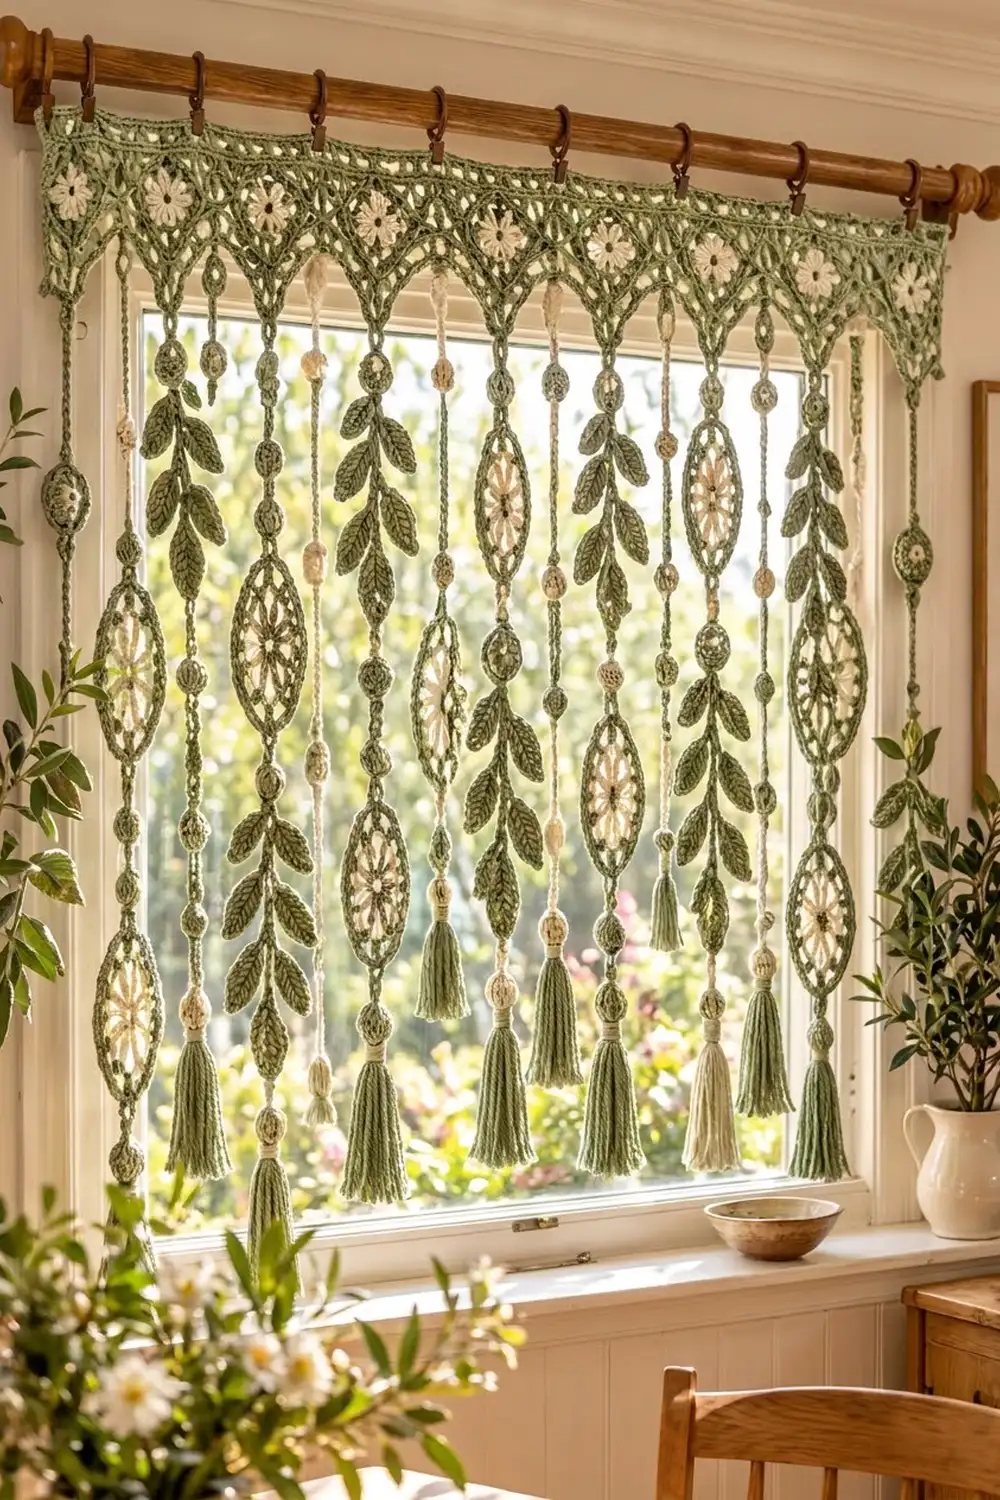
The Olive Grove Window Valance brings a little Mediterranean garden indoors. A lacy sage header with cream flowers hangs from your curtain rod. Below it, leaf vines alternate with oval flower medallions, and every strand ends in a soft tassel.
The palette is just two colors: sage green and cream. The style is relaxed farmhouse-boho. It catches sunlight beautifully and still lets light through the window.
This pattern uses US crochet terms. The finished valance is 22.75 in (57.8 cm) wide. It is 26 in (66.0 cm) long at the longest leaf strand and 24 in (61.0 cm) at the medallion strands.
Construction is modular. You make 7 header squares, each with a pointed triangle worked onto its bottom edge, and join them in a row. Then you add a top band and a bottom edging. Finally, you build 15 hanging strands from cords, leaves, medallions, balls and tassels and sew them to the header.
Finished Size and Construction
- Finished size: 22.75 in (57.8 cm) wide × 26 in (66.0 cm) long at the longest point
- Skill level: Intermediate
- Terminology: US
- Yarn weight: DK (3), cotton or cotton blend
- Hook: 3.5 mm (E-4)
- Number of pieces: 7 header squares and 15 strands (pieces are listed below)
- Layout: 7 squares in one row, with 8 medallion strands alternating with 7 leaf strands
- Square size: 3.25 in (8.3 cm)
- Header size before border: 22.75 × 5.25 in (57.8 × 13.3 cm), including the triangles
- Top border depth: 0.75 in (1.9 cm)
Materials
Choose a smooth, mercerized or matte DK cotton. Cotton holds the leaf points crisply and hangs straight. Avoid fuzzy yarns, because they blur the lace.
- Sage green: 500 g, about 1,050 m
- Cream: 75 g, about 160 m
These quantities include a margin of roughly 10%.
Tools:
– 3.5 mm (E-4) crochet hook
– Tapestry needle
– Stitch markers
– A 4 in (10.2 cm) piece of card for the tassels
– Scrap yarn for stuffing the balls
– 8 curtain clip rings
– Rust-proof pins, a blocking mat and a spray bottle
– Tape measure
Abbreviations (US Terms)
- ch: chain
- sl st: slip stitch
- sc: single crochet
- hdc: half double crochet
- dc: double crochet
- tr: treble crochet
- sc2tog / sc3tog: single crochet 2 (or 3) together
- BLO: back loop only
- BPsc: back post single crochet
- sp: space
- st(s): stitch(es)
- RS: right side
Special stitch: BPsc. Insert your hook from back to front to back around the post of the stitch, yarn over, pull up a loop, then yarn over and pull through 2 loops.
Gauge and Checkpoints
Make one header square with its triangle before anything else. It is your gauge swatch.
- Square gauge: 1 square through Round 6 = 3.25 in (8.3 cm), with 17 sc per side.
- Chain gauge: 25 ch = 5 in (12.7 cm), relaxed.
Measure at these checkpoints:
- Round 2 (flower): about 1.5 in (3.8 cm) across
- Round 4: about 2.25 in (5.7 cm)
- Round 5: about 3 in (7.6 cm)
- Round 6: 3.25 in (8.3 cm)
- Triangle: 2 in (5.1 cm) deep from the square edge to the tip
If your square is too big, go down 0.25 mm in hook size. If it is too small, go up 0.25 mm. A 0.25 in (0.6 cm) error per square adds up to 1.75 in (4.4 cm) across the 7 squares, so fix it now.
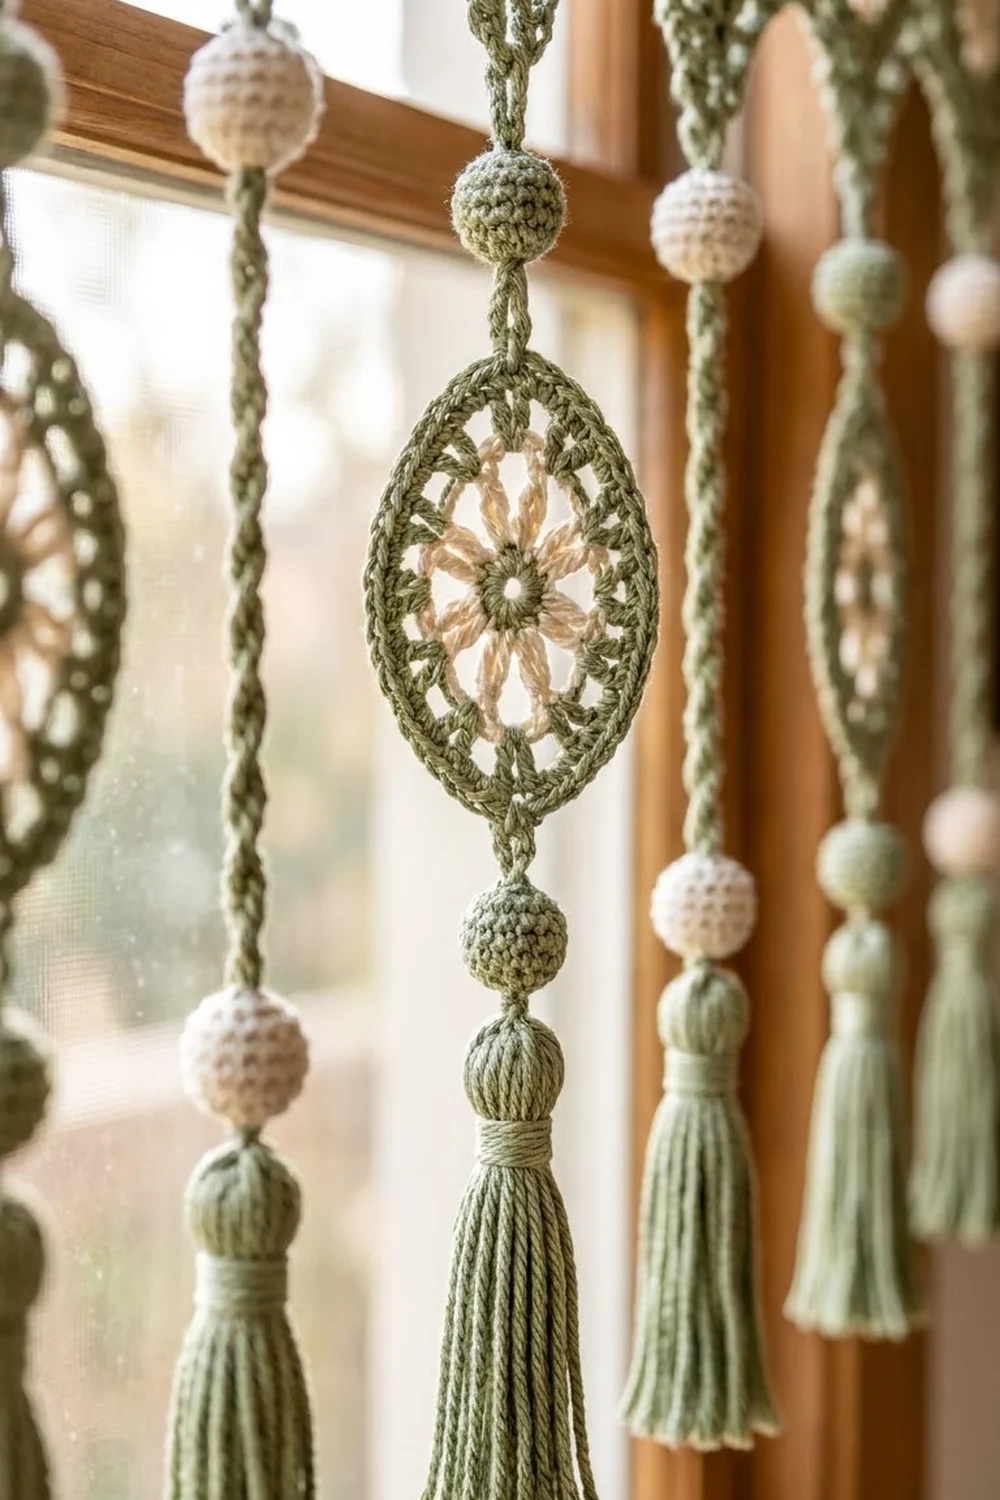
Header Square (make 7)
Round 1 (cream): Make a magic ring. Ch 1, then work 8 sc in the ring. Sl st to the first sc. (8 sts)
Round 2 (cream): In each sc, work (ch 2, 2 dc, ch 2, sl st). (8 petals) Fasten off.
Round 3 (green): Join with a BPsc around any Round 1 sc. Ch 4. Then work (BPsc around the next Round 1 sc, ch 4) 7 times. Sl st to the first BPsc. (8 ch-4 sps) These spaces sit behind the petals.
Round 4: Sl st into the first sp. Ch 3 (this counts as a dc) and work (2 dc, ch 2, 3 dc) in the same sp. Work 3 hdc in the next sp. Then work (3 dc, ch 2, 3 dc) in the next sp, 3 hdc in the next sp, and repeat from * twice more. Sl st to the top of the ch-3. (36 sts: 9 per side between the ch-2 corners, plus 4 corner sps)
Round 5: Sl st in the next 2 dc and into the corner sp. Ch 3, then work (dc, ch 2, 2 dc) in the same sp. Work 1 dc in each of the next 9 sts. Then work (2 dc, ch 2, 2 dc) in the corner sp, dc in the next 9 sts, and repeat from * twice more. Sl st to join. (52 sts: 13 per side, plus 4 corner sps)
Round 6: Ch 1. Work 1 sc in each st and 3 sc in each corner sp. Sl st to join. (64 sts) Mark the middle sc of each 3-sc corner as the corner st. Each side has 17 sts, counting both of its corner sts: 4 × 15 side sts + 4 corner sts = 64.
Bottom Triangle
Work the triangle in green rows into one side of the square. Row 1 starts in a corner st.
Row 1 (RS): Ch 1, then sc in each of the 17 sts along the side. (17)
Rows 2–8: Ch 1 and turn. Sc2tog, sc to the last 2 sts, sc2tog. The counts are 15, 13, 11, 9, 7, 5 and 3.
Row 9: Ch 1 and turn. Sc3tog. (1) Fasten off.
Checkpoint: The square plus its triangle should measure 3.25 in (8.3 cm) wide × 5.25 in (13.3 cm) tall.
Leaf (make 84, green)
Ch 9. Work these sts into the chain, starting in the 2nd ch from the hook: sc, hdc, 3 dc, hdc, sc. (7 sts)
In the last ch (the leaf tip), work (sc, ch 2, sc).
Rotate the piece. Work into the remaining loops of the same 7 ch: sc, hdc, 3 dc, hdc, sc. Sl st into the ch-9 base. (16 sts and 1 ch-2 tip)
Fasten off, leaving an 8 in (20.3 cm) tail. The foundation chain runs down the center and forms the vein. Each leaf is 1.75 × 0.75 in (4.4 × 1.9 cm).
Oval Medallion (make 16)
Round 1 (cream): Make a magic ring. Ch 1, work 8 sc, and sl st to join. (8)
Round 2 (cream): In the 1st sc, work (ch 3, tr, ch 3, sl st). In each of the next 3 sc, work (ch 2, 2 dc, ch 2, sl st). In the 5th sc, work (ch 3, tr, ch 3, sl st). In each of the last 3 sc, work (ch 2, 2 dc, ch 2, sl st). (8 petals: 2 long and 6 short) Fasten off.
The long petals mark the top and bottom of the oval.
Round 3 (green): Join with a BPsc around the 1st sc of Round 1 (behind the top long petal). Ch 4. Work (BPsc around the next sc, ch 4) 7 times, then sl st to join. (8 ch-4 sps)
Round 4: Work 6 dc in each of the 4 sps on either side of the long petals: sps 1, 4, 5 and 8. Work 5 hdc in each of the 4 side sps: sps 2, 3, 6 and 7. Sl st to join. (44 sts: 24 dc + 20 hdc)
Round 5: Ch 1. Sc in each st around, but work 2 sc in each of these 4 sts: the dc on either side of the top BPsc, and the dc on either side of the bottom BPsc. Sl st to join. (44 + 4 = 48 sts)
Round 6: Sl st in the BLO of each st around. (48 sl st) This makes the raised frame.
Fasten off, leaving a 10 in (25.4 cm) tail. The medallion measures about 2.5 × 3 in (6.4 × 7.6 cm).
Ball (make 23 green and 15 cream)
Round 1: Make a magic ring and work 6 sc in it. (6)
Round 2: Work 2 sc in each st. (12)
Rounds 3–4: Sc in each st. (12)
Round 5: Sc2tog 6 times. (6) Before closing, stuff the ball firmly with scrap yarn.
Close the hole and leave a 10 in (25.4 cm) tail. Each ball is about 0.75 in (1.9 cm) across.
Cord (make 15, green)
Ch 76. Sl st in the 2nd ch from the hook and in each ch across. (75 sl st)
The cord measures 15 in (38.1 cm). It is firm and does not stretch much.
Tassel (make 15, green)
- Wrap yarn 30 times around the 4 in (10.2 cm) card.
- Tie the top with a 10 in (25.4 cm) strand.
- Cut the loops at the bottom.
- Wrap the neck tightly 0.5 in (1.3 cm) below the top.
- Trim the tassel to 3.5 in (8.9 cm).
Make All Pieces
Green:
– 7 square outer sections (Rounds 3–6) with triangles
– 84 leaves
– 16 medallion frames
– 15 cords
– 23 balls
– 15 tassels
Cream:
– 7 square flowers
– 16 medallion flowers
– 15 balls
Building the Strands
Leaf strands (make 7):
1. Sew a green ball to the top of a cord.
2. Sew leaf pairs at 1.5, 3.75, 6, 8.25, 10.5 and 12.75 in (3.8, 9.5, 15.2, 21.0, 26.7 and 32.4 cm) from the top of the cord. Angle each leaf outward and slightly down. (12 leaves per strand)
3. Sew a cream ball to the bottom of the cord.
4. Sew a tassel under the cream ball.
Medallion strands (make 8):
1. Sew a green ball to the top of a cord.
2. Sew one medallion over the front of the cord, from 2 to 5 in (5.1 to 12.7 cm).
3. Sew a cream ball at 7 in (17.8 cm).
4. Sew a second medallion from 9 to 12 in (22.9 to 30.5 cm).
5. Sew a green ball to the bottom of the cord, and a tassel under it.
Strand length: ball 0.75 in + cord 15 in + ball 0.75 in + tassel 3.5 in = 20 in (50.8 cm).
Layout Grid
[ S1 ][ S2 ][ S3 ][ S4 ][ S5 ][ S6 ][ S7 ]
M   L   M   L   M   L   M   L   M   L   M   L   M   L   M
- S = square with triangle
- L = leaf strand, hanging from a triangle tip (7)
- M = medallion strand, hanging from each outer corner and each seam valley (8)
Joining
Hold two squares with right sides together, with the triangles pointing the same way. Using green, sl st through the BLO of both layers along one side.
Join stitch to stitch: 17 sts to 17 sts, from corner st to corner st. Leave the triangle edges free.
Keep the tension loose. Your sl sts should match the width of the sc behind them. Tight seams pull the header into a curve. Join all 7 squares.
Checkpoint: The header should measure 22.75 in (57.8 cm) wide (7 × 3.25 in). It should be 5.25 in (13.3 cm) tall at the triangle tips.
Border
Border gauge: 17 sc per 3.25 in (8.3 cm), the same as the square edge.
Top Band (green)
Row 1 (RS): Join at the top right corner st. Ch 1, then sc in every st across. (7 squares × 17 = 119 sc)
Row 2: Ch 3 (this counts as a dc) and turn. Dc in each st. (119)
Row 3: Ch 1 and turn. Sc in each st. (119) Fasten off.
Why the math works: Each square’s 17 top sts already include both of its corner sts. The seams add no stitches, so 7 × 17 = 119 exactly. The band is 0.75 in (1.9 cm) deep. With the band, the header measures 22.75 × 6 in (57.8 × 15.2 cm).
Lower Edging (green)
Join at the bottom corner of S1. Then, for each triangle, work:
- 8 sc down the row ends of Rows 1–8
- (sc, ch 5, sc) in the Row 9 st at the tip
- 8 sc up the other side
That is 18 sc and 1 ch-5 loop per triangle, for a total of 7 × 18 = 126 sc and 7 loops. Fasten off.
Attaching the Strands
- Sew the top ball of each leaf strand to the ch-5 loop of a triangle tip.
- Sew the medallion strands to the 6 seam valleys and the 2 outer corners.
Final drop:
– Leaf strands: 6 + 20 = 26 in (66.0 cm)
– Medallion strands: 4 + 20 = 24 in (61.0 cm)
This difference creates the staggered tassel line.
Final Blocking
- Lightly spray the header until it is damp.
- Pin it face up to 22.75 × 6 in (57.8 × 15.2 cm). Pin each triangle tip sharply.
- Spray each medallion and pin it to 2.5 × 3 in (6.4 × 7.6 cm), shaping a clean oval.
- Lay the leaf strands flat. Pin each leaf tip and fan the leaves evenly.
- Steam the tassels lightly, comb them straight, and retrim them to 3.5 in (8.9 cm).
- Let everything dry completely, about 24 hours.
- Clip 8 rings to Row 2 of the top band, one at each end and one at each seam line.
Final Quality-Control Checklist
- [ ] All 7 squares measure 3.25 in (8.3 cm) and have 17 sts per side
- [ ] Every triangle comes to a single-stitch tip, 2 in (5.1 cm) deep
- [ ] All three rows of the top band have 119 sts
- [ ] The lower edging has 126 sc and 7 ch-5 loops
- [ ] Every leaf has a sharp ch-2 tip and a visible center vein
- [ ] All 16 medallions lie flat with even frames
- [ ] All 15 strands are 20 in (50.8 cm) long
- [ ] Every tail is woven in at least 2 in (5.1 cm)
Troubleshooting
- Square cups: Your Round 4 hdc groups are too tight. Use a larger hook for Round 4 only.
- Square ruffles: Check that you have 9 sts per side in Round 4. Extra sts cause waves.
- Triangle leans: Make sure you decrease at both ends of every row.
- Header curves upward: The seams are too tight. Redo them with looser sl sts.
- Leaves curl: Wet-block them flat. If needed, use dc in place of hdc for flatter sides.
- Medallion looks round, not oval: Use tr, not dc, for the long petals, and check the Round 5 increase placement.
- Strands twist: Hang the valance with a light weight on each tassel overnight.
Care
Hand wash the valance in cool water with mild detergent. Gently press the water out and lay it flat to dry, re-pinning the triangle tips and leaf tips as it dries.
Final Notes
Your measurement chain:
- One square: 3.25 in (8.3 cm), 17 sts per side
- Seven squares joined: 22.75 in (57.8 cm), 119 sts across
- Header with triangles and band: 6 in (15.2 cm) tall
- Strands: 20 in (50.8 cm) long
- Total drop: 26 in (66.0 cm) at the leaf strands and 24 in (61.0 cm) at the medallion strands
If the first square measures correctly, everything after it will fit. Take your time with the leaves, and enjoy watching your olive grove grow.
Happy crocheting!