

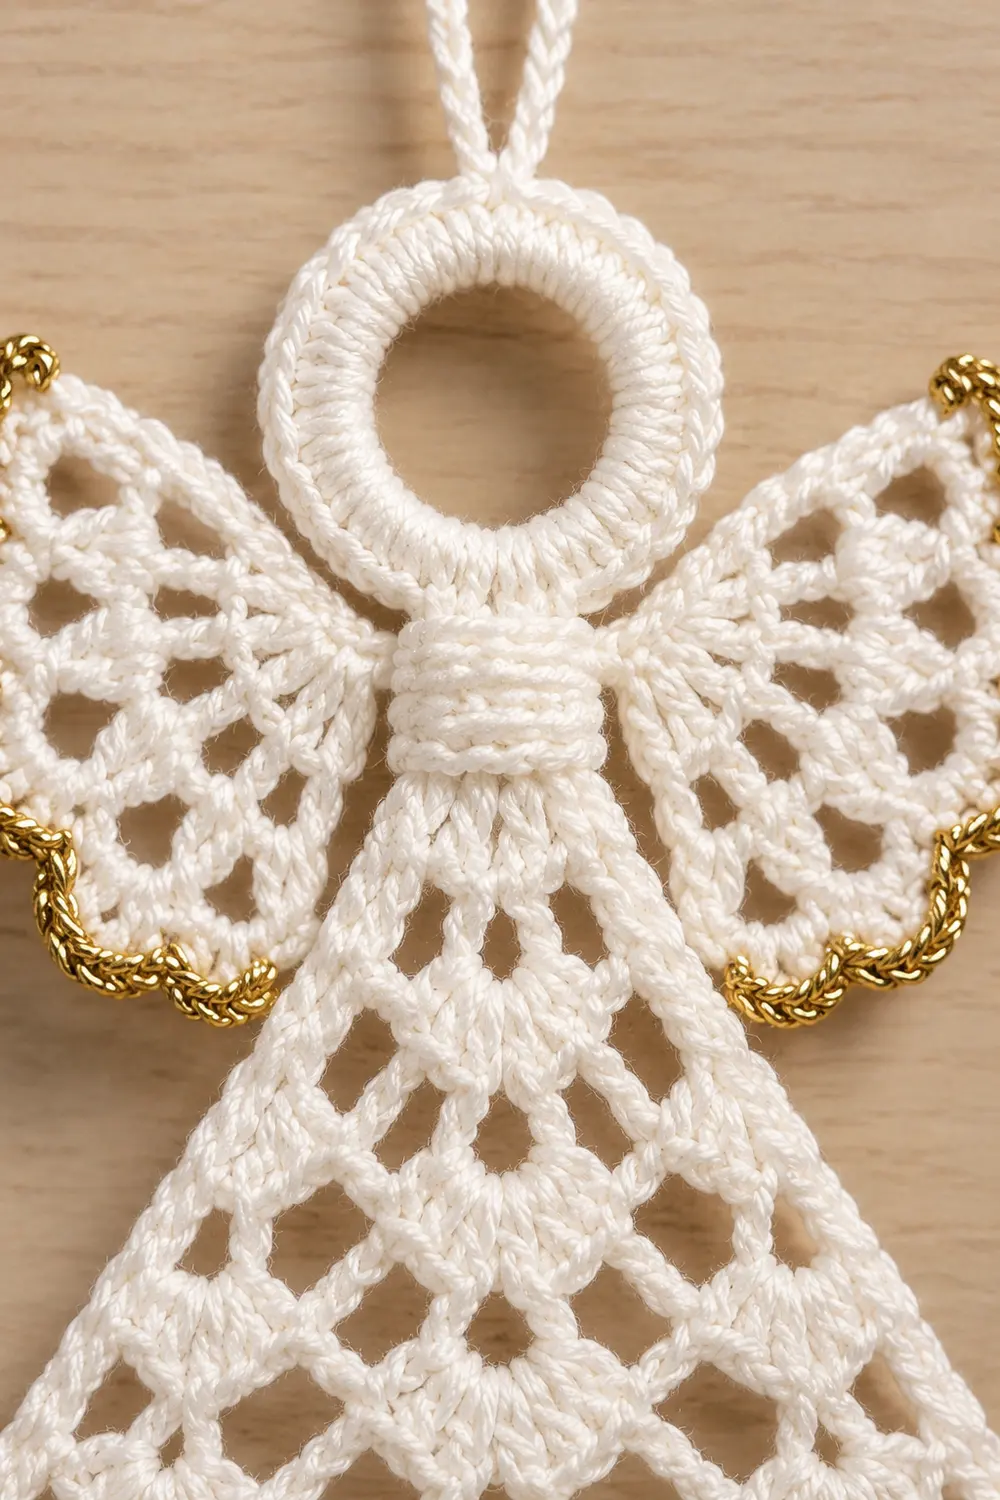
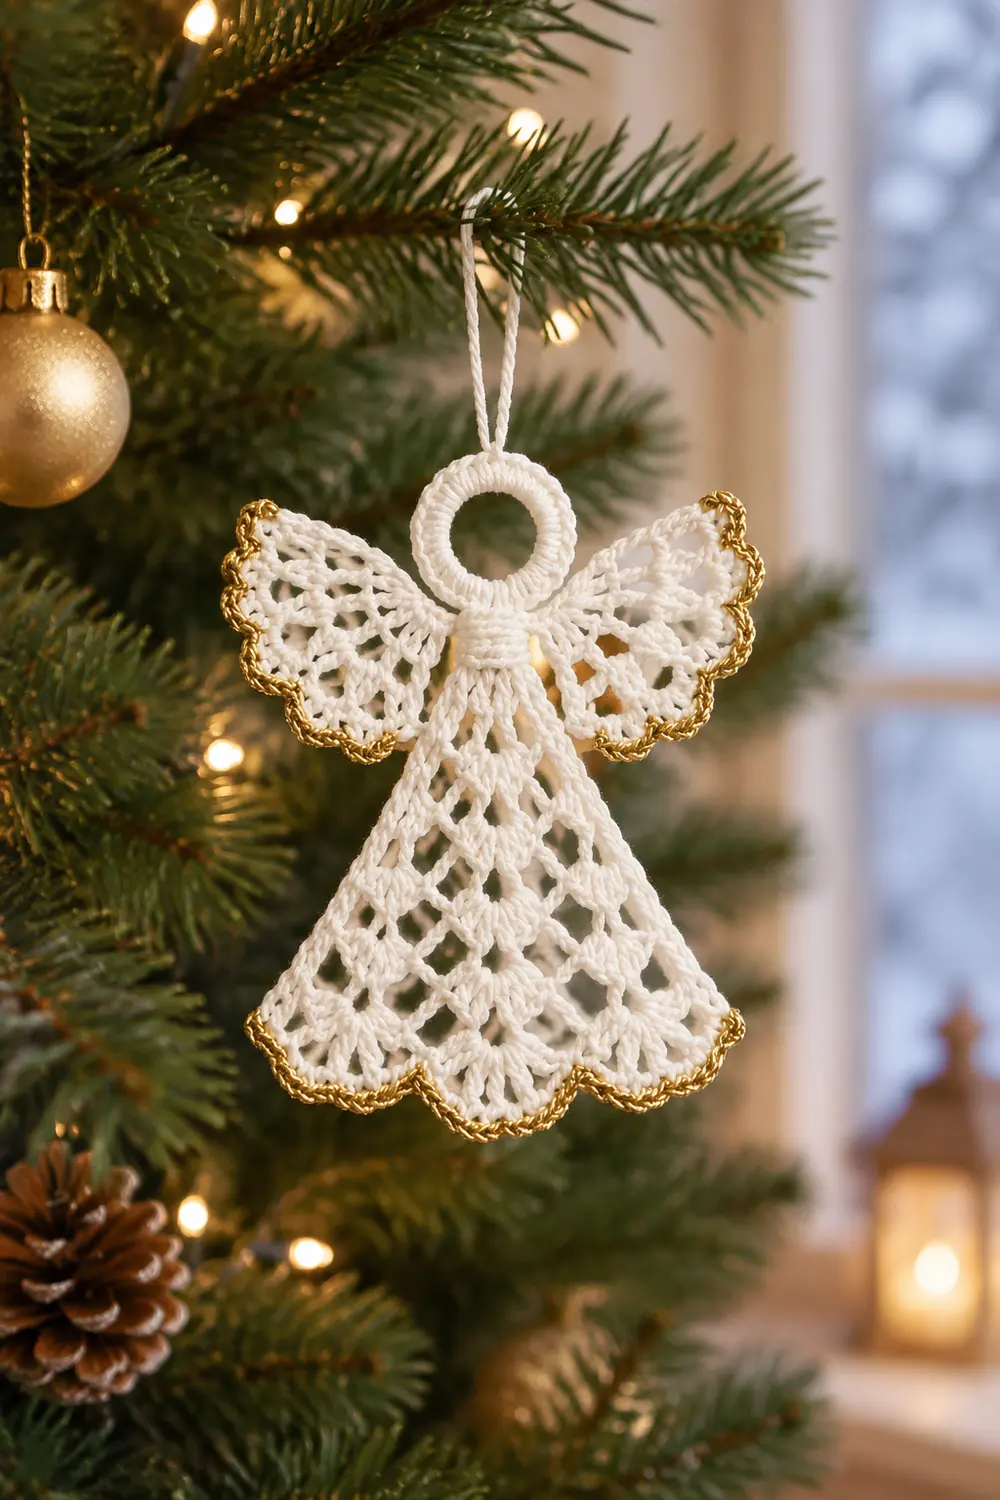
This little angel is a flat, lacy ornament worked in ivory cotton thread and finished with a gold metallic picot edge. It has a round open head with a small hanging loop, two fan-lace wings, and a triangular dress built from repeating shell fans. The result is an airy diamond lattice that catches the light on a tree branch.
The color scheme is simple: ivory for the whole body, gold for the trim. The gold runs around every free edge of the dress and wings, including the inner wing edges that sit beside the dress. The look is classic, heirloom-style thread lace.
The pattern uses US crochet terms. The finished angel measures 3.25 in (8.3 cm) tall, not counting the hanging loop, and 3.25 in (8.3 cm) across the wings.
Construction is all one piece. You crochet the head ring first. Then you work the dress downward in turned rows from the bottom of the head, and work each wing outward in turned rows from the sides of the head. A gold border goes around the dress and each wing. Finally, you starch and block the angel flat.
Finished Size and Construction
- Finished size: 3.25 in (8.3 cm) tall x 3.25 in (8.3 cm) wide, excluding the hanging loop
- Skill level: Intermediate (thread lace, working into row-ends)
- Terminology: US crochet terms
- Yarn weight: Size 10 cotton crochet thread (lace weight)
- Hook: 1.5 mm steel hook (US steel 8)
- Number of pieces: 1 (head, dress, and wings worked as one continuous piece)
- Layout: Single motif, worn flat
- Piece size: Same as the finished size
- Size before border: 3.0 in (7.6 cm) tall x 2.75 in (7.0 cm) wide
- Border depth: 0.25 in (0.6 cm), including picots
Materials
Use a mercerized cotton thread in size 10. It holds starch well, shows stitch definition clearly, and keeps the fans crisp. For the trim, choose a size 10 metallic crochet thread, or a metallic thread of similar thickness. Very fine metallic sewing threads are too thin and will make the border pucker.
Thread:
– Ivory (main color): 6 g, about 19 m
– Gold metallic (trim): 2 g, about 9 m
These quantities include a safety margin of roughly 50% over what one angel actually uses. You will have extra for a gauge swatch or a second attempt.
Tools:
– 1.5 mm steel crochet hook (US steel 8)
– Fine tapestry needle
– Small sharp scissors
– 2 removable stitch markers
– Rustproof pins and a foam blocking board
– Liquid starch or fabric stiffener
– Ruler marked in inches and cm
Abbreviations (US Terms)
- ch – chain
- sl st – slip stitch
- sc – single crochet
- dc – double crochet
- sk – skip
- sp – space
- st(s) – stitch(es)
- rep – repeat
- RS – right side
Special stitches:
– Fan: 5 dc worked into the same stitch or space.
– V-st: (dc, ch 2, dc) worked into the same stitch or space.
– Picot: ch 3, sl st in the first ch.
Gauge and Checkpoints
Gauge: 12 dc and 4 dc rows = 1 in (2.5 cm) with size 10 thread and a 1.5 mm hook.
Test one piece first. Before committing, make the head and dress Rows 1–3. Then check them against these measurements:
- Head after Round 2: 0.75 in (1.9 cm) outer diameter
- Dress after Row 3: 0.75 in (1.9 cm) tall, measured down from the head
- Dress after Row 9: 2.25 in (5.7 cm) tall, 2.5 in (6.4 cm) wide at the hem
- Each wing after Row 5: 1.25 in (3.2 cm) long, about 1.5 in (3.8 cm) across the outer fan edge
- Before border: 3.0 in (7.6 cm) tall x 2.75 in (7.0 cm) wide
- After border and blocking: 3.25 in (8.3 cm) x 3.25 in (8.3 cm)
If your pieces are too big, switch to a 1.25 mm hook, or tighten your chains so they are no longer than your dc are wide. If your pieces are too small, switch to a 1.75 mm hook. Small differences of about 0.125 in are normal and will even out in blocking.
Head
Work the head with ivory thread.
Ring: Ch 12, sl st in first ch to form a ring.
Round 1: Ch 3 (counts as dc), 23 dc in ring, sl st in top of ch-3 to join. (24 dc)
Round 2: Ch 1, sc in each dc around, sl st in first sc to join. This is a conversion round with no increases. (24 sc = 24 worked 1 per dc + 0 added)
Hanging loop: Ch 18, sl st in the same st as the join. Fasten off and weave in the end. The loop stands about 0.75 in (1.9 cm) tall.
Mark the ring. Hold the head so the hanging loop sits at the top. Call the joining sc st 1, and count clockwise around the ring.
– St 13 is bottom center. This is where the dress starts.
– St 9 and st 17 sit 4 sts to either side of bottom center. This is where the wings start.
Place markers in st 9 and st 17.
Checkpoint: the head measures 0.75 in (1.9 cm) across.
Dress
The dress is worked in turned rows, alternating fan rows and V-st rows. Each pair of rows adds one fan, which is what creates the triangle shape.
Row 1 (RS): Join ivory with a sl st in st 13. Ch 3 (counts as dc), 4 dc in the same st. Turn. (1 fan = 5 dc)
Row 2: Ch 5 (counts as dc + ch 2), dc in first dc. This makes the edge V-st. Then: ch 2, sk 1 dc, sc in center (3rd) dc of fan, ch 2, sk 1 dc, V-st in top of turning ch. Turn. (2 V-sts, 1 sc)
Row 3: Ch 3 (counts as dc), 4 dc in first V-st ch-2 sp. Then: sc in next sc, 5 dc in last V-st ch-2 sp. Skip the plain ch-2 sps; fans go only into V-st spaces. Turn. (2 fans, 1 sc; 10 dc)
Checkpoint: the dress measures 0.75 in (1.9 cm) tall.
Row 4 (V-st row pattern): Ch 5, dc in first dc. Work ch 2, sc in center dc of next fan, ch 2, V-st in next sc between fans. Repeat from * once. End with: ch 2, sc in center dc of last fan, ch 2, V-st in top of turning ch. Turn. (3 V-sts, 2 sc)
Row 5 (fan row pattern): Ch 3, 4 dc in first V-st sp. Work sc in next sc, 5 dc in next V-st sp across. Turn. (3 fans, 2 sc; 15 dc)
Rows 6–9: Keep alternating the V-st row pattern (Row 4) and the fan row pattern (Row 5). Every V-st row has 1 more V-st than the fan row below it. Every fan row has 1 fan in each V-st.
| Row | Count |
|---|---|
| Row 6 | 4 V-sts, 3 sc |
| Row 7 | 4 fans, 3 sc (20 dc) |
| Row 8 | 5 V-sts, 4 sc |
| Row 9 | 5 fans, 4 sc (25 dc) |
Fasten off after Row 9.
Checkpoint: the dress measures 2.25 in (5.7 cm) tall and 2.5 in (6.4 cm) wide at the hem.
Wings (Make 2, Worked Directly Into the Head)
Each wing uses the same fan and V-st system as the dress. The wings are attached only at the head. Their inner edges stay free, so they can carry their own gold trim.
Row 1 (RS): Join ivory with a sl st in the marked st 9. Ch 3, 4 dc in the same st. Turn. (1 fan)
Row 2: Work the same as Dress Row 2. (2 V-sts, 1 sc)
Row 3: Work the same as Dress Row 3. (2 fans, 1 sc)
Row 4: Work the same as Dress Row 4. (3 V-sts, 2 sc)
Row 5: Work the same as Dress Row 5. (3 fans, 2 sc; 15 dc)
Fasten off.
Repeat Rows 1–5 starting in st 17 for the second wing.
Checkpoint: each wing is 1.25 in (3.2 cm) long, measured from the head to the fan edge. The wingspan across both wings is about 2.75 in (7.0 cm).
Border
Work the border with gold metallic thread. It is done in three sections: the dress, then each wing. Every section starts and ends at the head.
Border gauge: 12 sc = 1 in (2.5 cm), the same as the body gauge. Each stitch count comes from the structure of the fabric:
– Row-ends: work 3 sc per row-end. Each row is 0.25 in (0.6 cm) tall, so this gives 12 sc per inch.
– Row tops: work 1 sc per stitch, plus one extra sc at the center of each fan.
Dress border
Join gold at the end of dress Row 1, right beside the head.
Right side (27 sc): Work 3 sc in each of the 9 row-ends, making a picot after every 3rd sc. (27 sc, 9 picots)
Hem (34 sc): Work these into the Row 9 stitches.
– For each fan: sc in dc 1, sc in dc 2, (sc, picot, sc) in dc 3, sc in dc 4, sc in dc 5. That is 6 sc and 1 picot per fan.
– Between fans: sc in each sc.
– Total: (5 fans x 6) + 4 sc = 34 sc, 5 picots.
The first and last fan dc act as the corners, so no extra corner stitches are added.
Left side (27 sc): Work as for the right side. (27 sc, 9 picots)
Fasten off at the head.
Dress total: 27 + 34 + 27 = 88 sc, 23 picots.
Wing border (each wing)
Join gold at the Row 1 end on the upper edge of the wing, next to the head.
- Upper edge: 3 sc in each of the 5 row-ends, with a picot after every 3rd sc. (15 sc, 5 picots)
- Outer edge: Work across the Row 5 fans as for the hem. That is (3 x 6) + 2 = 20 sc, 3 picots.
- Inner edge (the edge beside the dress): Work as for the upper edge, ending at the head. (15 sc, 5 picots)
Fasten off.
Wing total: 15 + 20 + 15 = 50 sc, 13 picots.
Why the math works
- Side edges: 27 and 15 are both divisible by 3. This means the picots land evenly, and every side ends on a complete repeat.
- Wing edges: 5 rows x 3 sc = 15 sc over 1.25 in (3.2 cm), which is exactly 12 sc/in.
- Dress sides: These run slightly looser, at about 11 sc/in. The slanted side is a little longer than its 2.25 in (5.7 cm) vertical height.
- Hems: The fan tops curve, so the edge is longer than the straight 2.5 in (6.4 cm) hem measurement. That is why 34 sc lies flat there. The center picot on each fan exaggerates the curve into a clear scallop.
Final Blocking
- Weave in all ends along the stitches of the same color. Leave the ends uncut for now.
- Soak the angel in liquid starch or stiffener. Squeeze out the excess, then blot it in a towel.
- Lay it face up on the foam board.
- Pin the head into a circle 0.75 in (1.9 cm) across, with the hanging loop straight up.
- Pin the dress to 2.25 in (5.7 cm) tall from the head. Pin the hem to 2.5 in (6.4 cm) wide, measured before the border. Pin one point at each fan’s center picot.
- Angle the wings out and slightly down. The inner edge of each wing should just touch the side of the dress without overlapping. Pin each outer fan picot.
- Check the overall size: 3.25 in (8.3 cm) x 3.25 in (8.3 cm).
- Let the angel dry completely, at least 6 hours. Then unpin it and trim the ends close to the work.
Final Quality-Control Checklist
- Head: 24 sc, round, with the hanging loop centered at the top
- Dress: 9 rows, ending with 5 fans and 4 sc
- Each wing: 5 rows, ending with 3 fans and 2 sc
- Dress border: 88 sc, 23 picots
- Each wing border: 50 sc, 13 picots
- Gold trim present on both inner wing edges
- Finished size: 3.25 in (8.3 cm) x 3.25 in (8.3 cm)
- The angel lies flat, with no cupping or ruffling
Troubleshooting
- Dress ruffles at the hem: Your chains are too long. Redo the V-st rows with tighter ch-2 sps.
- Dress cups or curls: Your fans are too tight. Go up 0.25 mm in hook size for the fan rows only.
- Gold border waves: Your metallic thread is thicker than the ivory. Use 2 sc per row-end instead of 3, and keep a picot after every 3rd sc. The counts become 18 per dress side and 10 per wing side, and the picot spacing shifts slightly.
- Wings droop: Re-starch them and pin each fan tip firmly.
- Head is oval: Re-pin it while damp. Make sure Round 1 has exactly 24 dc.
- Metallic thread splits: Work more slowly, and use a slightly rounder hook tip.
Care
Dust the angel gently, or rinse it in cool water and re-starch it flat if it softens. Store it flat in tissue paper, away from humidity, so the gold stays bright.
Final Notes
The measurement chain is simple:
– Head: 0.75 in (1.9 cm)
– Dress: 2.25 in (5.7 cm), giving 3.0 in (7.6 cm) before the border
– Border at the hem: 0.25 in (0.6 cm)
– Finished: 3.25 in (8.3 cm) tall and 3.25 in (8.3 cm) wide
If each checkpoint matches, the gold border counts will fall into place exactly. Happy crocheting!