

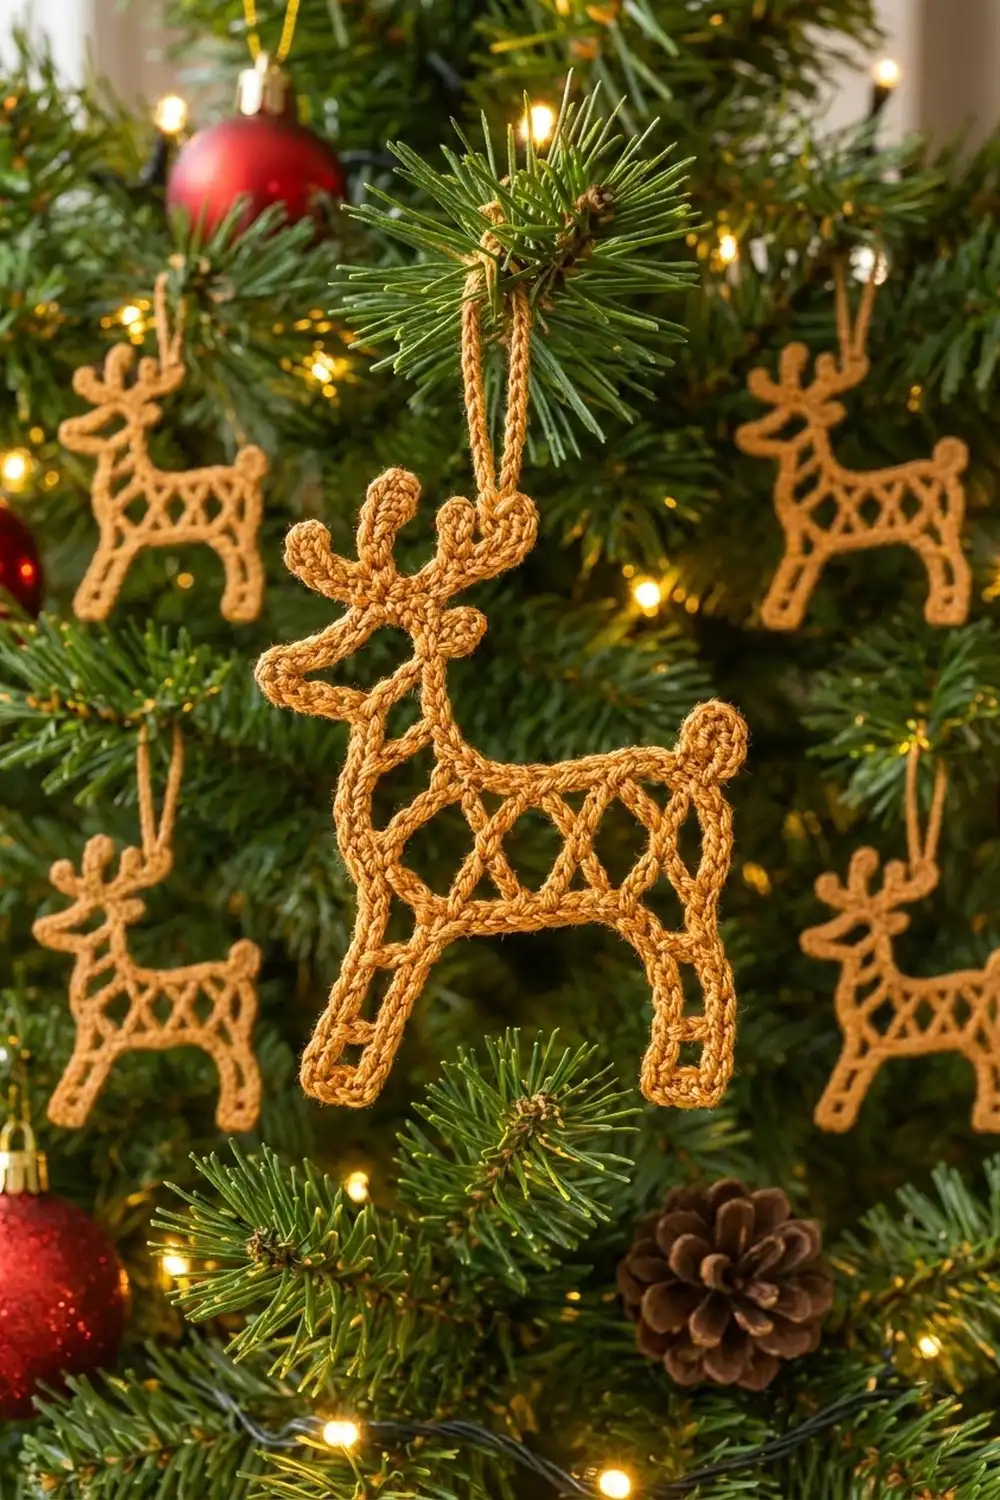
The Golden Lattice Reindeer is a flat, openwork Christmas ornament in one color of golden ochre cotton. It’s a classic standing reindeer facing left, with branched antlers, a slim snout, a straight back, a round tail and four ladder-style legs. Crossed chains fill the body and form three neat X shapes.
The look is airy and graphic, a bit like a gingerbread cookie outline or wire filigree. Using one warm color lets the lines carry the design. The reindeer works as a flat gift tag, and on a tree the lights shine through the open shapes.
This pattern uses US crochet terms. The finished ornament is about 4 in (10.2 cm) wide and 5 in (12.7 cm) tall from hoof to antler tip. The hanging loop adds 1.5 in (3.8 cm).
You start with one long closed chain in the shape of the reindeer. Next you add leg rungs, the body lattice and a neck bar inside it. A round of single crochet then turns the chain outline into a firm cord. The antlers, tail and hanging loop come last and are worked straight into that cord.
Finished Size and Construction
- Finished size: about 4 in (10.2 cm) wide x 5 in (12.7 cm) tall, not counting the loop
- Height with hanging loop: about 6.5 in (16.5 cm)
- Skill level: Intermediate (simple stitches, but you need to count carefully)
- Terminology: US crochet terms
- Yarn weight: Sport (#2) cotton
- Hook: 3.25 mm (US D/3)
- Number of pieces: 1 ornament, worked in one piece
- Layout: single motif, no joining
- Piece size: the body and head outline is 4 in (10.2 cm) wide x 4 in (10.2 cm) tall; the antlers add 1 in (2.5 cm) of height
- Size before border: the chain outline is about 3.5 in (8.9 cm) x 3.5 in (8.9 cm)
- Border depth: one round of sc, about 0.25 in (0.6 cm) wide
Materials
Choose a smooth, tightly plied mercerized cotton. It holds a crisp outline, shows every chain clearly and blocks flat. Acrylic also works, but it tends to curl and the lattice won’t stay as straight.
- Golden ochre (mustard-caramel) sport cotton: 6 g, about 19 m (21 yd)
These amounts include extra yarn for a gauge strip and longer tails for weaving in. One 50 g ball is enough for many ornaments.
Tools
- 3.25 mm (US D/3) crochet hook
- 6–8 removable stitch markers
- Tapestry needle
- Scissors
- Blocking mat and rustproof pins
- Spray bottle of water, or fabric stiffener (optional)
Abbreviations (US Terms)
- ch: chain
- sl st: slip stitch
- sc: single crochet
- st(s): stitch(es)
- rnd: round
- rep: repeat
- ch-3 picot: ch 3, sl st in 3rd ch from hook
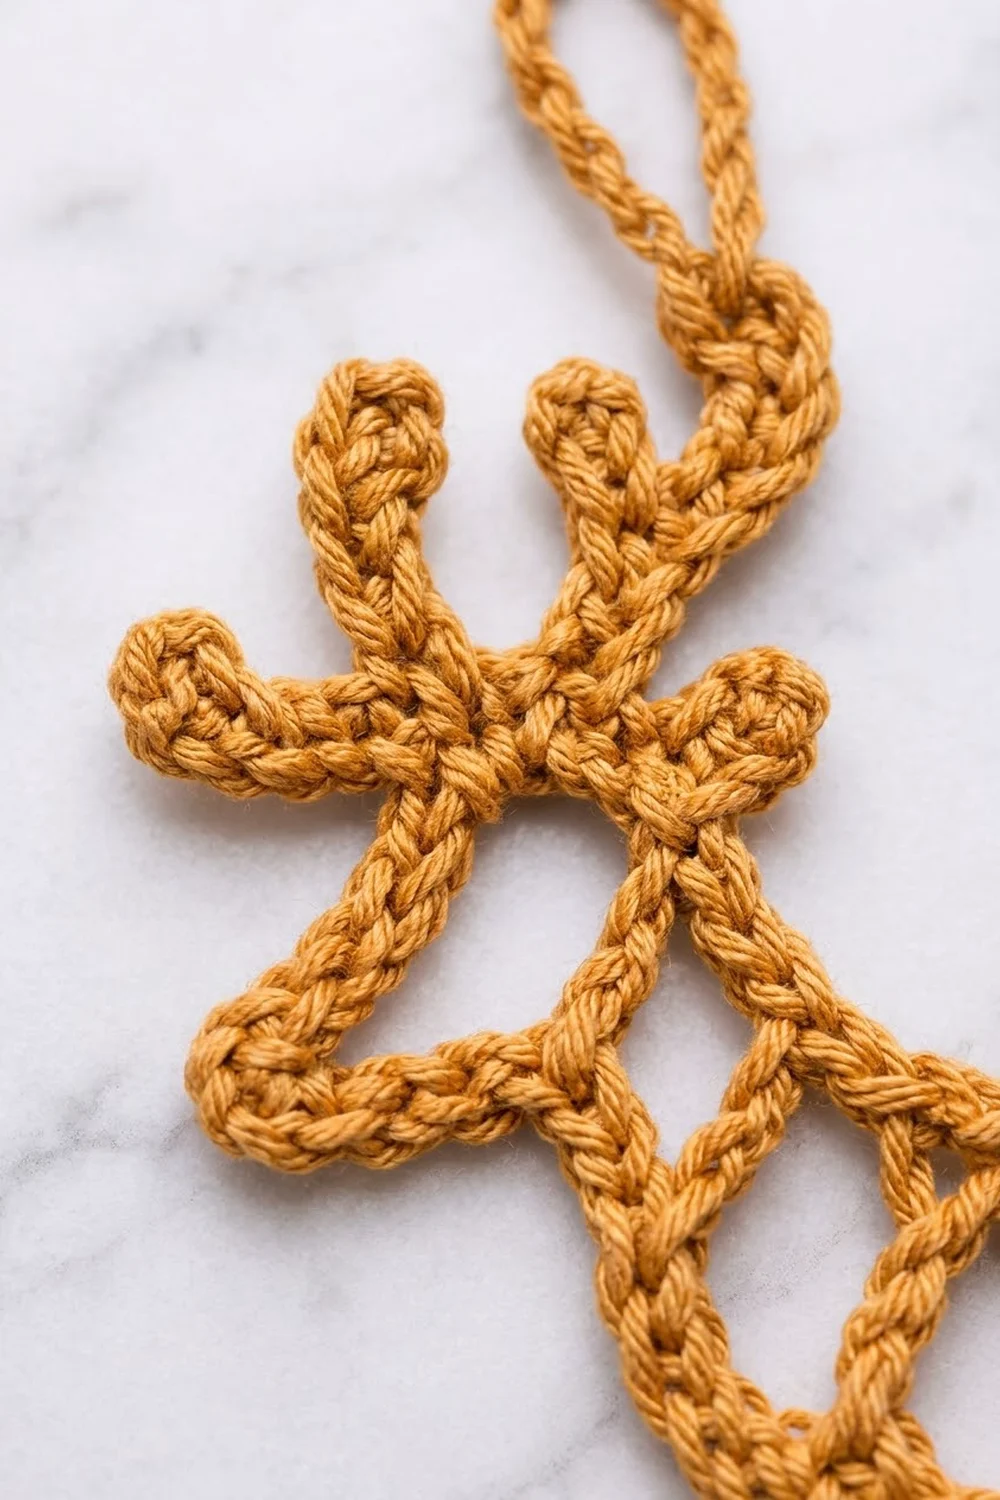
Special technique: working into the back bump. Turn the chain over and put your hook under the small bump on the back of each chain. The neat “V” line of the chain stays on the front edge, which gives the outline its braided look.
Gauge and Checkpoints
Gauge: 6 ch = 1 in (2.5 cm). 6 sc worked into those chains also = 1 in (2.5 cm).
Make a test strip first. Ch 24, then work 1 sc into the back bump of each ch. The strip should be 4 in (10.2 cm) long and about 0.25 in (0.6 cm) wide. Since the ornament is a single piece, this strip is your test piece.
Checkpoints:
- After the foundation chain: 102 ch, about 17 in (43.2 cm) long when laid straight.
- After the leg rungs: each leg opening is about 0.5 in (1.3 cm) wide.
- After the border round: the back line is about 2.5 in (6.4 cm) long, and the inner edge of each leg is about 1.5 in (3.8 cm) tall.
- After the antlers: each antler stem is about 1.5 in (3.8 cm) long.
If your strip is too long, go down to a 3.0 mm hook. If it’s too short, go up to a 3.5 mm (US E/4) hook. If your chains are too loose the lattice will sag, and if they’re too tight the body will pucker.
Pattern
Part 1: Foundation Outline (Rnd 1)
The outline is one closed ring of 102 ch, divided into 12 segments. All chain numbers below count from the first ch you make. As you go, put a marker in the first ch of each segment.
Ch 102. Without twisting the chain, sl st in the 1st ch to close the ring. (102 ch)
The segments go clockwise around the reindeer, starting at the front hoof:
| Segment | Chains | Count | Part of reindeer |
|---|---|---|---|
| S1 | 1–15 | 15 | front leg outer edge, hoof to chest |
| S2 | 16–21 | 6 | front of neck |
| S3 | 22–27 | 6 | underside of head to nose |
| S4 | 28–33 | 6 | top of snout to forehead |
| S5 | 34–39 | 6 | back of head, down to the back |
| S6 | 40–54 | 15 | back line, neck to rump |
| S7 | 55–69 | 15 | rump down to back hoof |
| S8 | 70–72 | 3 | back hoof |
| S9 | 73–81 | 9 | back leg inner edge, hoof up |
| S10 | 82–90 | 9 | belly, back to front |
| S11 | 91–99 | 9 | front leg inner edge, belly down |
| S12 | 100–102 | 3 | front hoof |
Check: 15 + 6 + 6 + 6 + 6 + 15 + 15 + 3 + 9 + 9 + 9 + 3 = 102.
Lay the ring flat and shape it into the reindeer, pinning each segment junction in place. Fasten off and leave a 6 in (15.2 cm) tail.
Part 2: Leg Rungs
Work each interior bar with a new strand of yarn. To join, put your hook into the back bump of the given ch, pull up a loop and ch 1 (this ch doesn’t count).
Front leg top bar: Join at ch 9. Ch 3, sl st in ch 91. Fasten off. (3 ch)
Front leg middle rung: Join at ch 5. Ch 3, sl st in ch 95. Fasten off. (3 ch)
Back leg top bar: Join at ch 61. Ch 3, sl st in ch 81. Fasten off. (3 ch)
Back leg middle rung: Join at ch 65. Ch 3, sl st in ch 77. Fasten off. (3 ch)
Each leg is now a closed ladder with two open windows. Put a marker in the center (2nd) ch of each top bar.
Part 3: Body Lattice
The lattice connects four top points and four bottom points:
- Top points: T1 = ch 41, T2 = ch 45, T3 = ch 49, T4 = ch 53
- Bottom points: B1 = center ch of the front leg top bar, B2 = ch 88, B3 = ch 84, B4 = center ch of the back leg top bar
B2 is ch 88 and B3 is ch 84 because the belly chains run from back to front.
Zigzag A: Join at T1. Ch 6, sl st in B2, ch 6, sl st in T3, ch 6, sl st in B4. Fasten off. (18 ch, 3 diagonals)
Zigzag B: Join at B1. Ch 3, sl st around the middle of the Zigzag A diagonal in front of you (between its 3rd and 4th ch), ch 3; sl st in T2. Rep from * to * once, then sl st in B3. Rep from * to * once more, then sl st in T4. Fasten off. (18 ch, 3 diagonals, 3 crossings)
Each crossing makes one X, so you now have three X shapes across the body. Small triangles form along the top and bottom edges.
Part 4: Neck Bar
Join at ch 21. Ch 4, sl st in ch 36. Fasten off. (4 ch)
This bar closes the head into its own open shape and stops the neck from stretching.
Border: Outline Cord Round
On this ornament the border is the round that turns the chain outline into a solid cord.
Border gauge: 6 sc = 1 in (2.5 cm) on straight segments.
Rnd 2: Join yarn in the back bump of ch 1 and ch 1 (doesn’t count). Work 1 sc in the back bump of each ch around, working right over any sl st joins. At the 6 outward corners, work 3 sc in the back bump of the corner ch: ch 27 (nose tip), ch 54 (rump), ch 69 and ch 72 (back hoof), and ch 99 and ch 102 (front hoof). Sl st in the first sc. (114 sc)
Stitch count for each segment:
| Segment | Chains | sc in Rnd 2 |
|---|---|---|
| S1 | 15 | 15 |
| S2 | 6 | 6 |
| S3 | 6 | 5 + 3 = 8 |
| S4 | 6 | 6 |
| S5 | 6 | 6 |
| S6 | 15 | 14 + 3 = 17 |
| S7 | 15 | 14 + 3 = 17 |
| S8 | 3 | 2 + 3 = 5 |
| S9 | 9 | 9 |
| S10 | 9 | 9 |
| S11 | 9 | 8 + 3 = 11 |
| S12 | 3 | 2 + 3 = 5 |
Total: 102 sc (1 per chain) + 12 extra corner sc (6 corners x 2) = 114 sc. Don’t fasten off.
Why the math works: On straight segments, 1 sc per chain makes the cord exactly as long as the chain, so the outline won’t ruffle or pull. Each outward corner needs 2 extra stitches to turn smoothly, so the count goes up by exactly 12. Inward corners (throat, back of neck, tops of legs) get no extra stitches. The cord pulls in a little there on its own, which keeps those angles crisp.
Tail
Sl st along the sc until you reach the center sc of the 3-sc group at the rump (ch 54). Ch 6, then sl st in the 6th ch from hook to form a ring. Work 9 sc into the ring and sl st in the 1st sc. Sl st into the same rump sc. Fasten off. (9 sc)
The ring makes a small, round tail on top of the rump, about 0.5 in (1.3 cm) across.
Antlers (make 2, worked directly onto the head)
Front antler: Join with a sl st in the sc worked into ch 31.
Ch 9. Work a ch-3 picot for the top tip.
Now work back down the stem into the back bump of each ch: sc in next 3 ch. Tine: ch 4, ch-3 picot, sc in each of the 4 tine ch. Sc in next 3 stem ch. Rep from * to * once. Sc in last 3 stem ch. Sl st in the joining sc. Fasten off. (17 sc: 9 on the stem + 4 on each tine; 3 picots)
Back antler: Join with a sl st in the sc worked into ch 35. Work the same as the front antler. (17 sc, 3 picots)
Each antler ends in three rounded picot tips, and the two antlers fan slightly apart.
Hanging Loop
Join in the top tip picot of the back antler. Ch 18, sl st in the same picot. Ch 1, work 24 sc over the loop and sl st in the 1st sc. Fasten off. (24 sc)
The loop stands about 1.5 in (3.8 cm) tall.
Weave all tails into the back of the cord, splitting the plies so they hold.
Final Blocking
- Lightly mist the ornament, or dip it in water and squeeze out the extra.
- Lay it right side up on a blocking mat.
- Pin the four hooves first with their bottom edges level. The hooves should be 2.5 in (6.4 cm) apart, measured from outer edge to outer edge.
- Pin the back line straight and the rump corner square, then shape the round tail.
- Pin the nose tip and head. Fan out the antlers so the tips sit about 1 in (2.5 cm) above the head.
- Gently straighten each lattice diagonal so the three X shapes match.
- Check the overall size: 4 in (10.2 cm) wide x 5 in (12.7 cm) tall.
- For a stiffer ornament, brush on fabric stiffener now.
- Let it dry completely before you take out the pins.
Final Quality-Control Checklist
- Rnd 1 has exactly 102 ch.
- Each leg has a top bar and a middle rung of 3 ch.
- Zigzags A and B each have 18 ch, with 3 neat crossings.
- The neck bar is 4 ch and lies flat.
- Rnd 2 has exactly 114 sc.
- The tail ring has 9 sc and stays round.
- Each antler has 17 sc and 3 picot tips.
- The hanging loop has 24 sc and is firmly attached.
- The ornament lies flat, with no cupping or ruffling.
- The finished size is about 4 in (10.2 cm) x 5 in (12.7 cm), plus the loop.
Troubleshooting
The outline ruffles. Your sc are looser than your chains. Go down one hook size for Rnd 2 only.
The outline cups or curls. Either Rnd 2 is too tight or an outward corner is missing its 3 sc. Recount each segment against the table.
The lattice sags. Your chains are too loose. Redo the zigzags with a smaller hook or tighter tension.
The body puckers. The lattice chains are too short for your gauge. Add 1 ch to each diagonal (7 ch) and keep the crossings centered.
The antlers flop. Block with stiffener, or work the sc down each stem more tightly.
Care
Hand wash in cool water with mild soap. Press the water out in a towel, then reshape and dry flat. If you used stiffener, spot clean only.
Final Notes
The whole reindeer is built on one gauge: 6 chains = 1 in (2.5 cm). That makes the 102-ch outline about 17 in (43.2 cm) of line. The 3-ch rungs give 0.5 in (1.3 cm) leg openings, and the 6-ch diagonals fit the depth of the body. The 114-sc cord round adds 0.25 in (0.6 cm) on every side, for a finished width of 4 in (10.2 cm). The antlers bring the height to 5 in (12.7 cm), and the loop adds another 1.5 in (3.8 cm).
Check your gauge strip, follow the chain numbers and recount at each checkpoint, and every reindeer you make will match the last one.
Happy crocheting!