

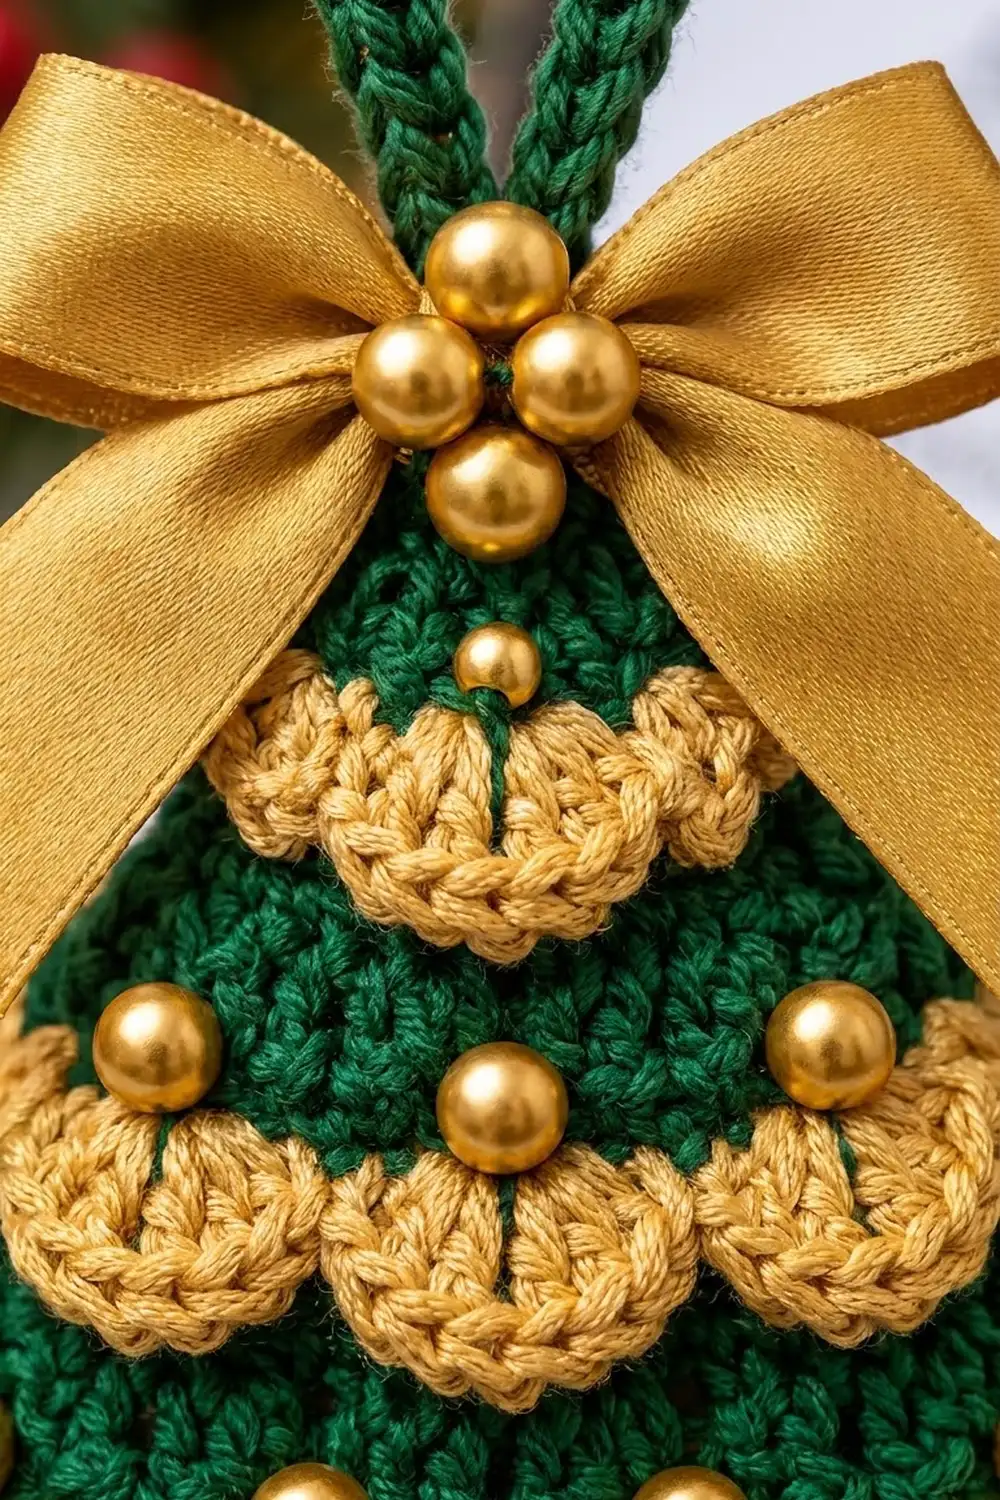
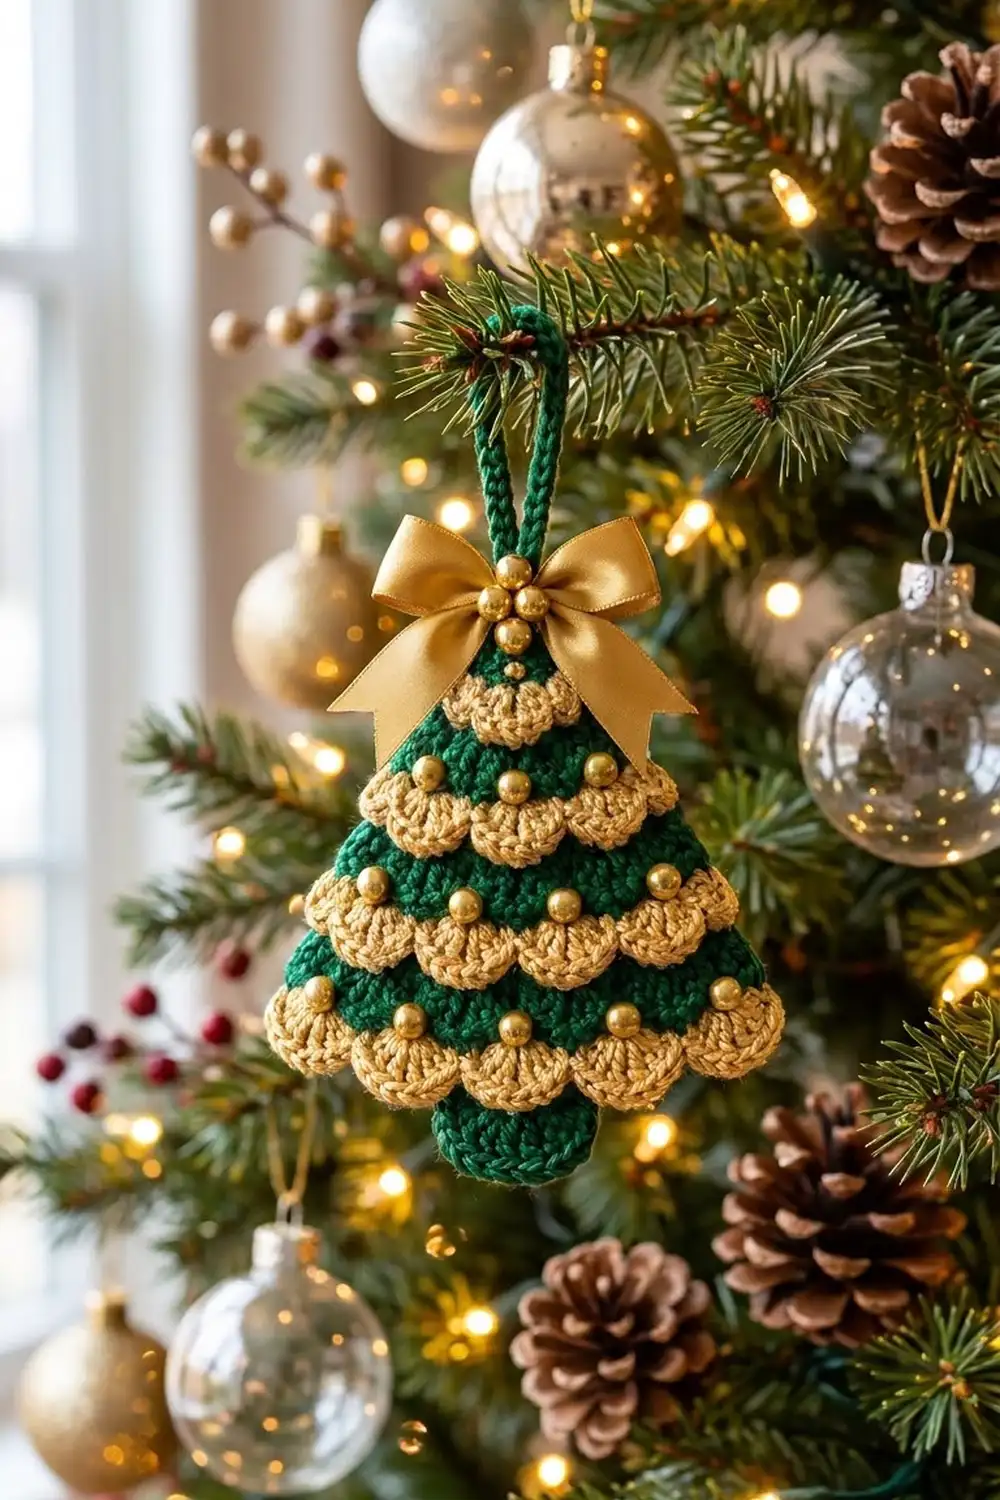
This little tree ornament combines deep forest green with soft metallic gold. Five tiers of fan-shaped shells cross the front. Each tier is wider than the one above it, and the widest tier forms a scalloped lower edge over a rounded trunk. Gold beads and a satin bow finish it in a classic holiday style.
The ornament is one flat piece. You work the green body in single crochet rows from the top point down. On five rows you work into back loops only, which leaves a line of free front loops. Later you work the gold shell tiers into those loops, so they sit on the surface and hang down over the green rows below.
The pattern uses US crochet terms. The finished ornament measures about 4.1 in (10.4 cm) wide and 4.6 in (11.7 cm) tall, not counting the hanging loop. The loop adds about 1.5 in (3.8 cm).
Construction overview: crochet the triangular body, then the trunk. Next, add a two-round green edging, the five gold tiers and the hanging loop. Finally, block the ornament and sew on the beads and bow.
Finished Size and Construction
- Finished size: 4.1 in (10.4 cm) wide x 4.6 in (11.7 cm) tall, plus a 1.5 in (3.8 cm) loop
- Skill level: Easy–intermediate
- Terminology: US crochet terms
- Yarn weight: DK (light #3) cotton or cotton blend
- Hook: 3.25 mm (US D/3)
- Number of pieces: 1 (single ornament, no joining)
- Layout: One triangle with a center trunk and 5 surface shell tiers
- Piece size before border: 3.8 in (9.7 cm) wide x 4.3 in (10.9 cm) tall
- Border depth: about 0.15 in (0.4 cm) on each edge, adding 0.3 in (0.8 cm) to the width and height
Materials
Yarn advice: Use a smooth, firm cotton or cotton blend so the shells keep their crisp fan shape. For the gold, choose a soft gold cotton or a cotton with a subtle metallic thread. Avoid very fuzzy or stretchy yarn, because the tiers will sag.
- Forest green (Color A): 10 g, about 24 m (26 yd)
- Gold (Color B): 5 g, about 12 m (13 yd)
These amounts include a safety margin of about 25%.
Tools and notions:
- 3.25 mm (US D/3) crochet hook
- Tapestry needle
- Thin beading or sewing needle and gold or green sewing thread
- 27 round gold beads, 6 mm (0.2 in): 24 for the tree and 3 for the bow. Buy 30 to allow for spares.
- 12 in (30.5 cm) of gold satin ribbon, 5/8 in (1.6 cm) wide
- Stitch markers
- Blocking mat and pins
- Ruler or tape measure
Abbreviations (US Terms)
- ch: chain
- sc: single crochet
- dc: double crochet
- sl st: slip stitch
- sc2tog: single crochet 2 together
- BLO: back loop only
- FL: front loop
- st(s): stitch(es)
- sk: skip
- RS / WS: right side / wrong side
Special stitch – Shell: 5 dc worked into the same stitch or loop.
Note: The ch 1 at the start of each row is a turning chain and does not count as a stitch.
Gauge and Checkpoints
Gauge: 22 sc x 24 rows = 4 in (10.2 cm) square in Color A. That works out to 5.5 sc and 6 rows per inch.
Before you start, crochet a swatch of 22 sc for 24 rows and measure it. The ornament is small, but its shape depends on gauge. Tight, dense stitches also make the shell tiers lie neatly.
Measurement checkpoints (body, measured flat):
- After Row 8 (9 sts): 1.6 in (4.1 cm) wide, 1.3 in (3.3 cm) tall
- After Row 12 (13 sts): 2.4 in (6.1 cm) wide, 2.0 in (5.1 cm) tall
- After Row 16 (17 sts): 3.1 in (7.9 cm) wide, 2.7 in (6.9 cm) tall
- After Row 21 (21 sts): 3.8 in (9.7 cm) wide, 3.5 in (8.9 cm) tall
- Trunk: 1.3 in (3.3 cm) wide, 0.8 in (2.0 cm) tall
If your piece is too big: If Row 21 measures more than 4.0 in (10.2 cm) wide, go down to a 3.0 mm hook and start again.
If your piece is too small: If Row 21 measures less than 3.6 in (9.1 cm) wide, go up to a 3.5 mm hook.
Keep the stitch counts exactly as written. The shell tiers only fit if those counts are correct.
Tree Body (Color A)
The body is worked from the top point down. Odd rows are RS rows and even rows are WS rows.
Increase rows: Every odd row from Row 3 to Row 19 is an increase row. Work 2 sc in the first st, sc in each st to the last st, then 2 sc in the last st. Each increase row has 2 more sts than the row before it.
Tier-base rows: Rows 5, 9, 13, 17 and 21 are worked in BLO. This leaves the front loops of Rows 4, 8, 12, 16 and 20 free on the RS. The gold tiers are worked into those free loops later.
Row 1 (RS): Ch 2, 3 sc in the 2nd ch from the hook, turn. (3 sts) Place a marker on this side to mark it as the RS.
Row 2 (WS): Ch 1, sc in each st across, turn. (3)
Row 3: Ch 1, 2 sc in the first st, sc in the next st, 2 sc in the last st, turn. (5)
Row 4: Ch 1, sc across, turn. (5)
Row 5 (tier base): Ch 1. Working in BLO only, 2 sc in the first st, sc in the next 3 sts, 2 sc in the last st, turn. (7)
Row 6: Ch 1, sc across, turn. (7)
Row 7: Increase row. (9)
Row 8: Ch 1, sc across, turn. (9)
Row 9 (tier base): Ch 1. Working in BLO, 2 sc in the first st, sc in the next 7 sts, 2 sc in the last st, turn. (11)
Row 10: Sc across. (11)
Row 11: Increase row. (13)
Row 12: Sc across. (13)
Checkpoint: the body should now be 2.4 in (6.1 cm) wide and 2.0 in (5.1 cm) tall.
Row 13 (tier base): Ch 1. Working in BLO, 2 sc in the first st, sc in the next 11 sts, 2 sc in the last st, turn. (15)
Row 14: Sc across. (15)
Row 15: Increase row. (17)
Row 16: Sc across. (17)
Row 17 (tier base): Ch 1. Working in BLO, 2 sc in the first st, sc in the next 15 sts, 2 sc in the last st, turn. (19)
Row 18: Sc across. (19)
Row 19: Increase row. (21)
Row 20: Sc across. (21)
Row 21 (tier base, no increase): Ch 1. Working in BLO, sc in each st across. (21) Fasten off.
Checkpoint: the body should be 3.8 in (9.7 cm) wide and 3.5 in (8.9 cm) tall. The free front loops of Rows 4, 8, 12, 16 and 20 should show as five horizontal lines on the RS. They should be spaced 4 rows, or 0.7 in (1.8 cm), apart.
Trunk (Color A)
The trunk is worked into the center 7 stitches of Row 21. Row 21 has 21 stitches, which divide into three groups of 7: 7 on one side, 7 for the trunk and 7 on the other side.
Trunk Row 1 (WS): With the WS facing, skip the first 7 sts of Row 21. Join Color A in the 8th st through both loops. Ch 1, sc in the same st and in the next 6 sts, turn. (7) Leave the last 7 sts unworked.
Trunk Rows 2–4: Ch 1, sc across, turn. (7)
Trunk Row 5 (RS): Ch 1, sc2tog, sc in the next 3 sts, sc2tog. (5) This rounds off the bottom corners. Fasten off.
Checkpoint: the trunk should be 1.3 in (3.3 cm) wide and 0.8 in (2.0 cm) tall. The full piece before the border should be 3.8 in (9.7 cm) wide and 4.3 in (10.9 cm) tall.
Border (Color A)
Border gauge: Work 1 sc in each row end and 1 sc in each stitch, with 3 sc at each outer corner.
The sides of the tree slope outward by 1 stitch every 2 rows. That makes each pair of rows about 0.38 in (1.0 cm) along the slope. At 5.5 sc per inch, that length needs 2.1 sc, so 1 sc per row end (2 sc per pair of rows) keeps the edge flat.
Round 1: With the RS facing, join Color A around the beginning ch at the top point and ch 1. Then work around the whole shape:
- Top point: 3 sc around the beginning ch (3)
- First long side: 1 sc in each row end of Rows 1–21 (21)
- Bottom edge, outer 7 sts: 3 sc in the first (corner) st, then sc in the next 6 sts (9)
- First trunk side: 1 sc in each row end of Trunk Rows 1–5 (5)
- Trunk bottom, 5 sts: 3 sc in the first st, sc in the next 3 sts, 3 sc in the last st (9)
- Second trunk side: 1 sc in each trunk row end (5)
- Bottom edge, other 7 sts: sc in the next 6 sts, then 3 sc in the last (corner) st (9)
- Second long side: 1 sc in each row end of Rows 21–1 (21)
Join with a sl st to the first sc.
Total for Round 1: 3 + 21 + 9 + 5 + 9 + 5 + 9 + 21 = 82 sc
Do not add extra stitches at the two inside corners where the trunk meets the tree. Leaving them out keeps those corners sharp.
Round 2: Ch 1, sl st loosely in each sc around. (82 sl st) Join and fasten off.
Why the math works: Each sloped side has 21 rows, so it gets 21 stitches. The three bottom sections each have 7 stitches; the outer ones gain 2 extra stitches at their outer corner, so each counts 9. The trunk bottom has 5 stitches; its 2 corner stitches each get 3 sc, making 9 in total. Each corner is counted only once.
Checkpoint: The ornament should now measure 4.1 in (10.4 cm) wide and 4.6 in (11.7 cm) tall.
Gold Shell Tiers (Color B)
Each tier is worked into a row of free front loops, always with the RS facing. Each row of free loops has a multiple of 4 plus 1 loops: 5, 9, 13, 17 and 21.
Tier pattern: Join Color B with a sc in the first free loop. Then repeat [sk 1 loop, Shell in the next loop, sk 1 loop, sc in the next loop] across. Each tier has (number of shells) + 1 sc and a total of 6 x (number of shells) + 1 stitches. Fasten off at the end of each tier.
- Tier 1 (Row 4 loops, 5 loops): 1 shell. (2 sc + 5 dc = 7 sts)
- Tier 2 (Row 8 loops, 9 loops): 2 shells. (3 sc + 10 dc = 13 sts)
- Tier 3 (Row 12 loops, 13 loops): 3 shells. (4 sc + 15 dc = 19 sts)
- Tier 4 (Row 16 loops, 17 loops): 4 shells. (5 sc + 20 dc = 25 sts)
- Tier 5 (Row 20 loops, 21 loops): 5 shells. (6 sc + 25 dc = 31 sts)
After each tier, press the shells downward with your fingers so they cover the green rows below. Each shell is about 0.4 in (1.0 cm) deep, so it covers about 2.5 of the 4 green rows between tiers. A clear green band should still show.
Tier 5 hangs past the bottom edge by about 0.2 in (0.5 cm). It covers the top of the trunk and forms the scalloped lower edge of the tree.
Hanging Loop (Color A)
Ch 30. Sl st in the 2nd ch from the hook and in each ch across. (29 sl st) This makes a firm, corded strand.
Fold the strand in half. Sew both ends to the back of the top point, so the loop stands about 1.5 in (3.8 cm) above the tree.
Final Blocking
- Weave in all ends on the WS. Run each end along stitches of its own color.
- Pin the ornament face up on a blocking mat at 4.1 in (10.4 cm) x 4.6 in (11.7 cm). Pin the top point, the two bottom corners and the trunk.
- Arrange each tier so its shells fan evenly and point downward.
- Hold a steam iron 1 in (2.5 cm) above the piece and steam it. Do not press the iron on the shells.
- Let the ornament dry completely before you unpin it.
- Sew the beads:
- Put one bead on each sc between two shells: 0 + 1 + 2 + 3 + 4 = 10 beads.
- Put one bead in the green band directly above the center of each shell in Tiers 2–5: 2 + 3 + 4 + 5 = 14 beads.
- Tie the ribbon into a bow about 2.5 in (6.4 cm) wide. Sew it to the front at the base of the loop, and sew 3 beads in a cluster on the knot.
Final Quality-Control Checklist
- [ ] Row 21 has 21 sts, and the trunk ends with 5 sts.
- [ ] Border Round 1 has 82 sc, with 3 sc at each of the 5 outer corners.
- [ ] Tiers have 1, 2, 3, 4 and 5 shells, from top to bottom.
- [ ] Every tier starts and ends with a sc at the side edge.
- [ ] Finished size is 4.1 in (10.4 cm) x 4.6 in (11.7 cm).
- [ ] 24 tree beads are sewn securely, with no thread showing on the RS.
- [ ] The bow is centered and the loop stands up straight.
Troubleshooting
The sides ripple. You are working the border too loosely or adding stitches. Work exactly 1 sc per row end.
The sides pull inward. Your border tension is too tight. Work Round 2 more loosely, or use a hook one size larger for the border only.
A tier doesn’t fit. Count the free loops in that row. Each row must have 5, 9, 13, 17 or 21 loops. If a count is off, an increase was missed in the body.
The shells stand up instead of lying flat. Steam them again and pin each shell down until it is dry.
The free loops are hard to find. Hold the piece with the top point facing up, RS toward you. The free loops lie as a raised line just above each BLO row.
The trunk sits off-center. Count again: skip exactly 7 sts before you join for the trunk.
Care
Hand wash gently in cool water and lay flat to dry, re-shaping the tiers while the ornament is damp. Store it flat so the shells and bow keep their shape.
Final Notes
Here is the measurement chain from start to finish:
- Gauge: 22 sc x 24 rows = 4 in (10.2 cm)
- Body: 21 sts and 21 rows = 3.8 in (9.7 cm) x 3.5 in (8.9 cm)
- Trunk: adds 0.8 in (2.0 cm), for 4.3 in (10.9 cm) total height before the border
- Border: 82 stitches, bringing the ornament to 4.1 in (10.4 cm) x 4.6 in (11.7 cm)
- Tiers: five tiers of shells fitted to 5, 9, 13, 17 and 21 free loops
If your gauge and counts match at each checkpoint, the tiers will fit and the tree will keep its shape. Make one for your own tree or several to give as gifts.
Happy crocheting!