

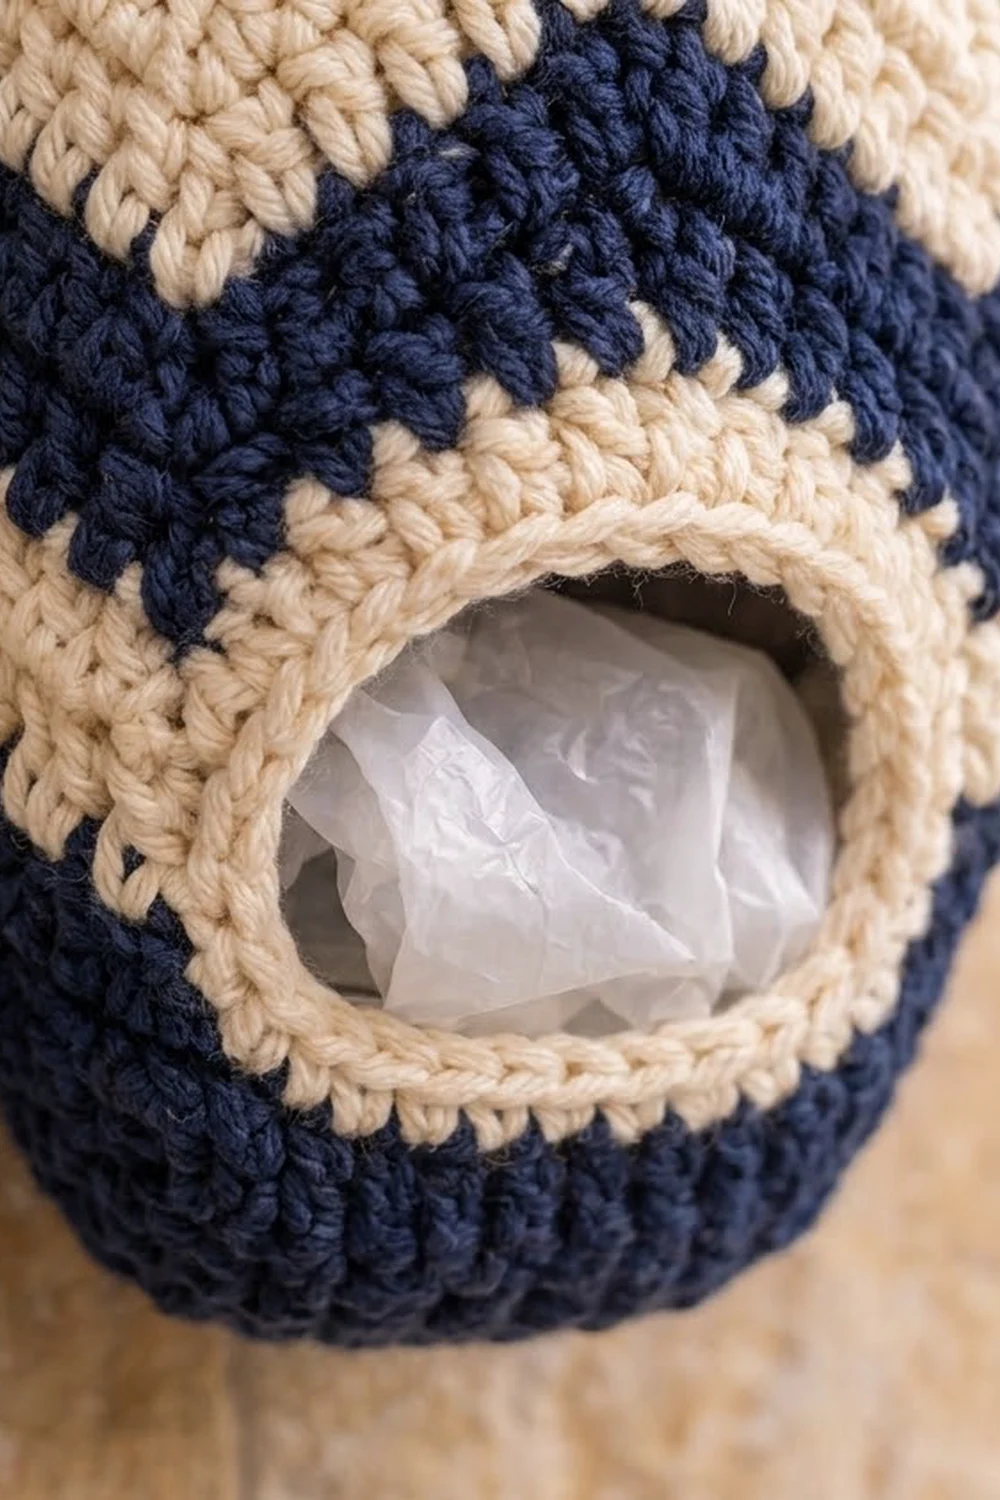
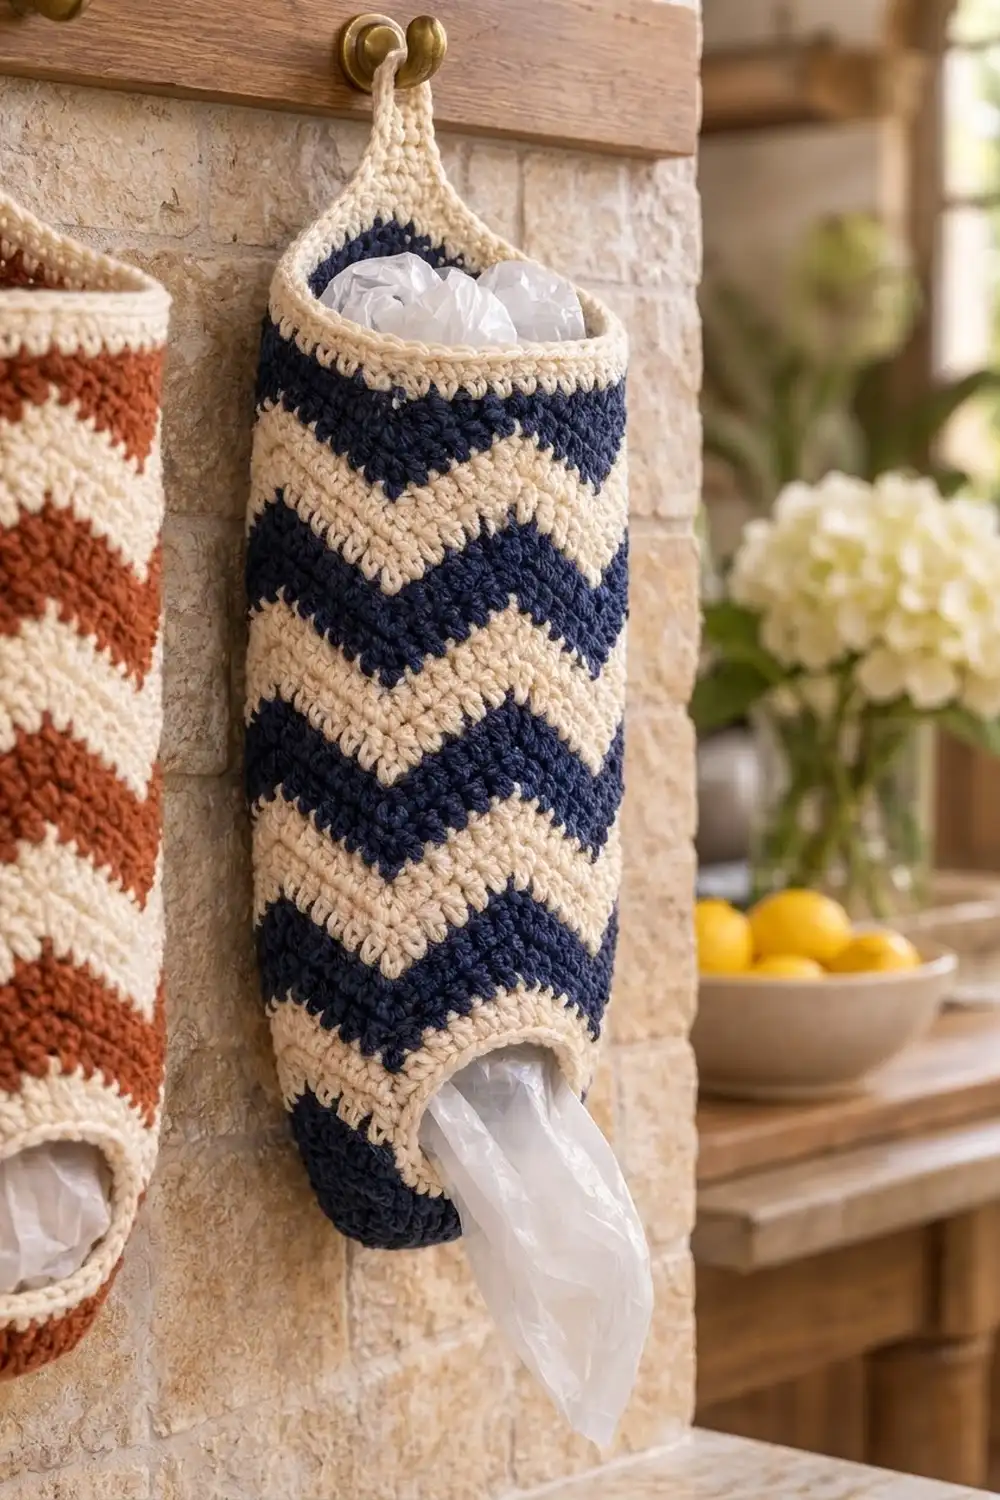
The Harbor Chevron Bag Holder turns a pile of plastic grocery bags into something you won’t mind seeing on the kitchen wall. You stuff bags in at the top and pull them out one at a time through an oval opening near the bottom.
This version uses deep navy and soft cream. Bold chevron stripes run around the tube, and the base, top rim, hanging loop and opening edge are all cream. Rust and cream also looks great if you want a warmer kitchen palette.
The pattern uses US crochet terms. The finished holder measures 7 in (17.8 cm) wide when flattened and 15.75 in (40.0 cm) tall. The hanging loop adds about 3 in (7.6 cm) on top.
Construction is one piece with no sewing. You start with a flat oval base, then work the walls upward in joined rounds. A few turned rows in the navy bottom band leave the dispensing opening. Next comes the chevron section, then a leveling round, and finally a cream rim with the hanging loop worked in.
Finished Size and Construction
- Finished size: 7 in (17.8 cm) wide flat × 15.75 in (40.0 cm) tall, plus a loop of about 3 in (7.6 cm)
- Skill level: Easy / advanced beginner
- Terminology: US
- Yarn weight: Worsted (#4), cotton or cotton blend
- Hook: US H-8 (5 mm)
- Number of pieces: 1
- Layout: Single seamless tube with a built-in base, opening and loop
- Piece size: 56 stitches around = 14 in (35.6 cm) circumference
- Size before border: 7 in (17.8 cm) × 14.5 in (36.8 cm)
- Border depth: 1.25 in (3.2 cm) top rim, plus a 2-round opening edge
Materials
Pick a smooth, firm worsted cotton. Cotton holds its shape when the tube is packed with bags and doesn’t stretch the way acrylic can. Avoid fuzzy yarns, because they make the chevron points hard to see.
- Cream (Color A): 110 g, about 190 m (208 yd)
- Navy (Color B): 110 g, about 190 m (208 yd)
These amounts include roughly a 20% margin for your gauge swatch and tension differences.
Tools:
– US H-8 (5 mm) crochet hook
– Tapestry needle
– 4 stitch markers
– Measuring tape
– Scissors
– Spray bottle and a rolled towel for blocking
Abbreviations (US Terms)
- ch – chain
- sc – single crochet
- hdc – half double crochet
- dc – double crochet
- tr – treble crochet
- sl st – slip stitch
- blo – back loop only
- st(s) – stitch(es)
- rnd – round
- RS / WS – right side / wrong side
Special stitch: sc2tog (single crochet 2 together): Insert hook in next st, yo, pull up a loop. Insert hook in following st, yo, pull up a loop. Yo and draw through all 3 loops on the hook. This uses 2 stitches and makes 1.
Gauge and Checkpoints
Gauge: 16 sc and 16 rnds = 4 in (10.2 cm) in sc worked in joined rounds.
The base doubles as your gauge test, so make it first and check the measurements below before you go on.
- After base Rnd 3: about 6.25 in (15.9 cm) long × 1.5 in (3.8 cm) wide, with 56 sts.
- After Rnd 16 (navy band): 3.25 in (8.3 cm) tall from the base edge. The tube flattens to 7 in (17.8 cm) wide.
- After Rnd 40: 9.25 in (23.5 cm) tall, measured straight up through a chevron peak.
- After Rnd 60: 14.25 in (36.2 cm) tall.
- After Rnd 61 (leveling): 14.5 in (36.8 cm) tall, with a straight top edge.
- Finished: 15.75 in (40.0 cm) tall.
If your piece is too big, go down to a 4.5 mm hook. If it is too small, go up to a 5.5 mm hook. Change hooks rather than stitch counts, because the chevron needs exactly 56 stitches (4 repeats of 14).
Pattern
Round notes: Join every round with a sl st to the first sc. The ch 1 at the start of a round does not count as a stitch. To change color, work the last yo of the joining sl st with the new color. Carry the color you’re not using up the inside of the tube. Nobody sees the inside, so you don’t need to cut and weave ends at every stripe.
Base (Cream)
Ch 22.
Rnd 1: Sc in 2nd ch from hook and in next 19 ch. 3 sc in last ch. Rotate and work along the other side of the foundation chain: sc in next 19 ch, 2 sc in same ch as the first sc. Join. (44 sts)
Rnd 2: Ch 1. 2 sc in first st, sc 19, 2 sc in each of next 3 sts, sc 19, 2 sc in each of next 2 sts. Join. (50 sts)
Rnd 3: Ch 1. Sc in first st, 2 sc in next st, sc 19, [sc in next st, 2 sc in next st] 3 times, sc 19, [sc in next st, 2 sc in next st] 2 times. Join. (56 sts)
Fasten off cream, leaving a 6 in (15.2 cm) tail. The long side worked second (sts 32–50) will be the front.
Navy Bottom Band and Dispensing Opening
Join navy with a sl st in st 48 of Rnd 3. That’s the 17th st of the front long side, 3 sts before the curve. From here on, st 1 of each round is the stitch where the round starts.
Rnd 4: Ch 1. Sc blo in each st around. Join. (56 sts) Working through the back loops only folds the fabric up into the wall.
Rnds 5–6: Ch 1. Sc in each st around. Join. (56 sts)
Now the opening. Sts 45–56 sit at the center front and stay unworked for the next 8 rows.
Row 7 (RS): Ch 1. Sc in sts 1–44. Turn. (44 sts)
Rows 8–14: Ch 1. Sc in each st across. Turn. (44 sts) Row 14 is a WS row, so you finish beside st 1.
Rnd 15 (RS): Ch 1, turn. Sc in each of the 44 sts. Ch 12, then join with a sl st to the first sc. (44 sc + 12 ch = 56 sts)
Rnd 16: Ch 1. Sc in each sc and each ch. Join. (56 sts) Drop navy. Pick up cream and sl st in the next sc. This moves the round start one stitch to the left, so the chevron valleys sit exactly over the opening and at the center back.
The opening now measures 3 in (7.6 cm) wide × 2 in (5.1 cm) tall.
Chevron Body
Chevron round: Ch 1. 2 sc in next st, sc 4, [sc2tog] twice, sc 4, 2 sc in next st; repeat from * 3 more times. Join. (56 sts: 14 per repeat × 4)*
Each repeat uses 14 sts and makes 14 sts (2 + 4 + 2 + 4 + 2), so the total stays at 56. The increases next to each other at the repeat boundaries push up into peaks. The paired decreases pull down into valleys.
Work the chevron round 44 times in 4-round stripes:
- Rnds 17–20: Cream
- Rnds 21–24: Navy
- Rnds 25–28: Cream
- Rnds 29–32: Navy
- Rnds 33–36: Cream
- Rnds 37–40: Navy
- Rnds 41–44: Cream
- Rnds 45–48: Navy
- Rnds 49–52: Cream
- Rnds 53–56: Navy
- Rnds 57–60: Cream
That’s 6 cream and 5 navy stripes, so with the bottom band you get 6 navy sections in total. Fasten off navy after Rnd 56. Keep cream attached after Rnd 60.
Leveling Round (Cream)
Rnd 61: Ch 1. Sc 2, hdc 2, dc 2, tr 2, dc 2, hdc 2, sc 2; repeat from * 3 more times. Join. (56 sts = 56 worked 1-per-stitch + 0 added)*
The short sc stitches land on the peaks and the tall tr stitches fill the valleys, which gives you a straight top edge for the rim.
Border: Top Rim, Hanging Loop and Opening Edge
Border gauge: Same as the body, 16 sc = 4 in (10.2 cm). The border is worked 1 sc per stitch and 1 sc per chain, so it lies flat without increases.
The front half of the rim is sts 36–56 plus 1–7 (28 sts). The back half is sts 8–35 (28 sts). The center back falls between sts 21 and 22.
Top Rim
Rnds 62–63: Ch 1. Sc in each st around. Join. (56 sts: 28 front + 28 back)
Rnd 64 (loop round): Ch 1. Sc in sts 1–17. Ch 30, skip sts 18–25, and sc in sts 26–56. Join. (48 sc + 30 ch = 78 sts: 28 front + 50 back)
The back count is 10 sc + 30 ch + 10 sc = 50. The 8 skipped stitches stay as a clean sc edge under the arch.
Rnds 65–66: Ch 1. Sc in each sc and each ch. Join. (78 sts: 28 front + 50 back) Fasten off.
Loop Inner Edge
With the RS facing, join cream with a sl st at the base of the loop, beside st 17 of Rnd 64. Sc in each of the 30 free loops on the underside of the chain. Sl st at the other base, beside st 26. (30 sc) Fasten off.
The loop is now 3 rows wide, about 0.75 in (1.9 cm), and rises about 3 in (7.6 cm) above the rim.
Opening Edge
Rnd 1: With the RS facing, join cream in the first unworked st of Rnd 6 (st 45). Then work:
- sc in sts 45–56 (12 sc along the bottom)
- 8 sc evenly up the side, 1 per row end of Rows 7–14
- sc in each of the 12 free chain loops of Rnd 15 (12 sc along the top)
- 8 sc down the other side
Join. (40 sts: 12 + 8 + 12 + 8)
Rnd 2: Sl st loosely in each st around. Join. (40 sts) Fasten off.
Why the math works: At this gauge one sc row is as tall as one sc is wide. That means 1 sc per row end on the sides and 1 sc per stitch or chain on the top and bottom keep the edge flat. With the edge in place the opening measures about 2.5 in (6.4 cm) × 1.5 in (3.8 cm). That’s snug enough to hold bags in but easy to pull them through.
Weave in all ends on the inside. Use the base tail to close any small gap at the beginning of the chain.
Final Blocking
- Turn the holder RS out and smooth the chevron points so they line up.
- Roll a towel into a tube about 7 in (17.8 cm) wide when flattened. Slide it inside.
- Mist the piece evenly with water until it’s damp but not soaked.
- Pat the rim straight, square up the opening, and press the base flat against the towel’s end.
- Shape the loop into an even arch and pin it upright if it leans.
- Let it dry completely, about 24 hours, then take out the towel.
- Check the final size: 7 in (17.8 cm) × 15.75 in (40.0 cm).
Final Quality-Control Checklist
- Base lies flat and counts 56 sts.
- Opening is centered on the front, directly under a chevron valley.
- All 11 chevron stripes are 4 rounds each.
- Peaks and valleys line up vertically around the tube.
- Rnd 61 gives a straight top edge.
- Loop is centered on the back and both bases are firmly anchored.
- Opening edge counts 40 sts and lies flat.
- Carried yarn inside isn’t puckering the stripes.
- All ends are woven in on the WS.
- Finished size matches 7 in (17.8 cm) × 15.75 in (40.0 cm).
Troubleshooting
Base cups or ruffles: A cupping base is too tight, so go up half a hook size. A ruffled base usually means extra increases, so recount Rnds 2–3.
Chevron drifts or zigzags lean: You probably missed a stitch at a round join. Count 56 at the end of every round, and don’t work into the joining sl st.
Visible jog at stripe changes: Change color on the joining sl st as written. Tug the old color gently before you start the new round.
Opening too tight: Work Rnd 2 of the opening edge more loosely, or leave it out.
Opening too loose or bags fall out: Add one more sl st round, or add a third sc round with 1 sc2tog at each corner.
Loop twists: Make sure you didn’t twist the 30-ch before joining it in Rnd 64.
Tube looks narrow in the chevron section: Chevron fabric can draw in about 0.25 in (0.6 cm). Blocking evens this out.
Care
Hand wash or machine wash cool on a gentle cycle, then reshape and lay flat to dry. Don’t tumble dry, because it can shrink cotton and distort the chevrons.
Final Notes
Here is the measurement chain:
- The base finishes at 56 sts, about 6.25 in × 1.5 in (15.9 × 3.8 cm).
- The navy band reaches 3.25 in (8.3 cm), with a 3 in × 2 in (7.6 × 5.1 cm) opening.
- Eleven 4-round chevron stripes take the body to 14.25 in (36.2 cm).
- The leveling round brings it to 14.5 in (36.8 cm).
- The rim adds 1.25 in (3.2 cm), for 15.75 in (40.0 cm) total, with a 3 in (7.6 cm) loop on top.
If each checkpoint matches, the finished holder will match too.
Happy crocheting!