

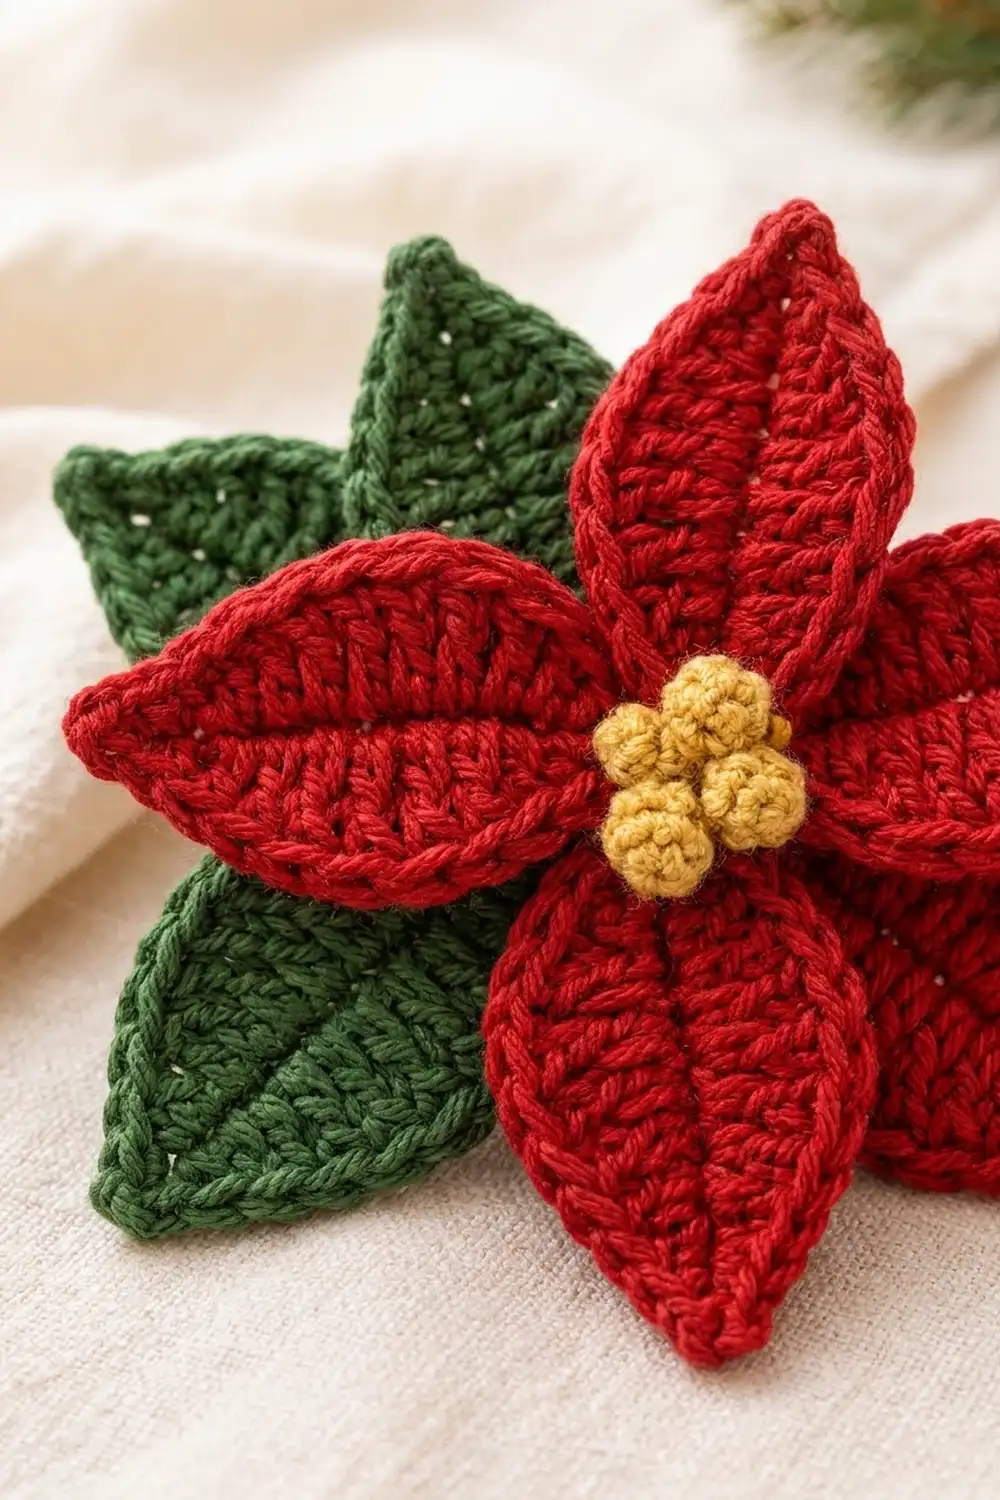
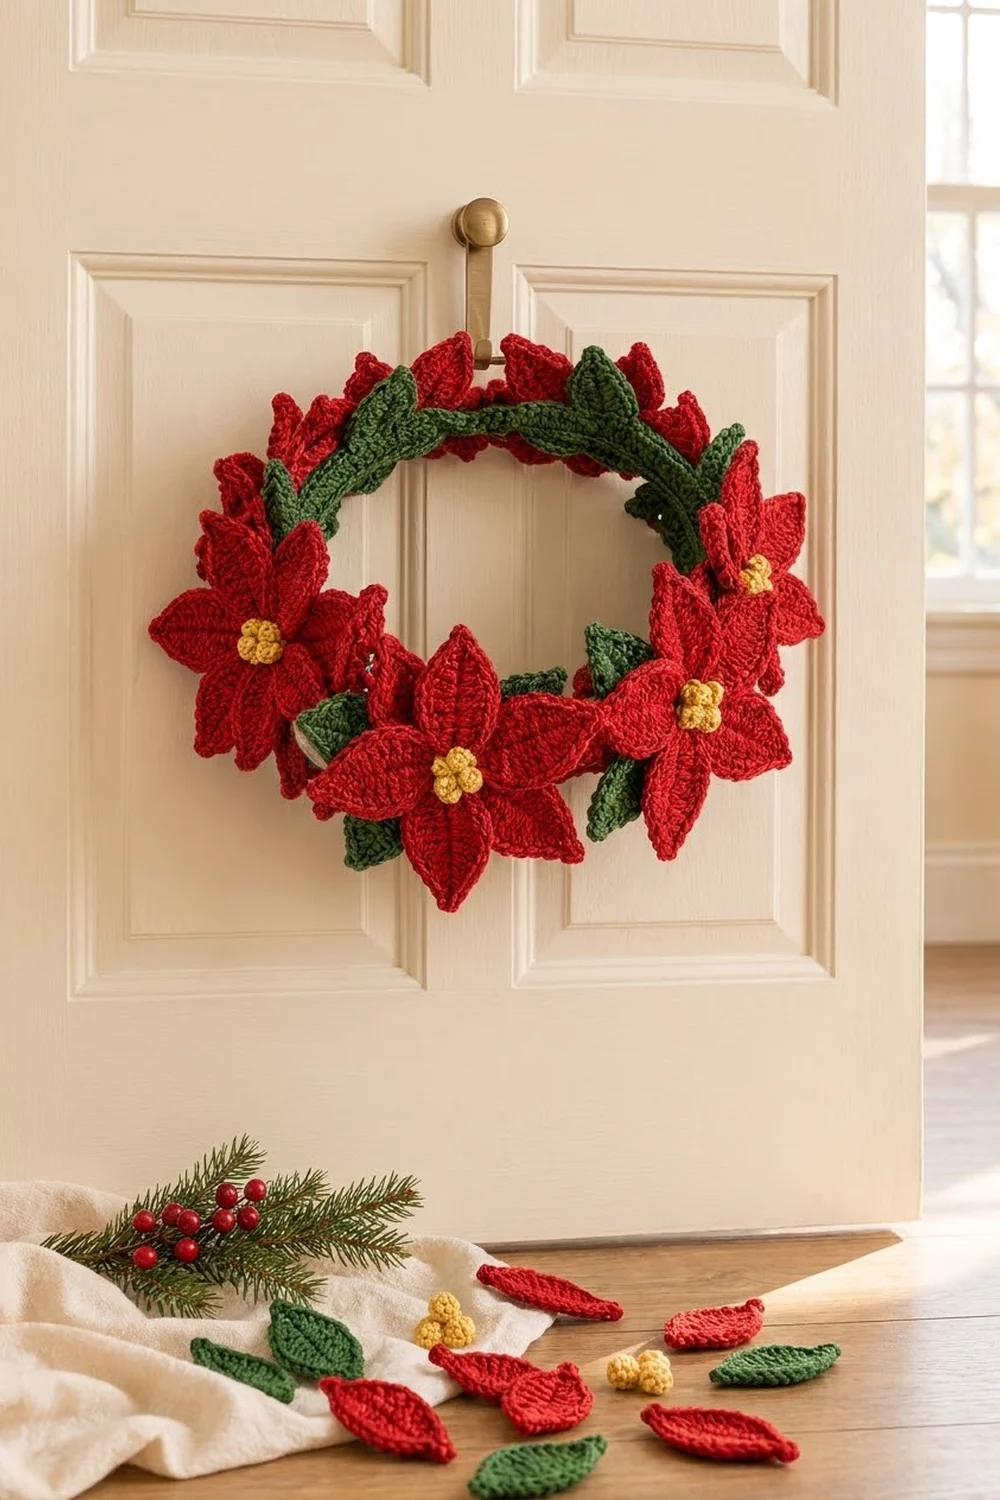
The Hearthside Poinsettia Wreath is a full, classic holiday wreath. Six red poinsettias sit around a green covered ring, with pointed green leaves tucked between them. Each flower has a small cluster of mustard-yellow bobbles at its center.
The palette has three colors: a true Christmas red, a deep forest green and a warm mustard yellow. The petals have a raised center line and a neat single crochet edge, so they look crisp and dimensional from across the room. It looks just as good on a front door as it does flat on a table as a centerpiece.
This pattern uses US crochet terms. The finished wreath is about 14 in (35.6 cm) across, with a center opening of about 5 in (12.7 cm).
Construction is modular. You crochet a long green strip and sew it around a foam ring. Then you make petals, leaves, flower discs and bobble centers, give every petal and leaf one edging round, build six flowers, and sew everything onto the ring.
Finished Size and Construction
- Finished size: about 14 in (35.6 cm) across, with a 5 in (12.7 cm) center opening
- Skill level: Intermediate
- Terminology: US crochet terms
- Yarn weight: Worsted (#4)
- Hook: 4.0 mm (G-6)
- Number of pieces: 61 (1 ring cover, 36 petals, 6 discs, 6 centers, 12 leaves)
- Layout: 6 flowers evenly spaced around a ring, with 2 leaves in each gap
- Piece sizes: petal 2.5 in × 1.25 in (6.4 cm × 3.2 cm); leaf 2 in × 1.1 in (5.1 cm × 2.8 cm); flower 5 in (12.7 cm) across
- Size before border: petal 2.2 in × 0.9 in (5.6 cm × 2.3 cm); leaf 1.8 in × 0.8 in (4.6 cm × 2.0 cm)
- Border depth: about 0.2 in (0.5 cm) per side
Materials
Use a smooth worsted yarn so the petal edges stay crisp. Cotton or a cotton blend gives the sharpest stitch definition. Soft acrylic works too and weighs less on the door.
- Red (petals, discs): 60 g / 110 m
- Forest green (ring cover, leaves): 55 g / 100 m
- Mustard yellow (centers): 10 g / 18 m
All quantities include a margin of about 20% for swatching and sewing tails.
Tools:
– 4.0 mm (G-6) crochet hook
– Round-profile foam wreath ring, 10 in (25.4 cm) outer diameter, 8 in (20.3 cm) inner diameter, 1 in (2.5 cm) thick
– Tapestry needle
– Stitch markers (at least 6)
– Scissors
– Blocking mat and rust-proof pins
– Spray bottle
Abbreviations (US Terms)
- ch – chain
- sl st – slip stitch
- sc – single crochet
- hdc – half double crochet
- dc – double crochet
- st(s) – stitch(es)
- sp – space
- rnd – round
Special stitch – 3-dc bobble: [Yarn over, insert hook in the stitch, pull up a loop, yarn over, draw through 2 loops] 3 times in the same stitch. You now have 4 loops on the hook. Yarn over and draw through all 4.
Gauge and Checkpoints
Gauge: 18 sc and 20 rows = 4 in (10.2 cm) in sc rows.
Before you start the full set, make one petal and one leaf. They are small and quick, and they will show you whether your tension matches.
Checkpoints:
– Petal after Rnd 1: 2.2 in × 0.9 in (5.6 cm × 2.3 cm)
– Petal after the edging: 2.5 in × 1.25 in (6.4 cm × 3.2 cm)
– Leaf after the edging: 2 in × 1.1 in (5.1 cm × 2.8 cm)
– Red disc: 1 in (2.5 cm) across
– Yellow center: 0.9 in (2.3 cm) across
– Ring cover strip: 3.1 in (7.9 cm) wide; 4 in (10.2 cm) long after 20 rows
If your pieces are too big, go down to a 3.75 mm hook. Oversized petals crowd each other and make the wreath stick out too far.
If your pieces are too small, go up to a 4.5 mm hook. Small petals leave gaps between the flowers.
The strip width matters most. It has to wrap snugly around a ring that is 1 in (2.5 cm) thick, which means a circumference of 3.14 in (8.0 cm).
Ring Cover
With green, ch 15.
Row 1: Sc in 2nd ch from hook and in each ch across. Turn. (14 sc)
Rows 2–140: Ch 1 (does not count as a st), sc in each st across. Turn. (14 sc)
Fasten off and leave a 30 in (76.2 cm) tail for sewing.
Checkpoint: The strip should measure 3.1 in × 28 in (7.9 cm × 71.1 cm). The 28 in (71.1 cm) length matches the circumference along the middle of the ring: a 9 in (22.9 cm) diameter × π = 28.3 in (71.8 cm). The strip will stretch slightly along the outer curve and ease in along the inner curve.
Petal (make 36 in red)
The petal is worked around both sides of a foundation chain. The chain itself forms the center line.
Ch 11.
Rnd 1:
– Sc in 2nd ch from hook (this is the tip).
– Hdc in next ch, dc in next 5 ch, hdc in next ch, sc in next ch. That makes 9 sts on Side A.
– Work 3 sc in the last ch (this is the base).
– Rotate the piece and work into the unused loops on the other side of the chain: sc in next ch, hdc in next ch, dc in next 5 ch, hdc in next ch, sc in the last ch. That makes 9 sts on Side B.
– Join with a sl st to the first sc.
Count: 21 sts (9 on Side A + 3 at the base + 9 on Side B).
Do not fasten off. The edging round is in the Border section below.
Leaf (make 12 in green)
Ch 9.
Rnd 1:
– Sc in 2nd ch from hook, hdc in next ch, dc in next 4 ch, hdc in next ch. That makes 7 sts on Side A.
– Work 3 sc in the last ch (base).
– Rotate and work into the other side of the chain: hdc in next ch, dc in next 4 ch, hdc in next ch, sc in the last ch. That makes 7 sts on Side B.
– Join with a sl st to the first sc.
Count: 17 sts (7 + 3 + 7).
Do not fasten off. Go to the Border section.
Flower Disc (make 6 in red)
Rnd 1: Make a magic ring. Ch 1, work 6 sc in the ring, pull the ring tight, and join with a sl st to the first sc. (6 sc)
Rnd 2: Ch 1, work 2 sc in each st around, and join. (12 sc)
Fasten off and leave a 12 in (30.5 cm) tail.
Checkpoint: The disc should be 1 in (2.5 cm) across.
Bobble Center (make 6 in yellow)
Rnd 1: Make a magic ring. Ch 1, work 5 sc in the ring, pull tight, and join. (5 sc)
Rnd 2: Sl st into the first st. Ch 2, then work a 2-dc bobble in the same st (this counts as the first bobble), ch 1. Work a 3-dc bobble in the next st, ch 1. Repeat from * 3 more times. Join to the top of the first bobble.
Count: 5 bobbles and 5 ch-1 sps.
Fasten off and leave an 8 in (20.3 cm) tail. Push the bobbles outward with your fingertip so they form a rounded cluster.
Checkpoint: The center should be 0.9 in (2.3 cm) across.
Make All Pieces
Each piece type uses one color:
| Piece | Color | Quantity |
|---|---|---|
| Ring cover | Green | 1 |
| Leaves | Green | 12 |
| Petals | Red | 36 (6 per flower) |
| Discs | Red | 6 |
| Bobble centers | Yellow | 6 |
Layout grid (front view; F = flower, L = leaf pair, one leaf on the outer edge and one on the inner edge):
              F1
        L            L
   F6                    F2
   L       (opening)      L
   F5                    F3
        L            L
              F4
Work the edging (Border section) on every petal and leaf before you start joining.
Joining
1. Cover the ring.
– Wrap the strip around the foam ring so the long edges meet at the inner back of the ring.
– Whipstitch the edges together, matching row-end to row-end: row 1 to row 1, and so on up to row 140 to row 140.
– Then join the short ends: whipstitch the 14 sts of Row 140 to the 14 foundation loops of Row 1.
Keep your tension firm but not tight. You want the seam to sit flat without puckering.
2. Build each flower.
– Turn a disc face down.
– Each petal covers 2 disc sts, so 12 sts ÷ 6 petals = 2 sts per petal with nothing left over.
– Lay a petal so its 3 base sc sit over 2 disc sts and its tip points outward. The lower 0.5 in (1.3 cm) of the petal should sit behind the disc, so the bases meet at the center.
– Tack it in place with 3–4 small stitches.
– Repeat for all 6 petals. They should touch at their widest points.
– Turn the flower face up and sew the yellow center onto the middle of the disc, stitching through the ch-1 sps.
Checkpoint: Each flower should measure 5 in (12.7 cm) from tip to opposite tip.
3. Mark the flower positions.
Place markers on the ring cover at rows 1, 24, 47, 70, 93 and 116. The gaps are 23 rows each, plus 25 rows between the last marker and the first. The extra 2 rows sit at the end seam, where the overlap hides them. The 23-row gaps are about 4.7 in (11.9 cm) apart along the middle of the ring.
4. Attach the flowers.
– Center each flower on a marker, slightly toward the outer edge of the ring.
– Sew through the disc and into the ring cover in about 8 places. Also tack the underside of each petal tip that touches the ring.
– Neighboring flowers will overlap by about 0.3 in (0.8 cm), which gives the full, layered look.
5. Attach the leaves.
– Slide 2 leaves into each gap between flowers: one angled out past the outer edge, and one angled toward the center opening.
– Sew each leaf base to the ring cover with 3–4 stitches.
Checkpoint: The wreath should measure about 14 in (35.6 cm) across, with a 5 in (12.7 cm) opening.
Border (Petal and Leaf Edging)
This single round gives each petal and leaf its crisp outline and sharp tip. Work it right after Rnd 1, before you fasten off.
Border gauge: Work 1 sc per stitch at the main gauge of 18 sc = 4 in (10.2 cm). The edging adds about 0.2 in (0.5 cm) all around.
Petal Rnd 2:
– Ch 1. Work (sc, ch 2, sc) in the first st: this is the tip.
– Sc in the next 8 sts of Side A.
– Sc in each of the 3 base sts.
– Sc in each of the 9 sts of Side B.
– Join with a sl st to the first sc.
Count by section:
– Tip: 2 sc + ch-2 point
– Side A: 8 sc
– Base: 3 sc
– Side B: 9 sc
– Total: 21 sts worked 1 per existing st + 1 extra sc at the tip = 22 sc, plus a ch-2 point
Fasten off and leave a 10 in (25.4 cm) tail.
Leaf Rnd 2:
– Ch 1. Work (sc, ch 2, sc) in the first st.
– Sc in the next 6 sts.
– Sc in each of the 3 base sts.
– Sc in the next 7 sts.
– Join.
Count: 17 sts worked 1 per existing st + 1 extra sc = 18 sc, plus a ch-2 point.
Fasten off and leave a 10 in (25.4 cm) tail.
Why the math works:
– One sc in every stitch along the sides follows the curve exactly, so the edges lie flat without ruffling or cupping.
– The single extra sc and the ch-2 at the tip give just enough room to turn a sharp point.
– The base gets no increases. It stays 3 sts wide, which fits neatly over 2 disc sts and stays hidden behind the disc.
Final Blocking
- Pin each petal and leaf to its finished size, 2.5 in × 1.25 in (6.4 cm × 3.2 cm) or 2 in × 1.1 in (5.1 cm × 2.8 cm). Pull the ch-2 tip to a sharp point.
- Mist with water until damp. Let the pieces dry completely, usually 6–8 hours.
- After assembly, lay the wreath face up. Use your fingers to shape the petals so they curve gently upward and outward.
- Mist the flowers lightly and let them dry flat.
- Fluff the bobble centers so they stand rounded and tall.
Final Quality-Control Checklist
- 36 petals, each 22 sc plus a ch-2 point
- 12 leaves, each 18 sc plus a ch-2 point
- 6 discs with 12 sc each; 6 centers with 5 bobbles each
- Ring cover is 14 sts wide and 140 rows long, fully seamed, with no foam showing
- Every flower is 5 in (12.7 cm) across, with 6 evenly spaced petals
- Flowers are evenly spaced about 4.7 in (11.9 cm) apart
- Overall diameter is about 14 in (35.6 cm)
- All tails are woven in on the back
Troubleshooting
- Petals curl into a tube: Your Rnd 1 tension is too tight. Go up a hook size for Rnd 1 only, and block firmly.
- Petal tip is blunt: Make sure you work the ch-2 between the 2 tip sc, and pin the tip while blocking.
- Foam shows through the cover: Your strip is too narrow. Remake it with a 4.5 mm hook, or add 1 sc per row (15 sts).
- Strip is too short to close: Add rows in sets of 2 until the ends meet without stretching.
- Flowers crowd or tilt: Move them toward the outer edge of the ring and recheck the marker spacing.
- Wreath hangs crooked: Put the end seam at the bottom, and rotate the wreath until F1 sits at the top.
Care
Spot clean with a damp cloth and mild soap, then reshape and dry flat. Store the wreath flat in a box so the petals keep their shape.
Final Notes
Every measurement builds on the one before it:
- Gauge is 18 sc = 4 in (10.2 cm).
- That gives a 3.1 in (7.9 cm) strip that wraps a ring 1 in (2.5 cm) thick.
- 140 rows make 28 in (71.1 cm), the length around the middle of the ring.
- Petals measure 2.5 in (6.4 cm) after the edging, so each flower is 5 in (12.7 cm) across.
- Six flowers spaced 4.7 in (11.9 cm) apart, with leaves in the gaps, make a full wreath about 14 in (35.6 cm) across.
Check each stage against these numbers, and the wreath will come together evenly. Happy crocheting!