

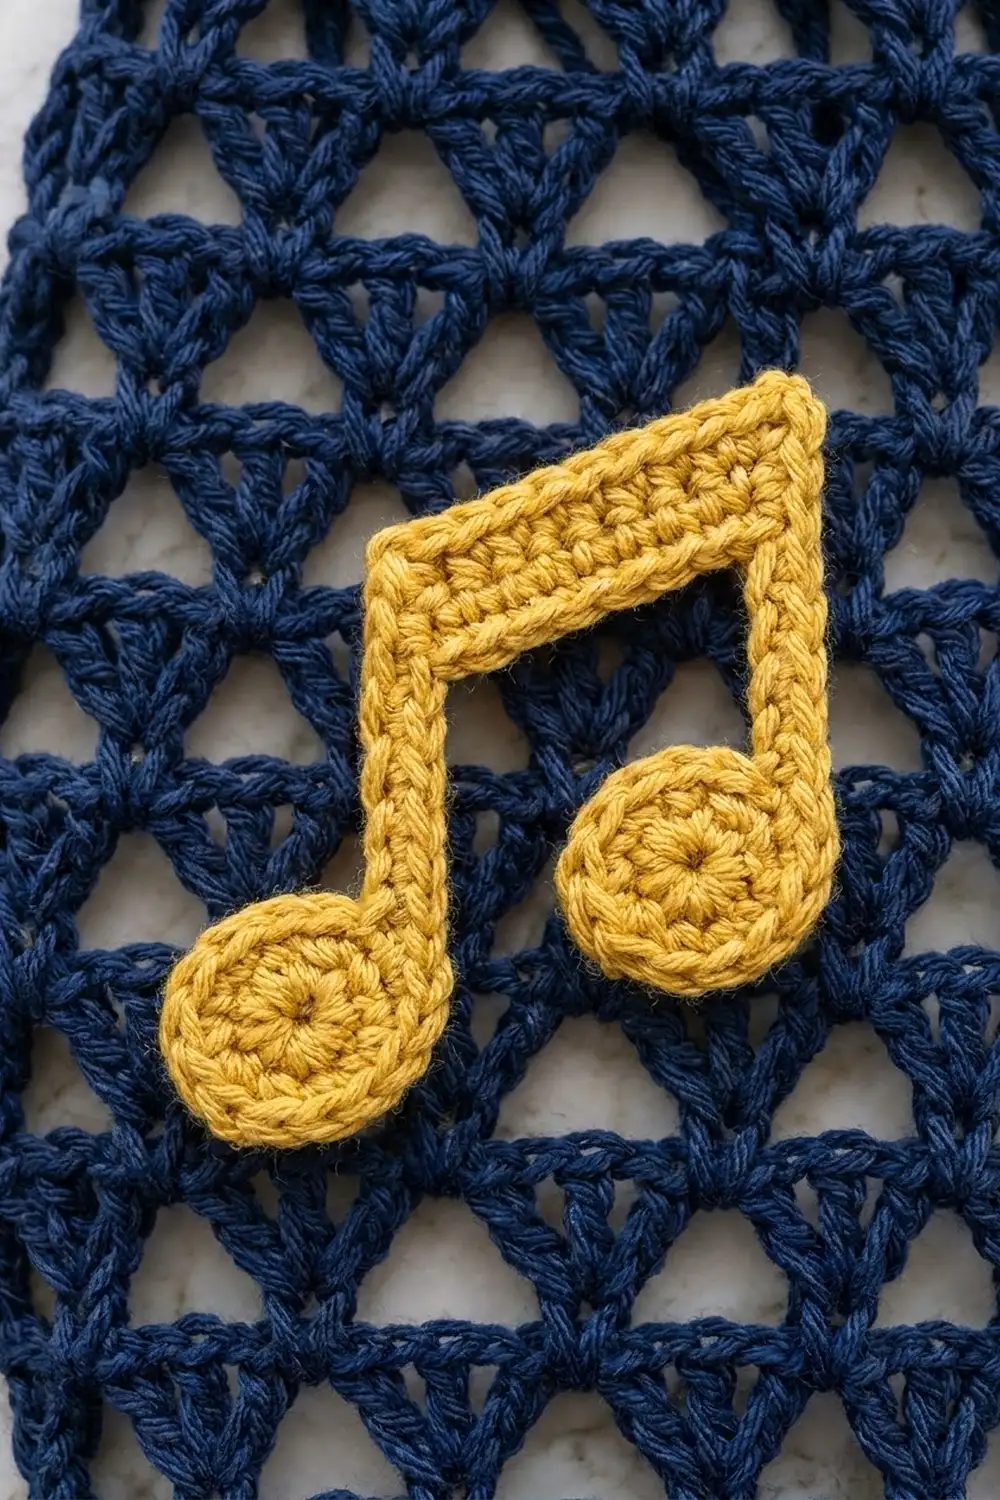
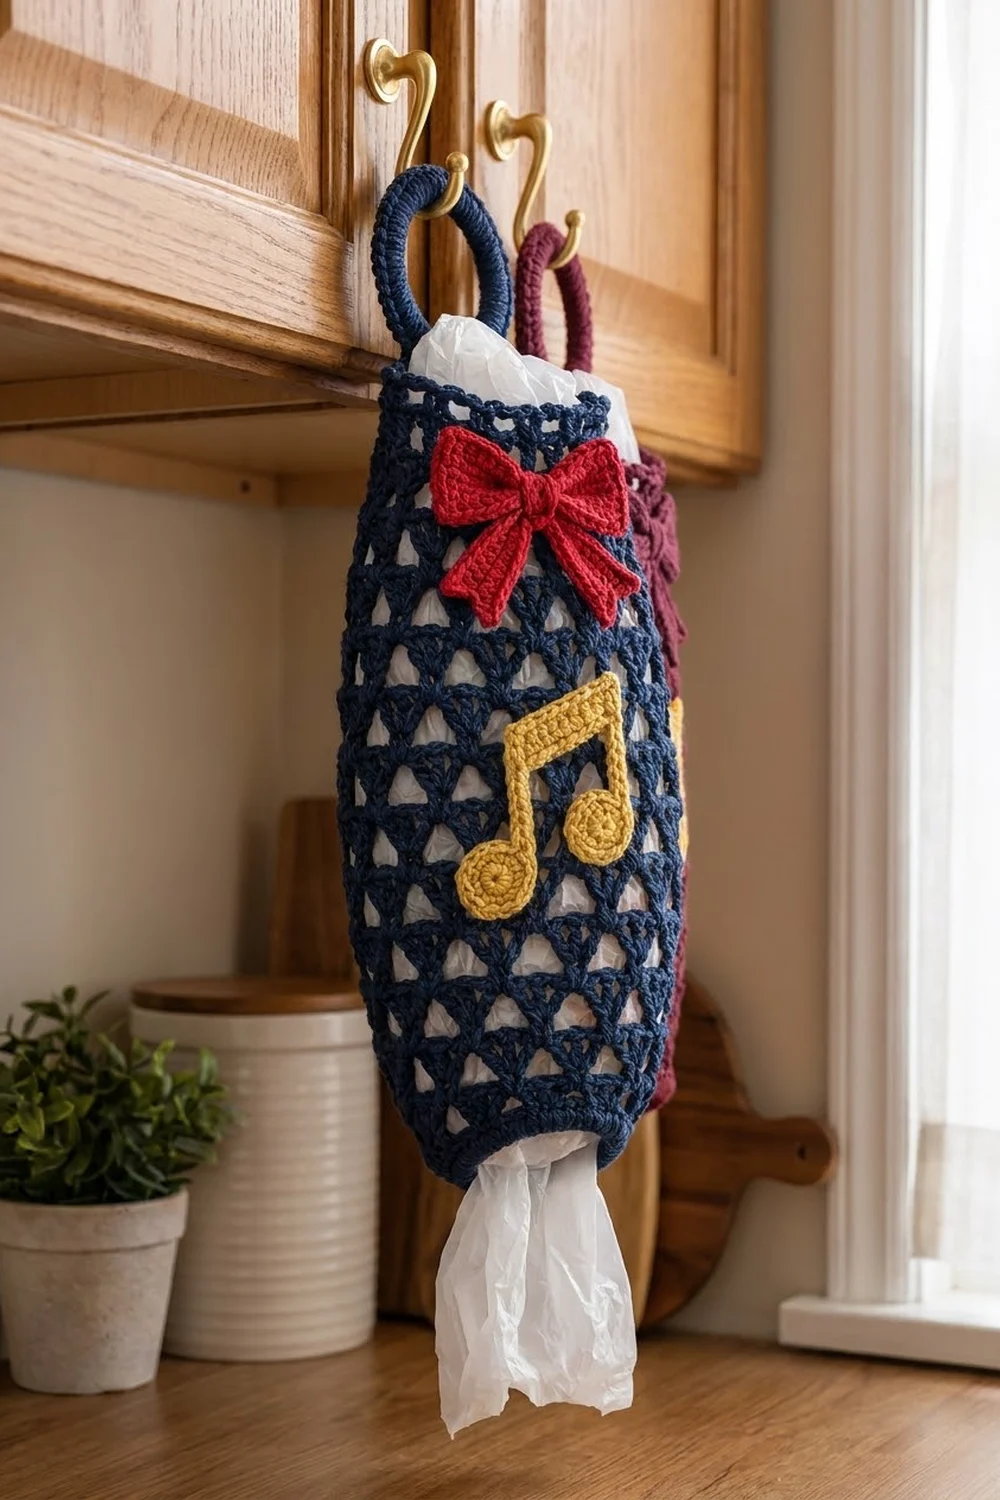
This bag holder is open lace with a bit of holiday decoration. Navy fans and triangle-shaped holes form the body, a red bow sits at the top, and a golden beamed music note sits below it. It hangs from a cabinet knob or hook and holds a lot of plastic bags without looking cluttered.
The colors are deep navy, bright red and mustard yellow. For a second holder, burgundy works well for the body with the same red and yellow accents. The look is classic and festive without being cartoonish, and the open lace lets the white bags show through.
This pattern uses US crochet terms. The finished holder measures about 7 in (17.8 cm) wide at its widest point and 14.25 in (36.2 cm) tall, not counting the ring. With the ring it hangs about 16.5 in (41.9 cm) long.
You work the body in joined rounds from the bottom up. You start with a small solid band around the bottom opening, flare out into the fan lace, taper slightly, and finish with a solid top band. After that you cover a ring with single crochet and sew it on, then make the bow and note appliqués and stitch them to the front.
Finished Size and Construction
- Finished size: 7 in (17.8 cm) wide × 14.25 in (36.2 cm) tall, laid flat
- Length with ring: 16.5 in (41.9 cm)
- Skill level: Easy–Intermediate
- Terminology: US
- Yarn weight: Worsted (#4)
- Hooks: 5 mm (H-8) for the body and ring; 4 mm (G-6) for the appliqués
- Number of pieces: 1 body, 1 covered ring, plus appliqué parts (bow wings, knot, 2 tails, 2 note heads, 2 stems, 1 beam)
- Layout: a single holder worked in the round, with the appliqués on the front
- Bottom opening: 2.9 in (7.4 cm) wide, flat
- Size before top band: 13.25 in (33.7 cm) tall
- Top band depth: 1 in (2.5 cm)
Materials
Use worsted-weight cotton or a cotton blend. Cotton keeps the fans crisp, holds the triangle holes open when the holder is full, and doesn’t stretch out over time. A firm acrylic also works, but the holder will be a little softer.
- Navy (main color): 80 g / 136 m
- Red (bow): 10 g / 17 m
- Golden yellow (note): 8 g / 14 m
These amounts include a margin of roughly 15% for swatching and sewing tails.
Tools:
– 5 mm (H-8) hook
– 4 mm (G-6) hook
– One 2.5 in (6.4 cm) plastic or wooden ring
– Tapestry needle
– Stitch marker
– Measuring tape
– Rust-proof pins
Abbreviations (US Terms)
- ch – chain
- sl st – slip stitch
- sc – single crochet
- dc – double crochet
- sk – skip
- sp – space
- st(s) – stitch(es)
- rnd – round
Special stitches:
– Fan A: 3 dc in the same space.
– Fan C: 4 dc in the same space.
– Mesh: sc in a ch-1 space, then a chain arch of the length given.
At the start of a fan round, ch 3 counts as the first dc.
Gauge and Checkpoints
Body gauge (5 mm hook): 14 sc and 16 rounds = 4 in (10.2 cm). In lace, 2 pattern pairs (fan round + mesh round) = 2.5 in (6.4 cm) tall, lightly stretched.
Appliqué gauge (4 mm hook): 16 sc and 18 rows = 4 in (10.2 cm).
Make Rnds 1–9 of the body first and treat them as your swatch. These are the checkpoints:
- After Rnd 3: the bottom band measures 2.9 in (7.4 cm) wide flat and 0.75 in (1.9 cm) tall.
- After Rnd 9: the body is about 4.5 in (11.4 cm) tall and 7 in (17.8 cm) wide flat.
- After Rnd 19: the body is 10.75 in (27.3 cm) tall.
- After Rnd 23: the body is 13.25 in (33.7 cm) tall.
- After the top band: the body is 14.25 in (36.2 cm) tall.
If your piece is too big, go down half a hook size. If it’s too small, go up half a size. Don’t change the chain-arch lengths, because they set how the fans stack.
Body
Use the 5 mm hook and navy.
Bottom Band
Rnd 1: Ch 20 and join with a sl st to form a ring, taking care not to twist the chain. Ch 1, then sc in each ch around. Join to the first sc. (20 sc)
Rnds 2–3: Ch 1, sc in each sc around, join. (20 sc)
Lace Setup
Rnd 4: Ch 1, sc in the first sc, ch 3, sk 1 sc. Sc in the next sc, ch 3, sk 1 sc; repeat from * 8 more times. Join to the first sc. (10 sc, 10 ch-3 sps)
Flare
Rnd 5 (Fan A round): Sl st into the first ch-3 sp. Ch 3, 2 dc in the same sp, ch 1. 3 dc in the next ch-3 sp, ch 1; repeat from * 8 more times. Join to the top of the ch-3. (30 dc, 10 ch-1 sps; 10 fans)
Rnd 6 (mesh, ch 4): Sl st in the next 2 dc and into the ch-1 sp. Ch 1, sc in the same sp, ch 4. Sc in the next ch-1 sp, ch 4; repeat from * 8 more times. Join. (10 sc, 10 ch-4 sps)
Each ch-4 arch spans over one fan. That means the next fans sit offset from the ones below, which is what makes the staggered triangle holes.
Rnd 7 (Fan C round): Sl st into the first ch-4 sp. Ch 3, 3 dc in the same sp, ch 1. 4 dc in the next ch-4 sp, ch 1; repeat from * 8 more times. Join. (40 dc, 10 ch-1 sps)
Rnd 8 (mesh, ch 4): Sl st in the next 3 dc and into the ch-1 sp. Ch 1, sc in the same sp, ch 4. Sc in the next ch-1 sp, ch 4; repeat from * 8 more times. Join. (10 sc, 10 ch-4 sps)
Rnd 9: Work as Rnd 7. (40 dc, 10 ch-1 sps)
Checkpoint: the body is about 4.5 in (11.4 cm) tall and 7 in (17.8 cm) wide flat.
Widest Section
Rnds 10–19: Alternate Rnd 8 and Rnd 7, ending with a Fan C round on Rnd 19.
- Even rounds have 10 sc and 10 ch-4 sps.
- Odd rounds have 40 dc and 10 ch-1 sps.
Checkpoint: the body is 10.75 in (27.3 cm) tall.
Taper
Rnd 20 (mesh, ch 3): Sl st in the next 3 dc and into the ch-1 sp. Ch 1, sc in the same sp, ch 3. Sc in the next ch-1 sp, ch 3; repeat from * 8 more times. Join. (10 sc, 10 ch-3 sps)
Rnd 21: Work as Rnd 5. (30 dc, 10 ch-1 sps)
Rnd 22 (mesh, ch 3): Sl st in the next 2 dc and into the ch-1 sp. Ch 1, sc in the same sp, ch 3. Sc in the next ch-1 sp, ch 3; repeat from * 8 more times. Join. (10 sc, 10 ch-3 sps)
Rnd 23: Work as Rnd 5. (30 dc, 10 ch-1 sps)
Checkpoint: the body is 13.25 in (33.7 cm) tall and about 5.7 in (14.5 cm) wide flat. This is the size before the top band. Don’t fasten off.
Covered Hanging Ring
Use the 5 mm hook and navy.
- Make a slip knot on the hook. Hold the 2.5 in (6.4 cm) ring and work sc over it, around the whole ring.
- Work about 44 sc, or as many as you need to cover the ring with no gaps. Pack the stitches snugly side by side.
- Join to the first sc. Fasten off and leave a 12 in (30.5 cm) tail.
The covered ring measures 3 in (7.6 cm) across the outside.
Appliqués
Use the 4 mm hook for all appliqué parts. Leave an 8 in (20.3 cm) tail on every part for sewing.
Bow (Red)
Wings:
– Ch 15.
– Row 1: Sc in the 2nd ch from the hook and in each ch across. (14 sc)
– Rows 2–8: Ch 1, turn, sc in each st across. (14 sc)
The wings piece is a 3.5 in × 1.75 in (8.9 cm × 4.4 cm) rectangle. Wrap the tail tightly around the center 4 times to pinch it into two wings.
Knot:
– Ch 4.
– Row 1: Sc in the 2nd ch from the hook and across. (3 sc)
– Rows 2–9: Ch 1, turn, sc in each st across. (3 sc)
The knot is a 0.75 in × 2 in (1.9 cm × 5.1 cm) strip. Wrap it around the pinched center and sew the ends together at the back.
Tails (make 2):
– Ch 4.
– Row 1: Sc in the 2nd ch from the hook and across. (3 sc)
– Rows 2–8: Ch 1, turn, sc in each st across. (3 sc)
– Row 9 (notch): Ch 1, turn, sc in the first st, sl st in the next st, sc in the last st. The lower middle stitch makes the V-notch.
Each tail measures 0.75 in × 2 in (1.9 cm × 5.1 cm). Sew the top of each tail behind the knot, angled outward so the two tails form an inverted V.
The finished bow measures about 3.5 in (8.9 cm) wide and 2.75 in (7.0 cm) tall.
Beamed Music Note (Yellow)
Note heads (make 2):
– Make a magic ring.
– Rnd 1: Work 6 sc into the ring. Pull it closed.
– Rnd 2: 2 sc in each st around. (12 sc)
– Sl st to join and fasten off.
Each head is about 1 in (2.5 cm) across.
Stems (make 2):
– Ch 9.
– Row 1: Sc in the 2nd ch from the hook and across. (8 sc)
Each stem is 2 in (5.1 cm) long.
Beam:
– Ch 9.
– Row 1: Sc in the 2nd ch from the hook and across. (8 sc)
– Row 2: Ch 1, turn, sc in each st across. (8 sc)
The beam is 2 in × 0.5 in (5.1 cm × 1.3 cm).
Assemble the note:
1. Sew each stem to the right edge of one note head.
2. Sew the beam across the top ends of both stems at a slight upward slant to the right.
The finished note is about 2.75 in (7.0 cm) wide and 3 in (7.6 cm) tall.
Top Band
The top band works like a border, and it closes the top neatly. Continue from Rnd 23 with the 5 mm hook. Band gauge matches the body: 14 sc = 4 in (10.2 cm).
Rnd 24 (conversion): Ch 1. Sc in each dc and in each ch-1 sp around. Join.
– Count: (30 sc worked 1-per-dc) + (10 sc added in the ch-1 sps) = 40 sc.
– Laid flat, that is 20 sc on the front and 20 sc on the back.
Rnd 25: Ch 3 (counts as dc), dc in each sc around, join. (40 dc; 20 per side)
Rnd 26: Ch 1, sc in each st around, join. (40 sc; 20 per side) Fasten off and weave in the ends.
Why the math works: Rnd 23 has 10 repeats of 4 stitch positions each (3 dc + 1 ch-1 sp), which is 40. At 14 sc = 4 in (10.2 cm), 40 sc make a circumference of 11.4 in (29.0 cm). Laid flat, that is 5.7 in (14.5 cm), the same width as Rnd 23, so the band neither ruffles nor pulls in. The band adds 1 in (2.5 cm), bringing the body from 13.25 in (33.7 cm) to 14.25 in (36.2 cm).
Attach the ring:
1. Find the center back of the top band (the side opposite the round joins).
2. Overlap the ring 0.75 in (1.9 cm) inside the band.
3. Sew 6 ring stitches to the 6 center-back band stitches. Go through the band twice for strength.
Attach the Appliqués
- Lay the body flat with the round joins at the back.
- Pin the bow centered on the front, with the top of the wings 0.5 in (1.3 cm) below the top band.
- Pin the note centered 0.75 in (1.9 cm) below the bow tails.
- Whipstitch around the outer edges with the matching yarn tails. Sew only through the solid fans and the top band, and keep the arches free so the lace still stretches.
Final Blocking
- Wet the holder and press out the water gently. Don’t wring it.
- Stuff a rolled towel inside the body. Shape it to 7 in (17.8 cm) wide at the widest point and 14.25 in (36.2 cm) tall.
- Open each triangle hole with your fingers so the fans look even.
- Pin the bow wings and tails flat. Leave the note heads slightly domed.
- Let it dry completely. Then remove the towel and check the measurements.
Final Quality-Control Checklist
- Bottom band is 20 sc and 2.9 in (7.4 cm) wide flat.
- Every fan round has 10 fans, and every mesh round has 10 arches.
- Rnds 7–19 have 40 dc each; Rnds 5, 21 and 23 have 30 dc each.
- Top band is 40 sts each round, 20 per side.
- Body is 14.25 in (36.2 cm) tall; with the ring it hangs 16.5 in (41.9 cm).
- The ring is fully covered and sewn through the band twice.
- Appliqués are centered, flat and securely stitched.
- All ends are woven in through solid stitches.
Troubleshooting
- Fans line up instead of staggering: you started the mesh sc in a dc instead of a ch-1 sp. Rework that round.
- The body spirals: the round joins are drifting. Always join to the first stitch, not the turning chain.
- The bottom opening is too loose for bags: add 1 more sc round, or work Rnds 1–3 with the 4 mm hook.
- The top band ruffles: you have too many stitches. Recount to 40.
- The top band puckers: your tension is too tight. Go up a hook size for Rnds 24–26 only.
- The bow curls: steam-block it under a pressing cloth before sewing it on.
- Note heads are cupped: pull the magic ring snug and flatten the head with steam.
Care
Hand wash in cool water and lay flat over a towel roll to dry. Don’t tumble dry, because heat can distort the appliqués.
Final Notes
Here is the full measurement chain:
- The 20-sc bottom band measures 2.9 in (7.4 cm) wide.
- The fan lace flares to 7 in (17.8 cm) and grows 1.25 in (3.2 cm) per pattern pair, reaching 13.25 in (33.7 cm).
- The 40-stitch top band adds 1 in (2.5 cm), for a 14.25 in (36.2 cm) body.
- The 3 in (7.6 cm) ring brings the total hanging length to 16.5 in (41.9 cm).
Check each checkpoint as you go and the holder will come out at this size.
Happy crocheting!