
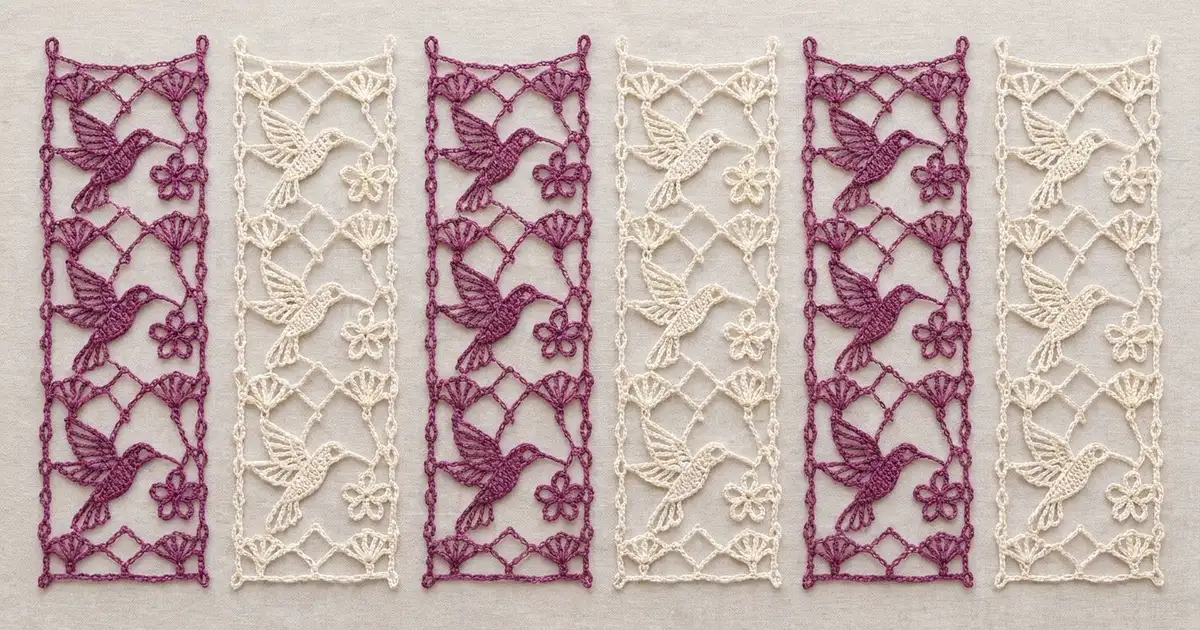
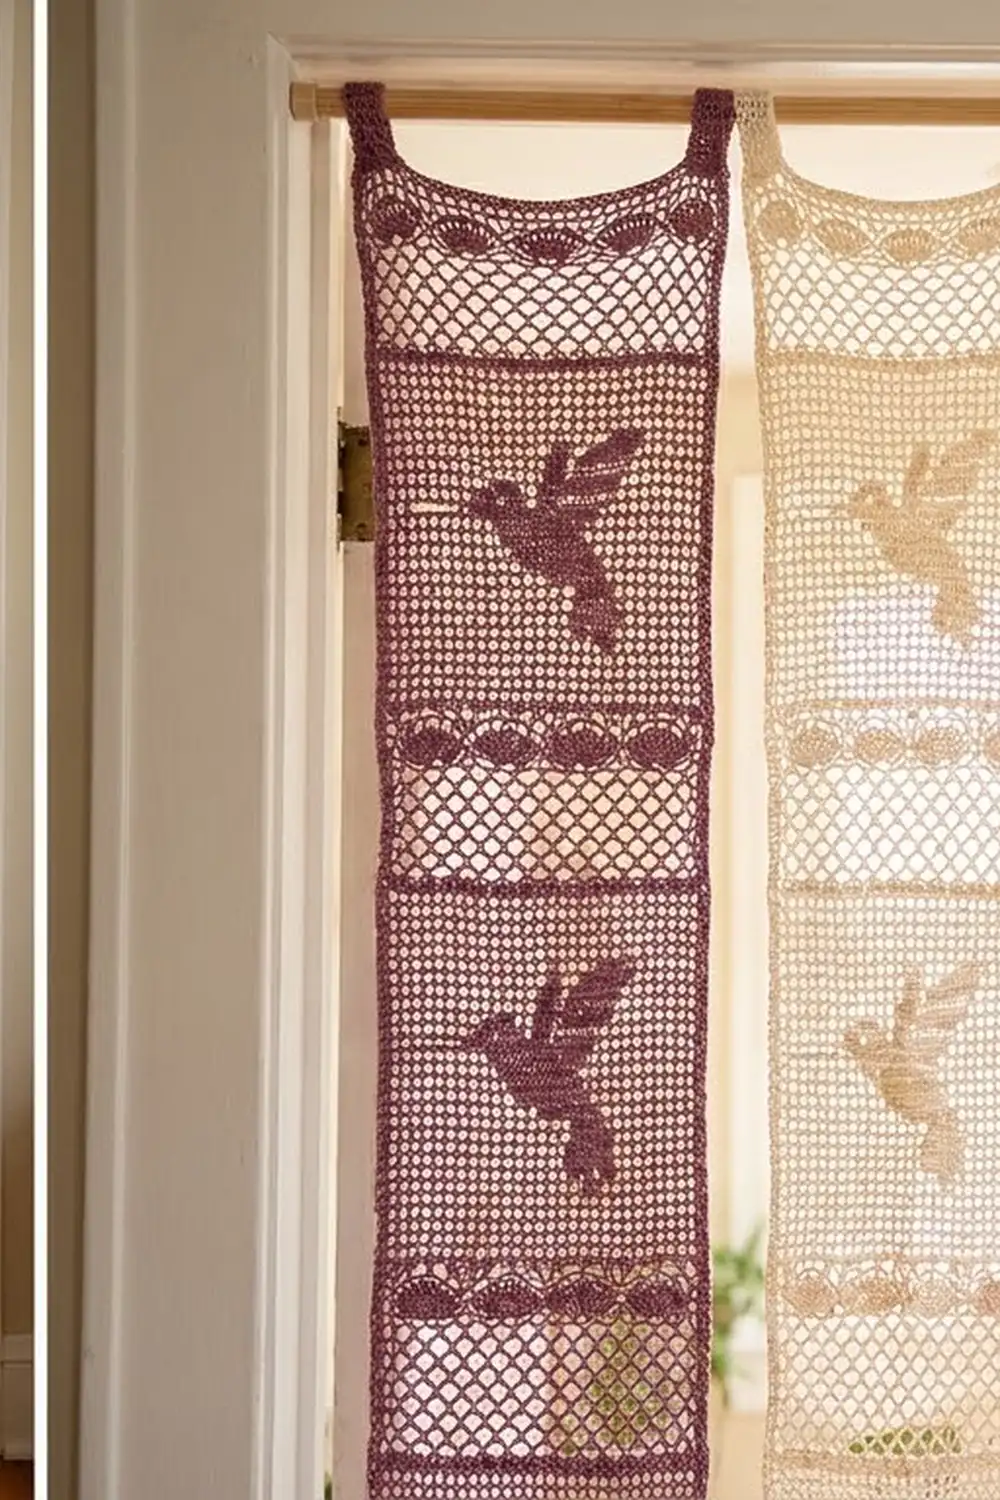
This door curtain is made of six separate lace strips that hang side by side from a rod. Each strip repeats a garden block: fan shells, a diamond net, and an open window holding a hummingbird that is flying toward a small flower.
The sample alternates rich plum and soft cream. The two colors read clearly against light and look good together when the strips move. The style is light and airy, a bit vintage, and easy to see through.
The pattern uses US crochet terms. Each finished strip measures 7 in x 79 in (17.8 cm x 200.7 cm) without the hanging tabs. Six strips spaced 1 in (2.5 cm) apart cover about 47 in (119.4 cm) of rod.
You work each strip in rows from the bottom up as a 30-stitch lace panel. You make the hummingbirds and flowers separately and sew them into the open windows. A two-round sc border and two folded tabs finish each strip. The strips are never seamed together.
Finished Size and Construction
- Finished strip size: 7 in x 79 in (17.8 cm x 200.7 cm)
- Skill level: Intermediate
- Terminology: US crochet terms
- Yarn weight: Sport (#2) mercerized cotton
- Hook: 3.5 mm (E-4)
- Number of pieces: 6 strips (3 plum, 3 cream), plus 54 hummingbirds and 54 flowers as appliqués
- Layout: 6 strips hung side by side, alternating colors, not joined
- Strip size before border: 6 in x 78 in (15.2 cm x 198.1 cm)
- Border depth: 0.5 in (1.3 cm) on every side
- Tabs: 2 per strip, each a 3 in (7.6 cm) loop
Materials
Yarn. Choose a smooth mercerized cotton or cotton blend in sport weight, about 155 m per 50 g. Mercerized cotton keeps the fans crisp and holds its length when it hangs. Avoid stretchy acrylic, because a 79 in (200.7 cm) strip will grow under its own weight.
- Plum: 550 g (1,705 m), for 3 strips, 27 hummingbirds and 27 flowers
- Cream: 550 g (1,705 m), for 3 strips, 27 hummingbirds and 27 flowers
Each strip uses about 160 g (about 496 m). These quantities include a margin of about 15% for gauge swatches and differences between dye lots.
Tools:
– 3.5 mm (E-4) crochet hook
– Tapestry needle
– Stitch markers
– Rust-proof pins and a blocking surface at least 80 in (203.2 cm) long, or a surface you can block on in sections
– Measuring tape
– Curtain rod, at least 47 in (119.4 cm) of usable length
Abbreviations (US Terms)
- ch – chain
- sl st – slip stitch
- sc – single crochet
- hdc – half double crochet
- dc – double crochet
- sk – skip
- sp – space
- st(s) – stitch(es)
Special stitch: Fan. Work 7 dc in the same stitch.
Edge column. Every row of the strip starts with “ch 3, dc in next 2 sts” and ends with “dc in last 3 sts”. The beginning ch-3 counts as a dc throughout. These 3-st columns form the solid edges.
Gauge and Checkpoints
Gauge: 20 dc and 8 dc rows = 4 in (10.2 cm). Every row of this pattern, including the fan and net rows, ends on a dc edge column, so each row is 0.5 in (1.3 cm) tall.
Test a section before you commit to six full strips. Work the foundation row and Block 1, then make one hummingbird.
Checkpoints:
– Foundation row: 30 sts = 6 in (15.2 cm) wide
– One block (17 rows): 8.5 in (21.6 cm) tall
– Foundation plus Block 1: 6 in x 9 in (15.2 cm x 22.9 cm)
– Window net: 4 in (10.2 cm) tall, with 4.8 in (12.2 cm) between the edge columns
– Hummingbird: about 3.5 in x 3 in (8.9 cm x 7.6 cm)
If your test piece is too big, go down a half hook size. If it is too small, go up a half hook size. Check the height carefully. A small row-height error repeats 156 times, so 0.05 in (0.1 cm) per row adds up to almost 8 in (20.3 cm) over the full strip.
Strip Pattern (Make 3 Plum, 3 Cream)
Foundation: Ch 32.
Row 0: Dc in 4th ch from hook and in each ch across, turn. (30 sts)
The Block (Rows 1–17)
Row 1 (fan row): Ch 3, dc in next 2 sts. [Sk 3, Fan in next st, sk 3, sc in next st] 3 times. Dc in last 3 sts, turn.
(30 sts: 3 edge + 3 x (7 + 1) + 3 edge)
Row 2 (dc row): Ch 3, dc in each st across, turn. (30 dc)
Row 3 (Net Row 1): Ch 3, dc in next 2 sts. Ch 5, sk 4, sc in next st. [Ch 5, sk 3, sc in next st] 4 times. Ch 5, sk 3, dc in last 3 sts, turn.
(6 ch-5 loops between the edge columns. Sts used: 3 + 5 + 16 + 3 + 3 = 30.)
Row 4 (Net A): Ch 3, dc in next 2 dc. Ch 2, sc in first loop. [Ch 5, sc in next loop] 5 times. Ch 2, dc in last 3 dc, turn.
(2 ch-2 sps and 5 ch-5 loops)
Row 5 (Net B): Ch 3, dc in next 2 dc. Sk the ch-2 sp. [Ch 5, sc in next ch-5 loop] 5 times. Ch 5, sk the ch-2 sp, dc in last 3 dc, turn. (6 ch-5 loops)
Rows 4 and 5 shift the loops by half a loop each time. This offset is what forms the diamonds.
Row 6 (closing row): Ch 3, dc in next 2 dc. Work 4 dc in each of the 6 loops. Dc in last 3 dc, turn.
(30 dc: 3 + 24 + 3)
Row 7: Repeat Row 1. (30 sts)
Row 8: Repeat Row 2. (30 dc)
Rows 9–16 (window):
– Row 9: Net Row 1
– Row 10: Net A
– Row 11: Net B
– Row 12: Net A
– Row 13: Net B
– Row 14: Net A
– Row 15: Net B
– Row 16: Net A
Row 16 ends with 2 ch-2 sps and 5 loops.
Row 17 (closing row): Ch 3, dc in next 2 dc. Work 2 dc in the ch-2 sp, 4 dc in each of the 5 loops, and 2 dc in the last ch-2 sp. Dc in last 3 dc, turn.
(30 dc: 3 + 2 + 20 + 2 + 3)
Checkpoint: The block measures 8.5 in (21.6 cm) and the strip is still 6 in (15.2 cm) wide.
Completing the Strip
Work Rows 1–17 nine times in total, for 153 block rows.
Checkpoint: With Row 0, the strip now has 154 rows and measures 77 in (195.6 cm).
Closing band: Work Row 1 (fan row), then Row 2 (dc row). Do not fasten off; continue straight into the border.
The strip now has 156 rows and measures 6 in x 78 in (15.2 cm x 198.1 cm).
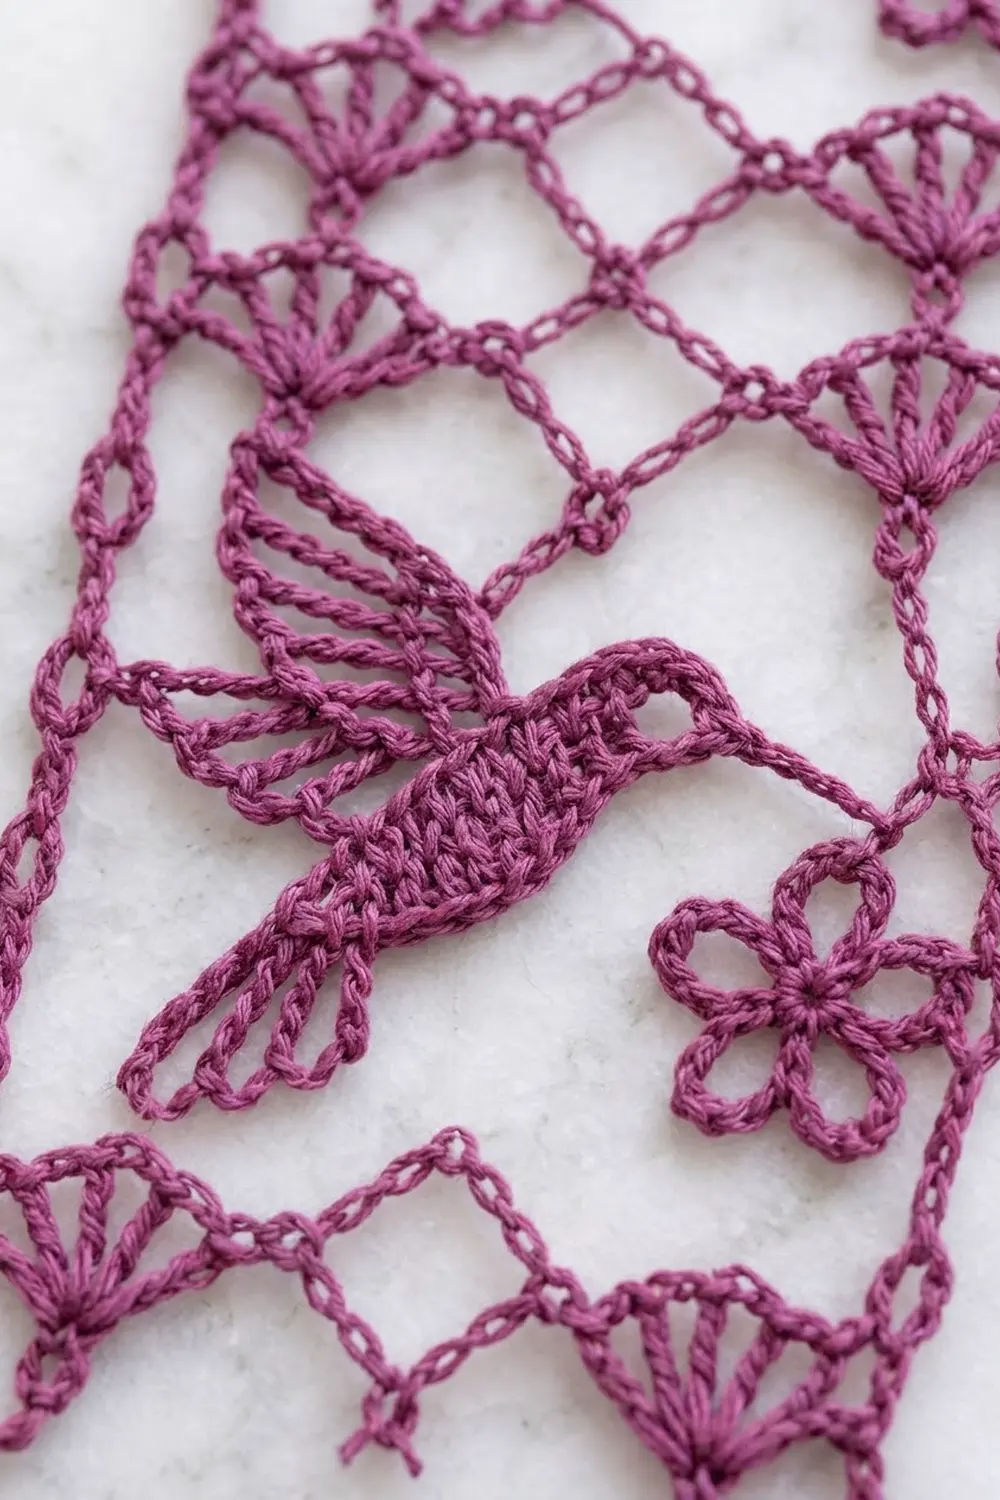
Hummingbird Appliqué (Make 9 per Strip in the Strip’s Color)
Body: Ch 9.
Rnd 1: Sc in 2nd ch from hook, hdc in next ch, dc in next 4 ch, hdc in next ch, 5 sc in last ch for the head. Working along the opposite side of the foundation: hdc in next ch, dc in next 4 ch, hdc in next ch, 2 sc in last ch. Join with sl st to first sc.
(20 sts: 7 + 5 + 6 + 2)
The body is a tapered oval about 2 in (5.1 cm) long.
Beak: Sl st into the next sts until you reach the 3rd sc of the 5-sc head group. Ch 6, sl st in 2nd ch from hook and in the next 4 ch, then sl st into the same head st. (5-st spike)
Wing: Sl st along the body to the 1st dc of the first side (the top edge). In each of the next 5 sts, make one feather: ch the number shown, then work back down the chain with sl st in 2nd ch from hook, sc in next 2 ch, hdc in next 3 ch, and dc in each remaining ch. Sl st into the same body st, then move to the next body st.
– Feather 1: ch 12 (5 dc)
– Feather 2: ch 14 (7 dc)
– Feather 3: ch 15 (8 dc)
– Feather 4: ch 13 (6 dc)
– Feather 5: ch 10 (3 dc)
The feathers fan backward like a raised wing.
Tail: Sl st around to the 2-sc tail end. Make 3 tail feathers across the 2 tail sts and the first sc. For each one, ch 7, sl st in 2nd ch from hook and in the next 5 ch, then sl st into the base st.
Fasten off and leave a 12 in (30.5 cm) tail for sewing.
Flower Appliqué (Make 9 per Strip)
Ch 5 and join with a sl st to form a ring.
Rnd 1: Ch 1, 10 sc in ring, join. (10 sc)
Rnd 2: Ch 1, sc in first st. [Ch 7, sk 1, sc in next st] 4 times. Ch 7, sk last st, join to first sc. (5 loops)
Rnd 3: In each loop work (2 sc, hdc, 3 dc, hdc, 2 sc). Join.
(45 sts: 5 petals x 9)
The flower measures 1.75 in (4.4 cm) across. Fasten off and leave a sewing tail.
Placing the Appliqués
Pin one hummingbird into each window (Rows 9–16). Angle the body diagonally, with the tail toward the lower left and the beak pointing right. Place the wing feathers against the upper net.
Pin a flower at the lower right of the window, just under the beak tip. The flower should touch the right edge column.
With matching yarn, whipstitch the outer edge of each motif to the net bars it crosses. Keep the stitches small and on the back. Stitch through the sc tops of the motif, not through the dc posts, so the stitches stay hidden.
Assembling the Curtain (No Stitched Joins)
This curtain has multiple pieces, but they are not seamed together. Each strip hangs on its own, so the strips can move and let people walk through. There is no stitch-to-stitch join to count.
Layout (front view, left to right):
| Plum | Cream | Plum | Cream | Plum | Cream |
   1      2       3      4       5      6
Pieces per color:
| Color | Strips | Hummingbirds | Flowers |
|---|---|---|---|
| Plum | 3 | 27 | 27 |
| Cream | 3 | 27 | 27 |
Spacing on the rod: Leave 1 in (2.5 cm) between strips. The strips cover 6 x 7 in = 42 in (106.7 cm), and the 5 gaps add 5 in (12.7 cm), for a total of 47 in (119.4 cm).
Tension advice: Weigh one finished plum strip and one finished cream strip. If one is more than 10 g heavier, it will hang longer. Re-block it shorter before you hang the curtain.
Border
Border gauge: Along the top and bottom edges, work 1 sc per stitch (5 sc per in). Along the long sides, work 2 sc per dc row end (4 sc per in). Every row of the strip ends on a dc column, so every row end takes exactly 2 sc.
Rnd 1: Continue from the closing band without fastening off. Ch 1 and work along the top edge: 3 sc in the first st, sc in the next 28 sts, 3 sc in the last st. Work 2 sc in each of the 156 row ends down the side (312 sc). Along the foundation, work 3 sc in the first st, 1 sc in each of the next 28 sts, and 3 sc in the last st. Work 312 sc up the second side. Join.
The center sc of each 3-sc group is the corner stitch.
| Rnd 1 | Count per side, including both corners |
|---|---|
| Top | 32 |
| Bottom | 32 |
| Each long side | 314 |
| Total for the round | 688 (60 + 624 + 4 corners) |
Rnd 2: Ch 1. Sc in each st around, with 3 sc in each corner st. Join.
| Rnd 2 | Count per side, including both corners |
|---|---|
| Top | 34 |
| Bottom | 34 |
| Each long side | 316 |
| Total for the round | 696 (688 + 8) |
Why the math works:
– Top and bottom: The 30 strip sts plus 2 extra sts per corner give 34 on Rnd 2, so the ends stay flat.
– Sides: 156 rows at 0.5 in (1.3 cm) each, with 2 sc per row end, gives 312 sc that lie flat along 78 in (198.1 cm).
– Corners: Each 3-sc corner adds exactly 2 sts per round, which keeps the corners square.
– Depth: The two rounds add 0.5 in (1.3 cm) on every side. The strip becomes 7 in x 79 in (17.8 cm x 200.7 cm).
Hanging Tabs
Number the 34 top-edge sts of Rnd 2, with the corners at sts 1 and 34. Each tab is 5 sts wide, about 1 in (2.5 cm).
- Join yarn in st 2. Sc in sts 2–6, turn. (5 sc)
- Work 23 more rows of sc, for 24 rows in total, about 6 in (15.2 cm).
- Fold the tab to the back and whipstitch the last row to Rnd 1 behind sts 2–6. This makes a 3 in (7.6 cm) loop.
- Repeat steps 1–3 over sts 29–33.
Final Blocking
- Soak each strip in cool water for 15 minutes, then press the water out in a towel. Do not wring.
- Pin the strip flat to 7 in x 79 in (17.8 cm x 200.7 cm). Pin both edge columns straight first.
- Pin each window net open so that the diamonds are even. The window should measure 4 in (10.2 cm) tall.
- Shape each fan into a smooth half-circle and pin the tips of the hummingbird’s wing feathers.
- Let the strip dry completely, about 24 hours.
- Hang the strip on the rod for one day, then measure it again. Cotton can drop by about 0.5 in (1.3 cm).
Final Quality-Control Checklist
- [ ] Each strip has 156 rows and 9 complete blocks.
- [ ] Every fan row has 3 fans and 30 sts.
- [ ] Every window holds 1 hummingbird and 1 flower, all facing the same direction.
- [ ] Border Rnd 2 has 696 sts with square corners.
- [ ] The tabs sit over sts 2–6 and sts 29–33.
- [ ] All six strips measure within 0.5 in (1.3 cm) of 79 in (200.7 cm).
- [ ] Yarn ends are woven into the edge columns and are not visible in the net.
Troubleshooting
- The strip narrows over time: You are probably skipping the 3rd dc of the edge column. Check for 3 dc at each end of every row.
- The diamonds look like squares: Check that the Net A rows start and end with ch 2, not ch 5.
- Fans ruffle: Your fan dc may be too loose. Pull each loop snug, or check that you skip 3 sts on each side of every fan.
- The border waves: You worked more than 2 sc per row end. Rip back and count 312 sc per side.
- The border pulls in: You worked fewer than 2 sc per row end. Rip back and add the missing sc.
- The hummingbird curls: Steam the motif flat before sewing it in, and keep the whipstitches loose.
- One strip is longer than the others: Re-block the long strip shorter, pinning the rows closer together.
Care
Hand wash in cool water with mild detergent. Dry flat or re-block, and never tumble dry, because the long strips will stretch out of shape.
Final Notes
Here is the measurement chain for one strip:
– 30 sts = 6 in (15.2 cm) wide
– 17-row block = 8.5 in (21.6 cm) tall
– 156 rows = 78 in (198.1 cm)
– Border adds 0.5 in (1.3 cm) per side, for a finished strip of 7 in x 79 in (17.8 cm x 200.7 cm)
– Six strips with 1 in (2.5 cm) gaps cover 47 in (119.4 cm) of rod
If you check your gauge at each stage, every hummingbird will sit in the same place across all six strips.
Happy crocheting!