

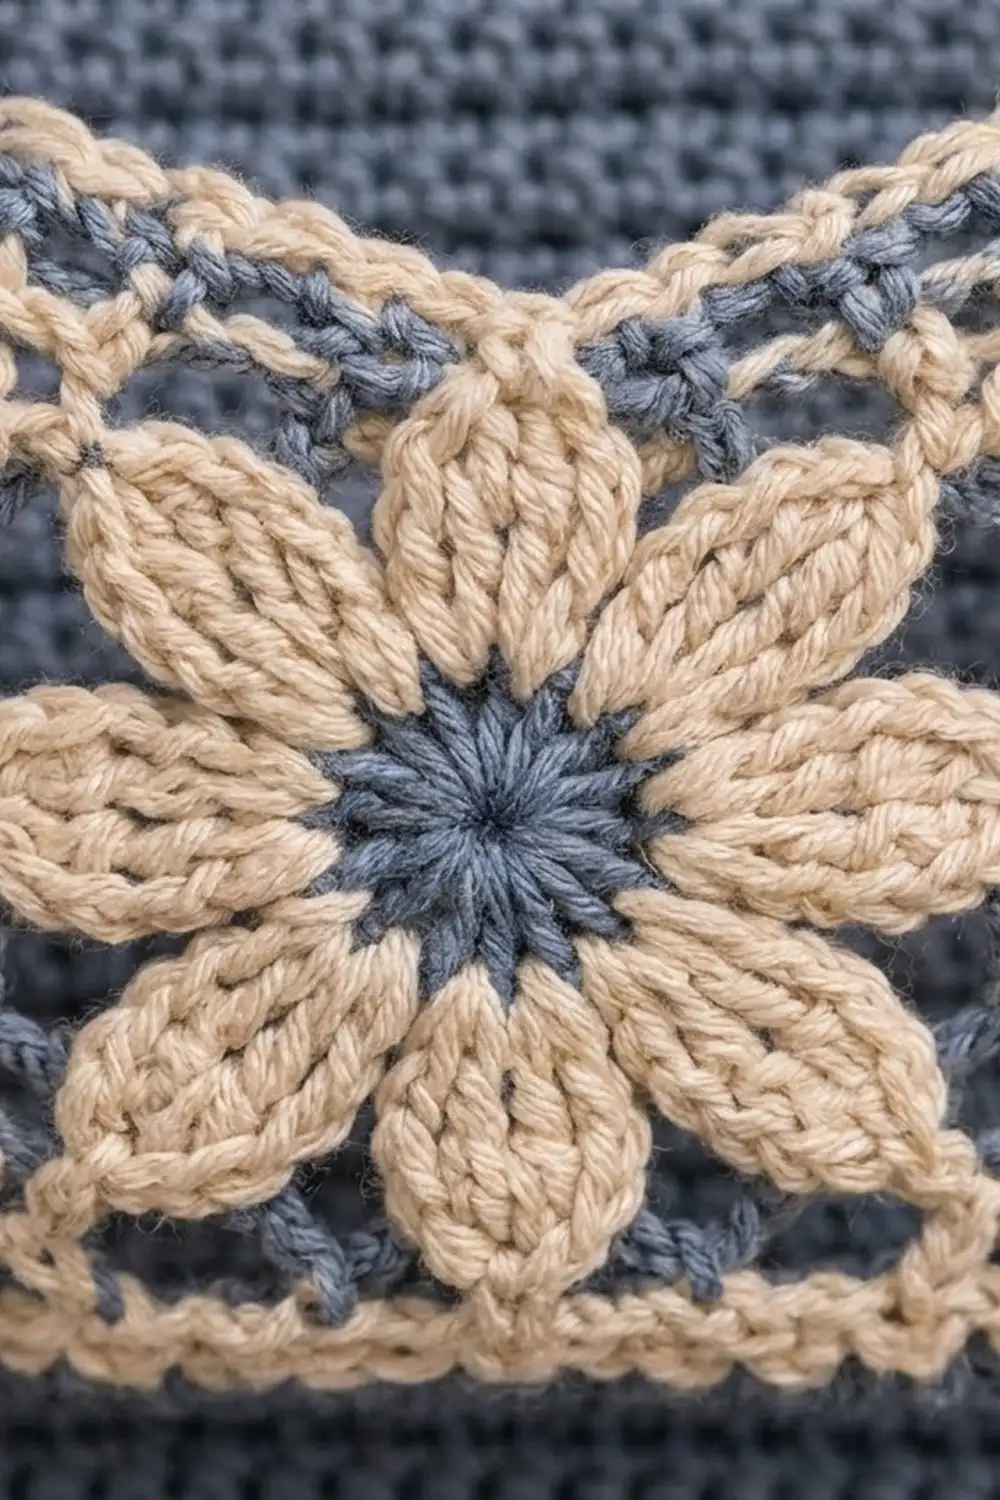
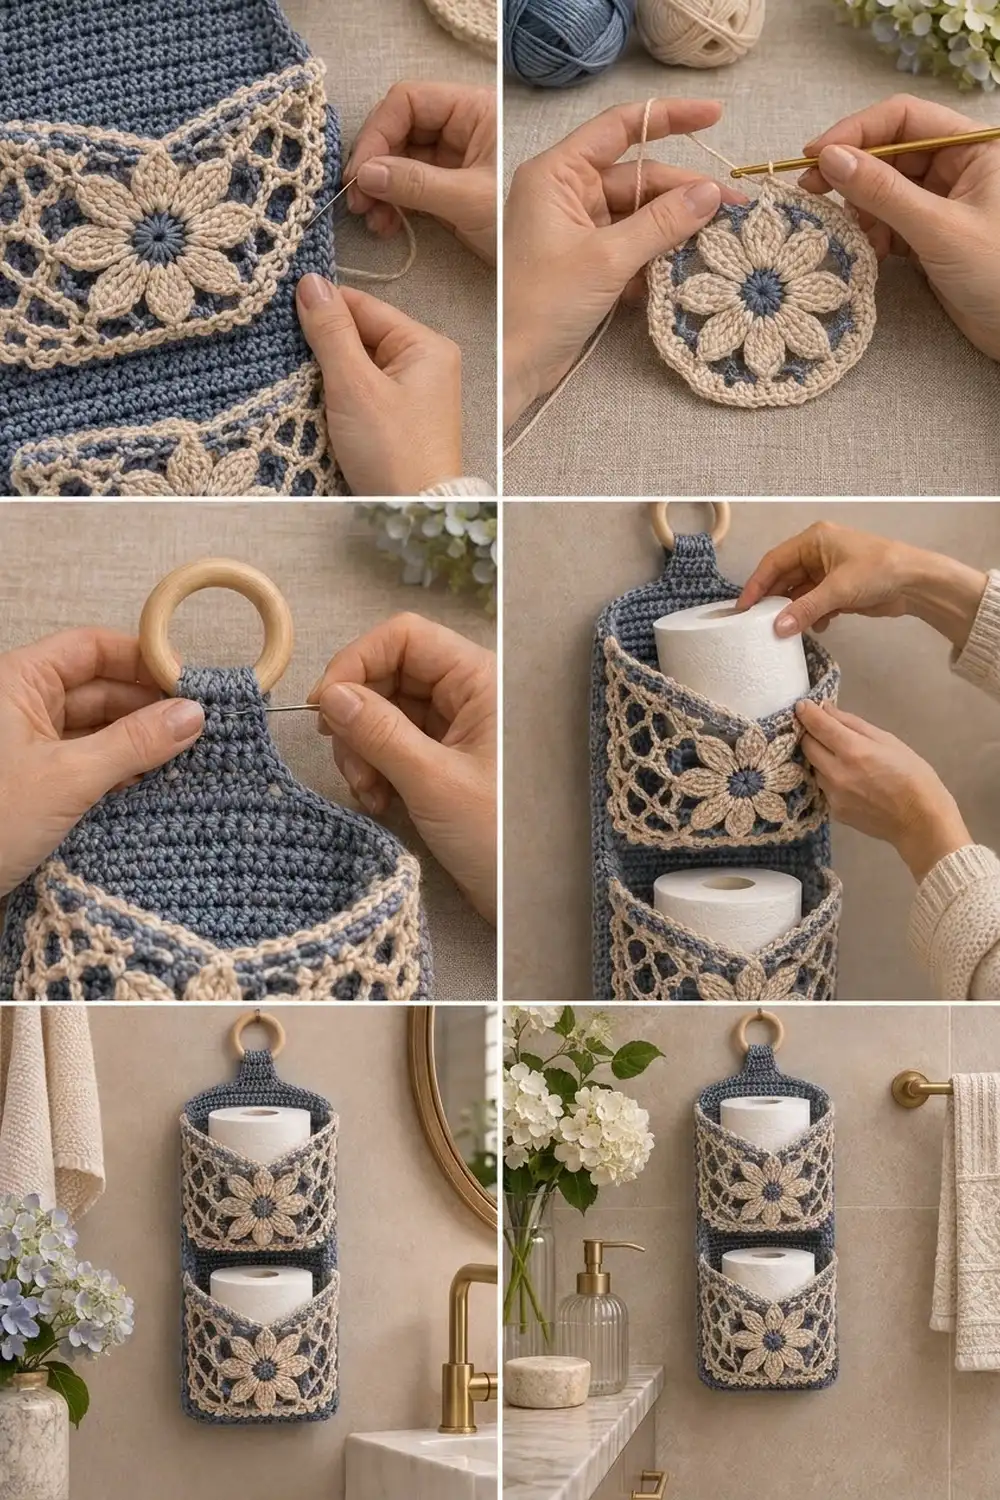
This hanging toilet paper holder pairs a sturdy dusty-blue back panel with two cream lace pockets. Each pocket front has an eight-petal flower with pointed petals around a blue center, surrounded by an open chain mesh. The blue panel shows through the lace, so the flower stands out against it.
The style is calm and classic, a little cottage and a little spa. Just two colors, dusty blue and cream, keep it easy to match with towels and bathroom fittings. The pattern uses US crochet terms throughout.
The finished holder measures 7 in (17.8 cm) wide by 19 in (48.3 cm) tall, not counting the tab and ring. Each pocket holds one standard roll.
The holder is built from five pieces. You’ll make one single-crochet back panel, two lace pocket fronts worked in the round, and two blue gusset strips that give each pocket a depth of 3 in (7.6 cm). The gussets are sewn between the fronts and the panel. Then a two-round border goes around the panel, and a tab is worked from the top edge and folded around a wooden ring.
Finished Size and Construction
- Finished size: 7 in × 19 in (17.8 cm × 48.3 cm), plus about 2 in (5.1 cm) of tab and ring
- Skill level: Intermediate
- Terminology: US
- Yarn weight: Medium / worsted (#4) cotton
- Hook: 5.0 mm (H-8)
- Number of pieces: 5 (1 back panel, 2 lace fronts, 2 gussets)
- Layout: 2 pockets stacked vertically on 1 panel
- Lace front size: 6 in (15.2 cm) wide × 7 in (17.8 cm) tall at the sides
- Panel size before border: 6 in × 18 in (15.2 cm × 45.7 cm)
- Border depth: 0.5 in (1.3 cm) on each side
Materials
Use a smooth worsted-weight cotton or cotton blend. Cotton holds its shape against the weight of the rolls and copes well with bathroom humidity. Choose a yarn of about 85 m per 50 g.
- Color A, dusty blue: 170 g (290 m)
- Color B, cream: 70 g (120 m)
Tools:
– 5.0 mm (H-8) crochet hook
– One wooden ring, 2.5 in (6.4 cm) across
– Tapestry needle
– 8 locking stitch markers
– Rust-proof pins and a blocking mat
– Measuring tape
These yarn amounts include a margin of about 15%, which covers a gauge swatch and some frogging.
Abbreviations (US Terms)
- ch: chain
- sl st: slip stitch
- sc: single crochet
- hdc: half double crochet
- dc: double crochet
- tr: treble crochet
- sk: skip
- sp(s): space(s)
- st(s): stitch(es)
- MR: magic ring
- RS: right side
Petal: (hdc, dc, tr, ch 2, tr, dc, hdc) all in the same ch-3 sp. The ch-2 forms the pointed tip.
Gauge and Checkpoints
Single crochet gauge: 16 sc and 18 rows = 4 in (10.2 cm), worked with Color A.
Before making the full set, make one lace front and check it at each stage:
- After Rnd 3 (flower): 3 in (7.6 cm) from petal tip to opposite petal tip
- After Rnd 6: about 5.25 in (13.3 cm) square
- After Rnd 7: 5.5 in (14.0 cm) square
- After Rnd 8: 6 in (15.2 cm) square
If your pieces come out too big: go down 0.5 mm in hook size. If the lace is only slightly large, tighten the ch-5 and ch-7 loops.
If your pieces come out too small: go up 0.5 mm in hook size.
The panel and gussets must match the single-crochet gauge exactly, because the joining ratios depend on it.
Back Panel
Use Color A. Turn at the end of every row. The ch 1 at the start of a row does not count as a stitch.
Row 1 (RS): Ch 21, sc in the 2nd ch from the hook and in each ch across. (20 sc)
Row 2: Ch 1, 2 sc in the first st, sc in the next 18 sts, 2 sc in the last st. (22 sc)
Row 3: Ch 1, 2 sc in the first st, sc in the next 20 sts, 2 sc in the last st. (24 sc)
Rows 2–3 shape the rounded bottom corners.
Rows 4–81: Ch 1, sc in each st across. (24 sc)
Fasten off.
Checkpoint: the panel should measure 6 in × 18 in (15.2 cm × 45.7 cm).
Place markers:
– Put a marker in each edge stitch of Row 4 and of Row 35. These mark the bottom pocket’s area.
– Put a marker in each edge stitch of Row 41 and of Row 72. These mark the top pocket’s area.
Rows 36–40 form a gap of about 1 in (2.5 cm) between the pockets. Rows 73–81 leave 2 in (5.1 cm) of plain panel above the top pocket.
Lace Pocket Front (Make 2)
Work with the RS facing throughout. Join each round with a sl st to the first st.
Rnd 1 (Color A): MR, ch 3 (counts as dc), 15 dc in the ring, join. (16 dc) Fasten off.
Rnd 2 (Color B): Join in any st, ch 1, sc in the same st, ch 3, sk 1, sc in the next st, ch 3, sk 1 7 times, join. (8 sc, 8 ch-3 sps)
Rnd 3: Sl st into the first ch-3 sp, then work 1 Petal in each ch-3 sp around, join. (8 petals)
Rnd 4: Sl st to the first ch-2 tip, ch 1, sc in the ch-2 tip, ch 7 8 times, join. (8 sc, 8 ch-7 loops)
Rnd 5: Sl st into the first loop, ch 1, (sc, ch 5, sc) in the loop, ch 5 8 times, join. (16 sc, 16 ch-5 sps)
Rnd 6: Sl st to the center of the first ch-5 sp, ch 1. Repeat the following sequence 4 times: sc in the sp, ch 5, sc in the next sp, ch 5, sc in the next sp, ch 5, (sc, ch 7, sc) in the next sp for the corner, ch 5. Join. (20 sc, 16 ch-5 sps, 4 ch-7 corners)
This round squares the mesh. There are 4 ch-5 sps on each side between the corners.
Rnd 7: Sl st into the first ch-5 sp, ch 1. Work 4 sc in each ch-5 sp and (2 sc, ch 2, 2 sc) in each ch-7 corner, join.
Each side has 2 + 16 + 2 = 20 sc between the ch-2 corner sps. (80 sc, 4 ch-2 sps) Fasten off.
Rnd 8 (trim round, Color A): Join in any sc. Sc in each sc, and work 3 sc in each ch-2 corner sp. Join.
Count: 80 (one per existing stitch) + 12 (3 per corner) = 92 sc. Each side has 22 sc between the corner centers, or 24 sc including both corner centers. Fasten off.
Checkpoint: the square should measure 6 in (15.2 cm).
Dipped Top Edge
Choose one side to be the top. You’ll work across its 24 sts, from corner center to corner center.
Row 9 (Color B): Join in the right corner center. Ch 4 (counts as tr), tr in the next 2 sts, dc in the next 3, hdc in the next 3, sc in the next 6, hdc in the next 3, dc in the next 3, tr in the last 3. (24 sts) Fasten off.
The tall stitches at the ends and the short stitches in the middle create the dip. The sides rise about 0.75 in (1.9 cm), and the center rises about 0.25 in (0.6 cm).
Row 10 (Color A): Join in the first st, ch 1, sc in each st across. (24 sc) Fasten off.
Checkpoint: the front should be 7 in (17.8 cm) tall at the sides and about 6.5 in (16.5 cm) tall at the center.
Gusset (Make 2)
Use Color A. Turn at the end of every row.
Row 1: Ch 13, sc in the 2nd ch from the hook and in each ch across. (12 sc)
Rows 2–91: Ch 1, sc in each st across. (12 sc)
Fasten off.
Checkpoint: the gusset should measure 3 in × 20.2 in (7.6 cm × 51.3 cm).
Place a marker at the end of Row 32 and another at the end of Row 59. This divides the strip into a 32-row side, a 27-row bottom, and a 32-row side.
Make All Pieces
| Piece | Color | Quantity |
|---|---|---|
| Back panel | A | 1 |
| Lace front | A center and trim, B lace | 2 |
| Gusset | A | 2 |
Layout, from the top of the holder to the bottom:
[ Tab + ring             ]
[ Panel, Rows 73–81      ]
[ Top pocket, Rows 41–72 ]
[ Gap, Rows 36–40        ]
[ Bottom pocket, Rows 4–35 ]
[ Panel, Rows 1–3 curve  ]
Joining
Sew all seams with Color A using a whipstitch through both loops. Keep the RS facing out.
Step 1: Sew a gusset to each front
Each gusset wraps around three edges of a front: one side, the bottom, and the other side.
Bottom: the front’s bottom edge has 24 sts, counting both corner centers. Match these to the gusset’s 27 bottom rows. Sew 1 front stitch to 1 gusset row-end, but on every 8th stitch catch 2 row-ends instead of 1. That doubles up 3 times, so 24 + 3 = 27.
Sides: each side of the front gives 28 edge points:
– 23 sts of Rnd 8 (the 22 sts between corner centers plus the top corner center)
– 4 points spaced evenly along the Row 9 tr post
– 1 row-end of Row 10
Match these 28 points to the gusset’s 32 side rows by catching 2 row-ends on every 7th point. That doubles up 4 times, so 28 + 4 = 32.
Step 2: Sew each gusset to the panel
Pin the free long edge of the gusset onto the front face of the panel, along the outermost column of stitches. The pocket sides line up with the panel sides.
Sides: the gusset rows and the panel rows have the same row gauge, so match them 1 to 1:
– Bottom pocket: gusset rows 1–32 to panel Rows 35–4, and gusset rows 60–91 to the other edge of Rows 4–35
– Top pocket: the same, using Rows 41–72
Bottom: sew the gusset’s 27 bottom rows straight across the panel’s 24 sts, along Row 4 for the bottom pocket and Row 41 for the top pocket. Catch 2 row-ends on every 8th stitch.
Tension and checkpoint
Sew snugly, but don’t pull the seams tight. A seam that puckers will shorten the panel.
Checkpoint: the panel should still measure 6 in × 18 in (15.2 cm × 45.7 cm), and each pocket should stand out 3 in (7.6 cm) from the panel.
Border
Border gauge: 4 sc per inch (2.54 cm), the same as the panel. Along the side edges, work 8 sc for every 9 row-ends so the edges stay flat.
Work into the panel’s own edges only. The gusset seams sit on the front face and stay clear of the border.
Rnd 1 (Color A): Join at the top right corner. Work 3 sc in the corner and in each of the other 3 corners. Between the corners, work:
– Top: 24 sc, 1 in each st
– Each side: 72 sc into the 81 row-ends (8 for every 9)
– Bottom: 24 sc (20 into the foundation chains, plus 2 into the row-ends of Rows 2–3 on each curve)
Join. Total: 24 + 72 + 72 + 24 + 12 = 204 sc.
Rnd 2: Ch 1. Sc in each sc, and work 3 sc in each corner center. Join.
Between the corner centers there are now 26 sc on the top and bottom and 74 sc on each side. Including the 4 corner centers, that’s 26 + 74 + 74 + 26 + 4 = 212 sc. Fasten off.
Why the math works: with both corner centers counted, the top and bottom each have 28 sts. At 4 sts per inch that’s 7 in (17.8 cm). Each side has 76 sts, which gives 19 in (48.3 cm). The border adds exactly 0.5 in (1.3 cm) on every side of the 6 in × 18 in panel.
Tab
Count the 28 sts across the top edge, including both corner centers.
Row 1: Join Color A in the 11th st, ch 1, sc in the same st and in the next 7 sts. (8 sc) This centers the tab, leaving 10 sts unworked on each side.
Rows 2–18: Ch 1, sc in each st across. (8 sc)
The tab measures 2 in × 4 in (5.1 cm × 10.2 cm). Fold it over the wooden ring toward the back and whipstitch Row 18 to the back of border Rnd 1.
Final Blocking
- Weave in all ends inside the gussets or along the seams.
- Spritz the holder evenly until it’s damp, not soaking.
- Lay it flat on a mat, RS up, with the pockets resting on the panel.
- Pin the outer edge to 7 in × 19 in (17.8 cm × 48.3 cm).
- Open up each lace front: pin the petal tips, the ch-7 corners, and the dip at the center top.
- Stuff each pocket lightly with a towel so it dries with a 3 in (7.6 cm) depth.
- Leave it to dry completely before you unpin it.
Final Quality-Control Checklist
- [ ] The panel measures 7 in × 19 in (17.8 cm × 48.3 cm)
- [ ] Each front measures 6 in (15.2 cm) wide and 7 in (17.8 cm) tall at the sides
- [ ] Each flower has 8 pointed petals with a blue center
- [ ] Each top edge dips evenly at the center
- [ ] There are 4 doubled stitches on each side seam and 3 on each bottom seam
- [ ] Border Rnd 2 has 212 sts
- [ ] The tab is centered and securely sewn around the ring
- [ ] A roll slides in and out of each pocket easily
Troubleshooting
- The flower cups instead of lying flat: the Rnd 2 chains are too short. Work ch 4 instead of ch 3.
- The lace front is wavy: your loops are too long. Use a smaller hook for Rnds 4–7.
- The front is narrower than the gusset seam: re-block the front to 6 in (15.2 cm) before sewing.
- The dip at the top isn’t visible: make sure the 3 stitches at each end of Row 9 are full tr.
- The pockets sag forward: add 2 rows to each gusset’s bottom section, then re-sew.
- The side edges ruffle: in border Rnd 1, work fewer sc into the row-ends.
Care
Hand wash in cool water, press out the water in a towel, and dry flat. Re-block if the pockets lose their shape.
Final Notes
The measurements all build on each other. If the gauge is 16 sc to 4 in (10.2 cm):
– each lace front grows from a 3 in (7.6 cm) flower to a 6 in (15.2 cm) square, then to 7 in (17.8 cm) tall with the dipped top
– each gusset is 3 in × 20.2 in (7.6 cm × 51.3 cm)
– the panel is 6 in × 18 in (15.2 cm × 45.7 cm)
– the border brings the panel to 7 in × 19 in (17.8 cm × 48.3 cm)
Check each stage as you go and the pieces will fit together without forcing.
Happy crocheting!