

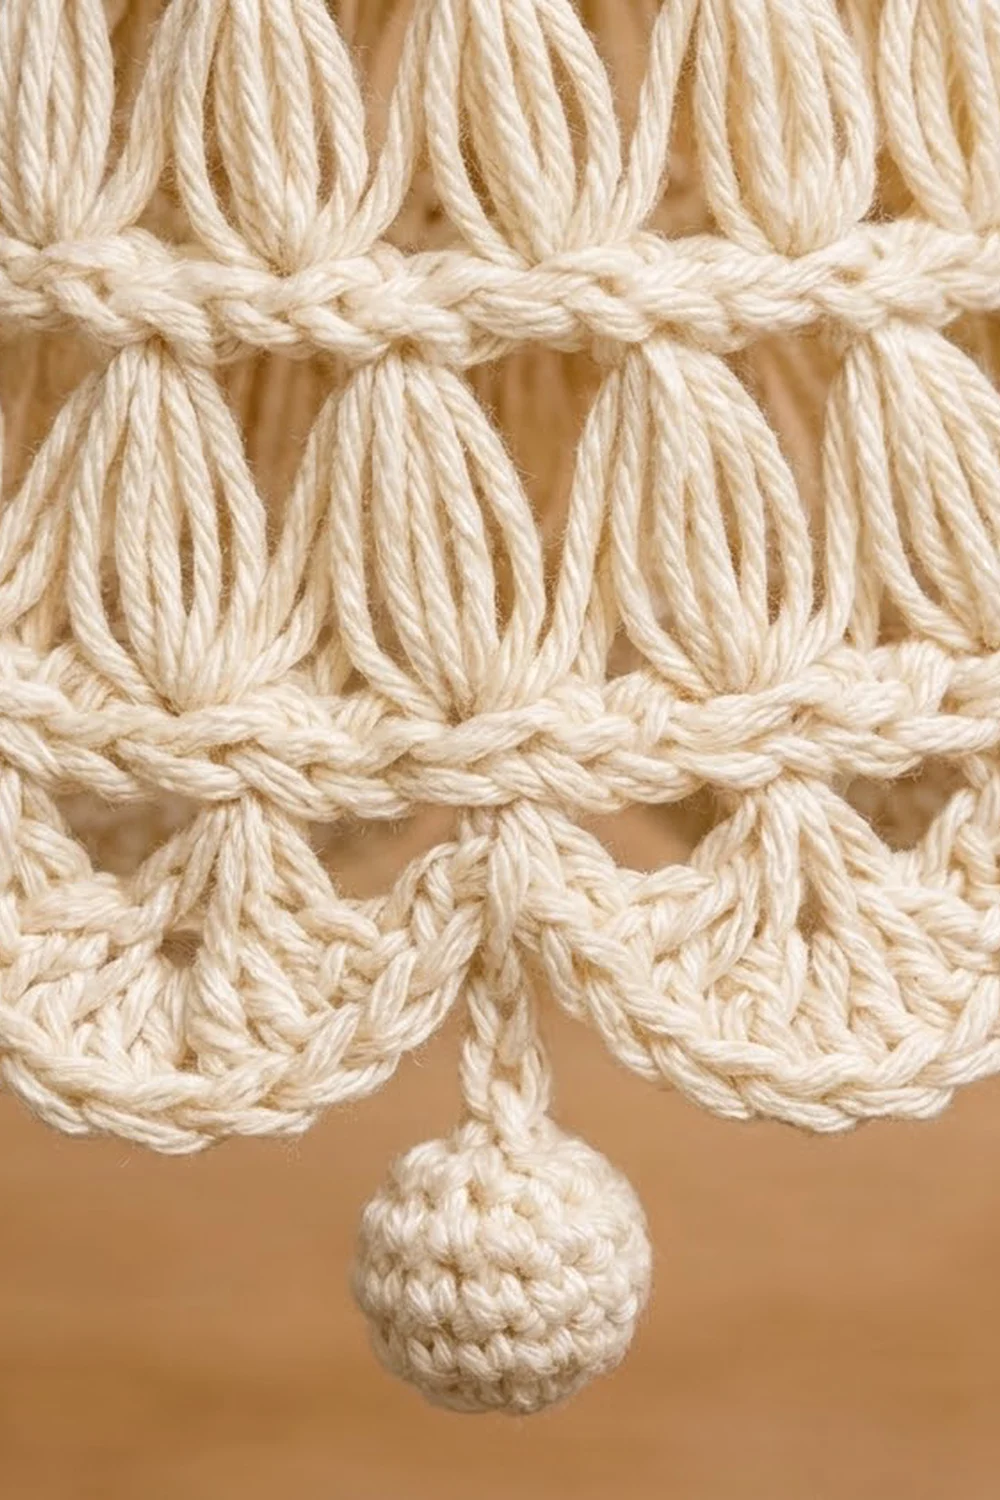
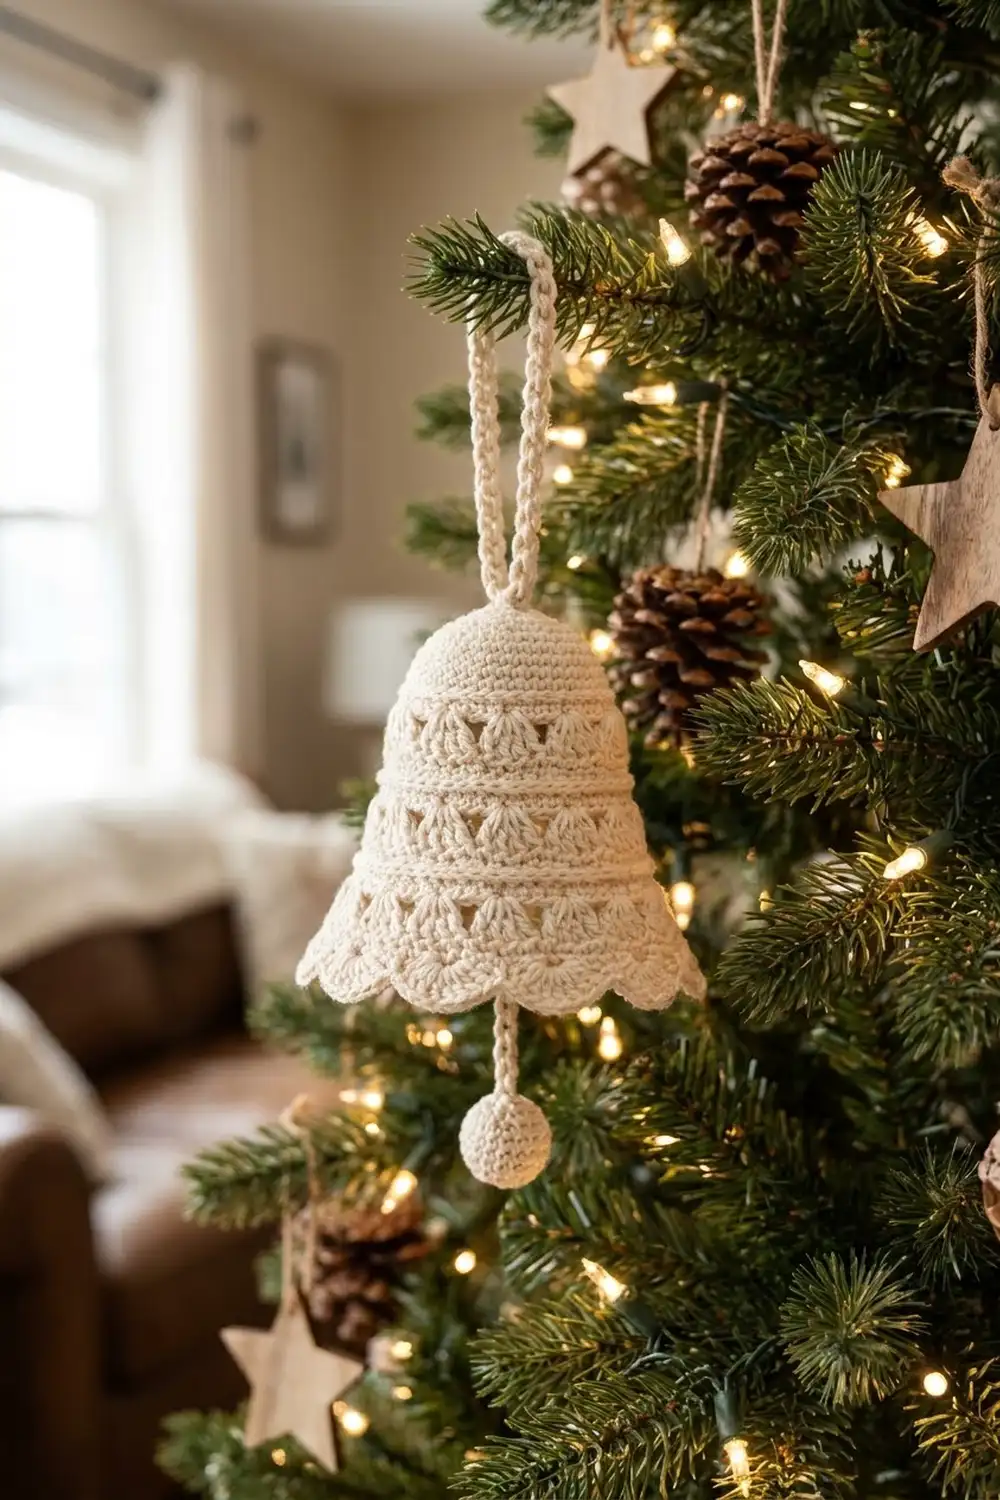
The Ivory Chime Bell is a flat lace ornament with a vintage feel. Four tiers of tall broomstick-lace clusters get wider as they go down, so the shape flares into a classic bell. A row of open scalloped fans finishes the hem, and a tiny crocheted ball hangs from the center like a clapper.
The whole bell is worked in one cream cotton, which lets the lace texture stand out. It looks lovely on a green tree, tied to a gift, or hung in a window.
This pattern uses US crochet terms. The finished bell is 5.75 in (14.6 cm) tall and 4.75 in (12.1 cm) wide at the hem, not counting the hanging loop and ball.
You work the bell flat in rows from the top down. A small single-crochet cap comes first. Then you alternate broomstick-lace rows with two-row single-crochet bands, increasing at both edges. A three-round border neatens the edges and adds the scallops and hanging loop. The ball is made separately and hung from the center scallop.
Finished Size and Construction
- Finished size: 5.75 in (14.6 cm) tall x 4.75 in (12.1 cm) wide at the hem
- Skill level: Intermediate (basic broomstick lace)
- Terminology: US crochet terms
- Yarn weight: Sport (#2) cotton
- Hook: 3.0 mm, plus an 8 mm (US 11) knitting needle or dowel for the broomstick loops
- Number of pieces: 1 bell body, plus 1 tiny ball accent
- Layout: Single piece, no joining
- Piece size before border: 4.67 in (11.9 cm) tall; 1.33 in (3.4 cm) wide at the top, 4 in (10.2 cm) wide at the hem
- Border depth: about 0.33 in (0.8 cm) at the sides and top; about 0.75 in (1.9 cm) at the scalloped hem
Materials
Use a smooth, mercerized sport-weight cotton in cream or ivory. Mercerized cotton shows the long broomstick loops clearly and holds its shape after blocking. Fuzzy or very soft acrylic will blur the lace.
- Cream: 12 g (about 36 m) for one bell, including the ball and hanging loop
Quantities include a margin of about 20% for swatching and weaving in ends. One bell actually uses about 10 g (30 m).
Tools:
– 3.0 mm crochet hook
– 8 mm (US 11) knitting needle, or a smooth dowel of the same thickness
– Tapestry needle
– Scissors
– Stitch marker
– A small pinch of fiberfill or matching yarn scraps for the ball
– Blocking mat, rust-proof pins, and a spray bottle
– Optional: fabric stiffener or starch
Abbreviations (US Terms)
- ch – chain
- sl st – slip stitch
- sc – single crochet
- hdc – half double crochet
- dc – double crochet
- sc2tog – single crochet 2 together
- st(s) – stitch(es)
- sp – space
- MR – magic ring
- RS / WS – right side / wrong side
Special stitch: Broomstick Lace Row (BLR). This is worked in two passes without turning.
- Loop pass (left to right): Pull up the loop on your hook and slip it onto the needle. This is loop 1. Working back across the row you just made, insert the hook in the next st, pull up a loop, and slip it onto the needle. Repeat in each st to the end. You will have 1 loop on the needle for every st in the row.
- Return pass (right to left): Slide the hook through the first 4 loops together and take them off the needle. Yo, pull through, ch 1 (this does not count as a st), then work 4 sc into the center of that group. *Slide the hook through the next 4 loops, take them off the needle, and work 4 sc into the center of the group; repeat from * to the end.
Each group of 4 loops becomes one tall lace cluster topped by 4 sc. The st count stays the same.
Left-handed crocheters should work the loop pass from right to left and the return pass from left to right.
Gauge and Checkpoints
Gauge: 24 sc and 24 rows = 4 in (10.2 cm) in sc with the 3.0 mm hook. That is 6 sts and 6 rows per 1 in (2.5 cm).
Loop height: With the 8 mm needle, the loops are 0.5 in (1.3 cm) tall. A full BLR (loops plus the sc on top) is about 2/3 in (1.7 cm) tall, which equals 4 sc rows.
Test the gauge by working Rows 1–9 first. These rows include the cap, one lace tier, and one band, so they test everything that matters.
Checkpoints:
– After Row 6 (cap): 2 in (5.1 cm) wide, 1 in (2.5 cm) tall
– After Row 9: 2.67 in (6.8 cm) wide at the lower edge, 2 in (5.1 cm) tall in total
– After Row 12: 3.33 in (8.5 cm) wide, 3 in (7.6 cm) tall
– After Row 15: 4 in (10.2 cm) wide, 4 in (10.2 cm) tall
– After Row 16: 4 in (10.2 cm) wide, 4.67 in (11.9 cm) tall
If your piece is too big: Use a 2.75 mm hook. If only the lace tiers are too tall, use a 7 mm needle.
If your piece is too small: Use a 3.25 mm hook. If the loops look squashed, use a 9 mm needle.
Bell Body
Every row starts with ch 1, and the ch 1 does not count as a st. Rows 8, 9, 11, 12, 14 and 15 each increase by 2 sts, one at each edge. This gives the bell its straight, flared sides.
Cap
Row 1: Ch 9. Sc in 2nd ch from hook and in each ch across. (8 sts)
Row 2: Ch 1, turn. 2 sc in first st, sc in next 6 sts, 2 sc in last st. (10 sts)
Row 3: Ch 1, turn. Sc in each st across. (10 sts)
Row 4: Ch 1, turn. 2 sc in first st, sc in next 8 sts, 2 sc in last st. (12 sts)
Row 5: Ch 1, turn. Sc in each st across. (12 sts)
Row 6: Ch 1, turn. Sc in each st across. (12 sts)
Place a marker on the side facing you. This is the RS. Do not turn.
Tier 1
Row 7 (RS): Work 1 BLR across the 12 sts: 12 loops on the needle, then 3 groups of 4. (12 sc, 3 clusters)
Row 8 (WS): Ch 1, turn. 2 sc in first st, sc in next 10 sts, 2 sc in last st. (14 sts)
Row 9 (RS): Ch 1, turn. 2 sc in first st, sc in next 12 sts, 2 sc in last st. (16 sts)
Do not turn. Row 9 ends at the correct edge to start the next loop pass.
Tier 2
Row 10 (RS): Work 1 BLR: 16 loops, then 4 groups of 4. (16 sc, 4 clusters)
Row 11 (WS): Ch 1, turn. 2 sc in first st, sc in next 14 sts, 2 sc in last st. (18 sts)
Row 12 (RS): Ch 1, turn. 2 sc in first st, sc in next 16 sts, 2 sc in last st. (20 sts)
Tier 3
Row 13 (RS): Work 1 BLR: 20 loops, then 5 groups of 4. (20 sc, 5 clusters)
Row 14 (WS): Ch 1, turn. 2 sc in first st, sc in next 18 sts, 2 sc in last st. (22 sts)
Row 15 (RS): Ch 1, turn. 2 sc in first st, sc in next 20 sts, 2 sc in last st. (24 sts)
Tier 4
Row 16 (RS): Work 1 BLR: 24 loops, then 6 groups of 4. (24 sc, 6 clusters)
Do not fasten off. Check the size: 4 in (10.2 cm) across the last row and 4.67 in (11.9 cm) from the foundation chain to the last row.
Clapper Ball
Rnd 1: 6 sc in a MR. (6 sts)
Rnd 2: 2 sc in each st. (12 sts)
Rnds 3–4: Sc in each st. (12 sts)
Rnd 5: Sc2tog 6 times. (6 sts)
Stuff firmly with a small pinch of fiberfill or yarn scraps. Fasten off with a 6 in (15.2 cm) tail. Thread the tail through the front loops of the last 6 sts and pull tight. The ball measures about 0.75 in (1.9 cm) across. Keep the tail for attaching.
Border
Border gauge: The border uses the body gauge of 6 sc per 1 in (2.5 cm). Along the sides, work 1 sc into the end of each sc row and 4 sc into the end of each BLR, because one BLR is as tall as 4 sc rows.
Why the math works: Each side has 6 cap rows, 6 band rows, and 4 BLRs. That is 6 + 6 + (4 x 4) = 28 sc. At 6 sc per in, 28 sc equals the 4.67 in (11.9 cm) side height, so the edge stays flat. Corners are counted separately from the side counts.
Rnd 1 (RS): Continue from the end of Row 16. Ch 1, then rotate to work along the row ends.
– Side 1: 28 sc evenly along the row ends.
– Corner B: 3 sc in the first free loop of the foundation ch.
– Top: sc in the next 6 free loops.
– Corner C: 3 sc in the last free loop.
– Side 2: 28 sc along the row ends.
– Corner D: 3 sc in the first st of Row 16.
– Bottom: sc in the next 22 sts.
– Corner A: 3 sc in the last st of Row 16.
Sl st to the first sc. Total: 28 + 3 + 6 + 3 + 28 + 3 + 22 + 3 = 96 sts.
Rnd 2: Ch 1.
– Side 1: sc in the same st and the next 27 sts. (28)
– Corner B: sc in the next st, 3 sc in the center st, sc in the next st. (5)
– Top: sc in the next 6 sts. (6)
– Corner C: sc, 3 sc in the center st, sc. (5)
– Side 2: sc in the next 28 sts. (28)
– Corner D: sc in the first sc of the corner group. (1)
– Hem arches: sc in the Corner D center st. *Ch 5, skip 4 sts, sc in the next st; repeat from * 4 more times. The last sc lands in the Corner A center st.
– Sc in the last sc of Corner A. (1)
Sl st to the first sc. The hem span runs from the Corner D center to the Corner A center: 1 + 1 + 22 + 1 + 1 = 26 sts. Since 1 + (5 x 5) = 26, the 5 arches fit exactly. Total: 80 sc and 5 ch-5 arches.
Rnd 3: Ch 1.
– Side 1: sl st in each of the 28 sts.
– Top section (Corner B, Top, Corner C = 16 sts): sl st in the next 8 sts. Ch 24 for the hanging loop. Sl st in the next 8 sts.
– Side 2: sl st in the next 28 sts, then in the first Corner D sc.
– Hem: sl st in the anchor sc. *Work (sc, hdc, 7 dc, hdc, sc) in the next ch-5 arch, then sl st in the next anchor sc; repeat from * 4 more times.
– Sl st in the last Corner A sc.
Join with sl st to the first sl st. Total: 80 sl sts, 5 shells of 11 sts each, and a ch-24 loop. Fasten off.
Reinforce the hanger: Join yarn at one base of the ch-24 loop. Work 24 sc over the chain, then sl st at the other base. Fasten off. The finished loop stands about 1.75 in (4.4 cm) tall.
Attach the ball: Thread the ball’s tail up to the 4th dc of the center (3rd) shell. Adjust the strand to a 0.5 in (1.3 cm) drop and secure it on the WS.
Final Blocking
- Weave in all ends on the WS, running each tail through sc, not the lace loops.
- Spray the bell until it is evenly damp, or dip it and press out the water in a towel.
- Pin it RS up to 4.75 in (12.1 cm) across the hem and 5.75 in (14.6 cm) tall.
- Pin both sides as straight diagonal lines.
- Pin the tip of each scallop so the 5 fans are even.
- Gently straighten each lace cluster so the loops stand upright.
- If you like, brush on a light fabric stiffener or starch for a crisper ornament.
- Let it dry completely before unpinning. Leave the ball unpinned.
Final Quality-Control Checklist
- [ ] Tiers have 3, 4, 5 and 6 clusters from top to bottom
- [ ] All loops in each BLR are the same height
- [ ] The sides form straight diagonals with no steps
- [ ] Each side has 28 sc in Rnd 1
- [ ] The hem has exactly 5 even scallops
- [ ] The hanging loop is centered and firmly reinforced
- [ ] The ball hangs from the center scallop with a 0.5 in (1.3 cm) drop
- [ ] Finished size is 5.75 in (14.6 cm) x 4.75 in (12.1 cm)
Troubleshooting
The loop pass starts at the wrong edge. A band was not worked as 2 rows, or you turned after a BLR. BLRs must start after a RS row with no turn.
The clusters lean or twist. Keep all 4 loops untwisted as you slide the hook through, and work all 4 sc into the center of the group.
The loops are uneven. Pull each loop up snugly against the needle before you move on, and don’t let loops slip off.
The sides wave in Rnd 1. Recount: 1 sc per sc row and 4 per BLR. Too many sts cause ruffling, and too few cause puckering.
The arches don’t end at the corner. Recount the hem span in Rnd 2. It must be 26 sts from corner center to corner center.
The bell curls. Your tension is tight in the bands. Block firmly, or go up 0.25 mm for the sc rows only.
Care
Hand wash in cool water with mild soap, press out the water, and dry flat, pinned to shape. Store flat or hanging, away from heavy ornaments that could crush the lace.
Final Notes
Here is the full measurement chain. With a gauge of 6 sc per in, the 12-st cap is 2 in (5.1 cm) wide. Each tier adds 4 sts and 1 in (2.5 cm) of height, and Row 16 brings the body to 4 in (10.2 cm) wide and 4.67 in (11.9 cm) tall. The 28-st sides keep the border flat, and the 26-st hem fits exactly 5 scallops. The finished bell is 5.75 in (14.6 cm) tall and 4.75 in (12.1 cm) wide. Check each stage as you go and your bell will match from start to finish.
Happy crocheting!