

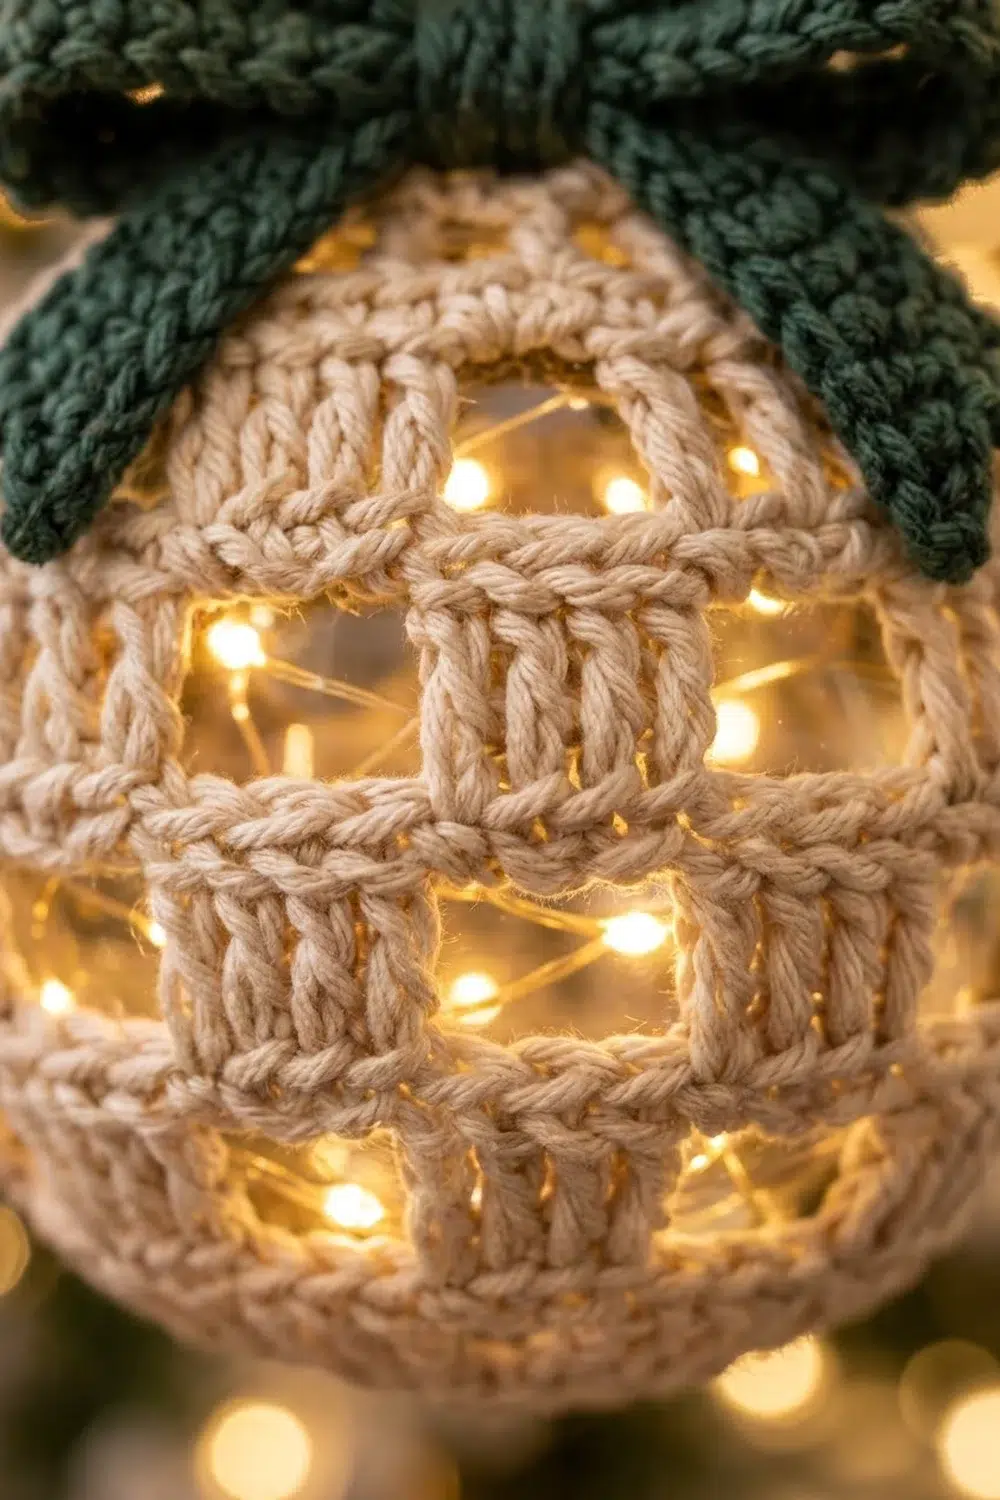
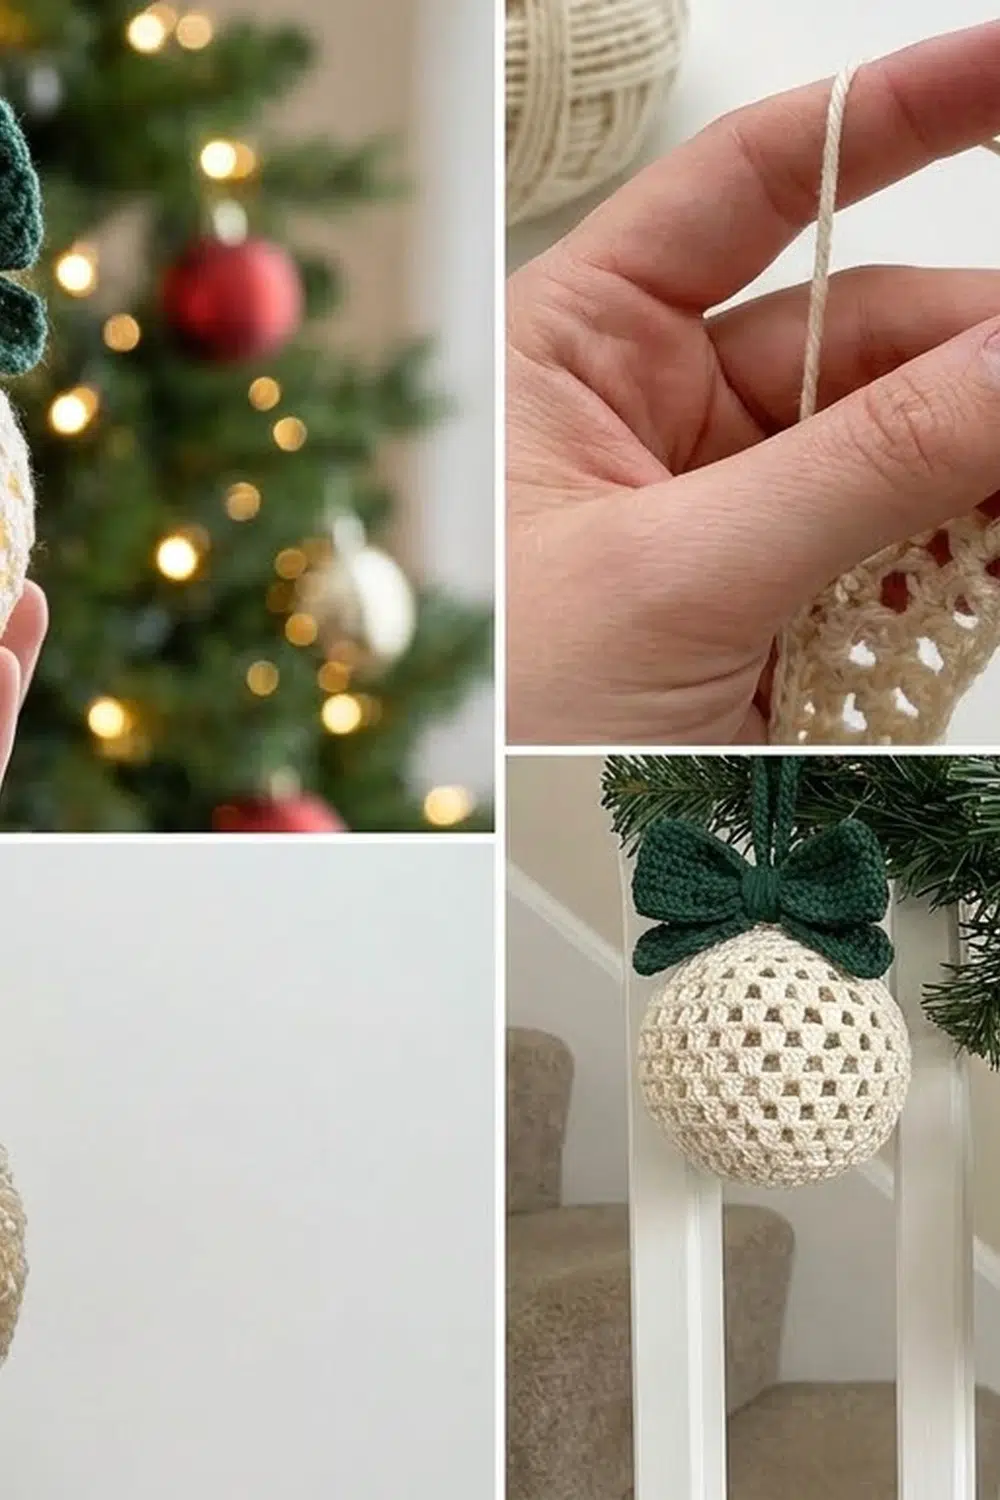
This cozy ornament cover turns a plain clear ball into a little lantern. A cream checkerboard mesh hugs the ornament, and the fairy lights inside shine through every square window. A dark green bow and a matching hanging cord finish the top.
The look is simple and classic: natural cream cotton, forest green accents, and a clean grid of solid blocks and open windows. It suits rustic, Scandinavian, or traditional decor, and it looks just as good on a garland as on a tree.
This pattern uses US crochet terms. The cover fits a 4 in (10.2 cm) clear fillable ornament, sold as 100 mm, with a circumference of about 12.6 in (32.0 cm). The bow is about 3 in (7.6 cm) wide.
Construction is easy to follow. You work the cover from the bottom up in joined rounds: a solid base cap, then five rounds of offset mesh. Then you slip the ornament inside and finish the shoulder and rim around it. You make the bow parts and the cord separately and sew them on.
Finished Size and Construction
- Finished size: fits a 4 in (10.2 cm) ball; the cover measures 12.4 in (31.5 cm) around at its widest point
- Skill level: easy-intermediate
- Terminology: US
- Yarn weight: DK / light (#3) cotton
- Hook: 3.5 mm (E-4)
- Number of pieces: 1 cover, plus a bow (1 loop strip, 2 tails, 1 center band) and 1 cord
- Layout: one seamless cover worked in joined rounds, from the bottom center to the top rim
- Piece size: 56 stitches around at the widest round
- Size before border: top opening of 24 dc, about 5.3 in (13.5 cm) around
- Border depth: 2 rounds, about 0.25 in (0.6 cm)
Materials
Choose a smooth mercerized or combed DK cotton. Cotton holds the grid crisply and doesn’t fuzz over the windows, so the light stays clean. Skip fuzzy acrylics and wool blends because they blur the stitch definition.
- Color A, cream/ecru: 10 g, about 22 m (24 yd)
- Color B, dark forest green: 8 g, about 18 m (20 yd)
These amounts include a margin of roughly 25% for your gauge swatch and yarn tails.
Tools and extras:
- 3.5 mm (E-4) crochet hook
- 4 in (10.2 cm) clear fillable plastic ornament with removable cap
- Battery micro LED fairy lights on copper wire, with a small coin-cell pack that fits inside the ball
- Stitch marker
- Tapestry needle
- Scissors
- Steam iron or garment steamer
Abbreviations (US Terms)
- ch – chain
- sl st – slip stitch
- sc – single crochet
- dc – double crochet
- sk – skip
- st(s) – stitch(es)
- sc2tog – single crochet 2 together
- dc2tog – double crochet 2 together
- beg – beginning
Special stitch – Block and Window: A block is 4 dc worked into 4 stitches in a row. A window is ch 4, skipping the next 4 sts. One block plus one window always equals 8 sts.
Gauge and Checkpoints
Gauge: 18 dc and 9 rounds = 4 in (10.2 cm) in dc; 20 sc and 22 rows = 4 in (10.2 cm) in sc.
That makes one dc round about 0.44 in (1.1 cm) tall and one window about 0.9 in (2.3 cm) wide.
Make one cover and check the fit before you make a set. The ornament can’t change size, so gauge matters more than usual.
Checkpoints:
- After Round 4: a flat circle about 3.5 in (8.9 cm) across.
- After Round 5: a shallow cup measuring 12.4 in (31.5 cm) around the edge.
- After Round 10: set the ball inside. The edge should sit about 3.2 in (8.1 cm) above the bottom of the ball.
Too big? The mesh will sag and the windows will gape. Go down to a 3.25 mm hook.
Too small? The ball won’t fit through Round 10. Go up to a 3.75 mm hook.
A difference of ±0.25 in (0.6 cm) at Round 5 is fine because the cotton mesh stretches that much.
Cover
Use Color A. Join each round with a sl st to the top of the beg ch-3. The beg ch-3 counts as 1 dc throughout.
Base Cap (Growth Rounds)
Round 1: Magic ring, ch 3, 11 dc in ring. Join. (12 dc)
Round 2: Ch 3, dc in same st, 2 dc in each st around. Join. (24 dc)
Round 3: Ch 3, 2 dc in next st, dc in next st, 2 dc in next st; repeat from * around. Join. (36 dc)
Round 4: Ch 3, dc in next st, 2 dc in next st, dc in next 2 sts, 2 dc in next st; repeat from * around. Join. (48 dc)
Pull the ring closed tightly and weave in the tail. The circle should lie flat.
Round 5 (conversion round): Ch 3, dc in next 4 sts, 2 dc in next st, dc in next 5 sts, 2 dc in next st; repeat from * 6 more times. Join. (48 + 8 = 56 dc)
This round has fewer increases on purpose, so the circle starts to cup around the curve of the ball.
Checkerboard Mesh
Round 6: Ch 3, dc in next 3 sts (first block made), ch 4, sk next 4 sts, dc in next 4 sts, ch 4, sk next 4 sts; repeat from * 5 more times. Join. (28 dc + 28 ch = 56 sts: 7 blocks, 7 windows)
Round 7: Sl st in next 3 dc and in first ch of the window (4 sl sts). Ch 3, dc in next 3 ch (block over the window), ch 4, sk next 4 dc, dc in each of next 4 ch, ch 4, sk next 4 dc; repeat from * 5 more times. Join. (28 dc + 28 ch = 56 sts)
Always work the dc into the chains themselves, not around them into the space. That keeps the count at exactly 8 sts per repeat.
Each new round puts a block over every window and a window over every block. This offset creates the checkerboard. Every window has dc posts on both sides and block tops above and below.
Rounds 8–10: Repeat Round 7. (56 sts each round)
The mesh band is now 5 rounds, about 2.2 in (5.6 cm) tall. It sits at and just above the widest part of the ball.
Insert the Ornament
Fill the ornament with the fairy lights and battery pack. Replace the cap with the wire hanger loop facing up. Switch the lights on to test them.
Set the ball into the cover and check that the edge sits about 3.2 in (8.1 cm) above the bottom of the ball. From here on, you crochet around the ball.
Shoulder (Decrease Rounds)
Round 11: Ch 3, dc in next 4 sts, dc2tog, dc in next 5 sts, dc2tog; repeat from * 6 more times. Join. (48 dc)
Over each window, work the stitches into the chains, one stitch per chain.
Round 12: Ch 3, dc in next st, dc2tog, dc in next 2 sts, dc2tog; repeat from * 10 more times. Join. (36 dc)
Round 13: Ch 3, dc2tog, dc in next st, dc2tog; repeat from * 10 more times. Join. (24 dc)
The opening is now about 5.3 in (13.5 cm) around and sits close to the ornament cap.
Border (Top Rim)
On this piece, the top rim is the border. A round cover has no sides, so all counts are per round.
Border gauge: 20 sc = 4 in (10.2 cm), or 5 sc per inch.
Round 14: Ch 1, sc2tog over the first 2 sts, sc2tog over each following pair around. Join to the first sc2tog. (24 sts worked into, 12 sc)
Round 15: Sl st in each sc around. Join. (12 sl sts) Fasten off and weave in the tail on the inside.
Why the math works: The 24 dc pair off exactly into 12 sc2tog, with nothing left over. At 5 sc per inch, 12 sc measure 2.4 in (6.1 cm) around. The ornament cap neck is about 2.5 in (6.4 cm) around, so the rim fits snugly. The slip-stitch round firms the edge so it won’t flare.
Bow
Make all bow parts in Color B, in rows of sc. The ch 1 at the start of each row doesn’t count as a st.
Loop Strip
Ch 7.
Row 1: Sc in 2nd ch from hook and in each ch across. (6 sc)
Rows 2–36: Ch 1, turn, sc in each st across. (6 sc)
Fasten off. The strip measures 1.2 in (3.0 cm) wide and 6.5 in (16.5 cm) long.
Tails (make 2)
Ch 6.
Row 1: Sc in 2nd ch from hook and in each ch across. (5 sc)
Rows 2–12: Ch 1, turn, sc across. (5 sc)
Row 13: Ch 1, turn, sc2tog, sc in next 3 sts. (4 sc)
Row 14: Ch 1, turn, sc in next 2 sts, sc2tog. (3 sc)
Row 15: Ch 1, turn, sc2tog, sc in next st. (2 sc)
Row 16: Ch 1, turn, sc2tog. (1 sc)
Fasten off. Each tail is 1 in (2.5 cm) wide and about 2.9 in (7.4 cm) long. All the decreases fall on the same edge, which makes the angled tip.
Center Band
Ch 5.
Row 1: Sc in 2nd ch from hook and across. (4 sc)
Rows 2–8: Ch 1, turn, sc across. (4 sc)
Fasten off, leaving a 6 in (15.2 cm) tail. The band is 0.8 in (2.0 cm) wide and about 1.5 in (3.8 cm) long.
Assemble the Bow
- Fold both short ends of the loop strip to the center so they overlap by 0.25 in (0.6 cm). Tack them down.
- Pinch the center into soft pleats and wrap yarn around it a few times.
- Lay the two tails behind the center in a V, with the angled tips pointing down and out.
- Wrap the center band around everything and sew its ends together at the back.
- Use the band’s tail to sew the bow to the front of the cover, just below the rim.
Hanging Cord
With Color B, ch 60.
Row 1: Sl st in the back bump of each ch across. (60 sl sts)
Fasten off. The cord is about 10 in (25.4 cm) long. Thread it through the ornament’s wire hanger loop and knot the ends together to make a loop about 5 in (12.7 cm) tall. Hide the knot behind the bow.
Final Blocking
- Keep the cover on the ornament and use the ball as your blocking form.
- Take out the battery pack, or keep the steam well away from it.
- Use your fingertips to ease each window square so the rounds run level.
- Hold the steam just above the cover without touching the yarn.
- Straighten the rim so it hugs the cap evenly.
- Lay the bow flat, steam it lightly, and pat the loops into shape.
- Let everything dry completely before you switch the lights back on.
Final Quality-Control Checklist
- Round 5 has 56 dc.
- Every mesh round has 7 blocks and 7 windows.
- Every block sits over a window, never over another block.
- The rim has 12 sc and fits snugly under the cap.
- The cover doesn’t slide or twist on the ball.
- The bow is centered and both tails hang evenly.
- The cord loop is about 5 in (12.7 cm) tall.
- All ends are woven in on the inside.
- The lights switch on and off easily.
Troubleshooting
The base cap ruffles. Round 4 probably has too many stitches. Recount it: you need exactly 48 dc.
The checkerboard drifts sideways. A round started in the wrong place. Always make exactly 4 sl sts before the beg ch-3.
The windows look like slanted slits. You worked into the chain space instead of into each chain. Work 1 dc into each chain.
The ball won’t fit through Round 10. Your gauge is too tight. Make the cover again with a larger hook.
The rim flares. Work the slip-stitch round a little tighter, or redo it with a smaller hook.
The bow flops forward. Sew it to the cover at both loop ends as well as at the center.
Care
Remove the lights and battery before cleaning. Spot clean the cover with cool water, reshape it on the ornament, and let it air dry.
Final Notes
Every measurement in this pattern builds on the one before. A gauge of 18 dc per 4 in (10.2 cm) gives 56 sts at 12.4 in (31.5 cm), which hugs a 4 in (10.2 cm) ball. Seven repeats of 8 sts keep the checkerboard exact. Decreasing from 56 to 48, 36, then 24 stitches rounds the shoulder, and 12 sc close the rim at 2.4 in (6.1 cm) around the cap. Check each stage as you go, and your cover will fit the first time.
Happy crocheting!