

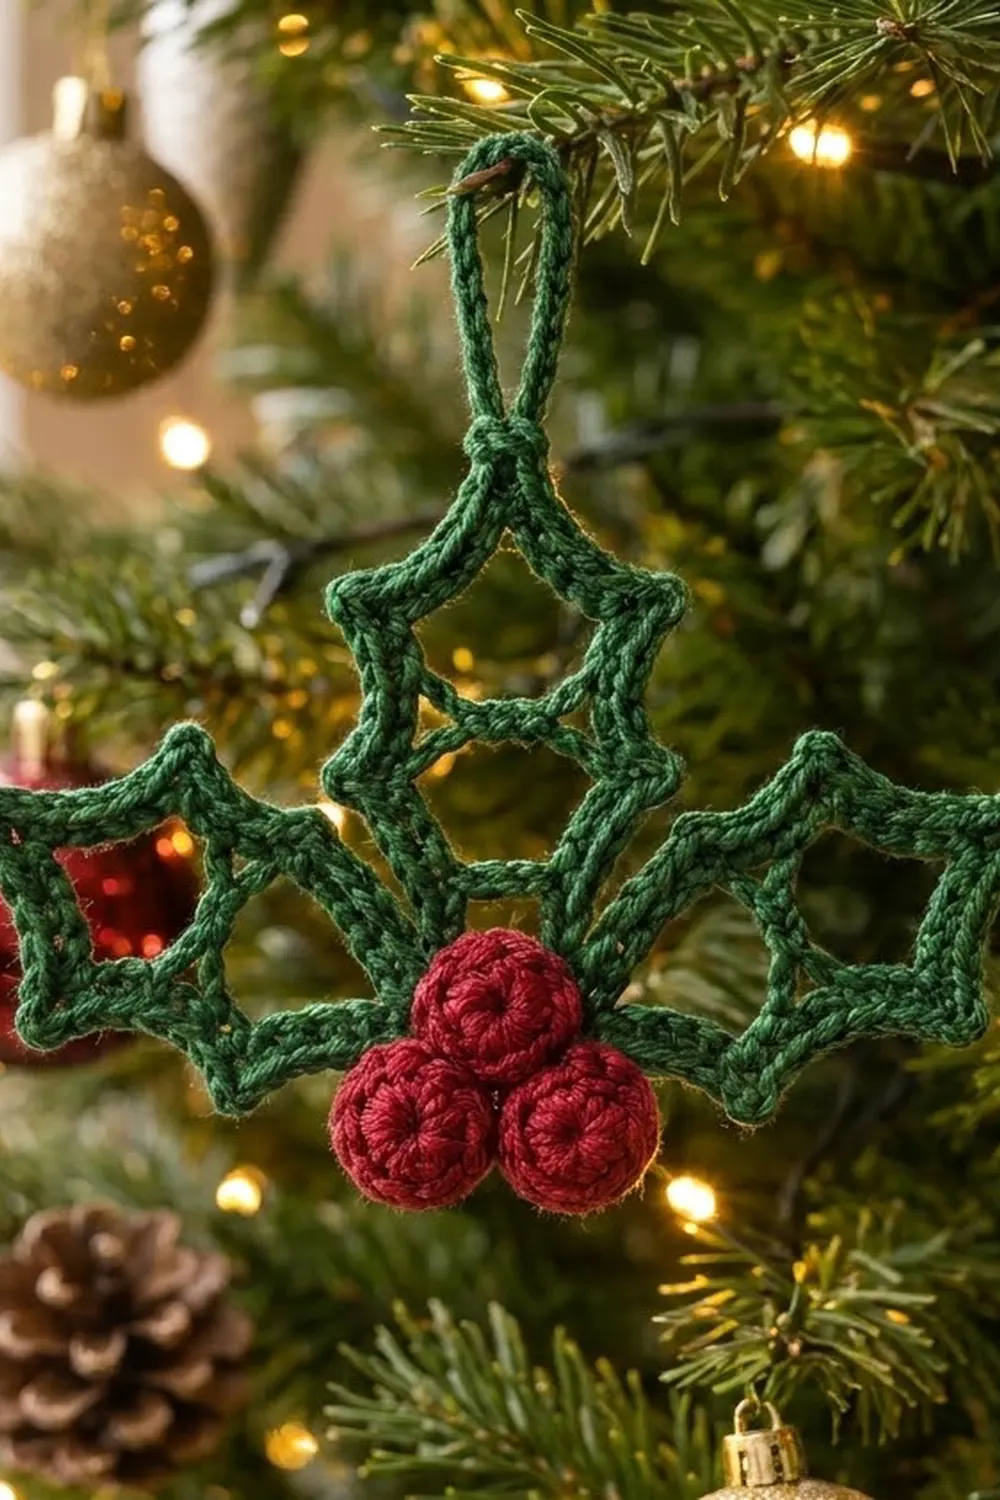
The Lattice Holly Ornament is a small Christmas hanging decoration. It has three openwork holly leaves and a cluster of three round red berries at their base. Each leaf is a spiky outline of cord-like stitches, and two crossbars divide the inside of each leaf into three open windows. It looks light and graphic on a tree branch, a gift box, or a window hook.
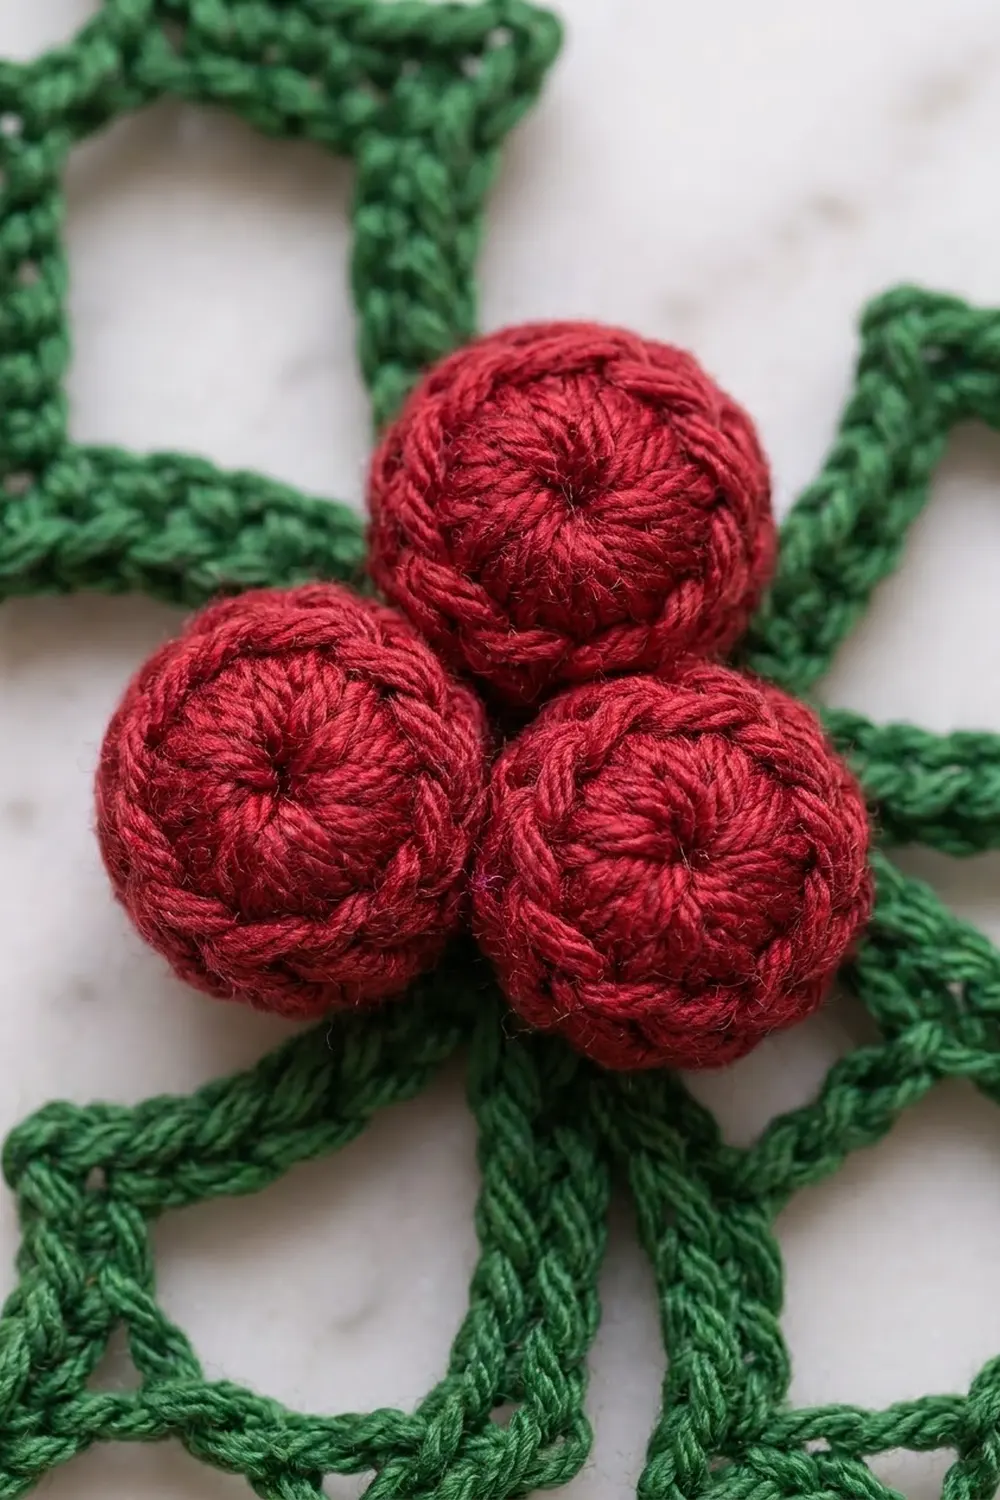
The colors are classic: deep forest green for the leaves and hanging loop, and rich cranberry red for the berries. The finished ornament looks crisp and slightly tailored. Its edges have a raised, braided texture, and the berries are firm little balls with a neat spiral at the center.
This pattern uses US crochet terms. The finished ornament measures about 4.5 in (11.4 cm) wide and 3 in (7.6 cm) tall without the loop, or 3.75 in (9.5 cm) tall with the loop.
You make one ornament from six small components: three leaves and three berries. Each leaf starts as a chain ring and becomes a pointed outline in one round. Then you add two slip-stitched crossbars and a slip-stitch border round. Finally, you make three stuffed berries, sew everything together, and add the hanging loop to the top leaf.
Finished Size and Construction
- Finished size: 4.5 in (11.4 cm) wide x 3 in (7.6 cm) tall, plus a 0.75 in (1.9 cm) loop
- Skill level: Easy-intermediate
- Terminology: US
- Yarn weight: Sport (#2) mercerized cotton
- Hook: 2.5 mm
- Number of pieces: 1 finished ornament (3 identical leaves + 3 berries, sewn together)
- Layout: one leaf pointing straight up, with two leaves angled about 30 degrees above horizontal to the left and right, and the berries at the center
- Leaf size (finished): 2.25 in (5.7 cm) long x 1.25 in (3.2 cm) wide
- Leaf size before border: 2 in (5.1 cm) long x 1 in (2.5 cm) wide
- Border depth: 0.125 in (0.3 cm) on each edge
- Berry size: 0.6 in (1.5 cm) diameter
Materials
Use a smooth, tightly plied mercerized cotton. It gives the clean, braided edge texture and holds the leaf points after blocking. Acrylic also works, but the points will be softer.
- Forest green: 8 g / about 25 m (leaves, crossbars, border, loop, sewing)
- Cranberry red: 3 g / about 9 m (berries)
Both amounts include a small safety margin for a gauge test and sewing tails.
Tools:
- 2.5 mm crochet hook
- Tapestry needle
- 4 stitch markers
- Small pinch of polyester fiberfill
- Rust-proof pins and a foam blocking mat
- Spray bottle with water (spray starch optional)
- Scissors
Abbreviations (US Terms)
- ch – chain
- sl st – slip stitch
- sc – single crochet
- sc2tog – single crochet 2 together
- sp – space
- MR – magic ring
- rep – repeat
- st(s) – stitch(es)
Special stitch – Point: Work (sc, ch 2, sc) all in the same stitch. This makes one holly spike, and the ch-2 sp is the tip of the spike.
Surface cord: For the crossbars and loop, you work a sl st into the back bump of each chain. This doubles the chain into a firm cord that matches the border.
Gauge and Checkpoints
Gauge: 7 sc = 1 in (2.5 cm), and 8 ch = 1 in (2.5 cm) with relaxed tension. Exact gauge doesn’t matter much for an ornament, but it decides whether the three leaves fit neatly around the berry cluster.
Make one complete leaf, including its border, before you start the others. Check it at each stage:
- After Round 1: Laid flat as a loose oval, the 40-ch ring measures about 5 in (12.7 cm) around.
- After Round 2: The leaf measures 2 in (5.1 cm) from tip to tip.
- After the crossbars: Each crossbar measures 1 in (2.5 cm) between side points.
- After the border and blocking: The leaf is 2.25 in (5.7 cm) long x 1.25 in (3.2 cm) wide.
If the leaf is too big: Go down to a 2.25 mm hook. If it’s too small: Go up to a 2.75 mm hook. Don’t change the stitch counts, because the points and crossbars depend on the 40-ch base.
Leaves (Make 3)
All three leaves are identical. Use forest green.
Round 1: Base Ring
Ch 40, then sl st in the first ch to form a ring. Make sure the chain isn’t twisted. (40 ch)
Place a marker in the joining ch. This is the bottom tip.
Round 2: Outline With Points
Ch 1. Work this round into the chains of the ring.
Work a Point in the first ch (bottom tip). Sc in next 4 ch, Point in next ch. Rep from * to * 4 times. The first 3 Points are the right-side points, and the 4th Point is the top tip. Then sc in next 4 ch, Point in next ch. Rep from * to * 3 times to make the left-side points. Sc in the last 4 ch. Sl st to the first sc.
Chains used: 1 + (4 + 1) x 4 + (4 + 1) x 3 + 4 = 40, so you use each base ch exactly once.
Count: 48 sc and 8 ch-2 sps. That is 32 plain sc plus 8 Points of 2 sc each.
Tension tip: Work the sc slightly loosely around the chain ring. If the sc are tighter than the base, the leaf will cup instead of lying flat.
The leaf now has 2 tips and 3 side points on each side. Name the side points P1 (nearest the bottom tip), P2, and P3 (nearest the top tip). Mark P1 and P3 on both sides.
Per side: Counted from tip to tip, each side has 24 sc. That is 16 plain sc, plus 3 side points of 2 sc each (6 sc), plus 1 sc from each tip (2 sc). 24 x 2 = 48. ✓
Fasten off with a 6 in (15.2 cm) tail and weave it in.
Crossbars
The two crossbars divide the inside of the leaf into three windows.
Lower crossbar: Join green with a sl st in the ch-2 sp of right P1. Ch 8. Sl st in the ch-2 sp of left P1. Turn. Sl st in the back bump of each of the 8 ch. Sl st in the ch-2 sp of right P1. (8 ch, 8 sl st) Fasten off.
Upper crossbar: Work it the same way, between right P3 and left P3. (8 ch, 8 sl st) Fasten off.
Leave the P2 points unjoined. They stick out a little past the crossbars, so the leaf is widest in the middle, like real holly.
Joining tip: Lay the leaf flat on the table while you join each crossbar. Then you can see whether the 8 ch reach the opposite point without stretching it.
Checkpoint: Each crossbar lies straight and flat and measures about 1 in (2.5 cm). If a bar sags, take out the sl sts and work them more firmly. If it pulls the outline inward, add 1 ch.
Berries (Make 3)
Use cranberry red. Work in continuous spiral rounds, moving a marker up each round.
Round 1: 6 sc in MR. Pull the ring tightly closed. (6 sts)
Round 2: 2 sc in each st around. (12 sts)
Round 3: Sc in each st around. (12 sts)
Round 4: Sc in each st around. (12 sts)
Stuff firmly with a small pinch of fiberfill. Push the stuffing into the center with the hook handle so the berry stays round and doesn’t bulge.
Round 5: Sc2tog 6 times. (6 sts)
Fasten off, leaving an 8 in (20.3 cm) tail. Thread the tail through the front loop of all 6 sts and pull it tightly closed. Keep the tail for sewing.
Checkpoint: Each berry measures 0.6 in (1.5 cm) across. The magic-ring spiral is the front of the berry.
Border (Leaf Edging) and Assembly
Border Gauge
The border is one round of sl st worked into the top of Round 2. It adds about 0.125 in (0.3 cm) to each edge. This takes the leaf from 2 in x 1 in (5.1 cm x 2.5 cm) to 2.25 in x 1.25 in (5.7 cm x 3.2 cm). Keep your sl sts the same size as the sc below them so the edge stays flat.
Border Round (Work on Each Leaf)
With the right side facing, join green with a sl st in the ch-2 sp of the bottom tip. Ch 1, then sl st in the same ch-2 sp. Sl st in each sc to the next ch-2 sp. (Sl st, ch 1, sl st) in that ch-2 sp. Rep from * to * 7 times. Sl st in each remaining sc. Join with a sl st in the first sl st (don’t count the joining sl st).
When a ch-2 sp holds a crossbar join, insert your hook under the ch-2 sp and around the crossbar join. This hides the join inside the border.
Count: 64 sl st and 8 ch-1 sps.
- 48 sl st worked 1 per existing sc
- plus 16 sl st added at the points (2 in each of the 8 ch-2 sps)
- 48 + 16 = 64
Per side, from tip to tip: 32 sl st. That is 24 sl st over the side’s own sc, plus 6 sl st in its 3 side points, plus 1 sl st from each tip (2). 32 x 2 = 64. ✓
Why the math works: One sl st per sc adds height without adding width, so the outline stays flat. The extra stitches go only into the ch-2 sps, which sharpens each spike without making the straight edges ruffle.
Fasten off and weave in the ends on all three leaves.
Hanging Loop (Top Leaf Only)
Choose one leaf to be the top leaf. Join green with a sl st in the ch-1 sp at its top tip. Ch 16, then sl st in the same ch-1 sp to form a loop. Turn. Sl st in the back bump of each of the 16 ch. (16 sl st) Sl st in the top tip to close.
Checkpoint: The loop stands 0.75 in (1.9 cm) tall. Wrap the tail twice around the base of the loop to make the small knot, then weave it in.
Assembly
- Lay the top leaf vertically with the loop at the top.
- Place the two side leaves so their bottom tips meet the top leaf’s bottom tip. Angle each one about 30 degrees above horizontal.
- Using green and the tapestry needle, whipstitch the three bottom tips together through their border sl sts with 4 to 5 small stitches.
- Tack the inner edge of each side leaf to the lower edge of the top leaf for 0.25 in (0.6 cm). This keeps the leaves from swinging.
- Arrange the berries in a triangle over the joined tips, with one berry on top in the center and two side by side below it. The cluster is about 1.1 in (2.8 cm) wide.
- Use each berry’s red tail to sew it to the leaves and to the berries next to it. Hide the tails inside the berries.
Sew through the back of the leaves where you can. That way, no green stitches show on the front of the berries.
Final Blocking
- Lightly mist the leaves with water, or with spray starch if you want crisper points.
- Pin the ornament face up on the blocking mat.
- Pin both tips and all 6 side points of each leaf outward so the spikes are sharp.
- Check that each leaf is 2.25 in (5.7 cm) long and 1.25 in (3.2 cm) wide.
- Pull each crossbar straight, and pin its center if it bows.
- Check the full size: 4.5 in (11.4 cm) wide x 3 in (7.6 cm) tall without the loop.
- Keep the berries out of the spray so they stay round.
- Let the ornament dry completely, usually 6 to 8 hours, before you unpin it.
Final Quality-Control Checklist
- Each leaf has 2 tips and 3 side points per side
- Each leaf has two crossbars and three open windows
- Every leaf’s border has 64 sl st and 8 ch-1 sps
- The leaves measure 2.25 in x 1.25 in (5.7 cm x 3.2 cm)
- There are three berries, each 0.6 in (1.5 cm), with the spirals facing out
- The ornament measures 4.5 in x 3 in (11.4 cm x 7.6 cm) without the loop
- The loop is 0.75 in (1.9 cm) tall and firmly anchored
- No stuffing shows between the berry stitches
- All tails are woven in and trimmed
Troubleshooting
The leaf curls or cups: Your Round 2 sc are tighter than the base chain. Use a hook one size larger for Round 1 only.
The points look rounded: Pin them sharply when blocking and use starch. Also check that every point has a ch-2, not a ch-1.
The edges ruffle after the border: Your sl sts are too loose, or you added extra stitches along the straight edges. Work exactly 1 sl st per sc.
A crossbar sags: Take out the return sl sts and work them more firmly, or remove 1 ch.
The crossbar joins look bulky: Make sure the border sl st goes around the join, not beside it.
Stuffing shows through a berry: Go down a hook size for the berries, or use less fiberfill.
The ornament hangs crooked: Move the berry cluster slightly so its weight sits under the loop, and check that both side leaves are at the same angle.
Care
Hand wash in cool water with mild soap, press out the water in a towel, then reshape the ornament and pin it flat to dry. Store it flat or hang it by its loop so the points keep their shape.
Final Notes
Every measurement in this ornament builds on the one before it. A 40-ch ring of about 5 in (12.7 cm) becomes a 48-sc outline 2 in (5.1 cm) long. Two 8-ch crossbars, each 1 in (2.5 cm), make the windows. The 64-sl st border brings each leaf to 2.25 in x 1.25 in (5.7 cm x 3.2 cm). Three leaves and three 0.6 in (1.5 cm) berries then make a 4.5 in x 3 in (11.4 cm x 7.6 cm) ornament. If your first leaf passes its checkpoints, the other two will match.
Happy crocheting!