

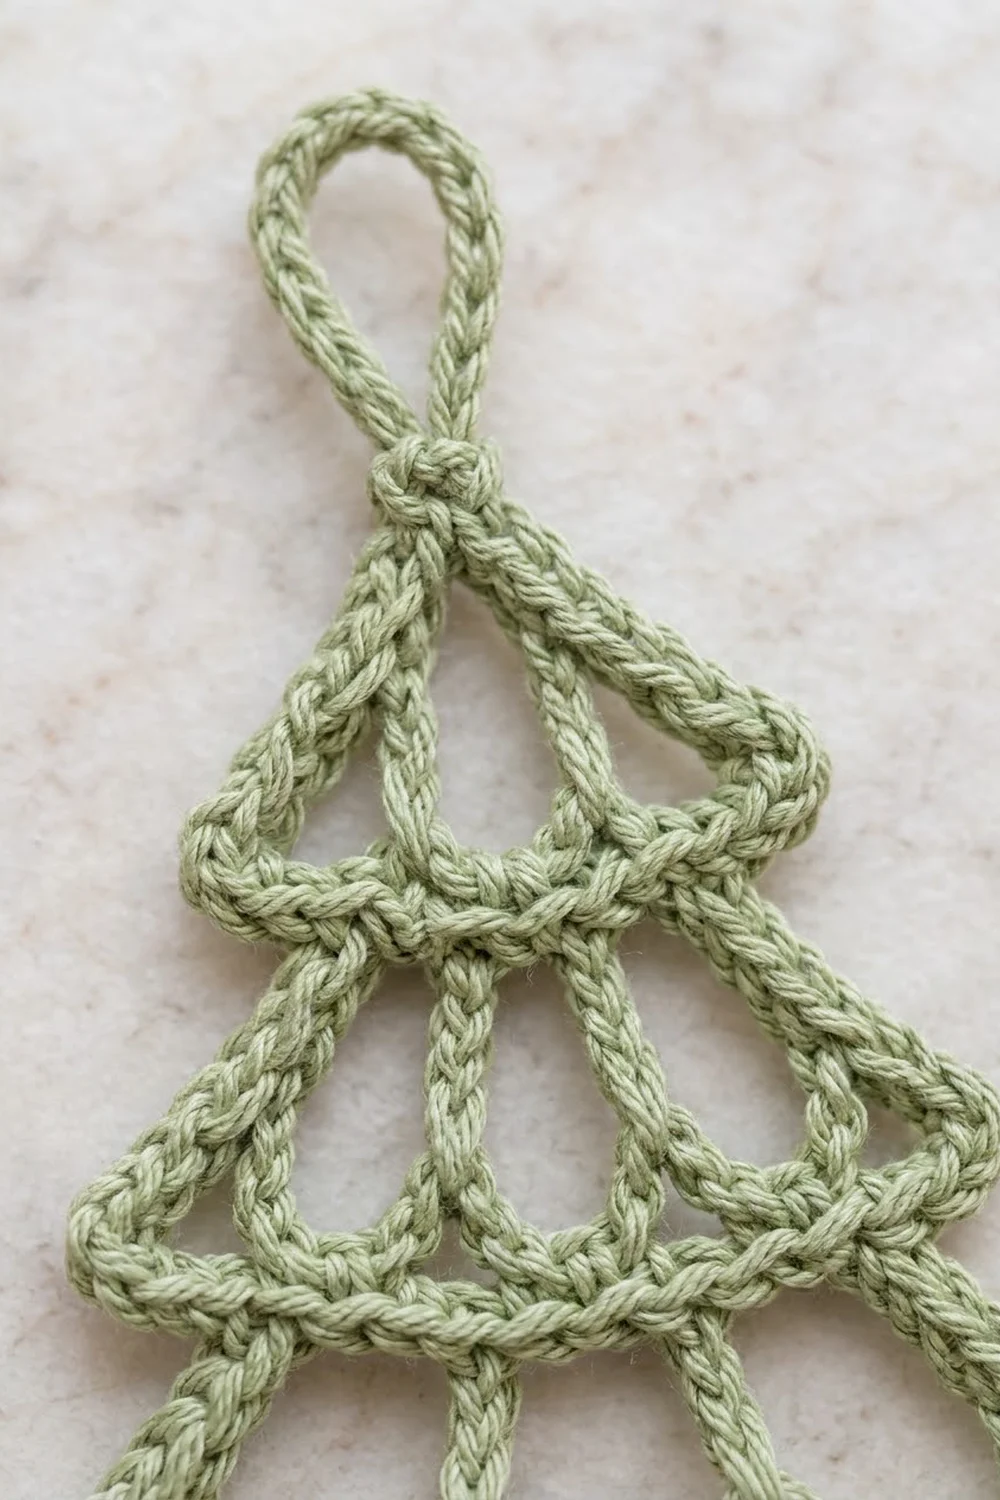
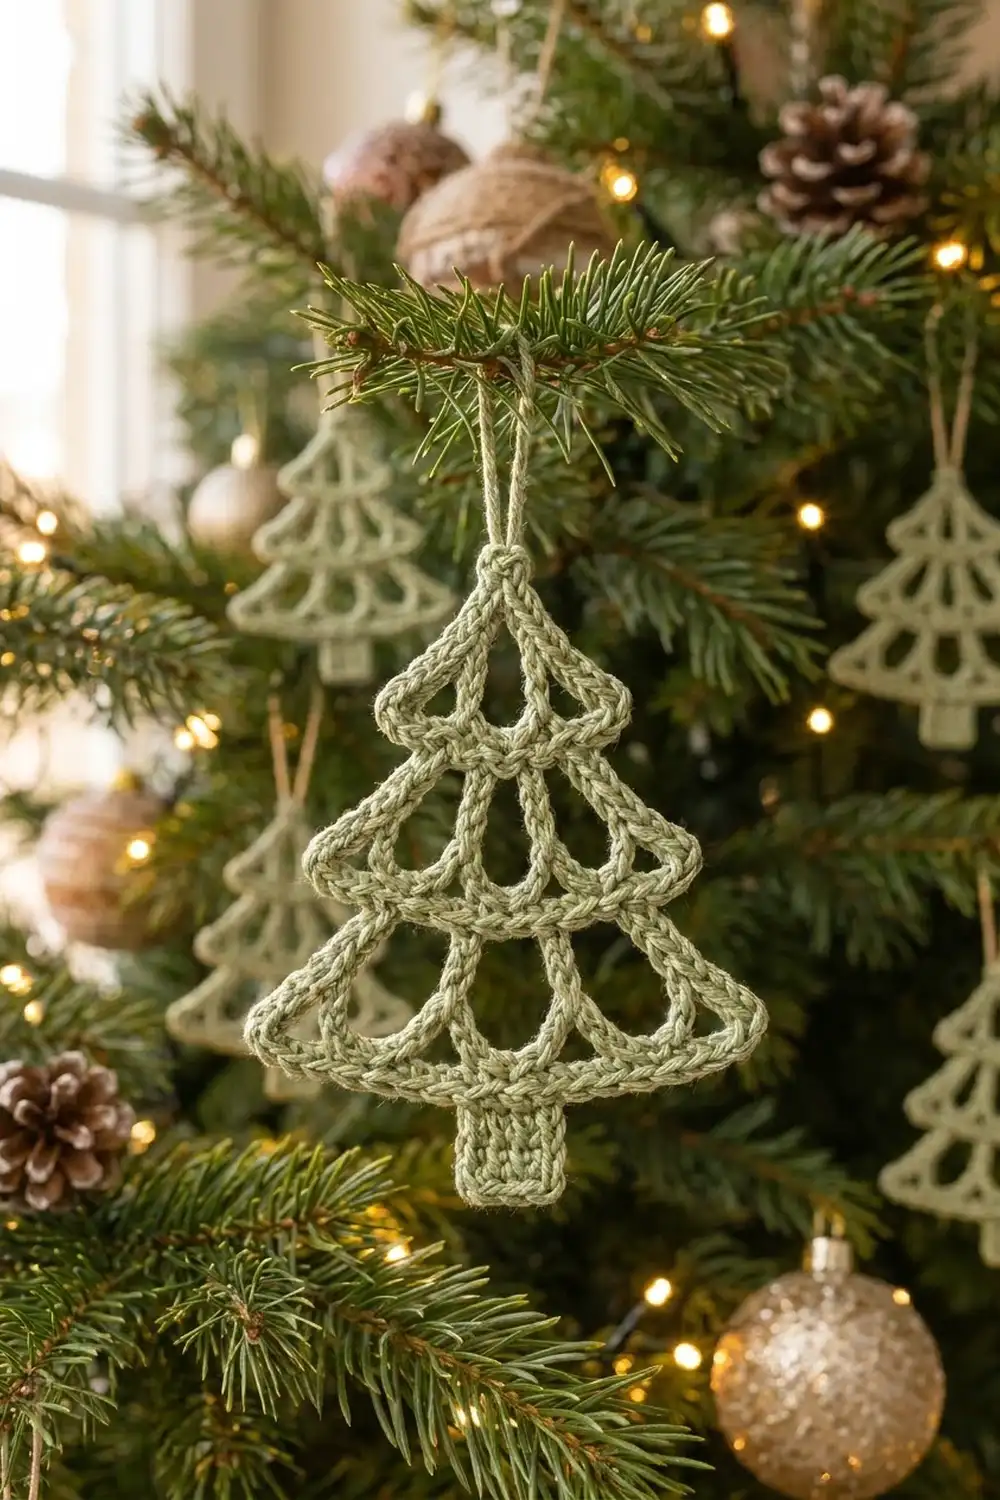
This little lace tree is made of rope-like cords instead of solid fabric. Three stacked triangles, each one wider than the last, frame open teardrop loops: two in the top tier, three in the middle, and four at the base. A short solid trunk anchors the bottom, and a corded hanging loop crowns the tip.
The sample is worked in a soft sage green cotton, which gives the ornament a calm, Scandinavian look against a busy tree. It works just as well in cream, deep pine, or a metallic-blend cotton. The pattern uses US crochet terms throughout.
The finished ornament measures about 4.0 in (10.2 cm) wide and 4.5 in (11.4 cm) tall from tip to trunk. The hanging loop adds about 1.0 in (2.5 cm), for 5.5 in (14.0 cm) overall.
Construction is top-down and all in one piece. You make the hanging loop first, then build each tier in three rows: covered loops, a frame chain that closes the triangle and catches the loop bottoms, and a cover row that turns the frame into a solid cord. The trunk is worked in rows below the bottom bar. One slip-stitch edge round sharpens the outline.
Finished Size and Construction
- Finished size: 4.0 in (10.2 cm) wide × 4.5 in (11.4 cm) tall, plus a 1.0 in (2.5 cm) hanging loop
- Skill level: Easy-intermediate
- Terminology: US crochet terms
- Yarn weight: DK (light worsted, #3) cotton
- Hook: 3.5 mm (E-4)
- Number of pieces: 1 (single ornament; no joining)
- Layout: 3 stacked tiers with 2, 3, and 4 loops, plus trunk
- Bar widths: 9 sc, 13 sc, and 17 sc
- Size before edge round: 3.9 in (9.9 cm) wide × 4.4 in (11.2 cm) tall
- Edge round depth: about 0.05 in (0.1 cm), one slip-stitch round
Materials
Yarn: Choose a smooth, tightly plied DK cotton or cotton blend. Firm cotton holds the open loops in shape and shows the cord texture clearly. Avoid fuzzy or very splitty yarns; the loops will lose definition.
- Sage green: 8 g (about 18 m) per ornament
This quantity includes a margin of roughly 25% for your gauge swatch and weaving in. A 50 g ball will make five or six ornaments.
Tools:
- 3.5 mm (E-4) crochet hook
- Tapestry needle
- Scissors
- 4 stitch markers
- Rustproof pins and a foam blocking mat
- Spray starch or fabric stiffener (optional)
Abbreviations (US Terms)
- ch – chain
- sl st – slip stitch
- sc – single crochet
- sp – space
- st(s) – stitch(es)
- T – tip point (the joining sl st of the hanging loop)
Special stitch – Covered Loop (CL[n/m]): Ch n, sl st in the anchor st, work m sc into the ch-n sp you just made (working around the chain, not into individual chs), sl st in the same anchor st. The packed sc turn a plain chain loop into a firm teardrop-shaped cord. Example: CL[10/14] means ch 10 and 14 sc.
Loop bottom: The lowest point of a covered loop, between its two middle sc. For CL[10/14] this is between sc 7 and sc 8.
Gauge and Checkpoints
Gauge: 18 sc and 20 rows = 4 in (10.2 cm) in sc rows, unblocked.
Before committing to a set, make one complete ornament and measure it. Gauge matters more than usual here, because the bar widths set the whole silhouette.
Checkpoints:
- Hanging loop: The covered ring hangs about 1.0 in (2.5 cm) above T.
- After Tier 1: Bar 1 measures 2.0 in (5.1 cm) wide. Tip to bottom of Bar 1 measures 1.3 in (3.3 cm).
- After Tier 2: Bar 2 measures 2.9 in (7.4 cm). Tip to bottom of Bar 2 measures 2.4 in (6.1 cm).
- After Tier 3: Bar 3 measures 3.8 in (9.7 cm). Tip to bottom of Bar 3 measures 3.5 in (8.9 cm).
- After trunk: Trunk measures 1.1 in (2.8 cm) wide × 1.0 in (2.5 cm) tall.
If Bar 1 is too wide, go down 0.5 mm in hook size. If it is too narrow, go up 0.5 mm. Do not change stitch counts; the loop counts depend on them.
Pattern
Hanging Loop
Rnd 1: Ch 16, sl st in first ch to form a ring.
Rnd 2: Ch 1, work 24 sc into the ring, sl st in first sc. (24 sc)
This joining sl st is T, the tip of the tree. Place a marker in it. Do not fasten off.
Tier 1 (2 loops)
Row 1 (loops): [CL[10/14] in T] 2 times. (2 covered loops hanging down from T)
Arrange the loops so they hang side by side, one to the left and one to the right.
Row 2 (frame chain): Ch 8 for the first side. Ch 2, sl st at the bottom of the nearest loop, ch 3, sl st at the bottom of the second loop, ch 2. Ch 8 more for the second side, sl st in T.
The bar section is 2 ch + 1 sl st + 3 ch + 1 sl st + 2 ch = 9 positions. The frame is now a closed triangle: 8-ch side, 9-position bar, 8-ch side.
Row 3 (cover): Ch 1. Working down the side you just made, sc in each of the 8 chs. Across the bar, sc in each ch and each catch sl st (9 sc). Up the remaining side, sc in each of the 8 chs. Sl st in T. (25 sc: 8 + 9 + 8)
Fasten off. The 9 sc along the bottom are Bar 1. Their tops face outward, toward the next tier. The pattern is symmetric, so you can count bar stitches from either end.
Checkpoint: Bar 1 is 2.0 in (5.1 cm) wide.
Tier 2 (3 loops)
Row 1 (loops): Join yarn with sl st in sc 2 of Bar 1. CL[11/15] in same sc. Sl st in sc 3, 4, and 5. CL[11/15] in sc 5. Sl st in sc 6, 7, and 8. CL[11/15] in sc 8. (3 covered loops)
Sc 1 and sc 9 of Bar 1 stay free. They become the overhanging corners that create the stepped look.
Row 2 (frame chain): Ch 8 for the first side. Ch 2, sl st at the bottom of the nearest loop, [ch 3, sl st at the bottom of the next loop] 2 times, ch 2. Ch 8 more, sl st in sc 2 of Bar 1.
Bar section: 2 + 1 + 3 + 1 + 3 + 1 + 2 = 13 positions.
Row 3 (cover): Ch 1. Sc in each of the 8 side chs, sc in each of the 13 bar positions, sc in each of the 8 remaining side chs, sl st in sc 8 of Bar 1. (29 sc: 8 + 13 + 8)
Fasten off. The 13 sc along the bottom are Bar 2.
Checkpoint: Bar 2 is 2.9 in (7.4 cm) wide.
Tier 3 (4 loops)
Row 1 (loops): Join yarn with sl st in sc 2 of Bar 2. CL[12/16] in same sc. Sl st in sc 3, 4, and 5. CL[12/16] in sc 5. Sl st in sc 6, 7, 8, and 9. CL[12/16] in sc 9. Sl st in sc 10, 11, and 12. CL[12/16] in sc 12. (4 covered loops)
The anchors at sc 2, 5, 9, and 12 mirror each other: 2 + 12 = 14, and 5 + 9 = 14, which is (13 + 1). That keeps the loops centered. Sc 1 and sc 13 stay free as the corners.
Row 2 (frame chain): Ch 9 for the first side. Ch 2, sl st at the bottom of the nearest loop, [ch 3, sl st at the bottom of the next loop] 3 times, ch 2. Ch 9 more, sl st in sc 2 of Bar 2.
Bar section: 2 + (3 × 3) + 2 chains + 4 sl sts = 17 positions.
Row 3 (cover): Ch 1. Sc in each of the 9 side chs, sc in each of the 17 bar positions, sc in each of the 9 remaining side chs, sl st in sc 12 of Bar 2. (35 sc: 9 + 17 + 9)
Fasten off. The 17 sc along the bottom are Bar 3.
Checkpoint: Bar 3 is 3.8 in (9.7 cm) wide. Tip to bottom of Bar 3 is 3.5 in (8.9 cm).
Trunk
The trunk is centered on Bar 3: 6 sts + 5 trunk sts + 6 sts = 17.
Row 1: Join yarn with sl st in sc 7 of Bar 3, working into the outward-facing tops. Ch 1, sc in same st and in each of the next 4 sts. (5 sc)
Rows 2–5: Ch 1, turn, sc in each st across. (5 sc)
Fasten off.
Checkpoint: Trunk is 1.1 in (2.8 cm) wide × 1.0 in (2.5 cm) tall. The tree now measures 3.9 in (9.9 cm) wide across the corners × 4.4 in (11.2 cm) tall.
Edge Round (Border)
This single slip-stitch round tightens the outer cord, gives it a braided finish, and turns each bar end into a crisp point. It goes around the outer silhouette only. Do not slip stitch into the inner loops.
Edge gauge: One sl st per existing outer stitch or row end, kept at the same tension as your sc.
Rnd 1: With RS facing, join yarn with sl st in the first sc of the trunk’s last row. Work as follows:
- Trunk bottom: sl st in each of the 5 sts (5 sl st; the joining sl st counts as the first).
- Trunk side: 1 sl st in each row end (5 sl st).
- Bar 3, first side: sl st in sc 6, 5, 4, 3, and 2 (5 sl st). In sc 1: (sl st, ch 1, sl st) for the corner.
- Tier 3 side: sl st in each of the 9 side sc (9 sl st).
- Bar 2 corner: (sl st, ch 1, sl st) in sc 1 of Bar 2.
- Tier 2 side: sl st in each of the 8 side sc (8 sl st).
- Bar 1 corner: (sl st, ch 1, sl st) in sc 1 of Bar 1.
- Tier 1 side: sl st in each of the 8 side sc (8 sl st).
- Tip: sl st in T (1 sl st).
- Second half: Mirror the first half: 8 sl st down Tier 1; corner in sc 9 of Bar 1; 8 sl st down Tier 2; corner in sc 13 of Bar 2; 9 sl st down Tier 3; corner in sc 17 of Bar 3; sl st in sc 16, 15, 14, 13, and 12 (5 sl st); 5 sl st up the trunk side row ends.
Sl st in the first sl st to join. Fasten off.
Count per half: 5 trunk side + 5 bar + 9 + 8 + 8 = 35 sl st, plus 3 corners × 2 sl st = 6, for 41 sl st and 3 ch-1 per half.
Total: 5 (trunk bottom) + 41 + 41 + 1 (tip) = 88 sl st, plus 6 ch-1 corners.
Why the math works: Every sl st matches exactly one stitch or row end that already exists, so the edge neither pulls in nor ruffles. The only additions are at the 6 corners, where the extra sl st and ch 1 form a point. These add about 0.05 in (0.1 cm) per side. That brings the width from 3.9 in (9.9 cm) to 4.0 in (10.2 cm) and the height from 4.4 in (11.2 cm) to 4.5 in (11.4 cm).
Final Blocking
- Weave in all ends along the cords, following the stitch direction so the tails disappear inside the packed sc.
- Soak the ornament in cool water for 5 minutes, then press it gently in a towel. Do not wring it.
- Lay it flat on the blocking mat, RS up.
- Pin the tip and the hanging loop straight up along a center line.
- Pin the six corners so the bars are horizontal and level. Bar 3 should measure 3.8 in (9.7 cm) between the corner sl sts.
- Use your fingers to shape each loop into an even teardrop, round at the bottom and narrow at the anchor.
- Pin the trunk square, centered under the tip.
- If you like, mist with spray starch for a stiffer ornament. Let it dry completely before unpinning.
- Measure the finished size: 4.0 in (10.2 cm) × 4.5 in (11.4 cm).
Final Quality-Control Checklist
- Hanging loop has 24 sc and sits straight above T.
- Tiers have 2, 3, and 4 loops, each caught at its exact bottom.
- Bar counts are 9, 13, and 17 sc.
- Cover rows have 25, 29, and 35 sc.
- Corners at sc 1 and the last sc of each bar are free and pointed.
- Trunk is 5 sts wide, 5 rows tall, with 6 Bar 3 sts on each side.
- Edge round has 88 sl st and 6 ch-1 corners.
- The ornament hangs straight when held by the loop.
Troubleshooting
Loops look uneven: Count the sc in each CL. One extra sc makes a loop visibly longer. Catch each loop exactly between its two middle sc.
Bar curves upward: The frame chain is too tight. Chain a little more loosely, or use a hook 0.5 mm larger for Row 2 only.
Bar ruffles: You have worked more than one sc into a bar position. Recount: 9, 13, or 17.
Tiers lean to one side: A tier was anchored off center. Check that the anchors mirror each other, for example sc 2 and sc 8 on Bar 1.
Corners are rounded: Make sure the corner sc was left free before the edge round, and work the (sl st, ch 1, sl st) firmly.
Edge round puckers: Your sl sts are too tight. Go up 0.5 mm for this round.
Ornament twists when hung: Block again, pinning the tip and trunk on one straight line.
Care
Hand wash in cool water, press out the moisture in a towel, and dry flat, reshaping the loops. Store flat in tissue paper between seasons.
Final Notes
The measurement chain is simple. Gauge sets Bar 1 at 2.0 in (5.1 cm). Bar 2 at 2.9 in (7.4 cm) and Bar 3 at 3.8 in (9.7 cm) follow from it. Adding the 1.0 in (2.5 cm) trunk and the edge round gives a finished tree of 4.0 in (10.2 cm) × 4.5 in (11.4 cm), plus the 1.0 in (2.5 cm) loop. If your first bar is right, the rest of the tree will be too.
Happy crocheting!