

The Lattice Pine is a flat Christmas tree ornament made of open filet mesh. Three stepped tiers of small square windows sit on a solid little trunk. A crisp, braided-looking border holds the shape. When it hangs on a door or a branch, light and color show through the grid.
The sample is worked in a single deep teal worsted yarn. Using one color keeps the focus on the texture, but evergreen, cranberry, cream, or a metallic-blend yarn all work just as well. The style is simple, modern, and quick: one ornament takes about an hour.
This pattern uses US crochet terms. The finished ornament measures 5 in (12.7 cm) wide and 5.75 in (14.6 cm) tall without the loop. With the loop it is about 7.25 in (18.4 cm) tall.
The ornament is made in one piece. You work the mesh top-down in rows, starting at the tip. On growth rows you add a mesh at each end, and you step in with slip stitches to start each new tier. Then you work the trunk into the center of the last row, add a two-round border, and finish with a covered hanging loop.
Finished Size and Construction
- Finished size: 5 in (12.7 cm) wide x 5.75 in (14.6 cm) tall, plus a 1.5 in (3.8 cm) loop
- Skill level: Easy / advanced beginner
- Terminology: US crochet terms
- Yarn weight: Worsted (#4)
- Hook: 4.5 mm (US 7)
- Number of pieces: 1
- Layout: Single ornament, three mesh tiers plus trunk, no joining
- Piece size before border: 4.5 in (11.4 cm) wide x 5.25 in (13.3 cm) tall
- Border depth: 0.25 in (0.6 cm) on every edge
Materials
Choose a smooth, tightly plied worsted yarn. Cotton or a cotton blend gives the sharpest mesh. Acrylic also works well and is easier on the hands. Avoid fuzzy or brushed yarns, because they fill in the windows.
- Teal (main and only color): 15 g, about 30 m (33 yd) of worsted yarn
- 4.5 mm (US 7) crochet hook
- Tapestry needle
- Scissors
- Stitch marker (1)
- Ruler or tape measure
- Pins and a foam blocking mat
- Spray bottle with water (or a steamer for acrylic)
The quantity includes a margin of about 30 percent to cover your gauge check and weaving in ends. The ornament itself uses about 11 g (22 m / 24 yd).
Abbreviations (US Terms)
- ch – chain
- sl st – slip stitch
- sc – single crochet
- dc – double crochet
- sp – space
- st(s) – stitch(es)
- RS – right side
- rep – repeat
Special terms:
- Mesh: One open square, made of a dc post on each side with a ch-1 across the top. A row with M meshes has M + 1 posts and 2M + 1 sts in total (counting each dc and each ch-1).
- Ch-4 turning chain: Counts as 1 dc plus 1 ch-1 throughout. Its top is the 3rd ch.
- Increase at start of row: Ch 4, turn, dc in the first dc (the st at the base of the ch-4). This adds 1 mesh.
- Increase at end of row: After the last dc of the row, ch 1, dc in the same st. This adds 1 mesh.
- Step-in: Turn without chaining, sl st in the first dc, sl st in the next ch-1 sp, sl st in the next dc. This moves you in by 1 mesh.
Gauge and Checkpoints
Gauge: 1 mesh = 0.5 in (1.3 cm) wide x 0.5 in (1.3 cm) tall. That is 4 sts (dc and ch-1) per 1 in (2.5 cm), and 2 mesh rows per 1 in (2.5 cm).
This is a single small piece, so the ornament is your test piece. Work Rows 1 to 3 and measure before going further. Measure with the work lying flat and unstretched.
Checkpoints:
- After Row 3 (5 meshes): 2.5 in (6.4 cm) wide x 1.5 in (3.8 cm) tall
- After Row 6 (7 meshes): 3.5 in (8.9 cm) wide x 3 in (7.6 cm) tall
- After Row 9 (9 meshes): 4.5 in (11.4 cm) wide x 4.5 in (11.4 cm) tall
- After the trunk: 4.5 in (11.4 cm) wide x 5.25 in (13.3 cm) tall
- After the border: 5 in (12.7 cm) wide x 5.75 in (14.6 cm) tall
If your tier is too big, go down 0.5 mm in hook size. If it is too small, go up 0.5 mm. Blocking can ease out differences of up to 0.25 in (0.6 cm). Make each ch-1 the same height as the loop on your hook so the windows stay square.
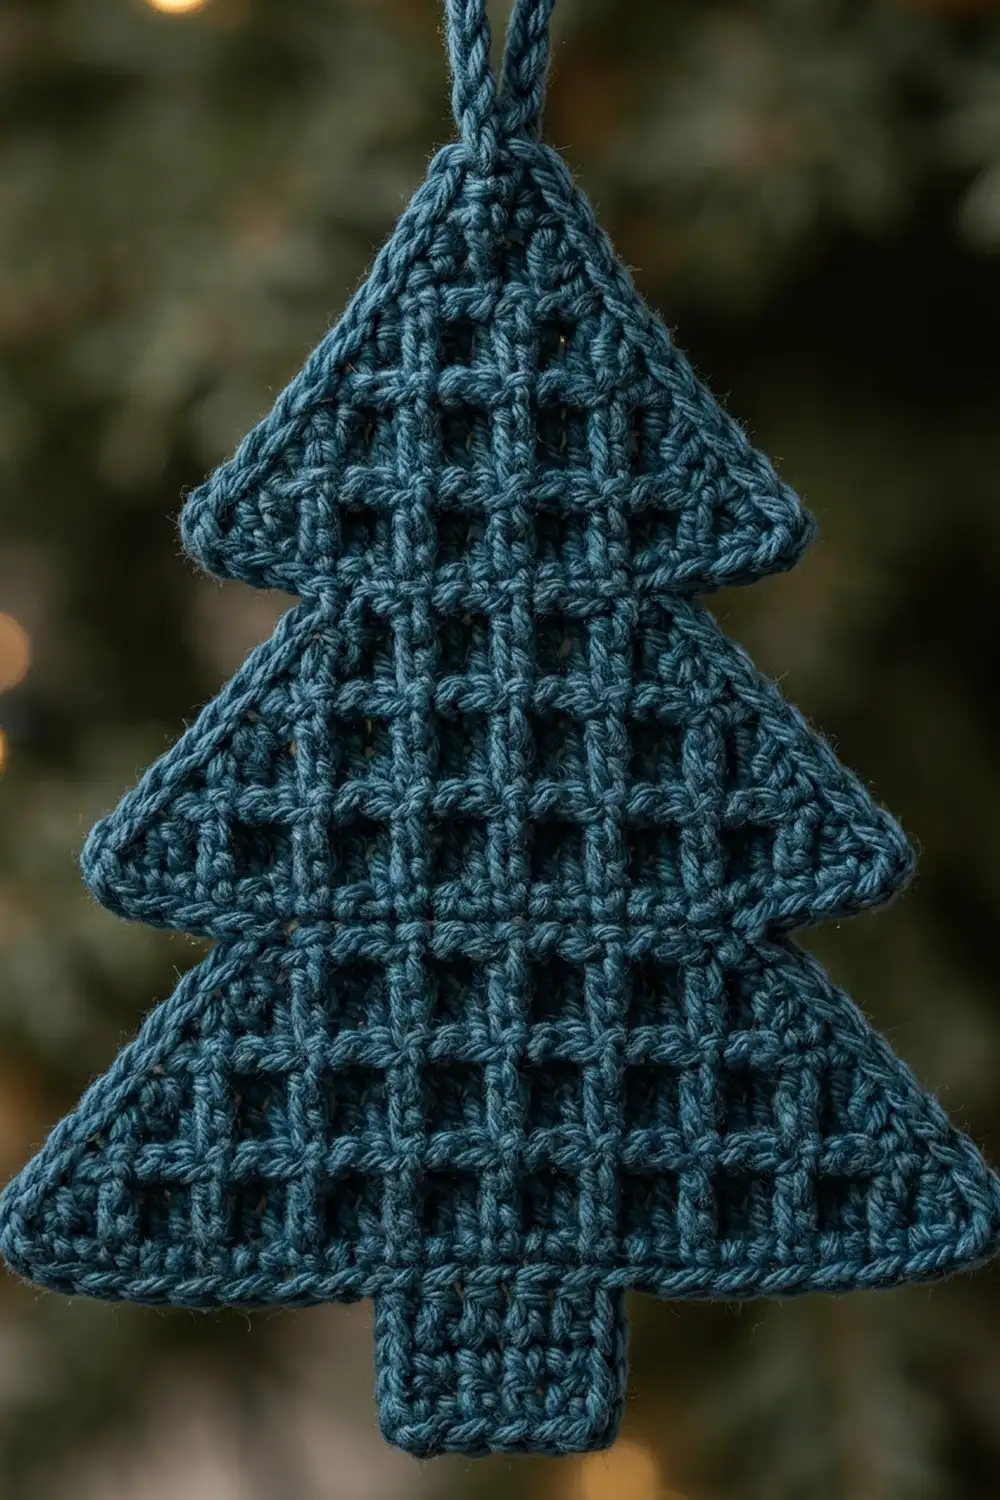
Tree Body (Filet Mesh Tiers)
Work in rows, top-down. The posts of growth rows lean slightly outward. This is correct and gives each tier its slope.
Tier 1 (Top)
Row 1: Ch 5, dc in 5th ch from hook. The 4 skipped chs count as 1 dc + ch-1. (1 mesh, 2 posts, 3 sts)
Row 2 (growth): Ch 4, turn, dc in first dc (increase made). Ch 1, dc in the top of the chain post at the end of the row (the 4th ch of the beginning ch-5). Ch 1, dc in the same ch (increase made). (3 meshes, 4 posts, 7 sts)
Row 3 (growth): Ch 4, turn, dc in first dc. *Ch 1, dc in next dc; rep from * across, working the last dc in the 3rd ch of the turning ch-4. Ch 1, dc in the same ch. (5 meshes, 6 posts, 11 sts)
Checkpoint: 2.5 in (6.4 cm) wide x 1.5 in (3.8 cm) tall.
Tier 2 (Middle)
Row 4 (step-in): Step-in (3 sl sts). Ch 4, dc in next dc. *Ch 1, dc in next dc; rep from * 1 more time. Leave the last mesh unworked. (3 meshes, 4 posts, 7 sts)
This row sits centered under the middle 3 meshes of Row 3. On each side, the outer mesh of Row 3 now overhangs by 1 mesh. This forms the first step of the tree.
Row 5 (growth): Work as Row 3. (5 meshes, 6 posts, 11 sts)
Row 6 (growth): Work as Row 3. (7 meshes, 8 posts, 15 sts)
Checkpoint: 3.5 in (8.9 cm) wide x 3 in (7.6 cm) tall.
Tier 3 (Bottom)
Row 7 (step-in): Step-in (3 sl sts). Ch 4, dc in next dc. *Ch 1, dc in next dc; rep from * 3 more times. Leave the last mesh unworked. (5 meshes, 6 posts, 11 sts)
Row 8 (growth): Work as Row 3. (7 meshes, 8 posts, 15 sts)
Row 9 (growth): Work as Row 3. (9 meshes, 10 posts, 19 sts)
Fasten off. Checkpoint: 4.5 in (11.4 cm) wide x 4.5 in (11.4 cm) tall.
Mesh count summary: Tier 1 = 1, 3, 5. Tier 2 = 3, 5, 7. Tier 3 = 5, 7, 9. Each tier starts 2 meshes narrower than the row above it and grows by 2 meshes per row.
Trunk
Work the trunk into the 5 center sts of Row 9. Row 9 has 19 sts: post 1, sp 1, post 2, and so on, up to post 10. The center st is sp 5. The trunk uses sp 4, post 5, sp 5, post 6, and sp 6, which is symmetrical counted from either end.
Row 1: With the bottom edge of Row 9 facing you, join yarn in sp 4. Ch 1, sc in same sp, sc in next dc, sc in next sp, sc in next dc, sc in next sp. (5 sc)
Rows 2–3: Ch 1, turn, sc in each st across. (5 sc)
Fasten off. The trunk measures 1.25 in (3.2 cm) wide x 0.75 in (1.9 cm) tall.
Checkpoint: 4.5 in (11.4 cm) wide x 5.25 in (13.3 cm) tall.
Border
Border gauge: 4 sc per 1 in (2.5 cm) along straight edges, and 2 sc per dc row-end.
Each dc row is 0.5 in (1.3 cm) tall, so 2 sc per row-end matches the sc gauge exactly. The slanted edges are a little longer than they are tall. The 3-sc corners at each tier point add that extra length, so the edge lies flat without ruffling.
Round 1 (sc)
With RS facing, join yarn at the tip (the top of Row 1). Ch 1 (does not count). Place 3 sc in the tip, then work down one side as follows:
- Tier 1 slant: 2 sc in each row-end of Rows 1–3 = 6 sc
- Tier 1 corner: 3 sc in the outer corner of Row 3 = 3 sc
- Ledge: 1 sc in the free ch-1 sp, 1 sc in the next post (or sl st) = 2 sc
- Tier 2 slant: 2 sc in each row-end of Rows 4–6 = 6 sc
- Tier 2 corner: 3 sc in the outer corner of Row 6 = 3 sc
- Ledge: 1 sc in the free ch-1 sp, 1 sc in the next post (or sl st) = 2 sc
- Tier 3 slant: 2 sc in each row-end of Rows 7–9 = 6 sc
- Tier 3 corner: 3 sc in the outer post of Row 9 = 3 sc
- Base edge: 1 sc in each of sp 1, post 2, sp 2, post 3, sp 3, post 4 = 6 sc
- Trunk side: 1 sc in each trunk row-end = 3 sc
- Trunk corner: 3 sc in the corner sc of the trunk = 3 sc
One side = 43 sc.
Next, work across the trunk bottom: 1 sc in each of the 3 center trunk sts = 3 sc. Then work the second side in reverse order with the same counts (43 sc), ending back at the tip. Sl st to the first sc.
Total: 3 (tip) + 43 + 3 (trunk bottom) + 43 = 92 sc
On the ledges, one side has sl sts from the step-in rows and the other side has bare dc tops. Work into whichever is there; the count stays the same.
Round 2 (sl st)
Do not chain. Sl st loosely in each sc around. (92 sl sts) Do not fasten off.
This round gives the edge its raised, braided look. Keep it loose. If it pulls, go up one hook size for this round only.
The border adds 0.25 in (0.6 cm) on every side. The ornament becomes 4.5 + 0.25 + 0.25 = 5 in (12.7 cm) wide and 5.25 + 0.25 + 0.25 = 5.75 in (14.6 cm) tall.
Hanging Loop
Slip stitch along to the center sc of the tip. Ch 16, sl st in the same st. Work 22 sc over the ch-16 loop until it is fully covered. Sl st in the base of the loop. Fasten off and weave in all ends.
The finished loop is about 1.5 in (3.8 cm) tall.
Final Blocking
- Lay the ornament RS up on a foam mat.
- Pin the tip, then the trunk, so the tree is 5.75 in (14.6 cm) tall from tip to trunk bottom.
- Pin the two Tier 3 corners so the base is 5 in (12.7 cm) wide.
- Pin the Tier 1 and Tier 2 corners so each overhang is level and both sides match.
- Use a ruler to check that the trunk is centered and straight.
- Spray until damp, or steam lightly from above for acrylic. Do not press the iron down.
- Gently push each mesh window square with a fingertip.
- Let it dry fully before unpinning. A light spray starch gives extra stiffness if you like.
Final Quality-Control Checklist
- Rows count 1, 3, 5 / 3, 5, 7 / 5, 7, 9 meshes.
- Each tier overhangs the next by 1 mesh on each side.
- Trunk is 5 sc wide, 3 rows tall, and centered on sp 5.
- Border Round 1 has 92 sc; Round 2 has 92 sl sts.
- Finished size is 5 in (12.7 cm) x 5.75 in (14.6 cm).
- Windows are open and roughly square.
- Loop is firmly anchored at the tip.
- All ends are woven in on the back.
Troubleshooting
The tiers are lopsided. Check that each step-in row leaves exactly 1 mesh unworked on each side. Count posts: a step-in row should start on post 2.
The windows look tall and narrow. Your ch-1 is too tight. Make each chain the same size as the loop on your hook.
The edges ruffle. You are adding extra sc on the slants. Keep to 2 sc per row-end.
The edges pull in or the tier corners curl. Your border tension is too tight. Loosen the sl st round, or use a larger hook for Round 2.
The trunk is off-center. Recount Row 9 from both ends. The trunk must start in sp 4 and end in sp 6.
The loop flops forward. Add 2 to 4 more sc over the chain so it is packed firmly.
Care
Hand wash in cool water and lay flat to dry, pinning it back to shape if needed. Store it flat or hanging, away from heavy ornaments that could crush the mesh.
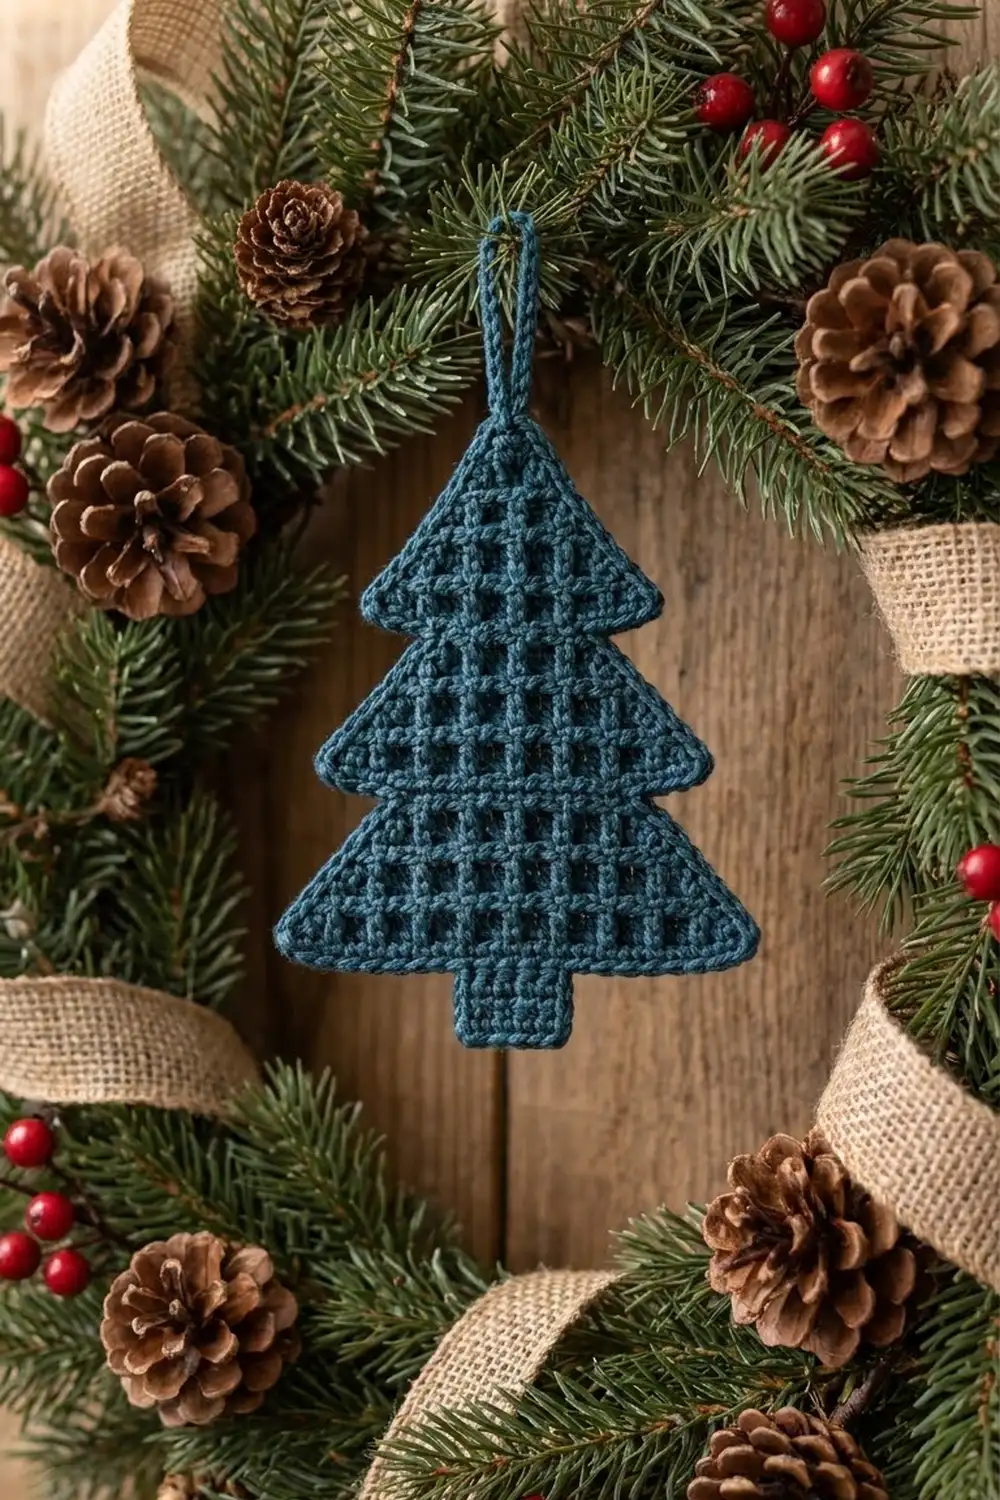
Final Notes
The measurement chain is simple. One mesh is 0.5 in (1.3 cm) square. Row 9 has 9 meshes, so it is 4.5 in (11.4 cm) wide, and the 9 rows are 4.5 in (11.4 cm) tall. The trunk adds 0.75 in (1.9 cm) of height. The border adds 0.25 in (0.6 cm) all around, giving a finished 5 in (12.7 cm) x 5.75 in (14.6 cm) tree with a 1.5 in (3.8 cm) loop on top.
Check your gauge at Row 3, count meshes on every row, and keep the border at 92 sts. Make one for the tree, then a few more in other colors as gift toppers.
Happy crocheting!