

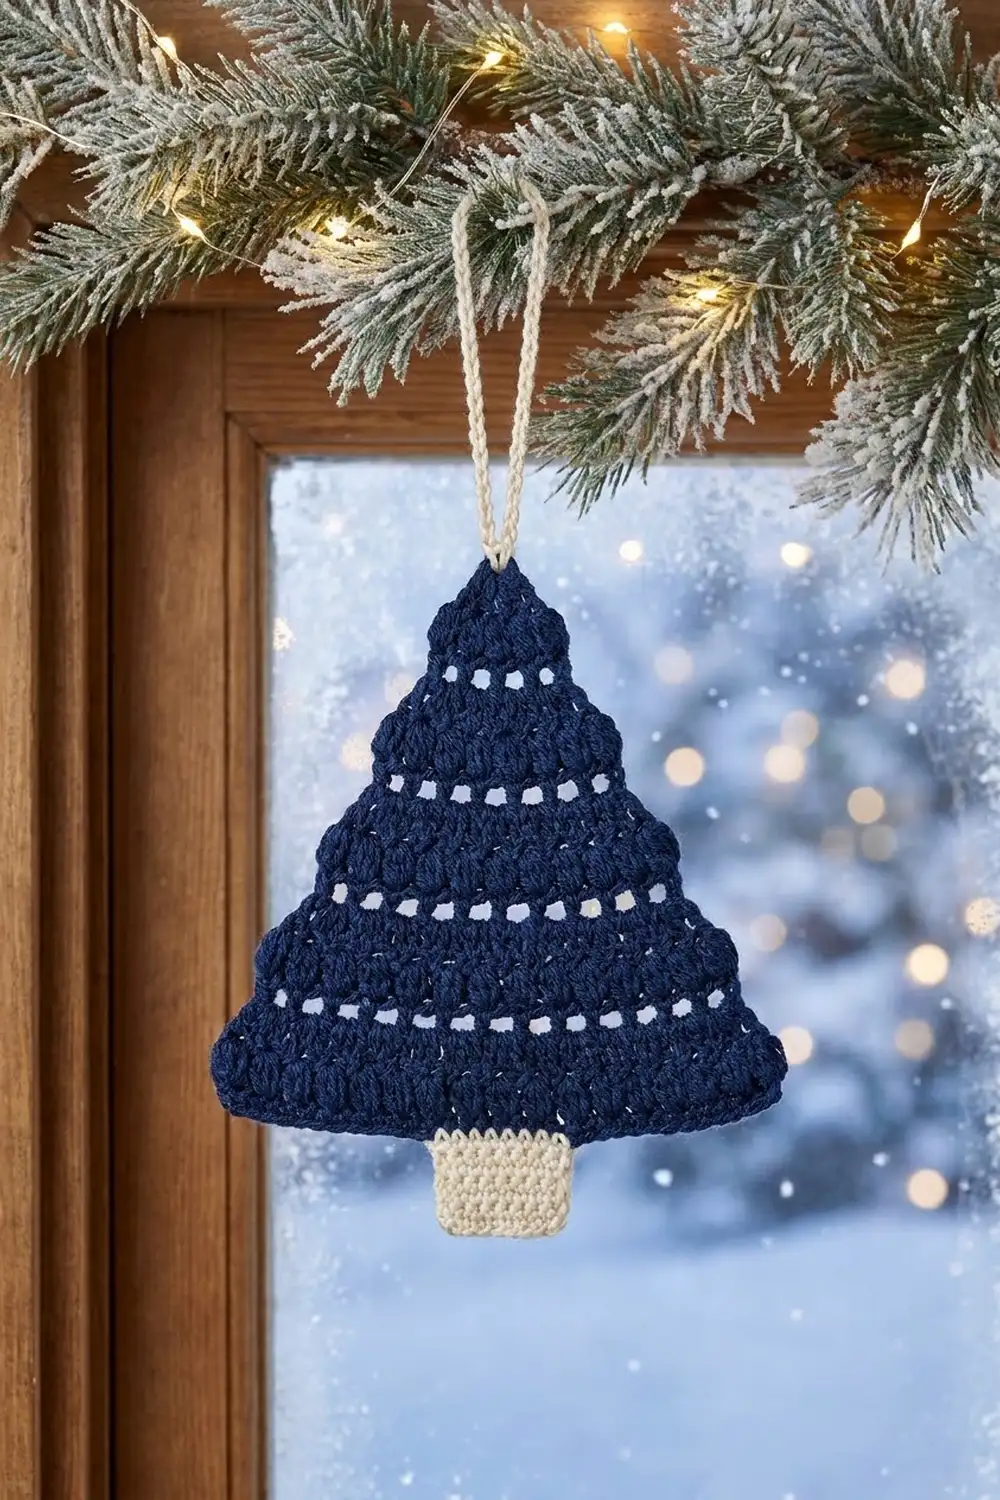
The Midnight Pine is a flat, triangular Christmas tree ornament in deep navy blue with a small cream trunk and a cream hanging loop. Solid double crochet rows alternate with lacy rows of puff stitches and chain spaces. The result is a tree with clear horizontal branch bands and small open windows that glow when the ornament hangs in front of a light.
The look is quiet and Scandinavian: two colors, crisp straight edges, and plenty of texture without fuss. One ornament takes well under an hour, so you can easily make several to hang along a window, a mantel garland or a gift package. The navy and cream pairing reads beautifully against both snowy daylight and warm string lights.
This pattern uses US crochet terms. The finished tree body is about 4.6″ (11.7 cm) wide at the base and 4.65″ (11.8 cm) tall. With the trunk it is 5.45″ (13.8 cm) tall, and with the loop the full hanging length is about 7.45″ (18.9 cm).
Construction is simple. You work the tree top-down in turned rows, adding one stitch at each edge on every row. A single round of navy single crochet then borders all three sides. Finally, you work the cream trunk straight off the bottom edge and chain the cream loop at the tip. There is nothing to sew together.
Finished Size and Construction
- Finished size (tree body): 4.6″ (11.7 cm) wide × 4.65″ (11.8 cm) tall
- Height with trunk: 5.45″ (13.8 cm); with loop, about 7.45″ (18.9 cm)
- Skill level: Easy / advanced beginner
- Terminology: US crochet terms
- Yarn weight: DK (light worsted, #3)
- Hook: 3.5 mm (E-4)
- Number of pieces: 1 (the trunk and loop are worked directly onto the tree)
- Layout: Single standalone motif
- Piece size before border: 4.2″ (10.7 cm) wide × 4.25″ (10.8 cm) tall
- Border depth: About 0.2″ (0.5 cm) on each edge
Materials
Choose a smooth DK cotton or cotton blend of about 115 m per 50 g. Cotton gives the sharp stitch definition you see in the puff bands, and it blocks to clean, straight edges. Mercerized cotton adds a soft sheen. Acrylic also works, but the puffs will look softer and the edges may need more blocking.
Pick a navy dark enough to contrast with the cream, but not so dark that the puff texture disappears. Hold the yarn under the light where the ornament will hang before you commit.
- Navy (Color A): 12 g, about 28 m (31 yd)
- Cream (Color B): 4 g, about 9 m (10 yd)
These amounts include a margin of about 25 percent for testing gauge and weaving in ends. For a set of six trees, multiply by six. One 50 g ball of navy and one small ball of cream is plenty.
Tools:
- 3.5 mm (E-4) crochet hook
- Tapestry needle
- Scissors
- 2 stitch markers
- Blocking mat, rust-proof pins and a spray bottle
- Ruler or measuring tape
- Optional: fabric stiffener and a small brush
Abbreviations (US Terms)
- ch – chain
- sc – single crochet
- dc – double crochet
- sl st – slip stitch
- st(s) – stitch(es)
- sp – space
- sk – skip
- rep – repeat
- RS / WS – right side / wrong side
Special stitch – Puff: Yarn over, insert hook in indicated st, yarn over and pull up a loop to the height of a dc. Repeat from * to * 3 times in total, then yarn over and draw through all 7 loops on the hook. There is no closing chain. Each puff counts as 1 st.
Counting note: In every row, each dc, each puff, each ch-1 sp and each turning ch-3 counts as 1 st.
Gauge and Checkpoints
Gauge: 20 dc and 9 dc rows = 4″ (10.2 cm). In single crochet: 5 sc and 5 sc rows = 1″ (2.5 cm).
So one dc is 0.2″ (0.5 cm) wide, and one dc row is about 0.44″ (1.1 cm) tall.
Test one piece first. The ornament is small, so the tree itself is the best gauge swatch. Make one, check it at each checkpoint below, and adjust before you make a set.
- After Row 6 (13 sts): About 2.6″ (6.6 cm) wide and 2.5″ (6.4 cm) tall.
- After Row 10 (21 sts): 4.2″ (10.7 cm) wide and 4.25″ (10.8 cm) tall.
- After the border: 4.6″ (11.7 cm) wide × 4.65″ (11.8 cm) tall.
- After the trunk: 5.45″ (13.8 cm) tall in total.
For an ornament, being within 1/4″ (0.6 cm) in either direction is fine.
Too big? Go down to a 3.25 mm (D-3) hook. Too small? Go up to a 3.75 mm (F-5) hook. If the width is right but the height runs long, pull up the first loop of each dc a little less.
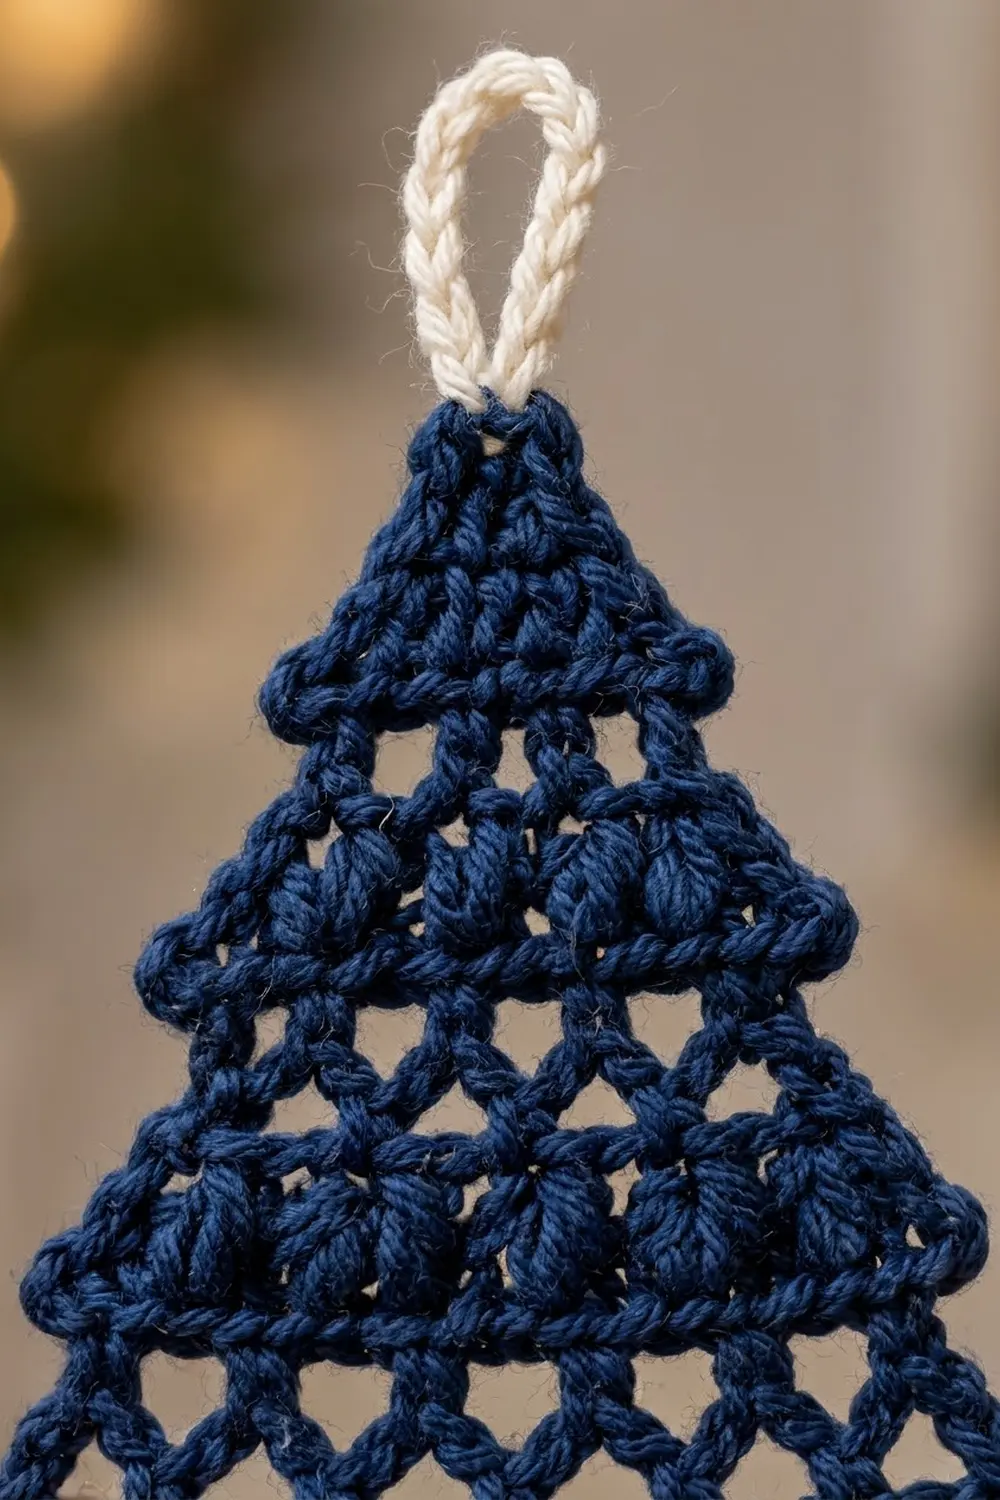
The Tree (Navy)
Work top-down in turned rows. Odd-numbered rows are RS rows, so the puffs sit on the RS. Use Color A.
Row 1 (RS): Ch 2, then work 3 sc in the 2nd ch from the hook. Turn. (3 sts)
This tiny row forms the tip and is about 0.25″ (0.6 cm) tall.
Row 2 (WS, solid): Ch 3 (counts as dc), dc in the same st, dc in the next st, 2 dc in the last st. Turn. (5 sts)
Row 3 (RS, puff): Ch 3 (counts as dc), dc in the same st, ch 1, sk next st, puff in next st, ch 1, sk next st, 2 dc in last st. Turn. (7 sts: 4 dc, 1 puff, 2 ch-1 sps)
Row 4 (WS, solid): Ch 3 (counts as dc), dc in the same st, dc in each st and ch-1 sp across to the last st, 2 dc in the top of the turning ch. Turn. (9 sts)
Rows 3 and 4 set up the two row types. Every solid row and every puff row adds exactly 2 sts: one extra dc at each edge.
Puff row, general rule (worked over an odd count, N): Ch 3 (counts as dc), dc in the same st. Ch 1, sk next st, puff in next st. Rep from * to * until 2 sts remain. Ch 1, sk next st, 2 dc in last st. Turn. This gives N + 2 sts, including (N − 3) ÷ 2 puffs and (N − 1) ÷ 2 ch-1 sps.
Solid row, general rule: Ch 3 (counts as dc), dc in the same st, dc in each st and ch-1 sp across to the last st, 2 dc in last st. Turn. This gives N + 2 sts.
Row 5 (RS, puff): Work a puff row over 9 sts. (11 sts: 4 dc, 3 puffs, 4 ch-1 sps)
Row 6 (WS, solid): Work a solid row. (13 sts)
Checkpoint: About 2.6″ (6.6 cm) wide and 2.5″ (6.4 cm) tall.
Row 7 (RS, puff): Work a puff row over 13 sts. (15 sts: 4 dc, 5 puffs, 6 ch-1 sps)
Row 8 (WS, solid): Work a solid row. (17 sts)
Row 9 (RS, puff): Work a puff row over 17 sts. (19 sts: 4 dc, 7 puffs, 8 ch-1 sps)
Row 10 (WS, solid): Work a solid row. (21 sts) Do not fasten off.
Checkpoint: 21 sts × 0.2″ = 4.2″ (10.7 cm) wide. The height is Row 1 at 0.25″ (0.6 cm) plus 9 dc rows at about 0.44″ (1.1 cm) each, for 4.25″ (10.8 cm) in total.
You now have four puff bands, with 1, 3, 5 and 7 puffs, separated by solid dc bands. The ch-1 spaces beside each puff form the small open windows. The solid rows read as the layered branches.
Stitch placement tips: In solid rows, work into the ch-1 spaces themselves, not into the chains. This keeps the windows open and round. Work the dc above each puff into the top of the puff, which closes neatly just right of its center. At the end of each row, the last st is the top of the turning ch-3, so insert your hook into its 3rd chain.
Border (Navy)
Border gauge: Along the bottom edge, 5 sc = 1″ (2.5 cm). Along the slanted sides, work 2 sc into each dc row end and 1 sc into the sc row end of Row 1.
Corner groups: At each of the three corners, work 3 sc into one st. The middle sc of each group is the corner st.
Border Round (RS):
1. Ch 1 and turn so the RS faces you.
2. Along the top of Row 10: 3 sc in the first st (bottom corner), sc in each of the next 19 sts, 3 sc in the last st (bottom corner).
3. Rotate to work up the slanted side: 2 sc in each of the 9 dc row ends (Rows 10 through 2), then 1 sc in the row end of Row 1. (19 sc)
4. Work 3 sc in the foundation ch at the tip.
5. Work down the second slanted side: 1 sc in the row end of Row 1, then 2 sc in each of the 9 dc row ends (Rows 2 through 10). (19 sc)
6. Sl st to the first sc and fasten off.
Count check:
- Bottom edge between corner groups: 19 sc
- Each slanted side between corner groups: 19 sc
- Corner groups: 3 × 3 sc = 9 sc
- Total: 19 + 19 + 19 + 9 = 66 sc
You can also count each side from corner st to corner st, including both corners. That gives 23 sc per side: 1 corner st + 1 flanking sc + 19 + 1 flanking sc + 1 corner st. Three sides × 23 = 69. Subtract the 3 corner sts that were counted twice, and you get 66, which matches the total.
Why the math works: The bottom edge takes 1 sc per Row 10 st. Its 21 sts become 19 single sc plus 2 corner sts, so the base neither ruffles nor pulls in. On the slanted sides, a dc row end is about as tall as 2 sc, so working 2 sc into each one keeps the sides flat. The border adds about 0.2″ (0.5 cm) to each edge. That brings the width from 4.2″ (10.7 cm) to 4.6″ (11.7 cm) and the height from 4.25″ (10.8 cm) to 4.65″ (11.8 cm).
Next, find the 19 bottom-edge sc between the two corner groups. Place markers in the 8th and 12th of them. The 10th sc is the center, so the 5 sc from marker to marker are exactly centered.
Trunk (Cream)
Row 1 (RS): Hold the tree with the RS facing you and the bottom edge at the top. Join Color B with a sl st in the marked 8th sc. Ch 1, then sc in the same st and in each of the next 4 sc, ending in the marked 12th sc. Turn. (5 sc)
Rows 2–4: Ch 1, sc in each st across. Turn. (5 sc)
Fasten off after Row 4.
Checkpoint: The trunk is 5 sc = 1″ (2.5 cm) wide and 4 rows = 0.8″ (2.0 cm) tall. It sits centered with 7 border sc on each side.
Hanging Loop (Cream)
Join Color B with a sl st in the middle sc of the tip corner group. Ch 20, then sl st into the same st. Fasten off, leaving a 4″ (10.2 cm) tail.
The chain folds into a loop about 2″ (5.1 cm) long. Weave the tail back through the base of the loop twice so the loop stands upright and the tree hangs straight.
Final Blocking
- Weave in all ends on the WS. Run navy ends through the dc rows and cream ends through the trunk or loop base, so no strands show through the open windows.
- Mist the ornament lightly with water until it is damp but not soaked.
- Lay it RS up on the blocking mat.
- Pin the three corners first: base width 4.6″ (11.7 cm), with the tip 4.65″ (11.8 cm) above the base edge and centered over it.
- Pin along each slanted side every 1/2″ (1.3 cm) to keep the edges perfectly straight.
- Push each puff up gently with a fingertip, and open each ch-1 window with the tip of your hook.
- Pin the trunk square at 1″ (2.5 cm) × 0.8″ (2.0 cm).
- Let it dry completely, at least 4 hours, before unpinning.
- For a stiffer ornament, brush on a light coat of diluted fabric stiffener before it dries.
Final Quality-Control Checklist
- Row 10 has exactly 21 sts.
- The puff bands have 1, 3, 5 and 7 puffs from top to bottom.
- The border round has 66 sc, with 19 sc on each side between corner groups.
- The tree body measures 4.6″ (11.7 cm) × 4.65″ (11.8 cm), within 1/4″ (0.6 cm).
- Both slanted sides are the same length and straight, not wavy.
- The trunk is centered and 5 sc wide, with 7 border sc showing on each side.
- The hanging loop is centered on the tip and holds firmly.
- No loose ends show from the RS or through the windows.
Troubleshooting
Sides ripple or wave. There are too many sc on the slanted edges. Check that you worked 2 sc per dc row end, not 3.
Sides cup or pull inward. Your border tension is too tight. Loosen your grip, or go up half a hook size for the border round only.
Puffs look flat. Pull each loop up to full dc height before the final yarn over, and make sure you are working the puffs on RS rows.
Stitch count is off by one. Usually a turning ch-3 was skipped or a ch-1 sp was missed. Each ch-1 sp counts as 1 st in the next solid row.
The tree leans to one side. One edge probably got 1 dc instead of 2. Count the sts at each checkpoint, and pin the tip centered when blocking.
Trunk is off-center. Recount the bottom edge starting just after the corner group. The trunk begins in the 8th of the 19 sc between the corners.
Tip looks blunt. Work the 3 tip sc firmly into the foundation ch, then block the tip to a point.
Care
Hand wash in cool water with mild soap, press out the water in a towel, and dry flat, reshaping it as you did when blocking. Store the ornament flat or hanging so the loop doesn’t crease.
Final Notes
The measurement chain is short and easy to check. A gauge of 20 dc and 9 rows = 4″ (10.2 cm) gives a 21-st Row 10 that is 4.2″ (10.7 cm) wide and 4.25″ (10.8 cm) tall. The 66-sc border brings the tree body to 4.6″ (11.7 cm) × 4.65″ (11.8 cm). The 5-sc trunk adds 0.8″ (2.0 cm) for a total height of 5.45″ (13.8 cm), and the cream loop gives a hanging length of about 7.45″ (18.9 cm).
If your first tree matches every checkpoint, the rest of the set will match too.
Happy crocheting!