

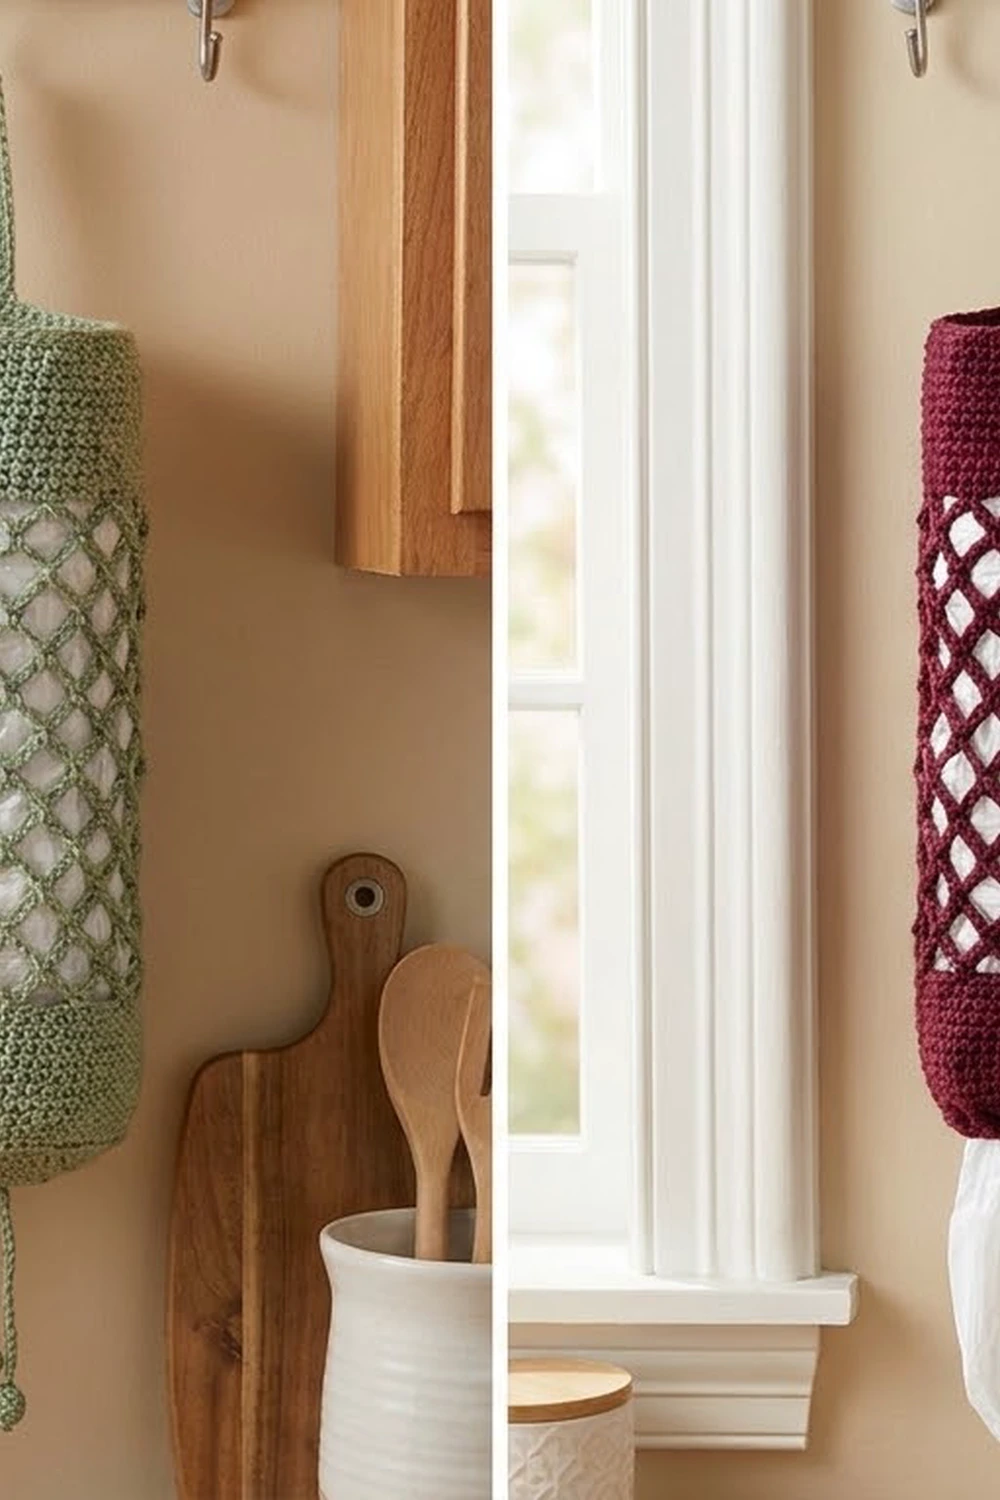
The Lattice Larder Bag Holder is a tall, slim crochet tube that hangs on a kitchen hook and keeps plastic grocery bags tidy. You push bags in through the top and pull them out one at a time through the small drawstring opening at the bottom.
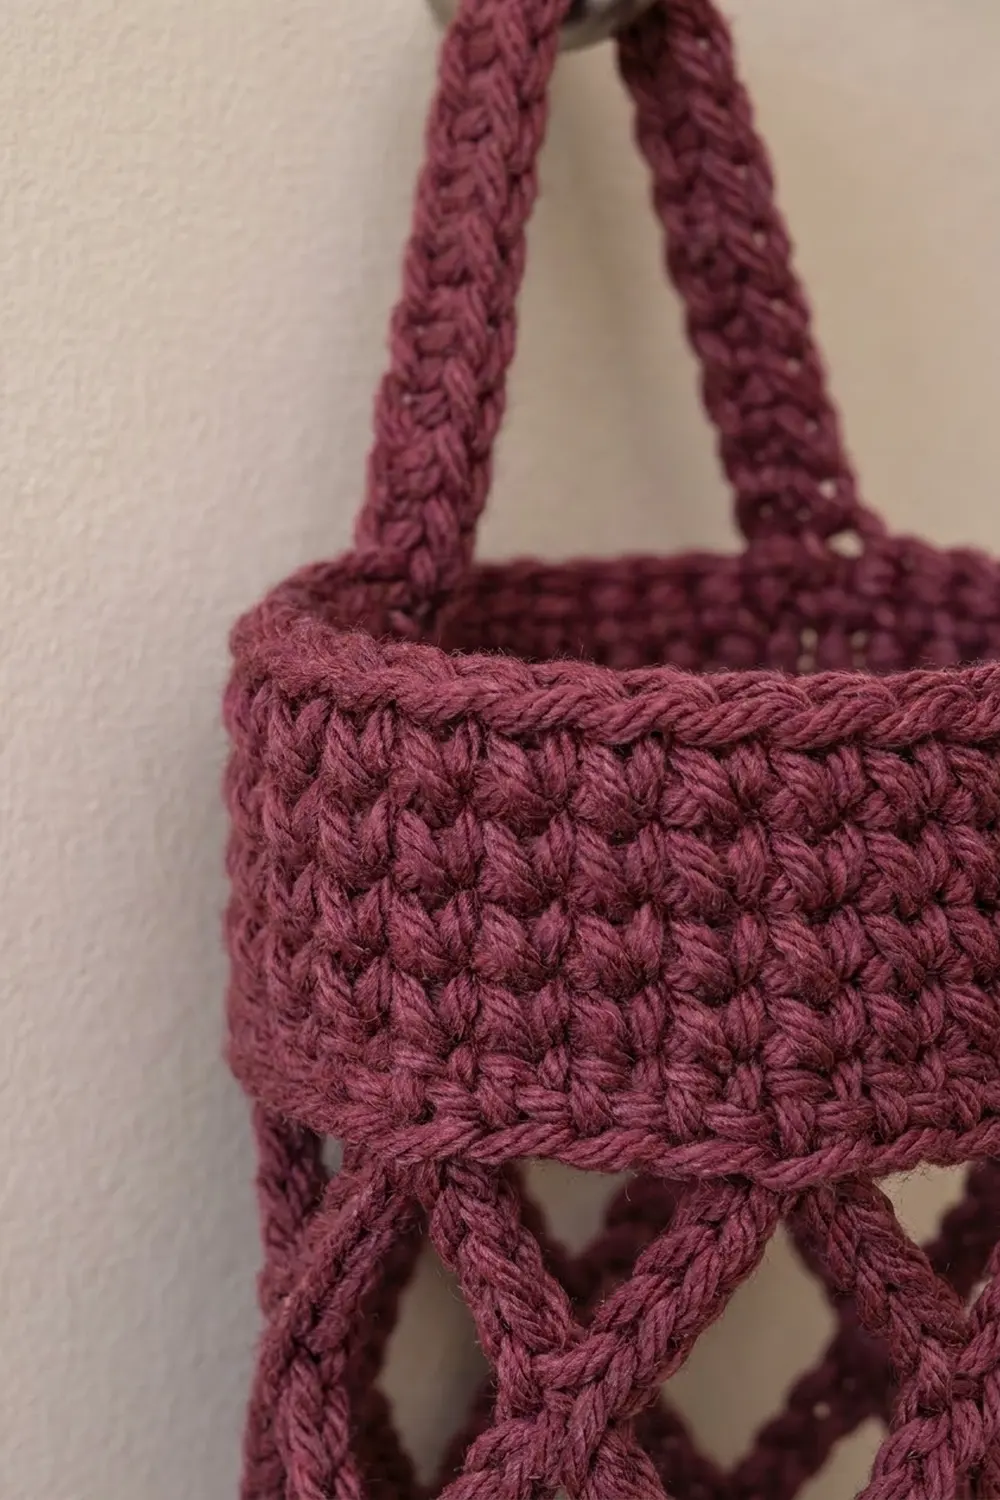
The look is simple and graphic. A firm single crochet band sits at the top, a long diamond lattice body lets the bags show through, and a matching firm band closes the bottom. A covered strap makes the hanging loop. A thin drawstring with tiny crochet beads on the ends pulls the bottom opening closed. The samples are deep burgundy and soft sage green, with one solid color per holder.
This pattern uses US crochet terms. The finished holder is about 6 in (15.2 cm) wide laid flat, 12 in (30.5 cm) around, and 17 in (43.2 cm) long from top rim to bottom rim. That length doesn’t include the loop or the ties.
The holder is worked top-down with no seams. You chain a ring and work the top band in joined rounds. Then you switch to a chain-loop mesh that spirals into diagonal lines. Next you convert back to single crochet for the bottom band, which includes an eyelet round. Last, you add a slip-stitch edge, a sewn-on strap and a drawstring.
Finished Size and Construction
- Finished size: 6 in (15.2 cm) wide flat × 17 in (43.2 cm) long
- Circumference: 12 in (30.5 cm)
- Skill level: Easy / Advanced Beginner
- Terminology: US crochet terms
- Yarn weight: Worsted (#4) cotton or cotton blend
- Hook: 5.0 mm (H-8)
- Number of pieces: 1 tube body, plus 1 strap, 1 drawstring and 2 small beads
- Layout: single vertical tube, worked in the round
- Piece size: top band 2 in (5.1 cm), mesh 13.5 in (34.3 cm), bottom band 1.5 in (3.8 cm)
- Size before border: 17 in (43.2 cm) long, 48 sts around
- Border depth: one slip-stitch round at each rim, adding less than 0.125 in (0.3 cm)
Materials
Choose a smooth worsted cotton or cotton blend. Cotton holds the mesh shape, doesn’t stretch much under the weight of the bags, and washes well. Acrylic also works, but the lattice will stretch longer when it’s full. Avoid fuzzy or very loosely plied yarns. They hide the diagonal lines and snag on the bags.
- Main color (one per holder): 60 g / 100 m (109 yd). Shown in burgundy and in sage green.
- For a matching pair, buy the same amount again in a second color.
These quantities include a margin of about 25% to cover gauge differences, the swatch check and the drawstring.
Tools:
- 5.0 mm (H-8) crochet hook
- 4 stitch markers (one for round starts, three for strap and eyelet placement)
- Tapestry needle
- Scissors
- Measuring tape
- Rust-proof pins and a spray bottle for blocking
- A rolled towel or a 4 in (10.2 cm) wide cardboard tube for shaping
Abbreviations (US Terms)
- ch – chain
- sl st – slip stitch
- sc – single crochet
- dc – double crochet
- st(s) – stitch(es)
- sp – space
- sk – skip
- rnd(s) – round(s)
- MR – magic ring
Special stitch – Mesh anchor: the single stitch (sc or dc) that sits in the center of each ch-5 loop. Every mesh round has exactly 12 anchors and 12 loops. The dc at the end of each mesh round makes a “short loop.” Ch 2 plus a dc is about as tall as a ch-5 loop, and it leaves your hook in the center of the last loop, ready for the next round.
Gauge and Checkpoints
Gauge: 16 sc and 18 rnds = 4 in (10.2 cm) in sc worked in joined rounds.
Mesh gauge: 1 mesh round = about 0.75 in (1.9 cm) tall when hanging with light weight; 12 loops around = 12 in (30.5 cm).
Use the top band as your swatch. Work Rnds 1–9, flatten the ring and check:
- Checkpoint 1 (after Rnd 1): the ring is 12 in (30.5 cm) around without stretching.
- Checkpoint 2 (after Rnd 9): the band is 6 in (15.2 cm) wide flat and 2 in (5.1 cm) tall.
- Checkpoint 3 (after Rnd 27): the mesh measures 13.5 in (34.3 cm) when hung from the band.
- Checkpoint 4 (after Rnd 34): the total length is 17 in (43.2 cm).
If the band is wider than 6 in (15.2 cm), go down one hook size to 4.5 mm. If it’s narrower, go up one size to 5.5 mm. Keep the stitch count the same, because the 12-loop mesh needs exactly 48 sts.
If the mesh is too long or too short at Checkpoint 3, remove or add mesh rounds in pairs and write down the change. Always measure the mesh while it hangs, never while it lies flat and squashed.
Pattern
Top Band
Ch 48. Join with a sl st to the first ch to form a ring, taking care not to twist the chain.
Rnd 1: Ch 1 (does not count as a st here and throughout), sc in each ch around, join with sl st to first sc. (48 sc)
Rnds 2–9: Ch 1, sc in each st around, join. (48 sc each round)
Place a marker in the first st of the round. The band should measure 2 in (5.1 cm) tall and 6 in (15.2 cm) wide flat.
Lattice Mesh
The mesh is a classic chain net. Each round ends with a short loop, so the next round starts in the middle of the last loop. This makes the anchors climb in a gentle spiral, and the chains line up into the crossing diagonals of the finished holder.
Rnd 10 (set-up): Ch 1, sc in first st, ch 5, sk 3 sts, sc in next st; repeat from * 10 more times, ch 2, sk 3 sts, dc in first sc. (12 loops: 11 ch-5 loops + 1 short loop; 12 anchors)
Check: 12 anchors × 4 sts used each (1 anchor + 3 skipped) = 48 sts. This uses every band stitch.
Rnd 11: Ch 5, sc in next ch-5 sp; repeat from * 10 more times, ch 2, dc in top of dc. (12 loops, 12 anchors)
The dc you start from is the first anchor, and the 11 sc are the other 11. Every sc goes into the loop space, never into a stitch.
Rnds 12–26: Repeat Rnd 11. (12 loops, 12 anchors each round)
Every few rounds, count the anchors across one flattened side. You should see 6 on the front and 6 on the back.
Rnd 27 (closing mesh round): Ch 5, sc in next ch-5 sp; repeat from * 10 more times, ch 5, sl st in top of dc. (12 full ch-5 loops, 12 anchors)
This last round ends with a full ch-5 instead of a short loop, so the bottom band starts level.
Checkpoint 3: hang the tube from the top band. The mesh (Rnds 10–27, 18 rounds) should measure 13.5 in (34.3 cm).
Bottom Band
Rnd 28 (conversion): Ch 1, sc in anchor, 3 sc in next ch-5 sp; repeat from * 11 more times, join. (12 sc in anchors + 36 sc in loops = 48 sc)
The first anchor is the dc you just slip-stitched into.
Rnds 29–30: Ch 1, sc in each st around, join. (48 sc each round)
Rnd 31 (eyelet round): Ch 1, sc in next 2 sts, ch 2, sk 2 sts; repeat from * 11 more times, join. (24 sc + 12 ch-2 sps)
Rnd 32 (recovery): Ch 1, sc in next 2 sc, 2 sc in next ch-2 sp; repeat from * 11 more times, join. (24 sc in sts + 24 sc in sps = 48 sc)
Rnds 33–34: Ch 1, sc in each st around, join. (48 sc each round)
Don’t fasten off. You’ll continue straight into the bottom edge (see Border). The bottom band (Rnds 28–34) measures about 1.5 in (3.8 cm).
Hanging Strap
Ch 5.
Row 1: Sc in 2nd ch from hook and in each ch across, turn. (4 sc)
Rows 2–40: Ch 1, sc in each st across, turn. (4 sc each row)
Fasten off and leave a 12 in (30.5 cm) tail. The strap is 1 in (2.5 cm) wide and about 8.9 in (22.6 cm) long.
Attaching: Flatten the body so the round-start marker sits on one side fold. Mark sts 1–4 and sts 25–28 of Rnd 1. These two groups sit directly opposite each other. Pin one strap end inside the top band over sts 1–4, overlapping 1 in (2.5 cm) down from the rim. Pin the other end the same way over sts 25–28. Whipstitch all four edges of each overlap. The loop rises about 3 in (7.6 cm) above the rim.
Drawstring and Beads
Drawstring: Ch about 80, until the chain measures 24 in (61.0 cm). Sl st in 2nd ch from hook and in each ch across. Fasten off.
Beads (make 2): Make a MR. Rnd 1: 6 sc in ring. (6 sc) Rnd 2: Sc in each st around. (6 sc) Tuck the tails inside to fill the bead and pull it closed. Sew one bead firmly to each drawstring end. Each bead is about 0.5 in (1.3 cm) across.
Weave the drawstring in and out through the 12 ch-2 eyelets of Rnd 31. Start and end at the same eyelet so both beads hang together at the front.
Border
Border gauge: 1 sl st per sc, so 4 sl sts = 1 in (2.5 cm), which matches the band gauge exactly. The border never adds stitches, so the rims stay 12 in (30.5 cm) around and don’t flare or pull in.
Bottom edge: Continuing from Rnd 34, ch 1, sl st loosely in each st around, join to first sl st. (48 sl st: 24 on each flattened side)
Top edge: Join yarn with a sl st in the free loop of the foundation chain at the round-start marker. Sl st loosely in each free loop around, join. (48 sl st: 24 on each flattened side)
Why the math works: The band has 48 sts. Flattened, that’s 2 sides × 24 sts, and 24 sts ÷ 4 sts per in = 6 in (15.2 cm) per side. The border puts exactly one sl st into each existing st, so each side starts and ends with 24. A tube has no corners, so you don’t add corner stitches. The border is less than 0.125 in (0.3 cm) deep, so the total length stays 17 in (43.2 cm).
Keep the slip stitches loose. If they’re tight, the rim will shrink below 12 in (30.5 cm) and bags will be hard to push in at the top.
Final Blocking
- Weave in all ends inside the solid bands. Never weave them through the mesh, where they would show.
- Spray the holder evenly with water until damp but not dripping.
- Slide a rolled towel or a 4 in (10.2 cm) wide cardboard tube inside to hold the round shape.
- Lay it flat and gently pull the mesh lengthwise so the diamonds open evenly and the diagonals run straight.
- Pin the top and bottom bands so each measures 6 in (15.2 cm) across flat.
- Check that the total length is 17 in (43.2 cm). Push the mesh in or pull it out to match.
- Let it dry completely, then remove the form and pins.
Final Quality-Control Checklist
- Top band: 9 rounds, 48 sc, 2 in (5.1 cm) tall.
- Mesh: 18 rounds, 12 loops and 12 anchors in every round, 13.5 in (34.3 cm) hanging.
- Bottom band: 7 rounds, 48 sts, 12 evenly spaced eyelets.
- Width: 6 in (15.2 cm) flat at both bands.
- Total length: 17 in (43.2 cm).
- Strap: 4 sts × 40 rows, sewn securely to opposite sides.
- Drawstring runs through all 12 eyelets, and the beads are firmly attached.
- No ends showing in the mesh.
Troubleshooting
The diagonals look like straight vertical columns. You’re probably working into the anchor instead of the loop. Every sc goes into the ch-5 space, not into the sc below it.
The loop count drifts to 11 or 13. Count anchors at the end of every mesh round. Put a marker in the dc so you never miss the first anchor.
The mesh twists around the tube. A gentle spiral is normal. A strong twist means your chains are too tight. Loosen them, or use a 5.5 mm hook for the mesh rounds only.
The bottom band ruffles. You worked 4 sc into the loops on Rnd 28. Use exactly 3 sc per loop.
The bottom band pulls in. You worked 2 sc into the loops on Rnd 28. Use exactly 3 sc per loop.
The eyelets are uneven. Check that each repeat on Rnd 31 is exactly 2 sc, then ch 2 over 2 skipped sts.
Bags slip out on their own. Pull the drawstring tighter and tie a bow so the opening is smaller.
The strap stretches. Sew all four edges of each overlap and use cotton, not acrylic.
Care
Hand wash, or machine wash on a gentle cool cycle inside a mesh laundry bag. Reshape and lay flat to dry, because hanging it while wet stretches the lattice.
Final Notes
The whole design depends on one chain of measurements. A gauge of 16 sc = 4 in (10.2 cm) gives 48 sts = 12 in (30.5 cm) around, or 6 in (15.2 cm) flat. Those 48 sts divide into 12 mesh loops of 4 sts each, and the conversion round turns 12 loops back into exactly 48 sts. Nine band rounds give 2 in (5.1 cm), eighteen mesh rounds give 13.5 in (34.3 cm), and seven band rounds give 1.5 in (3.8 cm), for a total of 17 in (43.2 cm). The slip-stitch border keeps every rim at 48 sts.
Check your counts at each checkpoint and the holder will come out straight and even. Make one in each color for a matching pair beside the sink.
Happy crocheting!