

This cheerful toadstool bag holder turns a pile of loose grocery bags into something you’ll be happy to hang on the wall. A tall cream body holds the bags. A brick-red mushroom cap with cream spots sits near the top, and a sturdy red strap hangs it from a hook.
The colors are simple: warm cream and a deep red, plus cream dots that tie them together. The style is cottage-kitchen and a little whimsical, but the shape is practical. You push bags in at the top and pull them out one at a time from the small opening at the bottom.
The pattern uses US crochet terms. The finished holder measures about 16.5 in (41.9 cm) long and 6 in (15.2 cm) wide when flat, and the cap is about 6.5 in (16.5 cm) across.
Construction is straightforward. You work the body bottom-up in continuous single crochet rounds, starting from a chain ring that becomes the dispensing opening. Next you crochet the cap separately as a flared ring, make 12 small dots and a strap, and sew everything together. Edging rounds finish both openings.
Finished Size and Construction
- Finished size: 16.5 in (41.9 cm) long × 6 in (15.2 cm) wide when flat
- Skill level: Easy / advanced beginner
- Terminology: US crochet terms
- Yarn weight: Worsted (#4)
- Hook: 5.0 mm (H-8)
- Number of pieces: 1 finished holder, assembled from 1 body, 1 cap, 1 strap and 12 dots
- Layout: Single item; the cap is sewn around the upper body
- Body size before edging: 16 in (40.6 cm) long, 12 in (30.5 cm) around
- Cap size: 6.5 in (16.5 cm) diameter, 2.4 in (6.1 cm) deep
- Edging depth: about 0.25 in (0.6 cm) at each opening
Materials
Use a smooth worsted-weight cotton or cotton blend. Cotton holds its shape when the holder is stuffed and doesn’t stretch out under the weight of the bags. Acrylic also works, but the body may lengthen slightly over time.
- Cream (body, edgings, dots): 160 g / 288 m
- Red (cap, strap): 70 g / 126 m
These quantities include a margin of about 10%.
Tools:
– 5.0 mm (H-8) crochet hook
– Tapestry needle
– Stitch marker
– Scissors
– Measuring tape
– Rust-proof pins
Abbreviations (US Terms)
- ch – chain
- sl st – slip stitch
- sc – single crochet
- inc – 2 sc in the same stitch
- st(s) – stitch(es)
- rnd(s) – round(s)
- BLO – back loop only
- rev sc – reverse single crochet
Special stitch: reverse single crochet (rev sc, also called crab stitch). Work from left to right. Insert your hook into the next stitch to the right, yarn over and pull up a loop, then yarn over and pull through both loops. This makes a firm, rope-like edge that doesn’t flare.
Gauge and Checkpoints
Gauge: 14 sc and 15 rnds = 4 in (10.2 cm), worked in continuous rounds.
Test on the real piece. Work the body through Rnd 15, then check these points before you go on:
- After Rnd 4: The tube lies flat at 6 in (15.2 cm) wide, which is 12 in (30.5 cm) around.
- After Rnd 15: The piece is 4 in (10.2 cm) long, measured from the foundation chain.
- After Rnd 30: 8 in (20.3 cm) long.
- After Rnd 60: 16 in (40.6 cm) long.
If your tube is wider than 6 in (15.2 cm), go down to a 4.5 mm hook. If it’s narrower than 5.75 in (14.6 cm), go up to a 5.5 mm hook.
If the width is right but the length runs ahead or behind, change the round count instead of the hook. Every 4 rounds adds about 1 in (2.5 cm).
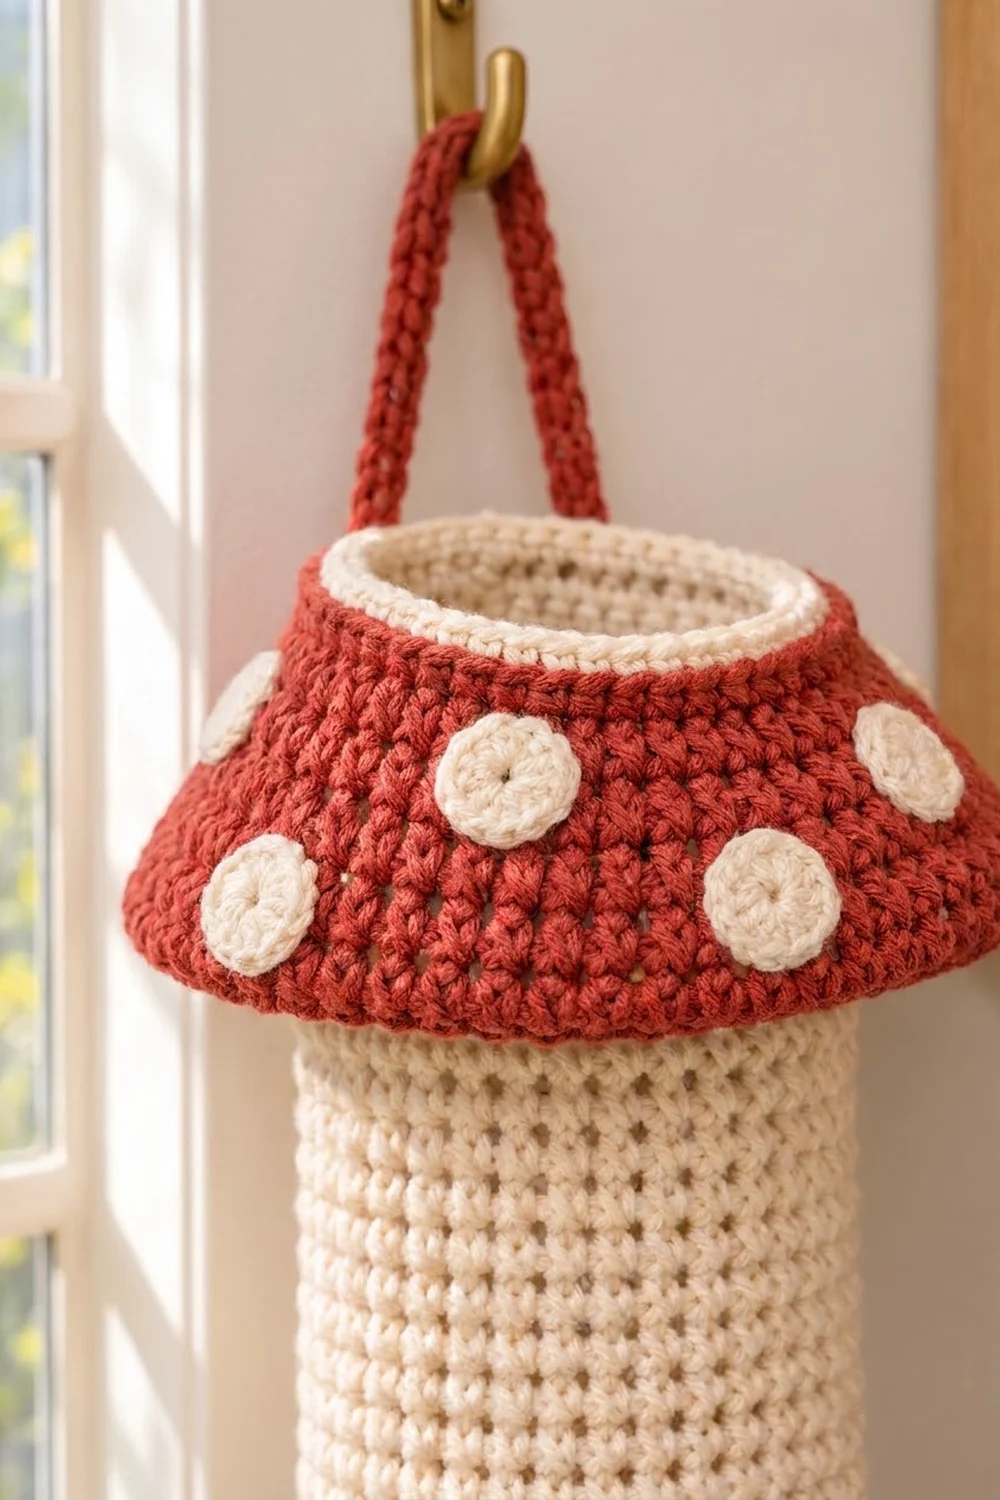
Body (Cream)
The body is worked in continuous rounds without joining. Move your marker up to the first stitch of each round.
Foundation: Ch 21 and sl st into the first ch to form a ring. Don’t twist the chain. This ring is the dispensing opening, about 6 in (15.2 cm) around and 1.9 in (4.8 cm) across.
Rnd 1: Ch 1, sc in each ch around. (21 sts)
Rnd 2: Sc 2, inc 7 times. (28 sts)
Rnd 3: Sc 3, inc 7 times. (35 sts)
Rnd 4: Sc 4, inc 7 times. (42 sts)
These three increase rounds make the rounded bottom you see on the finished holder. Seven increases per round keep the curve even all the way around.
Rnds 5–60: Sc in each st around. (42 sts per rnd; 56 rnds)
Check the length often. At Rnd 60 the body should be 16 in (40.6 cm) long.
At the end of Rnd 60, sl st into the next stitch. Don’t fasten off yet if you plan to work the top edging right away (see Edgings). Otherwise, fasten off and leave the live loop on a marker.
Placement markers: Put a contrasting marker in Rnd 57, at the stitch directly above the start of the rounds. This is where the cap seam goes. Put two more markers in Rnd 59: one at stitch 1 and one at stitch 22. These two stitches sit directly opposite each other and mark where the strap is attached.
Cap (Red)
The cap starts at its inner edge, which hugs the body, and grows outward and downward.
Foundation: Ch 42 and sl st into the first ch to form a ring. Check that the ring slips over the body. It should be snug but not stretched.
Rnd 1: Ch 1, sc in each ch around. (42 sts)
Rnd 2: Sc 6, inc 6 times. (48 sts)
Rnd 3: Sc 7, inc 6 times. (54 sts)
Rnd 4: Sc 8, inc 6 times. (60 sts)
Rnd 5: Sc 9, inc 6 times. (66 sts)
Rnd 6: Sc 10, inc 6 times. (72 sts)
Rnds 7–9: Sc in each st around. (72 sts per rnd)
The increase rounds add only 6 stitches each. That’s fewer than a flat circle needs at this size, so the cap slopes outward like a cone instead of lying flat. The three even rounds then turn straight down to form the curved, downturned rim.
Sl st into the next stitch and fasten off, leaving a 40 in (101.6 cm) tail for sewing.
Checkpoint: Rnds 1–9 together measure 2.4 in (6.1 cm) deep. The outer edge is 72 sts, which is 20.5 in (52.1 cm) around and about 6.5 in (16.5 cm) across.
Dots (Cream, make 12)
Rnd 1: Make a magic ring, ch 1, and work 6 sc into the ring. Pull the ring closed. (6 sts)
Rnd 2: 2 sc in each st around. (12 sts)
Sl st into the first st and fasten off, leaving an 8 in (20.3 cm) tail.
Each dot is about 1 in (2.5 cm) across. The seam between Rnd 1 and Rnd 2 creates the small center ring you see on the finished holder.
Strap (Red)
Foundation: Ch 43.
Row 1: Sc in the 2nd ch from the hook and in each ch across. Turn. (42 sts)
Row 2: Ch 1, sc in each st across. (42 sts)
Fasten off, leaving a 12 in (30.5 cm) tail. The strap is 12 in (30.5 cm) long and about 0.5 in (1.3 cm) wide.
Two rows of single crochet make a firm, cord-like strap that won’t stretch when the holder is full.
Assembly
- Dots: Lay the cap flat. Sew 6 dots in a band across Rnds 6–8, spacing them evenly with about 12 sts between dots. Sew the other 6 dots across Rnds 2–4, placing each one halfway between two dots in the lower band. Whipstitch around the outer edge of each dot, then weave in the ends on the wrong side.
- Cap: Slide the cap onto the body, foundation edge first, so it flares down toward the bottom opening. Line up the cap foundation with Rnd 57. Whipstitch stitch-to-stitch, 42 cap sts to 42 body sts. Rnds 58–60 and the top edging stay visible above the cap as a narrow cream band about 1 in (2.5 cm) wide.
- Strap: Put each strap end 1 in (2.5 cm) inside the top opening at the Rnd 59 markers, one at stitch 1 and one at stitch 22. Sew each end with a square of backstitches through both layers. Go over the stitches twice, because this joint carries the full load.
Edgings
Edging gauge: Each edging round works 1 st into each existing st, so the edge measures the same as the round below it. Each edging adds about 0.25 in (0.6 cm).
Bottom edging (cream): Join cream yarn in the unused loops on the other side of the foundation chain.
– Rnd 1: Ch 1, sc in each loop around. (21 sts)
– Rnd 2: Ch 1, rev sc in each st around. Sl st to join. (21 sts)
Top edging (cream): Work into Rnd 60.
– Rnd 1: Ch 1, sc in each st around. Join with a sl st. (42 sts)
– Rnd 2: Ch 1, rev sc in each st around. Sl st to join. (42 sts)
Why the math works: The bottom edging starts on the 21 foundation chains, and the top edging starts on the 42 stitches of Rnd 60. No stitches are added or skipped, so both openings stay at their designed sizes: 6 in (15.2 cm) around at the bottom and 12 in (30.5 cm) around at the top.
Reverse single crochet sits a little tighter than plain single crochet. That firms up the bottom opening so bags slide out one at a time instead of falling out.
The finished length is 16 in (40.6 cm) of body plus 0.25 in (0.6 cm) at each end, for a total of 16.5 in (41.9 cm).
Final Blocking
- Weave in all ends, running each one through at least 2 in (5.1 cm) of stitches.
- Lightly mist the whole holder with water until it’s damp but not wet.
- Stuff the body firmly with a rolled towel so it holds a cylinder shape 6 in (15.2 cm) wide when flat.
- Shape the cap with your fingers so it flares evenly. Pin the outer edge to a folded towel if it curls up.
- Press each dot flat with your fingertip.
- Let it dry completely, standing upright, for 24 hours.
- Take out the towel and measure again. The holder should be 16.5 in (41.9 cm) long.
Final Quality-Control Checklist
- [ ] Body is 6 in (15.2 cm) wide when flat and 16 in (40.6 cm) long before edging.
- [ ] Body has 42 sts around, and the bottom ring has 21 sts.
- [ ] Cap has 72 sts at the outer edge and is 6.5 in (16.5 cm) across.
- [ ] Cap seam is level, sitting on Rnd 57 all the way around.
- [ ] All 12 dots are sewn flat in two staggered bands.
- [ ] Strap is attached at two opposite points and is double-stitched.
- [ ] Both edgings are smooth, with no flare or pulling.
- [ ] All ends are woven in securely.
Troubleshooting
Body spirals noticeably. This is normal in continuous single crochet. A firm blocking softens it. To reduce it next time, try joining each round with a sl st and ch 1.
Bottom opening too loose. Bags will fall out. Work Rnd 2 of the bottom edging with a hook one size smaller, or add a round of sl sts on the inside.
Bottom opening too tight. Redo the foundation with 24 chains. Then work Rnd 2 as sc 3, inc 6 times (30 sts), Rnd 3 as sc 4, inc 6 times (36 sts), and Rnd 4 as sc 5, inc 6 times (42 sts).
Cap ruffles. Your tension loosened during the increase rounds. Go down one hook size for the cap.
Cap is cupped and won’t flare. Add one more increase round: sc 11, inc 6 times (78 sts), then work 2 even rounds instead of 3.
Strap stretches. Work a third row of sc, or make the strap with a hook one size smaller.
Cap seam puckers. You’ve skipped or doubled a stitch. Count again: each cap stitch should go into one body stitch, 42 to 42.
Care
Hand wash in cool water with mild soap and press out the water in a towel. Dry flat or upright while stuffed so the holder keeps its cylinder shape.
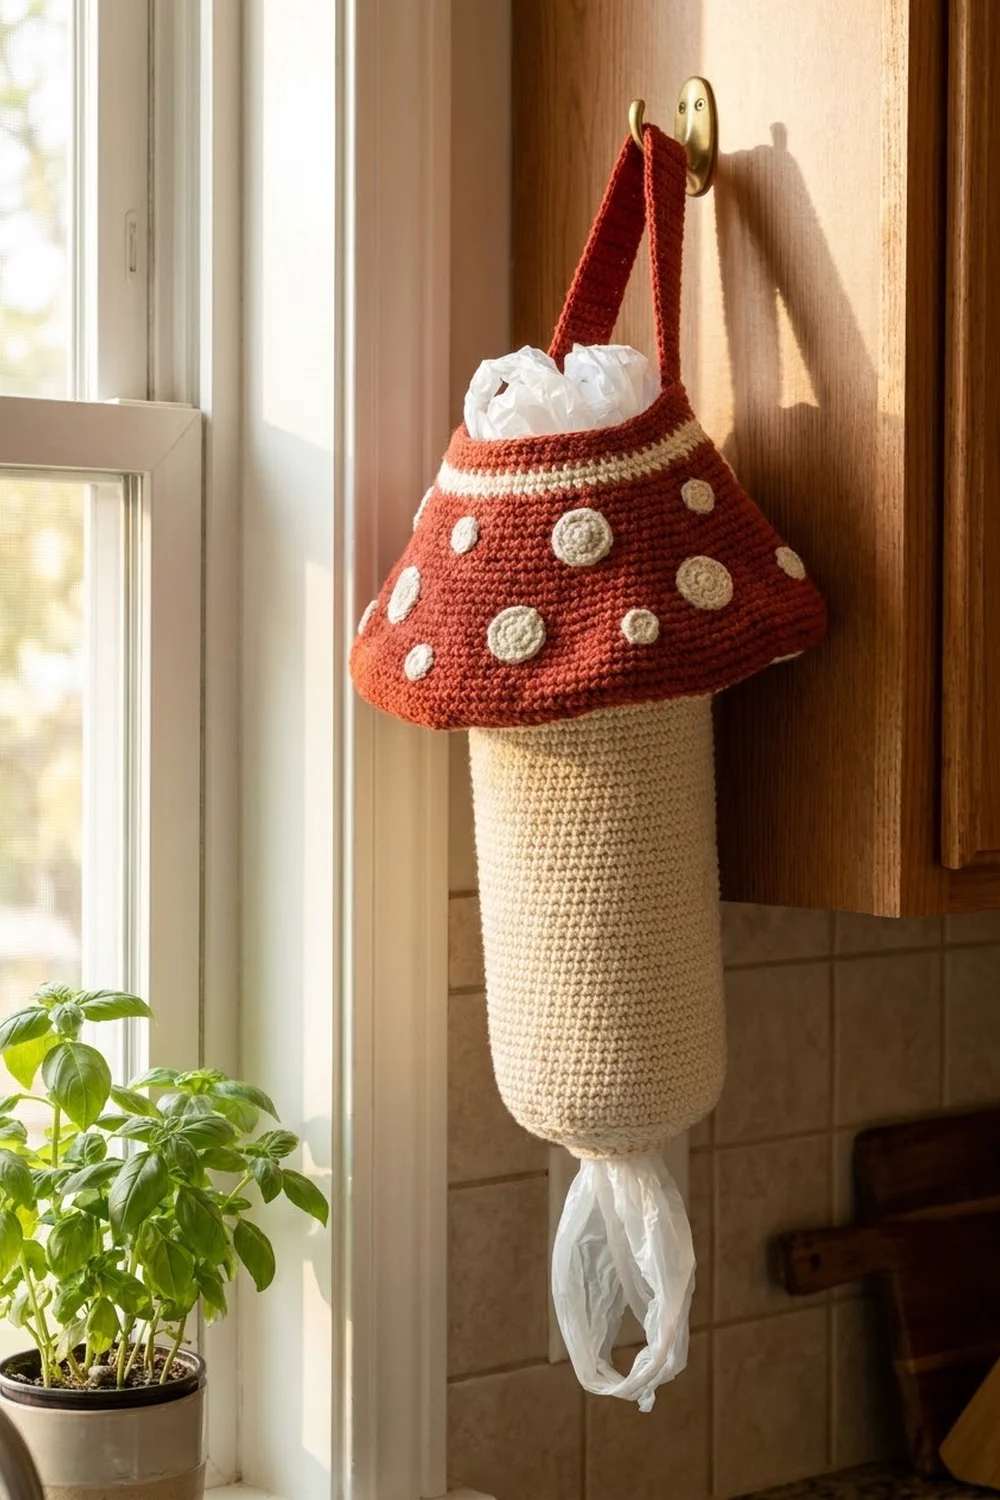
Final Notes
Everything in this pattern depends on the gauge: 14 sc and 15 rnds = 4 in (10.2 cm).
- Body: The 21-st bottom ring increases to 42 sts, which is 12 in (30.5 cm) around and 6 in (15.2 cm) flat. Sixty rounds make it 16 in (40.6 cm) long.
- Cap: It starts at 42 sts to match the body exactly, grows to 72 sts and 6.5 in (16.5 cm) across, and sits on Rnd 57.
- Edgings: They work 1 st into each existing st, keeping both openings true to size and bringing the finished length to 16.5 in (41.9 cm).
Check each measurement as you reach it, and the finished holder will come out the right size.
Happy crocheting!