

This little letter E keychain is soft lavender shell-stitch texture with a cluster of flowers trailing down its spine. It looks delicate, but the fabric is dense enough to hang from a bag handle every day.
The letter is light lavender. The appliqués are a cream flower with a gold seed-bead center, a plum flower with a cream bead center, four olive-green leaves, and one tiny plum berry. Gold hardware finishes the cottage-garden look.
The pattern uses US crochet terms. The finished keychain measures 3.25 in wide x 4.75 in tall (8.3 cm x 12.1 cm), not counting the hardware.
You work the letter flat in one piece, from the bottom arm up. You leave stitches unworked to make the gaps between the arms and add a short chain to start each new arm. Then a two-round edging outlines the whole letter. You make the flowers, leaves, and berry separately, block the letter, and sew everything on.
Finished Size and Construction
- Finished size: 3.25 in x 4.75 in (8.3 cm x 12.1 cm)
- Skill level: Easy-Intermediate
- Terminology: US crochet terms
- Yarn weight: DK (#3), cotton or cotton blend
- Hook: 3.25 mm (US D/3)
- Number of pieces: 1 letter piece, plus 2 flowers, 4 leaves, and 1 berry sewn on
- Layout: single letter E; spine on the left, three arms pointing right
- Letter size before border: 3 in x 4.5 in (7.6 cm x 11.4 cm)
- Spine width: 7 stitches, about 1.1 in (2.8 cm)
- Arm and gap height: 3 rows each, about 0.9 in (2.3 cm)
- Border depth: about 0.125 in (0.3 cm) per side
Materials
Use a smooth, mercerized DK cotton. Cotton gives the shells crisp definition and stands up to handling. The amounts below assume about 125 m per 50 g.
- Lavender (A): 12 g / 30 m (letter and border)
- Cream (B): 2 g / 5 m (cream flower)
- Plum (C): 3 g / 8 m (plum flower and berry)
- Olive green (D): 2 g / 5 m (leaves)
These amounts include a small safety margin.
Tools:
– 3.25 mm (US D/3) crochet hook
– Tapestry needle
– Sewing needle and thread to match the beads
– 7 gold and 7 cream size 8/0 seed beads
– Gold split key ring, about 1 in (2.5 cm) across
– Short gold chain (3–4 links) and 2 gold jump rings
– 2 pairs of flat-nose pliers
– Blocking board and rust-proof pins
– Stitch marker
Abbreviations (US Terms)
- ch – chain
- sl st – slip stitch
- sc – single crochet
- hdc – half double crochet
- dc – double crochet
- sk – skip
- st(s) – stitch(es)
- MR – magic ring
- RS / WS – right side / wrong side
Special stitches:
– Shell: 5 dc in the same stitch.
– Half shell: 3 dc in one stitch at the edge of a row. On WS rows, the starting ch 3 counts as the first of those 3 dc.
– Berry cluster: yarn over, insert hook in ring, yarn over and pull up a loop, yarn over and pull through 2 loops. Repeat 3 more times (5 loops on hook), then yarn over and pull through all 5 loops.
Gauge and Checkpoints
Gauge: In shell pattern, 19 sts = 3 in (7.6 cm) and 10 rows = 3 in (7.6 cm), so each row is about 0.3 in (0.8 cm).
Make Rows 1–3 and measure before you go on. That strip is your gauge swatch.
Checkpoints (before border):
– After Row 3: 19 sts, 3 in (7.6 cm) wide, 0.9 in (2.3 cm) tall
– After Row 6: spine 7 sts, 1.1 in (2.8 cm) wide; total height 1.8 in (4.6 cm)
– After Row 9: total height 2.7 in (6.9 cm)
– After Row 12: total height 3.6 in (9.1 cm)
– After Row 15: 3 in x 4.5 in (7.6 cm x 11.4 cm)
If your piece is too big, go down 0.25 mm in hook size. If it is too small, go up 0.25 mm. Height depends on row count, so don’t add or remove rows. That would throw off the arm-and-gap pattern.
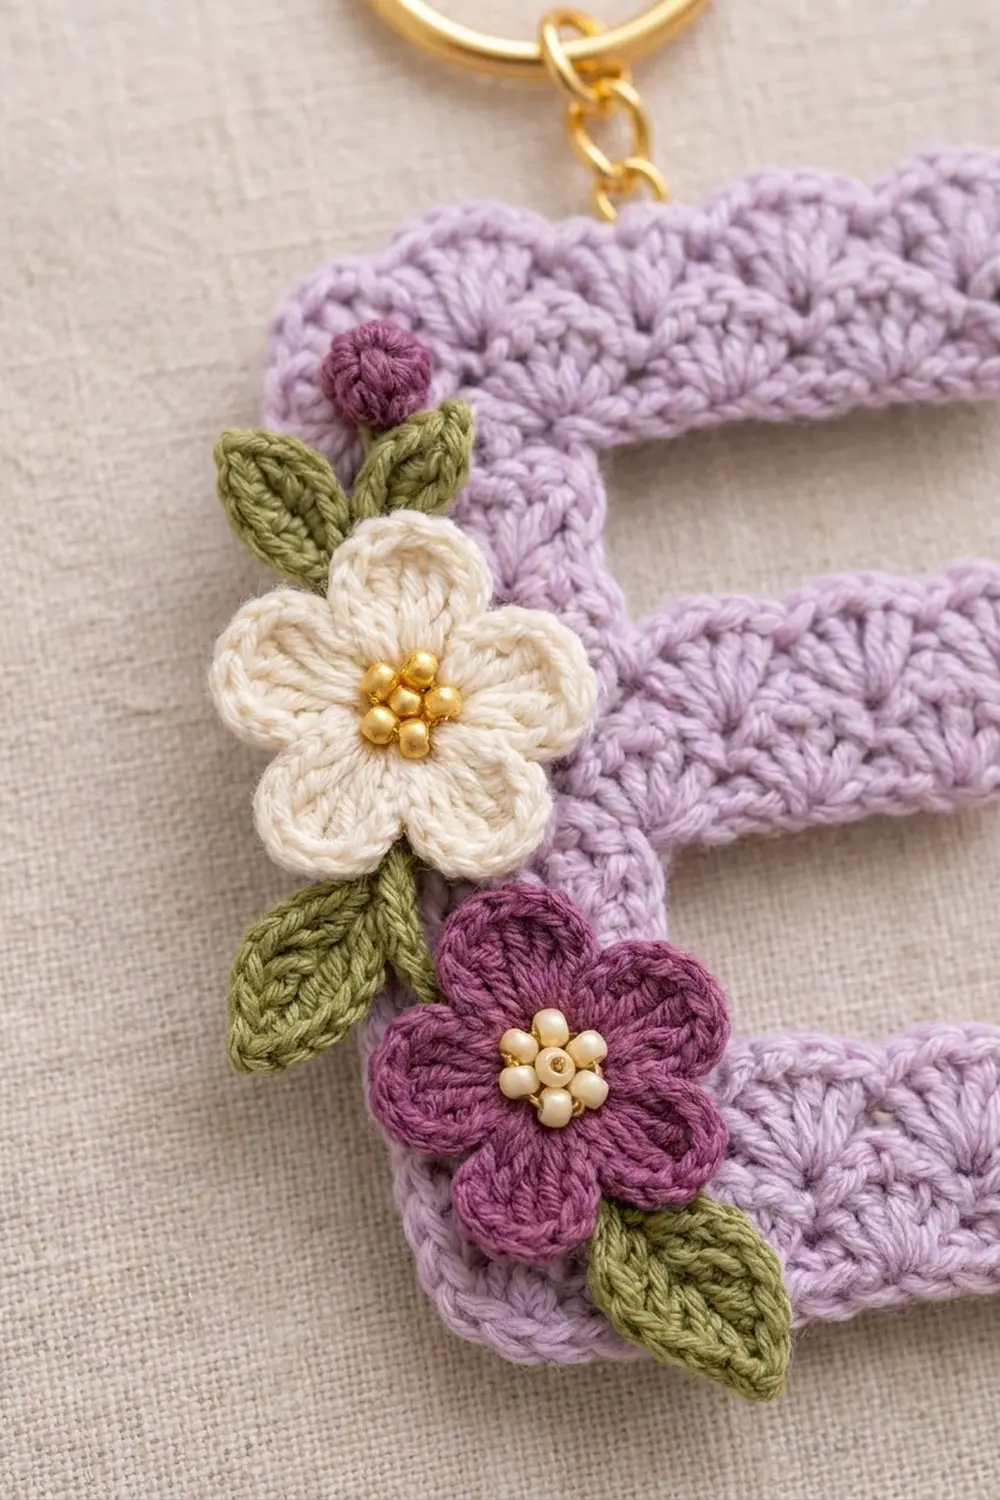
Letter E
With A, ch 20.
Row 1 (RS): Sc in 2nd ch from hook, sk 2 ch, shell in next ch, sk 2 ch, sc in next ch; repeat from * 2 more times. Turn. (19 sts: 4 sc, 3 shells)
Row 2 (WS): Ch 3 (counts as dc), 2 dc in first sc (half shell), sk 2 dc, sc in center dc of shell, sk 2 dc, shell in next sc; repeat from * once more, sk 2 dc, sc in center dc of last shell, sk 2 dc, 3 dc in last sc. Turn. (19 sts: 3 + 6 + 6 + 1 + 3)
Row 3 (RS): Ch 1, sc in first dc, sk 2 dc, shell in next sc, sk 2 dc, sc in next dc; repeat from * 2 more times, working the last sc in the top of the turning ch-3. Turn. (19 sts)
Rows 1–3 form the bottom arm. Shells now point upward across the full width.
Row 4 (WS, start spine): Ch 3, 2 dc in first sc, sk 2 dc, sc in center dc of shell, sk 2 dc, 3 dc in next sc. Turn, leaving the remaining 12 sts unworked. (7 sts)
Because WS rows travel from left to right when seen from the RS, these 7 sts sit on the left edge. That makes the spine.
Row 5 (RS): Ch 1, sc in first dc, sk 2 dc, shell in next sc, sk 2 dc, sc in top of turning ch-3. Turn. (7 sts)
Row 6 (WS): Ch 3, 2 dc in first sc, sk 2 dc, sc in center dc of shell, sk 2 dc, 3 dc in last sc. (7 sts) Do not turn yet. Ch 13 for the middle arm, then turn.
Row 7 (RS, middle arm): Sc in 2nd ch from hook, sk 2 ch, shell in next ch, sk 2 ch, sc in next ch, sk 2 ch, shell in next ch, sk 2 ch. That uses all 12 chains after the turning ch. Then sc in the last dc of Row 6 (the base of the chain), sk 2 dc, shell in next sc, sk 2 dc, sc in top of turning ch-3. Turn. (19 sts: 12 sts over the chain + 7 sts over the spine)
Row 8: Repeat Row 2. (19 sts)
Row 9: Repeat Row 3. (19 sts)
Rows 10–12: Repeat Rows 4–6, including the ch 13 at the end of Row 12. (7 sts each row)
Row 13: Repeat Row 7. (19 sts)
Row 14: Repeat Row 2. (19 sts)
Row 15: Repeat Row 3. (19 sts)
Do not fasten off. Your hook is at the top-left corner, ready for the border.
Left-handed crocheters: Your spine will form on the right. When the piece is finished, turn it over and use the WS as the front so the E reads correctly.
Flowers, Leaves, and Berry
Cream flower (make 1 with B):
– Rnd 1: MR, ch 1, 10 sc in ring, sl st to first sc. Pull the ring closed. (10 sts)
– Rnd 2: Sl st in next sc, (hdc, 3 dc, hdc) in next sc; repeat from * 4 more times. Sl st in the first sl st. (5 petals: 25 petal sts + 5 sl sts)
Fasten off and leave an 8 in (20.3 cm) tail. The flower measures about 1.25 in (3.2 cm) across.
Plum flower (make 1 with C):
– Rnd 1: As cream flower. (10 sts)
– Rnd 2: Sl st in next sc, (hdc, 2 dc, hdc) in next sc; repeat from * 4 more times. Sl st in the first sl st. (5 petals: 20 petal sts + 5 sl sts)
Fasten off and leave a long tail. The flower measures about 1 in (2.5 cm) across.
Leaf (make 4 with D): Ch 6. Working in the chains:
1. Sc in 2nd ch from hook, then hdc, dc, hdc, sc in the next 4 ch.
2. Ch 1 for the tip.
3. Rotate and work along the other side of the chain: sc, hdc, dc, hdc, sc.
4. Sl st to the first sc. (10 sts + ch-1 tip)
Fasten off and leave a tail. Each leaf is about 0.75 in (1.9 cm) long.
Berry (make 1 with C): MR, ch 2, berry cluster in ring, ch 1. Pull the ring tight and fasten off. The berry is about 0.375 in (1 cm) across.
Bead centers: Using the sewing thread, sew 7 gold beads to the center of the cream flower: 1 in the middle and 6 around it. Sew 7 cream beads to the plum flower the same way.
Border
Border gauge: Work 1 sc in each stitch or chain along top and bottom edges. Work 2 sc in each row end along the sides. One row is about the height of 2 sc, so the sides stay flat.
Corners: At each of the 8 outer corners, ch 1. The corner ch-1 spaces are not included in the side counts below. At the 4 inner corners where the arms meet the spine, add nothing. Just move straight on to the next edge.
Rnd 1 (sc): Ch 1. Working counterclockwise from the top-left corner:
– Left edge: 30 sc (15 rows x 2), ch 1
– Bottom edge: 19 sc in the foundation chain, ch 1
– Bottom arm, right end: 6 sc (3 rows x 2), ch 1
– Bottom arm, top edge: 12 sc in the unworked Row 3 sts
– Inner spine (Rows 4–6): 6 sc
– Middle arm, underside: 12 sc in the chain, ch 1
– Middle arm, right end: 6 sc, ch 1
– Middle arm, top edge: 12 sc in the unworked Row 9 sts
– Inner spine (Rows 10–12): 6 sc
– Top arm, underside: 12 sc in the chain, ch 1
– Top arm, right end: 6 sc, ch 1
– Top edge: 19 sc, ending in the last sc of Row 15, ch 1
Sl st to the first sc. (146 sc + 8 corner ch-1 spaces)
Check the math: 30 + 19 + 6 + 12 + 6 + 12 + 6 + 12 + 6 + 12 + 6 + 19 = 146.
Rnd 2 (sl st): Loosely sl st in each sc and in each corner ch-1 space. Join to the first sl st. (154 sl sts) Fasten off.
Why the math works: Every edge gets one sc for each stitch, chain, or half-row it already has. The bottom and top edges have the same 19 sts as each row, so the width stays the same. The 12 sc along each arm edge match the 12 chains or 12 unworked sts. The 2-sc-per-row rule matches the 0.3 in (0.8 cm) row height. The border only adds its own depth: 0.125 in (0.3 cm) per side. So the letter goes from 3 in x 4.5 in (7.6 cm x 11.4 cm) to 3.25 in x 4.75 in (8.3 cm x 12.1 cm).
Final Blocking
- Weave in all ends on the letter. Keep the flower tails for sewing.
- Lightly mist the letter with water, or hold a steam iron just above it without touching.
- Pin it to the board at 3.25 in x 4.75 in (8.3 cm x 12.1 cm). Put a pin at each of the 8 outer corners.
- Push the arms straight so each one is 0.9 in (2.3 cm) tall and the gaps are even.
- Let it dry completely before unpinning.
- Sew on the appliqués with the yarn tails, working from the top down:
- Berry at the top-left corner of the spine
- Two leaves fanning out above the cream flower
- Cream flower centered on the spine at the middle-arm level
- One leaf tucked below it on the left
- Plum flower on the lower spine, just overlapping the cream flower
- Last leaf under the plum flower
Let the pieces overlap the left edge by about 0.25 in (0.6 cm).
7. Attach the hardware: Open a jump ring and put it through Rnd 1 of the border on the top edge, 0.5 in (1.3 cm) in from the left. Hook it to the chain, then join the chain to the split ring with the second jump ring. Close both rings fully.
Final Quality-Control Checklist
- Rows 1–3, 7–9, and 13–15 have 19 sts; Rows 4–6 and 10–12 have 7 sts
- The letter measures 3 in x 4.5 in (7.6 cm x 11.4 cm) before the border
- Rnd 1 has 146 sc and 8 corner spaces; Rnd 2 has 154 sl sts
- The final size is 3.25 in x 4.75 in (8.3 cm x 12.1 cm)
- All three arms are the same length and the edges are straight
- The beads are secure and the flowers lie flat
- The jump rings are fully closed
- No yarn ends show on the front
Troubleshooting
- Arms are shorter than the bottom row: You probably miscounted the ch 13. You need 12 chains plus 1 turning chain.
- Spine ended up on the right: You worked the partial row on a RS row. Partial rows (Rows 4 and 10) must be WS rows.
- Shells lean or stack badly: Make sure each shell goes into an sc and each sc goes into the center dc of a shell.
- Border ruffles: Your tension is loose. Change to 1 sc per row end for every third row.
- Border cups: Your tension is tight. Loosen up or add 1 extra sc near each corner.
- Flowers curl: Steam them lightly and pin them flat before sewing.
- Keychain stretches: Attach the jump ring through both border rounds, not just the outer slip stitches.
Care
Spot clean with mild soap and cool water, then press dry in a towel and lay it flat. Don’t put it in the machine, because the beads and hardware can catch.
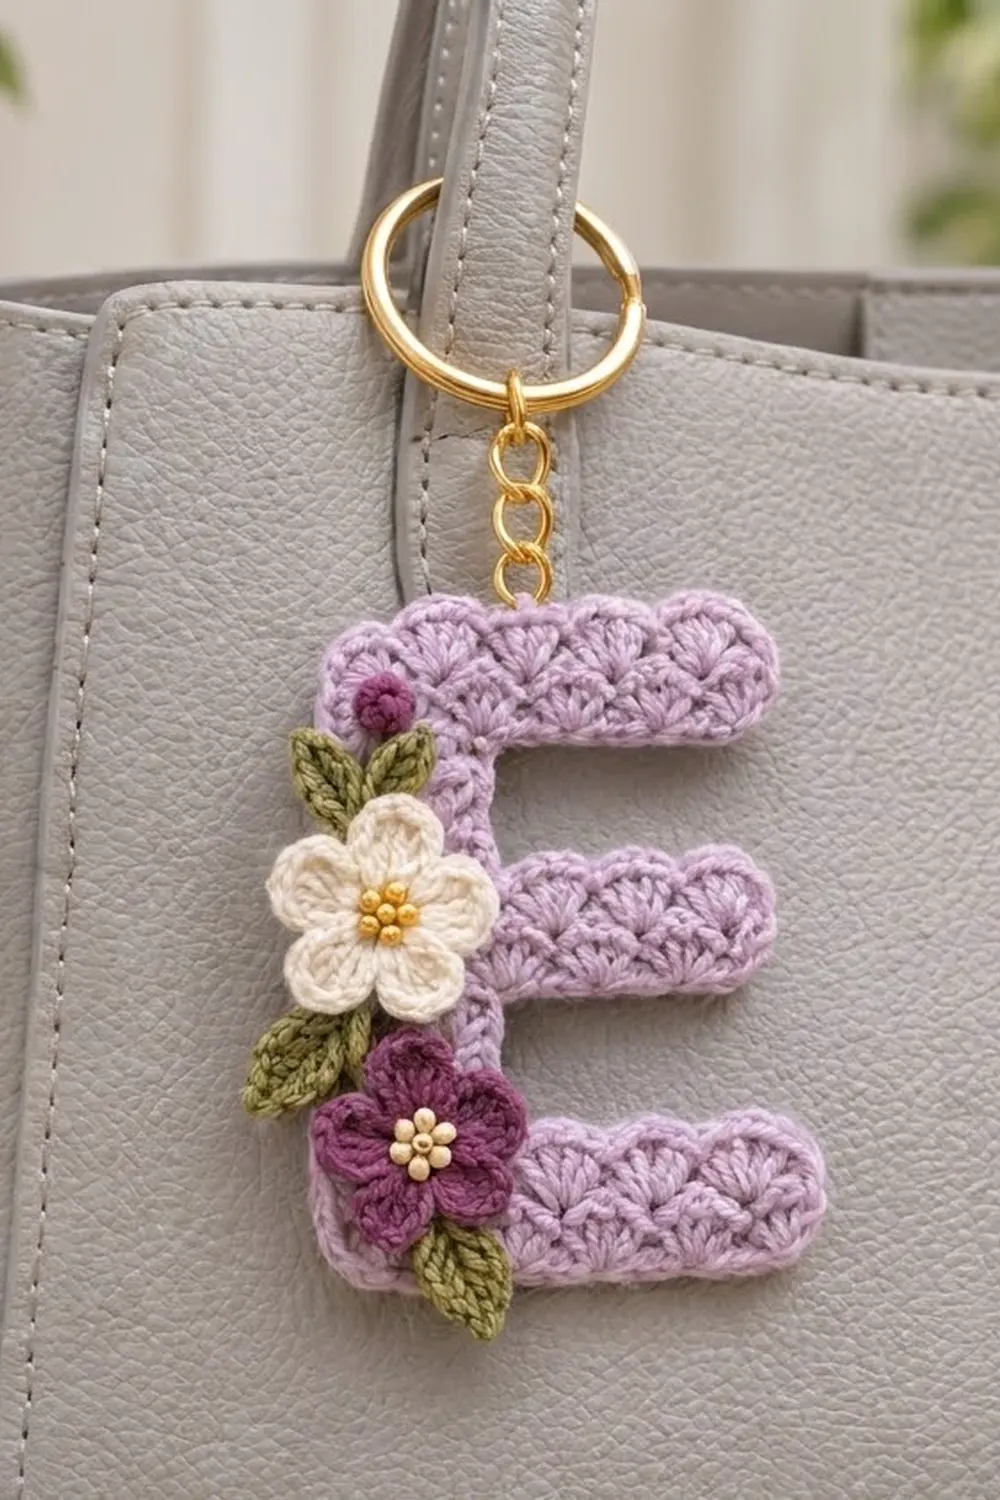
Final Notes
Each stage of this keychain builds on the last one:
1. 19 sts = 3 in (7.6 cm), and each row is 0.3 in (0.8 cm).
2. 15 rows give a 3 in x 4.5 in (7.6 cm x 11.4 cm) letter.
3. The 146-sc border adds 0.125 in (0.3 cm) per side, for a finished keychain of 3.25 in x 4.75 in (8.3 cm x 12.1 cm).
Check your measurements at each step and the last step will come out right. Once you’ve got the method down, try other letters using the same shell rows and chain extensions.
Happy crocheting!