

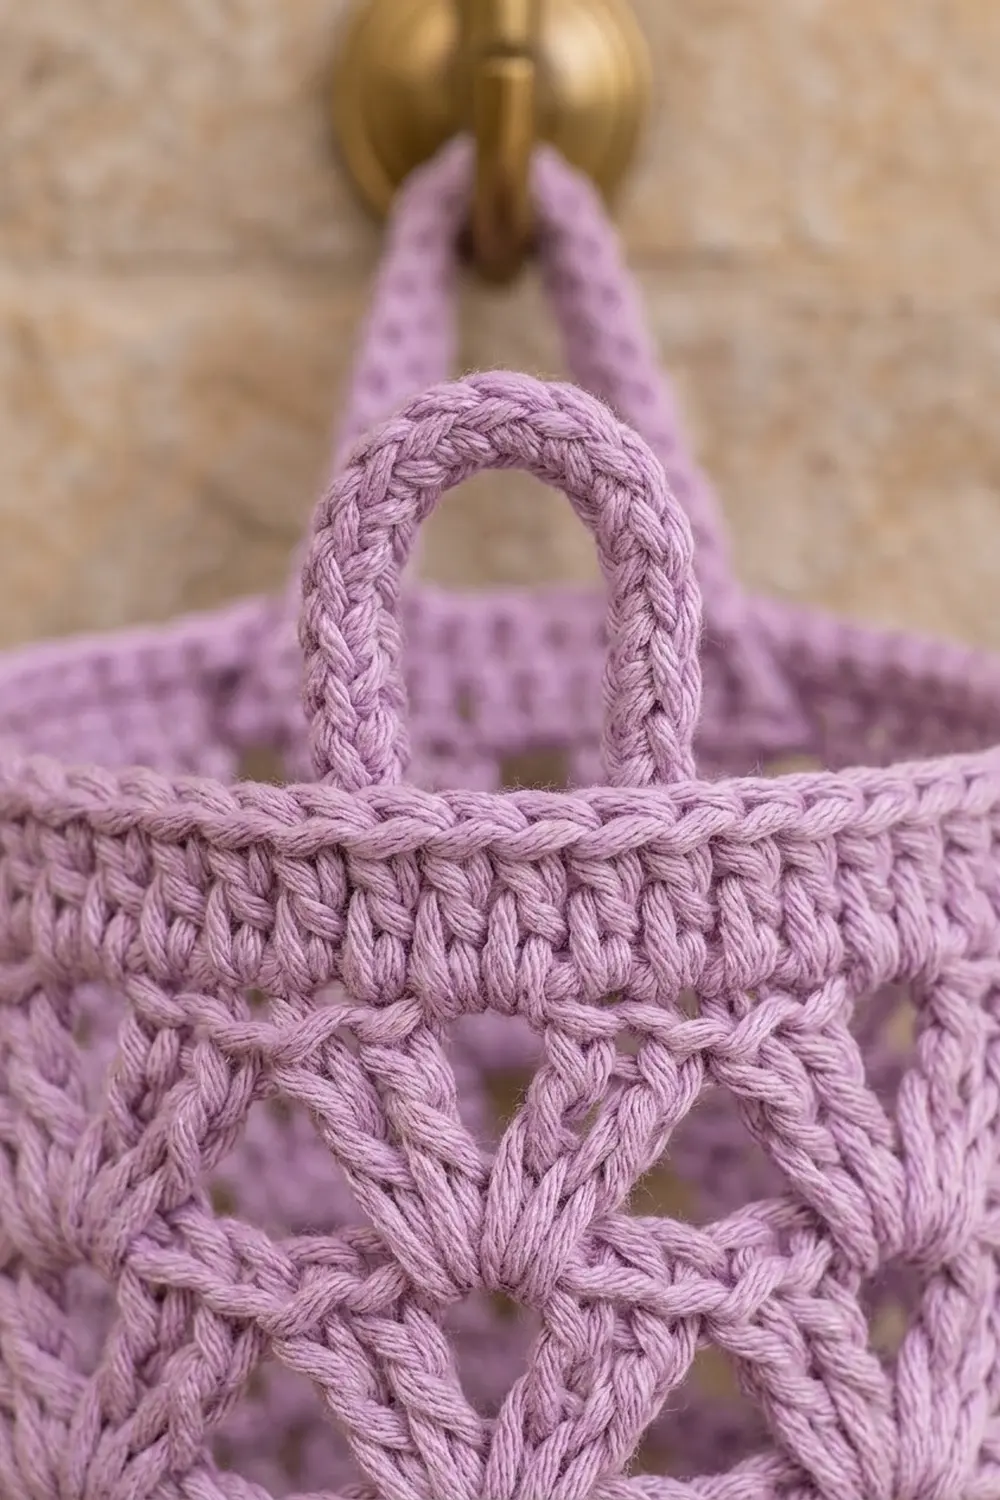
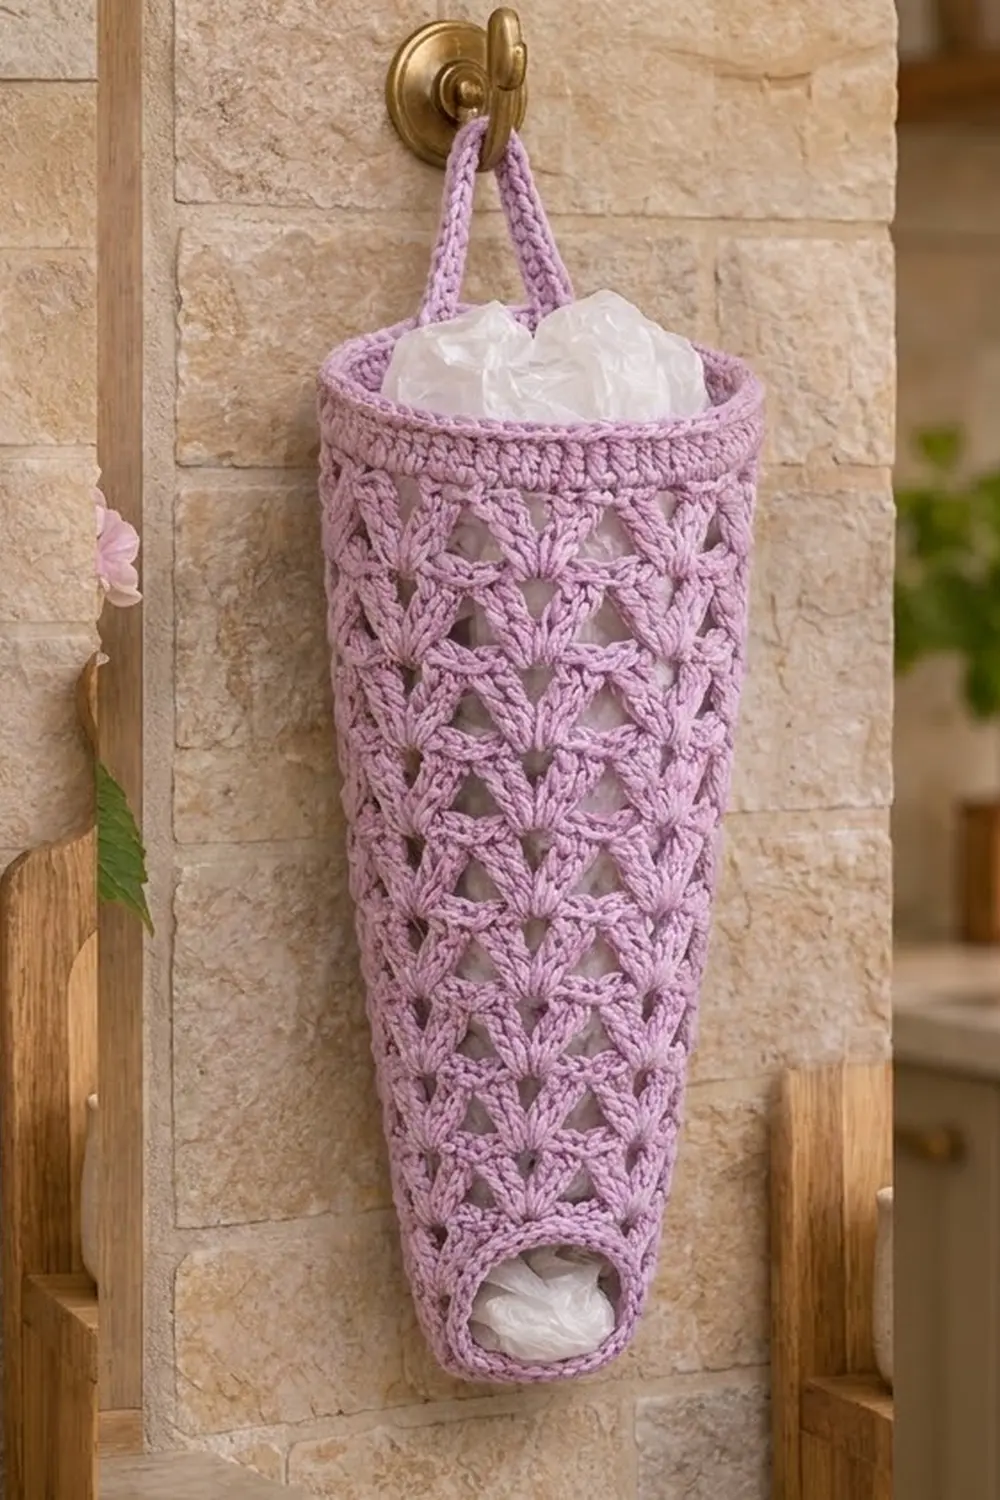
This bag holder is one tapered tube of open fan lace. It’s wide at the top so you can stuff bags in, and narrow at the bottom so you can pull them out one at a time. Rows of small V-shaped fans are staggered all the way up the body. A solid band finishes the top rim, a short solid band firms up the bottom opening, and a padded loop at the back of the rim hangs it from a hook or knob.
The sample is in soft lavender cotton. A sage green version is just as pretty if you want a second holder for the laundry room or pantry. White plastic bags show through the lace, which gives the piece its light, airy look. The style is cottage-kitchen: practical, but pretty enough to leave on display.
This pattern uses US crochet terms. The finished holder measures 7 in (17.8 cm) wide across the top and 4 in (10.2 cm) wide across the bottom, both measured flat. The body is 16.25 in (41.3 cm) tall, and the hanging loop adds 3 in (7.6 cm), so the total hanging length is 19.25 in (48.9 cm).
You work the holder bottom-up in joined rounds without turning. You start with a chain ring for the dispensing opening and work four rounds of single crochet. Then you work 21 rounds of fan lace in three stages. The fans get bigger at each stage, and that’s what makes the tube taper. Last, you work a solid top rim, the hanging loop, and a slip-stitch edging around the bottom opening.
Finished Size and Construction
- Finished size: 7 in (17.8 cm) wide at top, 4 in (10.2 cm) wide at bottom (flat); body 16.25 in (41.3 cm) tall; 19.25 in (48.9 cm) including loop
- Skill level: Easy-intermediate
- Terminology: US
- Yarn weight: Worsted (#4), cotton or cotton blend
- Hook: US H-8 (5.0 mm)
- Number of pieces: 1, worked seamlessly in the round
- Layout: Single tapered tube, open at both ends
- Piece size before border (Rnds 1–25): 15 in (38.1 cm) tall; 4 in (10.2 cm) wide at bottom, 7 in (17.8 cm) wide at top
- Border depth: Top rim 1.25 in (3.2 cm); hanging loop 3 in (7.6 cm); bottom edging adds no height
Materials
Use a smooth worsted-weight cotton or a cotton-acrylic blend. Cotton holds its shape when the holder is packed full, and the fans stay crisp. Avoid fuzzy or very stretchy yarns. The tube will sag under the weight of the bags, and the fans will blur together.
- Lavender (main color): 120 g, about 205 m (224 yd)
- Optional sage green version: 120 g, about 205 m (224 yd), used in place of lavender
These quantities include a margin of about 15% for your gauge swatch and small differences in tension.
Tools:
- US H-8 (5.0 mm) crochet hook
- 2 stitch markers
- Tapestry needle
- Scissors
- Measuring tape
- A rolled towel or a cardboard cone for blocking
Abbreviations (US Terms)
- ch – chain
- sl st – slip stitch
- sc – single crochet
- hdc – half double crochet
- dc – double crochet
- sk – skip
- sp – space
- st(s) – stitch(es)
- Rnd – round
Special stitches:
- Shell A: (2 dc, ch 1, 2 dc) in the same st.
- Shell B: (2 dc, ch 2, 2 dc) in the same st.
- Shell C: (3 dc, ch 2, 3 dc) in the same st.
- Shell center: the ch-1 or ch-2 sp in the middle of a shell.
Gauge and Checkpoints
Sc gauge: 16 sc and 16 rnds = 4 in (10.2 cm), so 4 sc = 1 in (2.5 cm).
Lace gauge: 3 lace rnds = 2 in (5.1 cm) tall in every stage.
Before you start the full holder, test Rnds 1–10 as a gauge piece. That’s the bottom band plus the first lace stage. You can keep it as the real start if it measures correctly.
Checkpoints (measured flat):
- After Rnd 4: 4 in (10.2 cm) wide, 1 in (2.5 cm) tall
- After Rnd 10: 4 in (10.2 cm) wide, 5 in (12.7 cm) tall
- After Rnd 19: 5.5 in (14.0 cm) wide at the top edge, 11 in (27.9 cm) tall
- After Rnd 25: 7 in (17.8 cm) wide at the top edge, 15 in (38.1 cm) tall
- After Rnd 29: 7 in (17.8 cm) wide, 16.25 in (41.3 cm) tall
If your work is too big, go down to a US G-6 (4.0 mm) hook. If it’s too small, go up to a US I-9 (5.5 mm) hook. Width matters most at the bottom ring. If the opening is much tighter than 4 in (10.2 cm), bags will stick. If it’s much looser, they’ll fall out on their own.
Pattern
Bottom Band
Foundation: Ch 32. Join with a sl st to the first ch to form a ring. Make sure the chain isn’t twisted.
Rnd 1: Ch 1 (doesn’t count as a st here or in later rnds). Sc in each ch around. Join with a sl st to the first sc. (32 sc)
Rnds 2–4: Ch 1, sc in each st around, join. (32 sc)
Checkpoint: the band is 1 in (2.5 cm) tall and 4 in (10.2 cm) wide when flat.
Lace Setup
Rnd 5: Ch 1, sc in the first st. Sk 1 st, Shell A in the next st, sk 1 st, sc in the next st. Repeat from * 6 more times. Sk 1 st, Shell A in the next st, sk the last st, and join to the first sc. (8 Shell A, 8 sc)
Each repeat uses 4 sts, so 8 repeats use all 32 sts exactly. Place a marker in the first sc to mark the start of the round.
Stage A – Small Fans
Rnd 6: Sl st in the next 2 dc, then sl st into the ch-1 shell center. Ch 1, sc in the same sp. Ch 2, Shell A in the next sc, ch 2, sc in the next shell center. Repeat from * 6 more times. Ch 2, Shell A in the last sc (the sc you joined into on Rnd 5), ch 2, join to the first sc. (8 Shell A, 8 sc, 16 ch-2 sps; 80 sts including chains)
Rnds 7–10: Sl st into the next ch-2 sp, sl st in the next 2 dc, then sl st into the shell center. Work the rest of the round the same as Rnd 6. (8 Shell A, 8 sc, 16 ch-2 sps; 80 sts including chains)
Each round puts its shells on top of the previous round’s sc and its sc in the previous round’s shell centers. That’s how the fans stagger into the diamond-and-V lace.
Checkpoint: 5 in (12.7 cm) tall, 4 in (10.2 cm) wide.
Stage B – Medium Fans
Rnd 11: Sl st into the next ch-2 sp, sl st in the next 2 dc, then sl st into the ch-1 shell center. Ch 1, sc in the same sp. Ch 3, Shell B in the next sc, ch 3, sc in the next shell center. Repeat from * 6 more times. Ch 3, Shell B in the last sc, ch 3, join. (8 Shell B, 8 sc, 16 ch-3 sps; 104 sts including chains)
Rnds 12–19: Sl st into the next ch-3 sp, sl st in the next 2 dc, then sl st into the ch-2 shell center. Work the rest of the round the same as Rnd 11. (104 sts including chains)
The repeat count stays at 8. Each repeat widens from 10 to 13 sts including chains, so the tube flares gently.
Checkpoint: 11 in (27.9 cm) tall, 5.5 in (14.0 cm) wide at the top edge.
Stage C – Large Fans
Rnd 20: Sl st into the next ch-3 sp, sl st in the next 2 dc, then sl st into the ch-2 shell center. Ch 1, sc in the same sp. Ch 3, Shell C in the next sc, ch 3, sc in the next shell center. Repeat from * 6 more times. Ch 3, Shell C in the last sc, ch 3, join. (8 Shell C, 8 sc, 16 ch-3 sps; 120 sts including chains)
Rnds 21–25: Sl st into the next ch-3 sp, sl st in the next 3 dc, then sl st into the ch-2 shell center. Work the rest of the round the same as Rnd 20. (120 sts including chains)
Checkpoint: 15 in (38.1 cm) tall, 7 in (17.8 cm) wide at the top edge. Don’t fasten off.
Border
The border has three parts: a solid top rim, a hanging loop, and a sl st edging around the bottom opening.
Border gauge: the same sc gauge as the bottom band, 4 sc = 1 in (2.5 cm). Hdc rounds are about 0.375 in (1.0 cm) tall each.
Top Rim
Rnd 26 (conversion): Ch 1, sc in the same sc as the join. 2 sc in the next ch-3 sp, 2 sc in the next shell center, 2 sc in the next ch-3 sp, sc in the next sc. Repeat from * 7 more times, leaving out the final sc on the last repeat. Join to the first sc.
Count: 8 sc worked one per existing sc, plus 48 sc worked into spaces (6 per repeat × 8), = 56 sc. Skip the dc of the shells. The sc worked into the spaces wrap around them.
Rnds 27–28: Ch 2 (doesn’t count as a st), hdc in each st around, join. (56 hdc)
Rnd 29: Ch 1, sc in each st around, join. (56 sc)
Flatten the tube with the join at one side fold. That gives exactly 28 sts on the front and 28 sts on the back, and the side fold falls between st 56 and st 1.
Why the math works: at 4 sc per inch, 56 sts make a 14 in (35.6 cm) circumference. Half of that is 7 in (17.8 cm) flat. That matches the 8 Stage C repeats, which are 1.75 in (4.4 cm) each, so the rim doesn’t ruffle or pull the lace in.
Checkpoint: 16.25 in (41.3 cm) tall.
Hanging Loop
Sl st in the next 14 sts, ending in st 15. This is the center of the back side: 14 sts on each side of it, out of that side’s 28.
Loop: Ch 30, then sl st into the same st 15 to close the loop.
Padding round: Work 40 sc into the ch-30 loop, sliding them close together so they cover the chain. Sl st into st 15. Fasten off and weave in the end through the rim.
When hanging, the loop measures about 3 in (7.6 cm) from the rim to the top of the loop.
Bottom Edging
Turn the holder upside down. Join yarn with a sl st into any ch of the foundation ring. Sl st loosely in each foundation ch around (32 sl sts). That’s 16 sts on each flattened side, and they match the 32 sc of Rnd 1 one for one. Join, fasten off, and weave in the ends.
This round stops the opening from stretching out of shape. Keep it loose. If it pulls the opening narrower than 4 in (10.2 cm) flat, take it out and redo it with a hook one size larger.
Final Blocking
- Weave in all ends before blocking. Go through solid sts, not through the open lace.
- Soak the holder in cool water for 10 minutes. Gently press the water out without wringing.
- Roll it in a towel to take out the extra moisture.
- Slide a rolled towel or a cardboard cone into the tube. It should be 7 in (17.8 cm) wide at the top and taper to 4 in (10.2 cm) at the bottom.
- Lay it flat. Ease each fan open so the V shapes line up in clean diagonal columns.
- Check the length: the body should be 16.25 in (41.3 cm). Pin the rim and bottom band straight.
- Let it dry completely, then remove the form.
Final Quality-Control Checklist
- Rnds 1–4: 32 sc each round
- Rnd 5: 8 Shell A, 8 sc
- Stage A: 80 sts per round including chains
- Stage B: 104 sts per round including chains
- Stage C: 120 sts per round including chains
- Rnds 26–29: 56 sts each round, 28 per side
- Fans staggered every round, with no stacked columns
- Loop centered on the back at st 15, with the padding sc fully covering the chain
- Bottom opening is 4 in (10.2 cm) flat; top is 7 in (17.8 cm) flat
- Body is 16.25 in (41.3 cm) tall; total hanging length is 19.25 in (48.9 cm)
- All ends woven in securely
Troubleshooting
The fans stack straight up instead of staggering. You probably put a shell into a shell center. Shells always go into an sc, and sc always go into a shell center.
The repeat count is off. Count sc, not chains. Every lace round has exactly 8 sc and 8 shells.
The tube twists into a spiral. Joined rounds can drift slightly. Make sure you sl st into the shell center at the start of each round, not into the dc next to it.
The top rim ruffles. You probably worked more than 2 sc into a space on Rnd 26. Recount to 56.
The top rim pulls in. Work Rnds 27–28 more loosely, or use a hook one size larger for those rounds.
Bags fall out by themselves. The bottom opening is too loose. Redo the bottom edging more firmly, or work an extra sc round on Rnd 4.
The loop stretches. Pack the padding sc tighter, or add 5 more sc.
Care
Hand wash in cool water and lay flat to dry, reshaping the taper while damp. Avoid hot tumble drying, which can shrink cotton unevenly.
Final Notes
The measurement chain is simple. The 32-st bottom ring gives you a 4 in (10.2 cm) flat opening. Stage A keeps that width up to 5 in (12.7 cm) of height. Stage B widens the tube to 5.5 in (14.0 cm) at 11 in (27.9 cm) of height. Stage C reaches 7 in (17.8 cm) at 15 in (38.1 cm). The 56-st rim holds that 7 in (17.8 cm) width and brings the body to 16.25 in (41.3 cm). The 3 in (7.6 cm) loop finishes it at 19.25 in (48.9 cm) hanging. Check each point as you go, and you’ll end up with a holder that fills easily, dispenses neatly, and looks lovely on the wall.
Happy crocheting!