

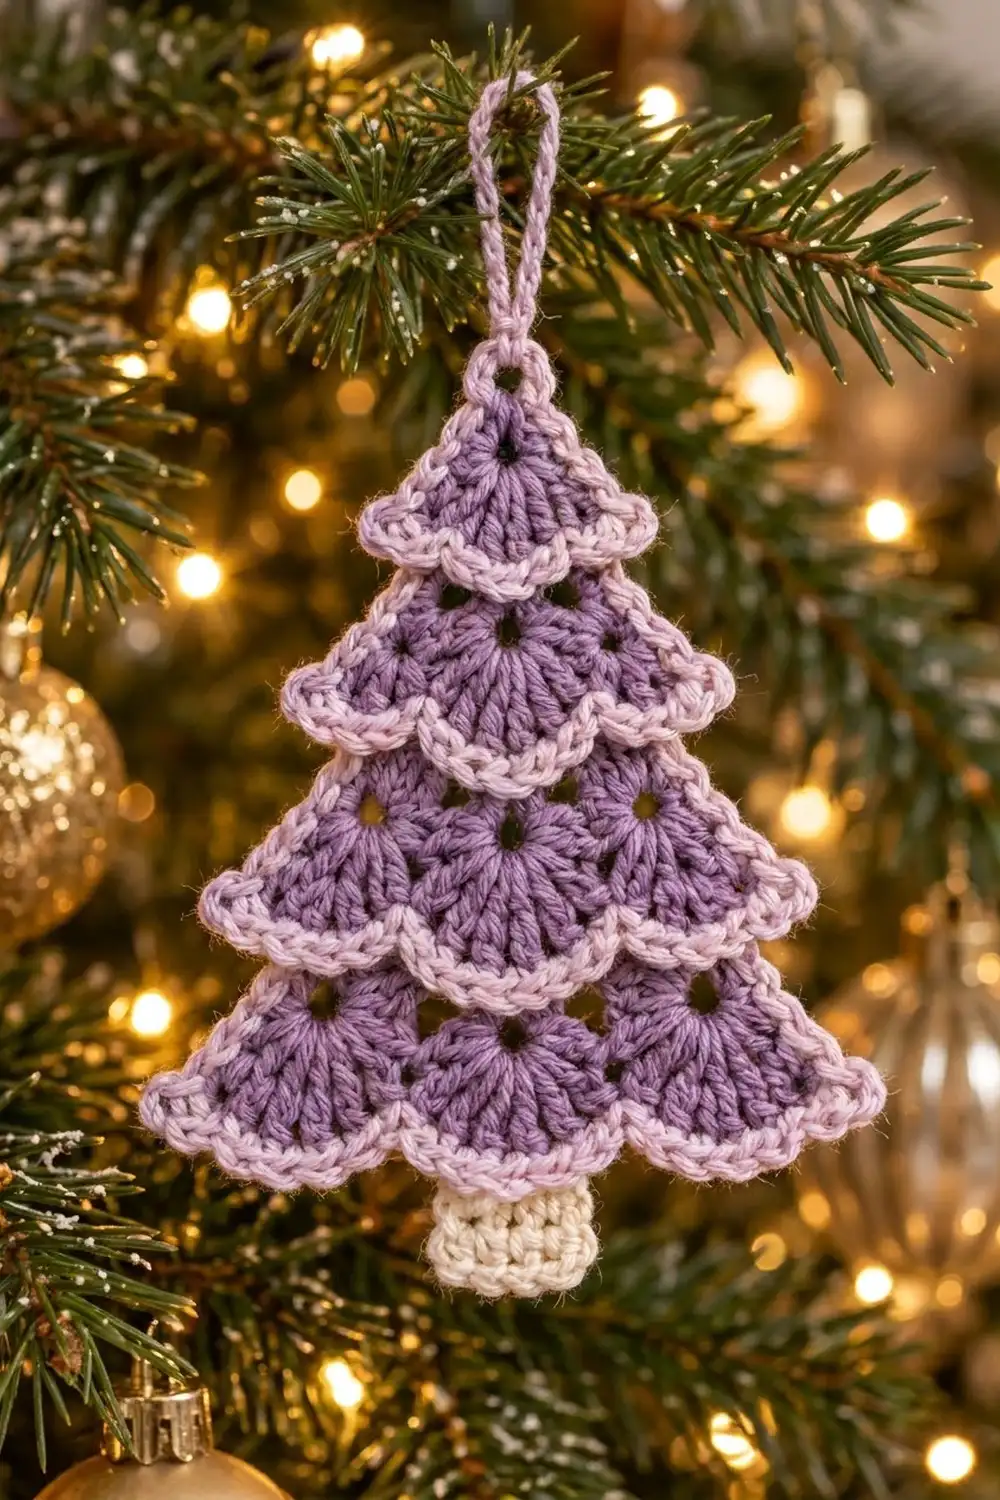
This little tree ornament is made of soft lavender fans stacked into four tiers. Each tier ends in a scalloped pale lilac edge, and a small cream trunk sits at the bottom. Hung on green branches among gold lights, it reads as gentle and wintry rather than bright and loud.
The palette has three colors: medium lavender for the fans, pale pinkish lilac for the scallops, side outline and hanging loop, and cream for the trunk. Every fan grows from a small eyelet, so light shows through each tier.
The pattern uses US crochet terms. The finished ornament measures 3.5 in (8.9 cm) wide by 3.875 in (9.8 cm) tall, plus a hanging loop of about 1.25 in (3.2 cm).
You work the tree in one piece from the top down, in turned rows. Each tier has a lavender set-up row with chain spaces, a lavender row of fans worked into those spaces, and a lilac scallop row. You then add the trunk to the bottom center and finish with a lilac side border that also makes the hanging loop.
Finished Size and Construction
- Finished size: 3.5 in (8.9 cm) wide × 3.875 in (9.8 cm) tall, plus loop
- Skill level: Easy–Intermediate
- Terminology: US
- Yarn weight: Sport (#2), cotton or cotton blend
- Hook: 3.25 mm (D/3)
- Number of pieces: 1
- Layout: Four tiers with 1, 2, 3 and 3 fans, plus a centered trunk
- Piece size before border: 3.25 in (8.3 cm) wide × 3.75 in (9.5 cm) tall, trunk included
- Border depth: about 0.125 in (0.3 cm) along each side and at the top
Materials
Use a smooth, tightly plied sport-weight cotton. It shows the fan stitches clearly and holds the scallops crisp after blocking. Fuzzy or loosely spun yarn will blur the eyelets.
- Medium lavender (fans): 6 g, about 19 m
- Pale lilac (scallops, border, loop): 3 g, about 9 m
- Cream (trunk): 1 g, about 3 m
The quantities include a margin for swatching and weaving in ends.
Tools:
– 3.25 mm (D/3) crochet hook
– Tapestry needle
– Scissors
– Rustproof pins and a blocking mat or folded towel
– Spray bottle with water
– Ruler or tape measure
Abbreviations (US Terms)
- ch: chain
- sl st: slip stitch
- sc: single crochet
- dc: double crochet
- st(s): stitch(es)
- sp: space
- sk: skip
Special stitches:
- Shell: 7 dc worked into the same ch-sp or ring.
- Large Shell: 9 dc worked into the same ch-sp.
- Scallop Edge (over a Shell): 2 sc in the first dc, then (sc in the next dc, 2 sc in the next dc) 3 times. That is 11 sc.
- Large Scallop Edge (over a Large Shell): 2 sc in the first dc, then (sc in the next dc, 2 sc in the next dc) 4 times. That is 14 sc.
Color change: Work the last st of the row until 2 loops remain on the hook. Yarn over with the new color and pull through. Cut the old color, leaving a 4 in (10.2 cm) tail.
Gauge and Checkpoints
Gauge is checked against the top tier. Work Rows 1–2 and measure before you go further.
- Base gauge: 6 sc and 7 rows = 1 in (2.5 cm) in plain sc
- After Row 2: Tier 1 is 1.0 in (2.5 cm) wide × 0.75 in (1.9 cm) tall
- After Row 5: 1.75 in (4.4 cm) wide × 1.5 in (3.8 cm) tall
- After Row 8: 2.5 in (6.4 cm) wide × 2.25 in (5.7 cm) tall
- After Row 11: 3.25 in (8.3 cm) wide × 3.25 in (8.3 cm) tall
- After trunk: 3.25 in (8.3 cm) wide × 3.75 in (9.5 cm) tall
If Tier 1 is wider than 1.0 in (2.5 cm), go down to a 3.0 mm hook. If it is narrower than 0.875 in (2.2 cm), go up to a 3.5 mm (E/4) hook. Small differences of about 0.125 in (0.3 cm) usually block out.
Pattern
Tier 1 (One Fan)
With lavender, ch 4 and sl st into the first ch to form a ring.
Row 1: Ch 3 (counts as dc), then 6 dc in the ring. Change to lilac in the last dc. (7 dc: one Shell)
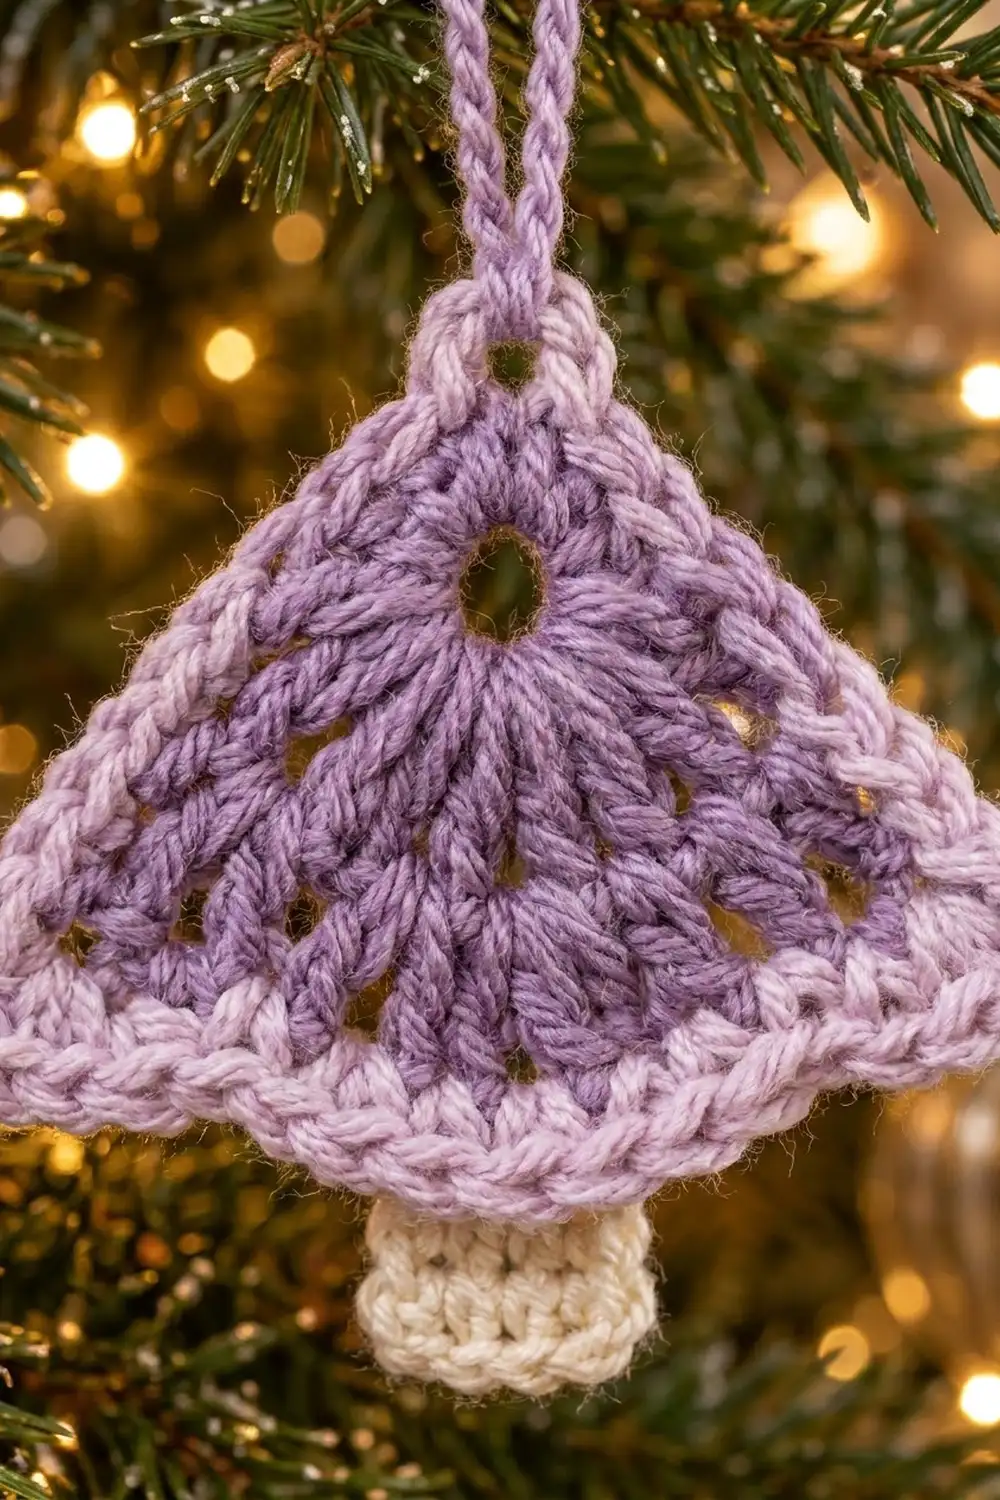
The dc fill only the lower half of the ring. The open upper half becomes the eyelet at the peak and the anchor for the hanging loop later.
Row 2 (lilac): Ch 1, turn. Work a Scallop Edge across the Shell; the last 2 sc go into the top of the turning ch-3. Change to lavender in the last sc. (11 sc)
Checkpoint: 1.0 in (2.5 cm) wide.
Tier 2 (Two Fans)
Row 3 (lavender, set-up): Ch 1, turn. Sc in the first sc, ch 3, sk 4 sc, sc in the next sc, ch 3, sk 4 sc, sc in the last sc. (3 sc + 2 ch-3 sps)
Check: 1 + 4 + 1 + 4 + 1 = 11 sts used.
Row 4: Ch 1, turn. Sc in the first sc, Shell in the ch-3 sp, sc in the middle sc, Shell in the next ch-3 sp, sc in the last sc. Change to lilac in the last sc. (14 dc + 3 sc = 17 sts)
Each Shell flares out from its ch-3 sp, which leaves an eyelet at the top of each fan. Because the set-up row pulls in slightly, the top of Tier 2 tucks under the Tier 1 scallop. That is what gives the stacked look.
Row 5 (lilac): Ch 1, turn. Sc in the first sc, then (Scallop Edge over the next Shell, sc in the next sc) 2 times. Change to lavender in the last sc. (1 + 11 + 1 + 11 + 1 = 25 sc)
Checkpoint: 1.75 in (4.4 cm) wide × 1.5 in (3.8 cm) tall.
Tier 3 (Three Fans)
Row 6 (lavender, set-up): Ch 1, turn. Sc in the first sc, then (ch 4, sk 7 sc, sc in the next sc) 3 times. (4 sc + 3 ch-4 sps)
Check: 1 + 3 × (7 + 1) = 25 sts used.
Row 7: Ch 1, turn. Sc in the first sc, then (Shell in the ch-4 sp, sc in the next sc) 3 times. Change to lilac in the last sc. (21 dc + 4 sc = 25 sts)
Row 8 (lilac): Ch 1, turn. Sc in the first sc, then (Scallop Edge over the next Shell, sc in the next sc) 3 times. Change to lavender in the last sc. (1 + 3 × 12 = 37 sc)
Checkpoint: 2.5 in (6.4 cm) wide × 2.25 in (5.7 cm) tall.
Tier 4 (Three Large Fans)
Row 9 (lavender, set-up): Ch 1, turn. Sc in the first sc, then (ch 5, sk 11 sc, sc in the next sc) 3 times. (4 sc + 3 ch-5 sps)
Check: 1 + 3 × (11 + 1) = 37 sts used.
Row 10: Ch 1, turn. Sc in the first sc, then (Large Shell in the ch-5 sp, sc in the next sc) 3 times. Change to lilac in the last sc. (27 dc + 4 sc = 31 sts)
Row 11 (lilac): Ch 1, turn. Sc in the first sc, then (Large Scallop Edge over the next Large Shell, sc in the next sc) 3 times. Fasten off. (1 + 3 × 15 = 46 sc)
Checkpoint: 3.25 in (8.3 cm) wide × 3.25 in (8.3 cm) tall.
In Row 11, st 1 is the edge sc. The scallops are sts 2–15, 17–30 and 32–45, with single sc at 16, 31 and 46. The center scallop runs from st 17 to st 30, so its exact middle falls between sts 23 and 24.
Trunk
Hold the tree with its bottom edge up and Row 11 facing you as the front. Count from the edge where Row 11 started.
Row 1: Join cream with a sl st in st 22. Ch 1, then sc in the same st and in the next 3 sts (sts 22–25). (4 sc)
Sts 22–25 sit exactly centered under the middle fan, with 21 sts on each side (21 + 4 + 21 = 46).
Rows 2–4: Ch 1, turn, sc in each sc across. (4 sc)
Fasten off. The trunk is about 0.7 in (1.8 cm) wide and hangs about 0.5 in (1.3 cm) below the scallops.
Checkpoint: 3.25 in (8.3 cm) wide × 3.75 in (9.5 cm) tall overall.
Border
The border is a single lilac pass that outlines both stepped sides and makes the hanging loop at the peak. It does not go along the bottom: the tier edges are already lilac scallops, and the trunk stays plain cream.
Border gauge: 1 sc into the side of each sc row and 2 sc into the side of each dc row. A dc row is about twice as tall as a sc row, so this spacing keeps the edge flat. It neither ruffles nor pulls in.
As you go, lay the color-change tails along the edge and work over them. That hides most of the ends.
Right side (15 sc): Join lilac in the side of the last sc of Row 11, at the bottom tip of Tier 4. Ch 1, then work up the side edge as follows:
- Row 11: 1 sc; Row 10: 2 sc; Row 9: 1 sc (4 sc)
- Row 8: 1 sc; Row 7: 2 sc; Row 6: 1 sc (4 sc)
- Row 5: 1 sc; Row 4: 2 sc; Row 3: 1 sc (4 sc)
- Row 2: 1 sc; Row 1: 2 sc (3 sc)
That is 4 + 4 + 4 + 3 = 15 sc.
Peak and loop (4 sc + loop): Work 2 sc into the open top of the ring. Ch 20, then sl st into the last sc made to form the loop. Work 2 more sc into the open top of the ring.
Left side (15 sc): Work down the other edge in reverse order: Row 1: 2 sc; Row 2: 1 sc; then for each lower tier, 1 sc, 2 sc and 1 sc. End in the side of the first sc of Row 11. Fasten off.
Border total: 15 + 4 + 15 = 34 sc, plus the ch-20 loop.
Why the math works: Each tier has two sc rows and one dc row, so each tier needs 1 + 2 + 1 = 4 border sc. Tier 1 has one dc row and one sc row, so it needs 3. Both sides mirror each other exactly, which keeps the tree symmetric.
The border adds about 0.125 in (0.3 cm) on each side and at the top. Finished size: 3.5 in (8.9 cm) × 3.875 in (9.8 cm).
Final Blocking
- Weave in any remaining ends along same-color stitches.
- Lay the ornament face down on a blocking mat and mist it until damp.
- Turn it face up. Pin the tip of the peak and the two bottom tips of Tier 4 so the widest point is 3.5 in (8.9 cm).
- Pin the bottom of the trunk so the total height is 3.875 in (9.8 cm).
- Pin the low point between each pair of scallops so every scallop forms an even curve.
- Open each eyelet with the tip of a pin.
- Let it dry completely, which takes 2–4 hours.
- For a firmer ornament, mist it lightly with fabric stiffener before drying.
Final Quality-Control Checklist
- Tier fan counts are 1, 2, 3 and 3, and each fan has a visible eyelet.
- Row 11 has 46 sc and three even scallops.
- The trunk is exactly centered on sts 22–25.
- There are 15 border sc on each side.
- The loop sits at the center of the peak and is securely anchored.
- The ornament is 3.5 in (8.9 cm) wide and 3.875 in (9.8 cm) tall.
- No color-change tails show on the front.
Troubleshooting
- Fans cup or curl: Your dc are too tight. Loosen the yarn-overs, or go up half a hook size.
- The tier above doesn’t overlap the one below: The set-up chains are too loose. Keep them snug.
- Scallops ruffle: Check that you are working the Scallop Edge sequence exactly, without extra 2-sc increases.
- Sides pull inward: Make sure you are working 2 sc into each dc row end, not 1.
- The trunk is off-center: Recount Row 11 from the edge where it started and rejoin in st 22.
- The loop twists: Block it straight, or work the ch 20 more loosely.
Care
Hand wash in cool water with mild soap, press out the water in a towel, and dry flat. Reshape the scallops while damp, and store flat between seasons.
Final Notes
The measurement chain runs Tier 1 at 1.0 in (2.5 cm), then 1.75 in (4.4 cm), 2.5 in (6.4 cm) and 3.25 in (8.3 cm). The trunk brings the height to 3.75 in (9.5 cm). The border takes the finished size to 3.5 in (8.9 cm) by 3.875 in (9.8 cm). If you check each tier against its checkpoint, the finished tree will come out right.
Happy crocheting!