
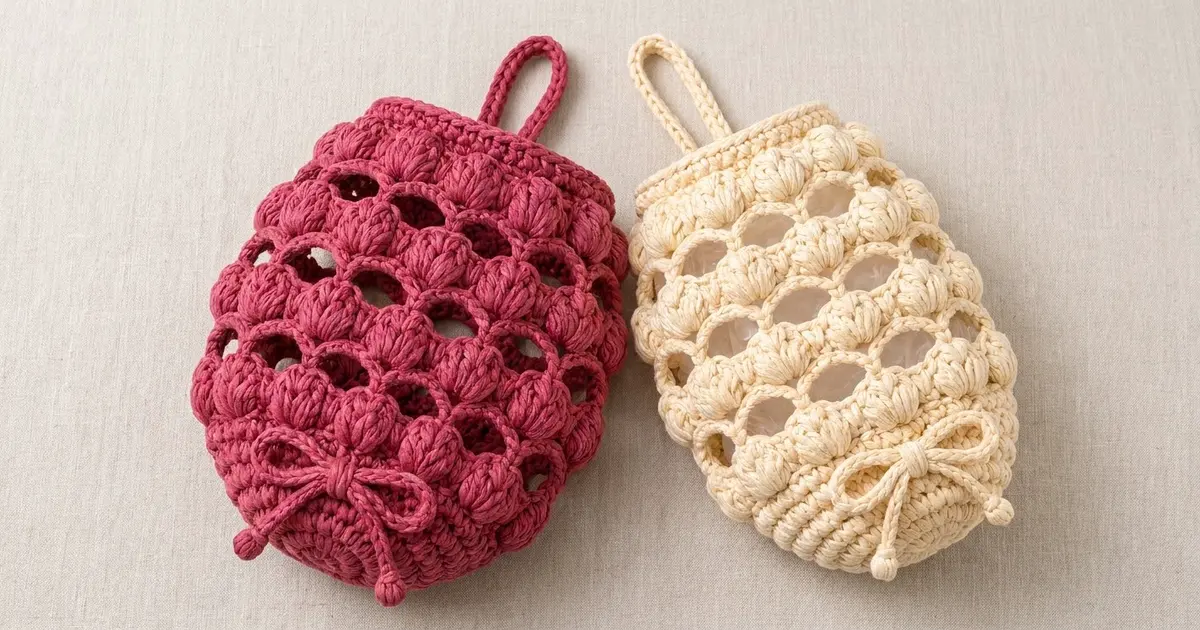
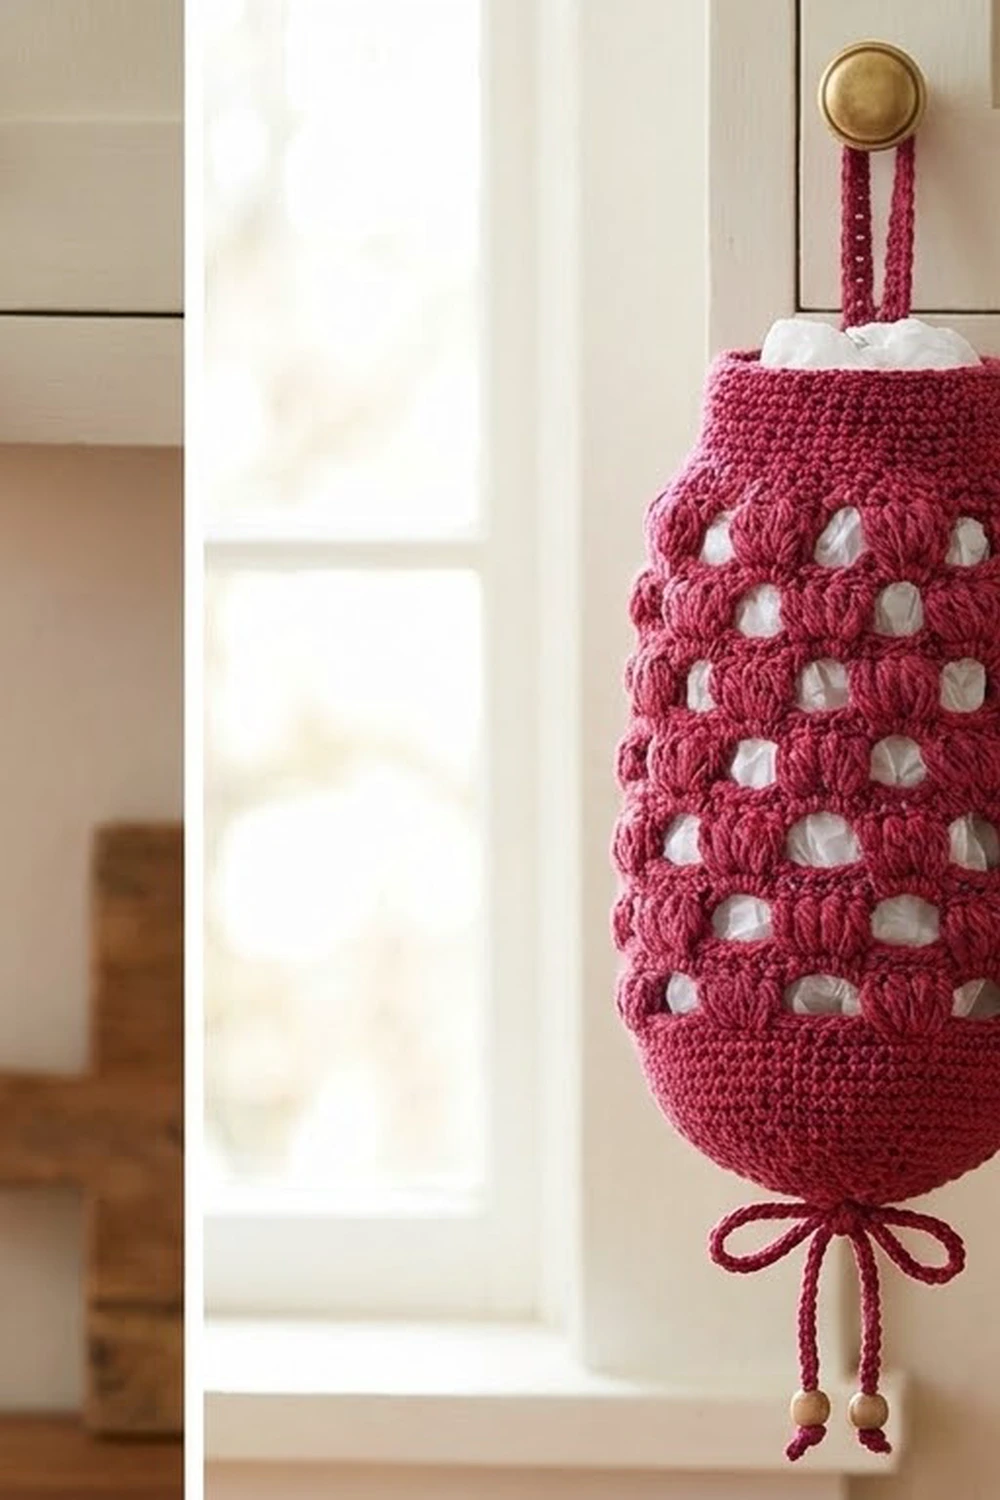
The Berry Puff Grocery Bag Holder is a chunky hanging dispenser for plastic shopping bags. You stuff bags in at the top and pull them out one at a time through a small opening at the bottom. Rows of round puff stitches sit over open chain arches, so the holder looks full and sculpted but stays light and breathable.
The sample is worked in deep raspberry bulky cotton cord. A soft cream version works just as well with the same pattern and gives a calmer, farmhouse look. A narrow strap at the top hangs it from a cabinet knob or hook. A crocheted drawstring at the base ties in a bow and lets you adjust the size of the opening.
This pattern uses US crochet terms. The finished holder measures about 7 in (17.8 cm) wide when flattened and 12 in (30.5 cm) tall, plus a hanging loop about 4 in (10.2 cm) tall.
Construction is simple and seamless:
1. Start with a chain ring at the bottom opening.
2. Increase in single crochet to make a shallow domed base.
3. Work alternating rounds of chain arches and puff stitches up the body.
4. Close the top with a single crochet band and work a strap straight off it.
5. Weave a drawstring through the base.
Finished Size and Construction
- Finished size: 7 in (17.8 cm) wide flat x 12 in (30.5 cm) tall, plus a 4 in (10.2 cm) loop
- Skill level: Easy / advanced beginner
- Terminology: US crochet terms
- Yarn weight: Bulky (#5) cotton or cotton-blend cord
- Hook: 6 mm (US J-10)
- Number of pieces: 1 body (strap worked on) + 1 drawstring
- Layout: A single tube worked bottom-up in joined rounds, with no turning
- Piece size: 14 in (35.6 cm) around at the widest round
- Size before the top band: 7 in (17.8 cm) wide x about 10.75 in (27.3 cm) tall
- Top band depth: 3 rounds, about 1 in (2.5 cm)
Materials
Choose a smooth, round bulky cotton cord or a chunky cotton blend. Cotton holds the puff shapes well and won’t stretch out under the weight of a full load of bags. Avoid very fuzzy or splitty yarns, because the puffs will blur together and the windows will close up.
- Main color, raspberry (or cream): about 170 g, approximately 170 m (186 yd) of bulky cotton cord
These quantities include a margin of about 10% for gauge differences and the drawstring.
Tools:
- 6 mm (US J-10) crochet hook
- 1 locking stitch marker
- Tapestry needle with a large eye
- Scissors
- Measuring tape
- Spray bottle and a rolled towel for blocking
Abbreviations (US Terms)
- ch: chain
- sl st: slip stitch
- sc: single crochet
- 2 sc in next: increase (2 sc in the same stitch)
- sc2tog: single crochet 2 together (decrease)
- sp(s): space(s)
- sk: skip
- yo: yarn over
- rnd(s): round(s)
- rep: repeat
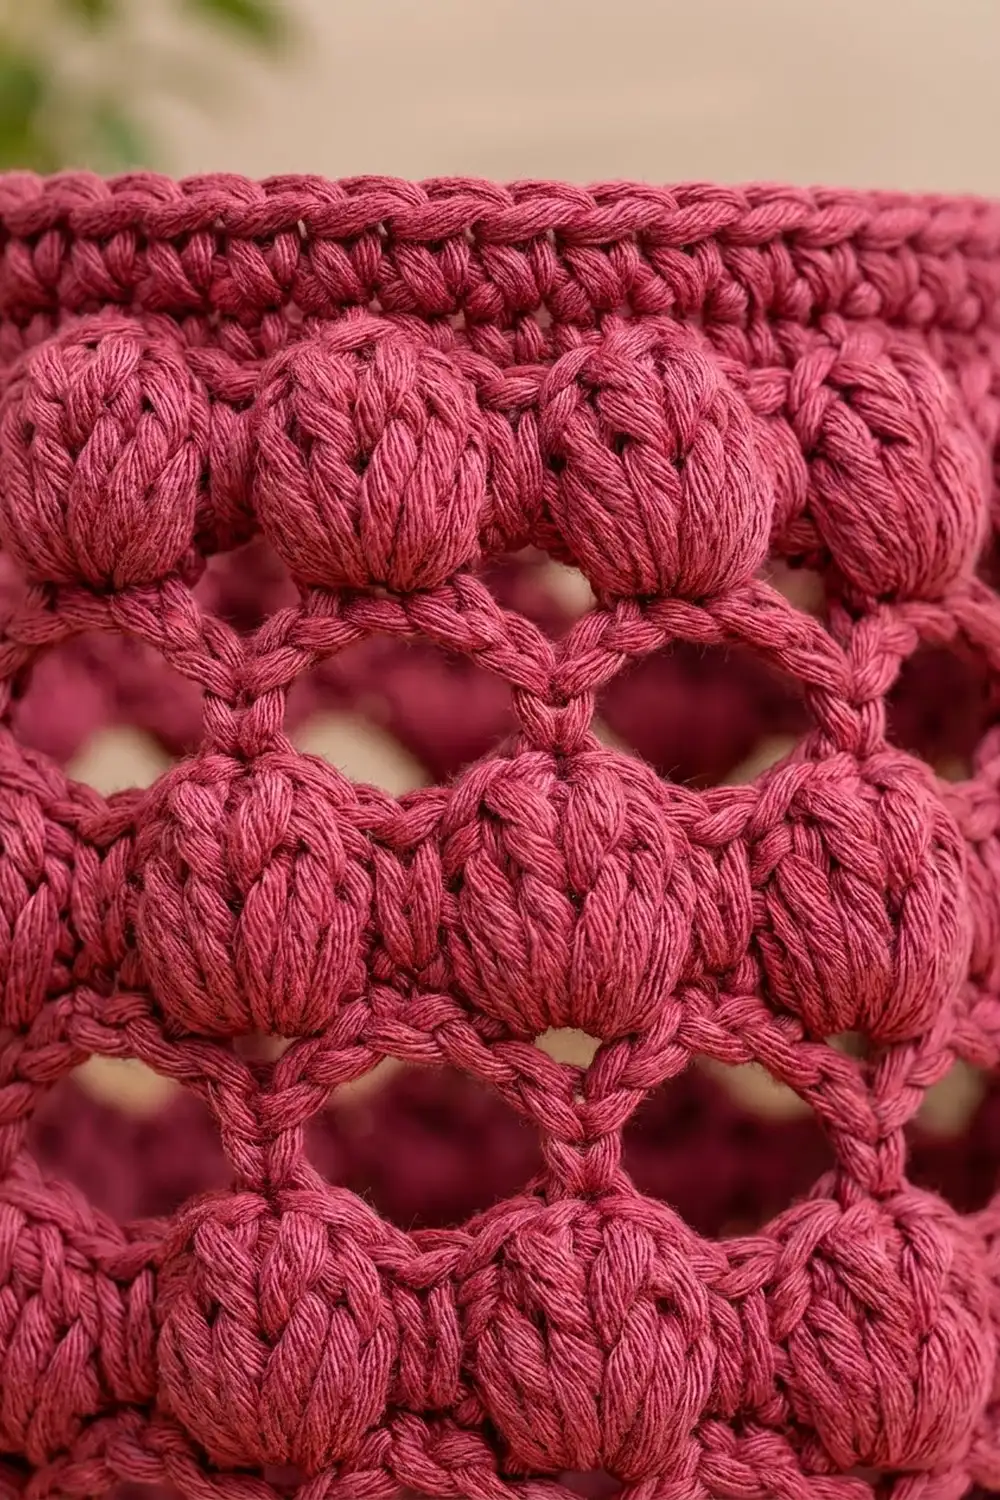
Special stitch: Puff. Yo, insert your hook in the indicated space, yo and pull up a loop about 3/4 in (1.9 cm) tall. Do this 4 times, so you have 9 loops on the hook. Then yo and draw through all 9 loops. Pull every loop to the same height so the puff is round and even.
Gauge and Checkpoints
Gauge: 12 sc and 13 rnds = 4 in (10.2 cm) in sc worked in joined rounds.
Pattern gauge: One arch round plus one puff round = 1.5 in (3.8 cm) tall.
Because this is a single piece, the base is your test. Work Rnds 1–5, then stop and measure before you start the puffs.
- After Rnd 1: The foundation ring measures 6 in (15.2 cm) around.
- After Rnd 5: The base is a shallow bowl about 1.5 in (3.8 cm) deep, with an outer edge of 14 in (35.6 cm) around.
- After Rnd 9: The puff section is 3 in (7.6 cm) tall from the top of Rnd 5, and the tube lies 7 in (17.8 cm) wide when flattened.
- After Rnd 18: The holder is about 10.75 in (27.3 cm) tall in total.
- After Rnd 21: The holder is about 11.75 in (29.8 cm) tall and relaxes to 12 in (30.5 cm) after blocking.
If your piece is too big: Go down to a 5.5 mm (US I-9) hook and keep your puff loops a little shorter.
If your piece is too small: Go up to a 6.5 mm (US K-10.5) hook and pull your puff loops a little taller.
Don’t change the stitch count. The puff pattern needs a multiple of 3 stitches.
Pattern
Work the body in joined rounds with the right side facing at all times. Place a marker in the first stitch of every round and move it up as you go. Keep your chain ring relaxed so the bottom opening stays wide enough for bags to pass through.
Base
Foundation: Ch 18 and sl st in the first ch to form a ring. Be careful not to twist the chain. This ring is the bottom opening.
Rnd 1: Ch 1, sc in each ch around, join with sl st to first sc. (18 sc)
Rnd 2: Ch 1, sc in next 2 sts, 2 sc in next st; rep from * 6 times, join. (24 sc)*
Rnd 3: Ch 1, sc in next 3 sts, 2 sc in next st; rep from * 6 times, join. (30 sc)*
Rnd 4: Ch 1, sc in next 4 sts, 2 sc in next st; rep from * 6 times, join. (36 sc)*
Rnd 5: Ch 1, sc in next 5 sts, 2 sc in next st; rep from * 6 times, join. (42 sc)*
The base now curves up into a shallow dome. Check that it measures 14 in (35.6 cm) around.
Puff Body
Rnd 6 (arch round): Ch 1, sc in first st, ch 3, sk next 2 sts, sc in next st, ch 3, sk next 2 sts; rep from * around, join with sl st to first sc. (14 sc, 14 ch-3 sps)*
The math: 42 stitches ÷ 3 stitches per repeat = 14 repeats.
Rnd 7 (puff round): Sl st into first ch-3 sp, ch 2 (does not count as a st), puff in same sp, ch 2, puff in next ch-3 sp, ch 2; rep from * around, join with sl st to top of first puff. (14 puffs, 14 ch-2 sps)*
Rnd 8 (arch round): Sl st into first ch-2 sp, ch 1, sc in same sp, ch 3, sc in next ch-2 sp, ch 3; rep from * around, join with sl st to first sc. (14 sc, 14 ch-3 sps)*
Each sc in Rnd 8 sits between two puffs, so the ch-3 arches sit directly above the puffs below. That shifts the next row of puffs by half a repeat. The result is a staggered, brick-like layout with open windows between the rows.
Rnds 9–16: Rep Rnds 7–8 four more times. (Each puff round: 14 puffs, 14 ch-2 sps. Each arch round: 14 sc, 14 ch-3 sps.)
Rnd 17 (final puff round): Rep Rnd 7. (14 puffs, 14 ch-2 sps)
You now have 6 puff rounds (Rnds 7, 9, 11, 13, 15 and 17) and 6 arch rounds (Rnds 6, 8, 10, 12, 14 and 16). Six pattern repeats of 1.5 in (3.8 cm) give a puff section about 9 in (22.9 cm) tall.
Rnd 18 (conversion round): Sl st into first ch-2 sp, ch 1, 2 sc in same sp, sc in top of next puff, 2 sc in next ch-2 sp; rep from * 12 more times, sc in top of first puff, join. (14 sc in puff tops + 28 sc in ch-2 sps = 42 sc)*
Checkpoint: The holder is about 10.75 in (27.3 cm) tall and still 7 in (17.8 cm) wide flat.
Border: Top Band, Strap and Bottom Edge
Border gauge: The band uses the main gauge of 12 sc = 4 in (10.2 cm), which is 3 sc per inch (2.5 cm). Flattened, the tube has a front and a back, so each “side” of the band is half the round.
Rnd 19: Ch 1, sc in next 5 sts, sc2tog; rep from * 6 times, join. (36 sc: 18 sc per flattened side)*
Rnds 20–21: Ch 1, sc in each st around, join. (36 sc: 18 sc per flattened side)
Why the math works:
– 42 stitches minus 6 decreases = 36 stitches.
– 36 ÷ 3 sc per inch = 12 in (30.5 cm) around, which lies 6 in (15.2 cm) wide flat.
– The top draws in gently from the 7 in (17.8 cm) body. That gives the holder its rounded, pod-like shape and keeps bags from spilling out of the top.
Hanging Strap
Don’t fasten off. Flatten the holder so the join of the round is at the center back. You’ll work the strap over the 3 center stitches of the back side.
Row 1: Ch 1, sc in next 3 sts, turn. (3 sc)
Rows 2–26: Ch 1, sc in each st across, turn. (3 sc)
The strap is about 8 in (20.3 cm) long, because 26 rows ÷ 13 rows per 4 in = 8 in. Fasten off and leave a 10 in (25.4 cm) tail.
Fold the strap up into a loop. Sew Row 26 to the inside of Rnds 20–21, directly behind Row 1. The finished loop stands about 4 in (10.2 cm) above the top edge.
Bottom Edge
Hold the holder with the base facing you and join yarn in any ch of the foundation ring. Sl st in each of the 18 ch loops around and join. (18 sl st) Fasten off and weave in the ends. This round firms up the opening so it doesn’t stretch.
Drawstring
Cord: Ch 75. Sl st in the back bump of the 2nd ch from the hook and in each ch across. (74 sl st) Fasten off.
The cord measures about 24 in (61.0 cm).
1. Start at the center front and weave the cord through Rnd 2, going over 2 sc and under 2 sc all the way around. That’s 24 sts, or 6 over-and-under repeats.
2. Bring both ends out at the center front.
3. Tie an overhand knot at each end, then tie a second knot over the first for a round, beaded look.
4. Pull the cord to close the opening to about 2 in (5.1 cm) across, and tie a bow.
Final Blocking
- Weave in all remaining ends on the inside. Follow the sc rounds so the ends don’t show through the arches.
- Mist the whole holder with water until it is damp but not soaked.
- Stuff it firmly with a rolled towel or a few plastic bags so it takes its finished shape.
- Pat each puff into a round shape with your fingers and gently open the chain arches.
- Flatten slightly and check the width: 7 in (17.8 cm) at the body and 6 in (15.2 cm) at the top band.
- Check the height: 12 in (30.5 cm) from the bottom edge to the top of the band.
- Let it dry completely before you remove the stuffing and hang it.
Final Quality-Control Checklist
- Every puff round has 14 even puffs
- The puffs are staggered from round to round, with open windows between rows
- Rnd 18 has exactly 42 sc, and Rnds 19–21 have 36 sc
- The top band lies 6 in (15.2 cm) wide flat
- The strap is centered on the back and sewn securely on the inside
- The foundation ring is firm, with 18 sl st around
- The drawstring is woven evenly through Rnd 2 and both ends are knotted
- All ends are woven in on the inside
Troubleshooting
Puffs look flat or uneven: Pull up every loop to the same 3/4 in (1.9 cm) height. Hold the loops on the hook with your index finger as you work.
The rounds are slanting: This is normal in joined rounds. Keep your joins consistent, and always work the first stitch into the same stitch as the join.
The base ruffles instead of cupping: Your tension is loose. Go down a hook size for Rnds 1–5 only.
The base pulls inward too much: Your tension is tight. Go up a hook size for Rnds 1–5.
Wrong stitch count in an arch round: Count chain spaces, not stitches. Every puff round and every arch round needs exactly 14 spaces.
Bags fall out of the bottom: Tighten the drawstring and double-knot the bow.
The strap stretches over time: Add a row of sl st along each edge of the strap, or use a firmer cotton cord.
Care
Hand wash in cool water with mild soap. Gently squeeze out the excess water and dry the holder flat over a stuffed towel to keep its shape. Don’t tumble dry, because heat can flatten the puffs.
Final Notes
Here is the measurement chain from start to finish:
– An 18-stitch ring gives a 6 in (15.2 cm) opening.
– Five base rounds bring you to 42 stitches and 14 in (35.6 cm) around.
– Fourteen repeats of arches and puffs keep that width for 9 in (22.9 cm).
– The conversion round restores exactly 42 sc.
– The top band draws in to 36 sc and 6 in (15.2 cm) wide.
– The finished holder blocks to 7 in (17.8 cm) by 12 in (30.5 cm), with a 4 in (10.2 cm) hanging loop.
Check your gauge at the base and count your spaces in every puff round. Then you’ll have a handy, pretty bag holder ready to hang in your kitchen.
Happy crocheting!