

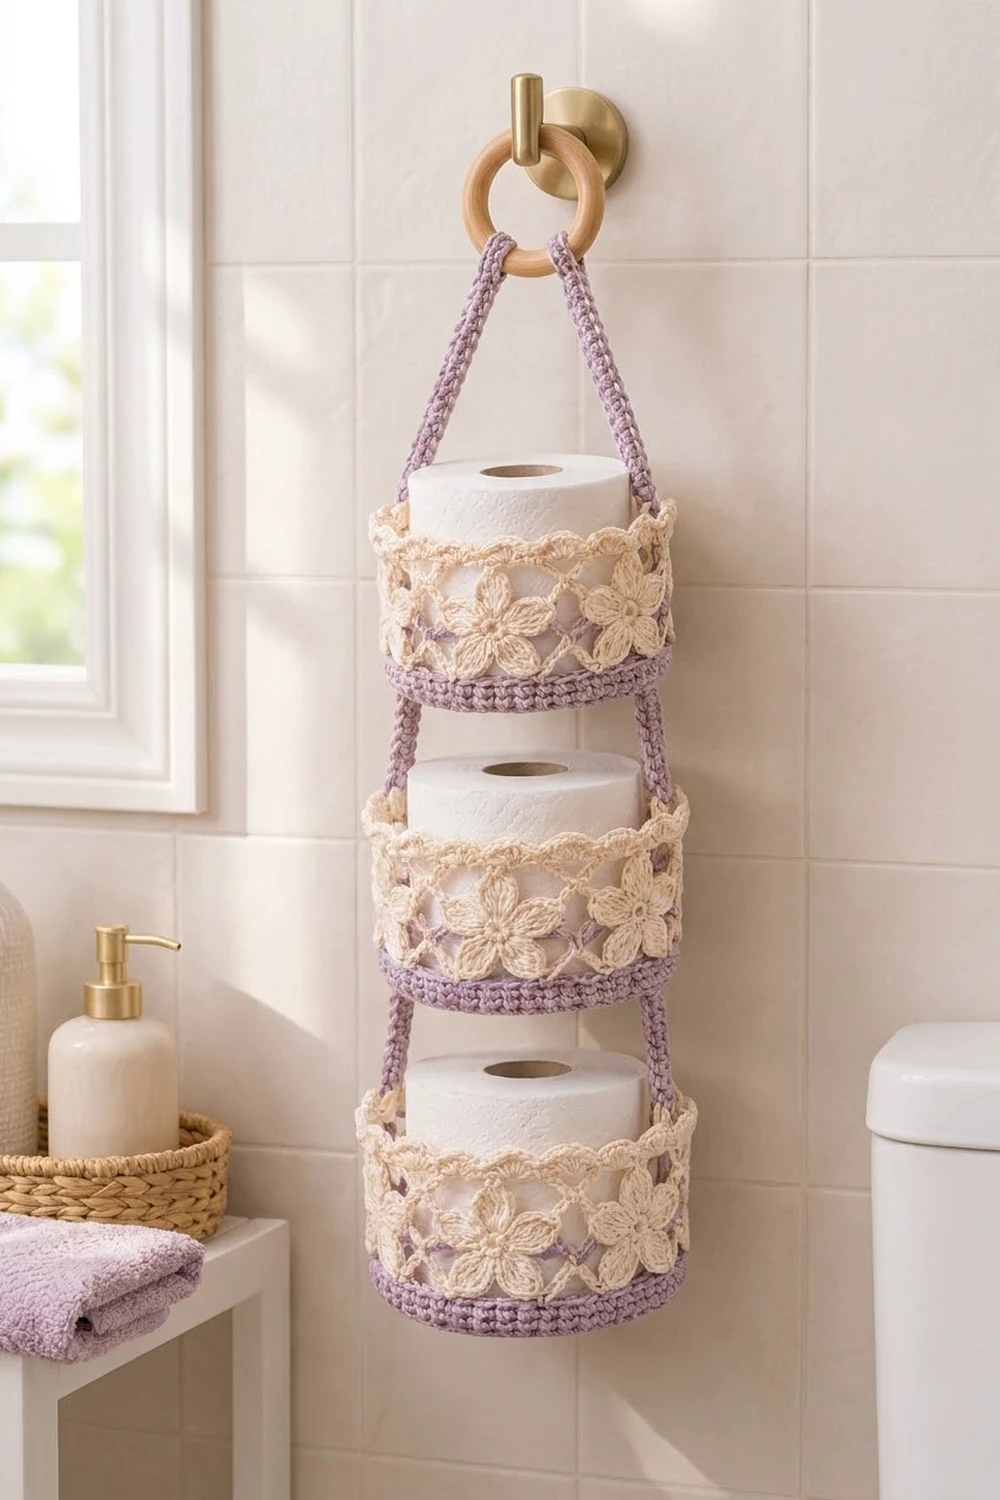
This hanging holder stores three rolls of toilet paper in a small amount of wall space. It has three round baskets stacked one above the other. Each basket has a sturdy lavender base and an airy cream mesh band decorated with five-petal blossoms. Lavender straps join the tiers and meet at a wooden ring, so you can hang the whole piece from a single hook or towel knob.
The colors are a soft lilac and a warm cream. Together they look fresh and a little vintage, and they suit pale tile, white fixtures, and natural wood. Because the mesh is open, you can see at a glance when a tier is empty.
All instructions use US crochet terms. Each basket measures about 5.75 in (14.6 cm) across and 3.5 in (8.9 cm) tall. The assembled holder hangs about 22 in (55.9 cm) from the top of the ring to the bottom of the lowest basket.
Here is how it’s built. You make the base as a flat single-crochet spiral, then turn the edge up into a short wall. Next you add five rounds of cream chain mesh and a scalloped top edging. Then you make small flowers and sew them onto the mesh. Finally, you crochet narrow straps and sew them on to link the baskets and the ring.
Finished Size and Construction
- Finished basket size: 5.75 in (14.6 cm) diameter × 3.5 in (8.9 cm) tall
- Overall hanging length: about 22 in (55.9 cm), including the ring
- Skill level: Easy-Intermediate
- Terminology: US
- Yarn weight: Worsted (#4) 100% cotton
- Hook: 4.0 mm (G-6)
- Number of pieces: 3 baskets, 21 flowers, 6 straps, 1 wooden ring
- Layout: 3 baskets stacked in a vertical column, 1 across × 3 down
- Piece size (one basket): 5.75 in (14.6 cm) × 3.5 in (8.9 cm)
- Size before border: 5.75 in (14.6 cm) diameter × 2.8 in (7.1 cm) tall
- Border (top edging) depth: 0.7 in (1.8 cm)
Materials
Use a smooth, firm cotton or cotton blend. Cotton holds its shape, survives washing, and handles bathroom humidity well. Avoid acrylic for the base, because it lets the bottom sag under a roll.
- Lavender: 100 g / about 170 m (186 yd). Used for bases, walls, and straps.
- Cream: 100 g / about 170 m (186 yd). Used for mesh, edging, and flowers.
These quantities include a margin of roughly 15–20% for swatching and joining.
Tools:
– 4.0 mm (G-6) crochet hook
– 1 wooden ring, 3 in (7.6 cm) diameter
– Tapestry needle
– 4 locking stitch markers
– Rustproof pins
– Measuring tape
– Scissors
Abbreviations (US Terms)
- ch: chain
- sl st: slip stitch
- sc: single crochet
- hdc: half double crochet
- dc: double crochet
- sc2: 2 sc in the same stitch (increase)
- BLO: back loop only
- sk: skip
- sp: space
- st(s): stitch(es)
- MR: magic ring
Special stitch – Shell: 5 dc worked in the same stitch.
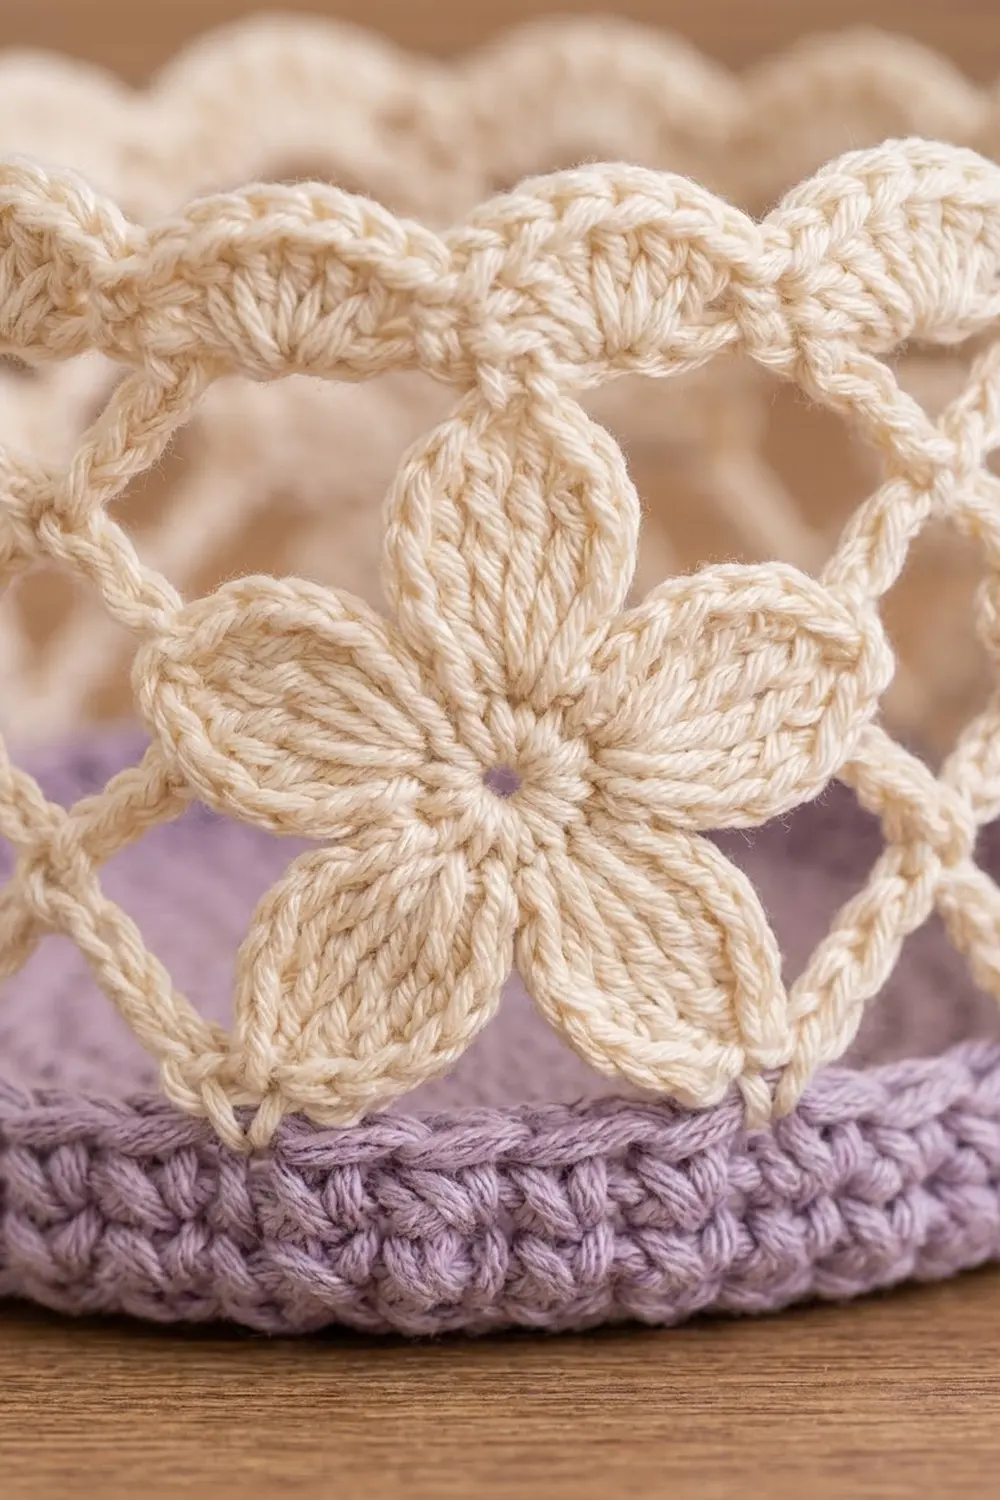
Special stitch – Petal: (sc, hdc, 2 dc, ch 2, 2 dc, hdc, sc) worked in one ch-3 space. The ch-2 forms the pointed tip.
Gauge and Checkpoints
Gauge: 18 sc × 20 rounds = 4 in (10.2 cm) in sc, worked firmly.
Make the base of one basket before you commit to all three. The base is the most important gauge test, because it controls whether a roll fits.
Checkpoints:
– After Rnd 10 (60 sts): the base measures about 4.1 in (10.4 cm) across.
– After Rnd 14 (84 sts): the base measures about 5.75 in (14.6 cm) across and lies flat.
– After Rnd 17: the lavender wall stands about 0.6 in (1.5 cm) tall.
– After Rnd 22: the basket measures about 2.8 in (7.1 cm) tall, of which the mesh band is about 2.2 in (5.6 cm).
– After Rnd 24: the basket measures 3.5 in (8.9 cm) tall.
– One flower: about 2 in (5.1 cm) from petal tip to petal tip.
If the base is too big, or ruffles, go down a hook size or tighten your tension. If it’s too small, or cups upward before Rnd 15, go up a hook size. A standard roll measures about 4.5 in (11.4 cm) across, so the base needs at least 5.5 in (14.0 cm) of inside diameter.
Basket (Make 3)
Base (Lavender)
Work in a continuous spiral. Place a marker in the first stitch of each round and move it up as you go.
Rnd 1: MR, 6 sc in ring. (6 sts)
Rnd 2: sc2 in each st around. (12 sts)
Rnd 3: sc 1, sc2 around. (18 sts)
Rnd 4: sc 2, sc2 around. (24 sts)
Rnd 5: sc 3, sc2 around. (30 sts)
Rnd 6: sc 4, sc2 around. (36 sts)
Rnd 7: sc 5, sc2 around. (42 sts)
Rnd 8: sc 6, sc2 around. (48 sts)
Rnd 9: sc 7, sc2 around. (54 sts)
Rnd 10: sc 8, sc2 around. (60 sts)
Checkpoint: about 4.1 in (10.4 cm) across.
Rnd 11: sc 9, sc2 around. (66 sts)
Rnd 12: sc 10, sc2 around. (72 sts)
Rnd 13: sc 11, sc2 around. (78 sts)
Rnd 14: sc 12, sc2 around. (84 sts)
Checkpoint: 5.75 in (14.6 cm) across, flat.
To keep the circle round instead of hexagonal, you can stagger the increases. On every other round, work half the plain sts before the first increase.
Wall (Lavender)
Rnd 15: sc in BLO of each st around. (84 sts) The unused front loops make a crisp ridge, and the edge turns upward.
Rnds 16–17: sc in each st around. (84 sts)
Sl st in the next st to smooth the step at the end of the spiral, then fasten off.
Mark strap positions now. Count from the sl st and place a locking marker in st 1 and in st 43. These two points sit exactly opposite each other, 42 sts apart on each side.
Checkpoint: wall about 0.6 in (1.5 cm) tall.
Mesh Band (Cream)
From here on, work in joined rounds.
Rnd 18: Join cream with a sl st in any lavender st. Ch 1, sc in the same st, ch 5, sk 3, sc in next st. Repeat from * around, ending ch 5, sk 3, sl st to first sc. (21 ch-5 loops)
The math is simple: each repeat uses 4 sts (1 sc + 3 skipped), and 84 ÷ 4 = 21 loops.
Rnd 19: Sl st in each of the next 3 ch to reach the center of the first loop. Ch 1, sc in the same loop, ch 5, sc in next loop. Repeat from * around, ending ch 5, sl st to first sc. (21 ch-5 loops)
Rnds 20–22: Repeat Rnd 19. (21 ch-5 loops each round)
Each sc lands at the center of the loop below, which offsets the mesh and forms the diamond pattern.
Checkpoint: about 2.8 in (7.1 cm) total height and 2.2 in (5.6 cm) of mesh.
Border (Top Edging, Cream)
The border has the same gauge as the base: 18 sc = 4 in (10.2 cm). Rnd 24 adds height but no width.
Rnd 23 (conversion round): Sl st to the center of the first loop. Ch 1, then work 4 sc in each ch-5 loop around. Sl st to first sc.
Count: 21 loops × 4 sc = 84 sts (0 sts worked 1-per-existing-stitch + 84 sts added into loops).
Rnd 24 (trim round): Ch 1, sc in the first st, sk 1, Shell in next st, sk 1, sc in next st. Repeat from * around, omitting the final sc. Sl st to first sc. Fasten off and weave in ends.
Count: 21 shells + 21 sc = 21 × 6 = 126 sts (21 sc worked 1-per-existing-stitch + 105 dc in shells).
Why the math works: Rnd 23 brings the rim back to exactly 84 sts, the same count as the base. That’s why the wall rises straight instead of flaring or pulling in. Each shell repeat uses 4 rim sts, and 84 ÷ 4 = 21, so the scallops close evenly with no partial repeat. The border adds 0.7 in (1.8 cm), which brings the basket from 2.8 in (7.1 cm) to 3.5 in (8.9 cm).
Flowers (Make 21, Cream)
Rnd 1: MR, ch 1, 10 sc in ring. Pull the ring snug, leaving a tiny center hole. Sl st to first sc. (10 sts)
Rnd 2: Ch 1, sc in first st, ch 3, sk 1, sc in next st. Repeat from * 3 more times, ch 3, sk 1, sl st to first sc. (5 sc, 5 ch-3 sps)
Rnd 3: Work a Petal in each ch-3 sp. Sl st to first sc.
Count: 5 petals × 8 sts = 40 sts, plus 5 ch-2 tips.
Fasten off, leaving a 12 in (30.5 cm) tail for sewing. Each flower measures about 2 in (5.1 cm) across.
Make All Pieces
Totals:
– Lavender: 3 bases with walls, 6 straps
– Cream: 3 mesh bands with edging, 21 flowers (7 per basket)
Straps (Lavender):
– Top straps (make 2): Ch 4, sc in 2nd ch from hook and next 2 ch (3 sc). Ch 1, turn. Work 3 sc per row until you have 40 rows, about 8 in (20.3 cm). Fasten off with a long tail.
– Connector straps (make 4): Work as for top straps, but for 20 rows, about 4 in (10.2 cm).
Each strap is 3 sts wide, about 0.67 in (1.7 cm).
Layout grid (front view):
        [ RING ]
        /      \
     TS          TS
   [ BASKET 1 – top ]
     CS          CS
   [ BASKET 2 – middle ]
     CS          CS
   [ BASKET 3 – bottom ]
TS = top strap, CS = connector strap.
Joining
Flowers to mesh: Count loops on Rnd 20, starting just after the strap marker at st 1. Center one flower on loops 2, 5, 8, 11, 14, 17, and 20. That puts every flower 3 loops from the next, and loop 20 leads back to loop 2 across the join (21 + 2 = 23 = loop 2), so the spacing is even all the way around.
Pin each flower flat so its petals reach into Rnds 19–21. Using the tail, tack down the center and each petal tip, plus one point at the base of each petal. Catch the mesh chains only, and don’t pull the chains in.
Connector straps: Each connector strap joins one basket’s rim to the base of the basket above.
- Line up the markers so st 1 and st 43 match from tier to tier.
- Lower basket end: Lay 1 in (2.5 cm) of strap (5 rows) against the inside of the lower basket, directly above its marker. The strap should cover Rnds 22–24. Whipstitch both long edges and the end, going through the rim sc of Rnd 23 and the chains of Rnd 22.
- Upper basket end: Lay the other 1 in (2.5 cm) against the outside of the upper basket’s lavender wall, over its marker. The top 0.6 in (1.5 cm) covers Rnds 15–17, and the rest folds under onto Rnds 13–14 of the base. Whipstitch stitch-to-stitch: each strap row edge to 1 wall or base st.
- That leaves 2 in (5.1 cm) of visible strap between tiers.
Top straps:
1. Sew 1 in (2.5 cm) of each strap inside the top basket’s rim at the markers, as above.
2. Bring both straps up to the ring. Fold 1.5 in (3.8 cm) of each strap over the ring and sew the end to the back of the strap.
3. Set the two folds side by side so they don’t overlap.
Tension: Keep the whipstitches snug but not tight. The strap should lie flat, and the rim shouldn’t pucker. Use matching lavender yarn so the joins disappear.
Size checkpoint: Hang the holder up empty. It should measure about 22 in (55.9 cm) from the top of the ring to the bottom of the lowest base, and every basket should hang level. If one tier tilts, re-sew one strap end until both straps on that tier are the same length.
Final Blocking
- Remove the stitch markers.
- Soak the whole holder in cool water for 10 minutes. Press the water out gently; don’t wring.
- Roll it in a towel to remove excess moisture.
- Put a toilet roll wrapped in a plastic bag inside each basket to shape the walls.
- Pin each flower’s petal tips flat against the mesh.
- Pinch each shell scallop into an even arc.
- Lay the holder flat with the straps straightened, and let it dry completely, usually 24 hours.
- Remove the rolls and hang the holder.
Final Quality-Control Checklist
- [ ] Every base has 84 sts and lies flat at 5.75 in (14.6 cm).
- [ ] The BLO ridge from Rnd 15 is visible all around each basket.
- [ ] Each mesh round has 21 loops.
- [ ] Each rim has 84 sc in Rnd 23 and 21 shells in Rnd 24.
- [ ] There are 7 flowers per basket, evenly spaced.
- [ ] All 4 connector straps are 20 rows, and both top straps are 40 rows.
- [ ] The straps line up vertically on both sides.
- [ ] All three tiers hang level.
- [ ] All ends are woven in securely.
Troubleshooting
- Base cups upward: Your tension is too tight, or you missed increases. Recount each round and go up a hook size.
- Base ruffles: You have extra stitches or loose tension. Recount, or go down a hook size.
- Mesh is too floppy: Change the ch 5 to ch 4 in Rnds 19–22. Keep 21 loops.
- Rim flares: You worked more than 4 sc per loop in Rnd 23. Rework it with exactly 4 sc per loop.
- Flowers curl: Block them separately before sewing, and tack every petal tip.
- Basket tilts: Make sure the strap markers sit exactly 42 sts apart.
- Roll doesn’t fit: Add a round to the base (Rnd 15 would become sc 13, sc2, for 90 sts). Then use 4 sts per repeat in Rnd 18 is no longer exact, so work ch 5, sk 2, sc in place of every seventh repeat to reach a count that divides evenly, or simply use a larger hook.
Care
Hand wash in cool water with mild soap, then reshape and dry flat. Avoid tumble drying, which can shrink cotton and distort the bases.
Final Notes
Each measurement leads to the next:
1. The base reaches 84 sts at 5.75 in (14.6 cm).
2. The wall rises 0.6 in (1.5 cm) on the same 84 sts.
3. Twenty-one mesh loops add 2.2 in (5.6 cm), bringing the basket to 2.8 in (7.1 cm).
4. Rnd 23 returns the rim to 84 sts, so the wall stays straight.
5. Twenty-one shells add 0.7 in (1.8 cm), finishing each basket at 3.5 in (8.9 cm).
6. Straps with 2 in (5.1 cm) gaps between tiers and a 3 in (7.6 cm) ring give a holder about 22 in (55.9 cm) long.
Check each stage as you go, and the finished holder will fit together. Happy crocheting!