

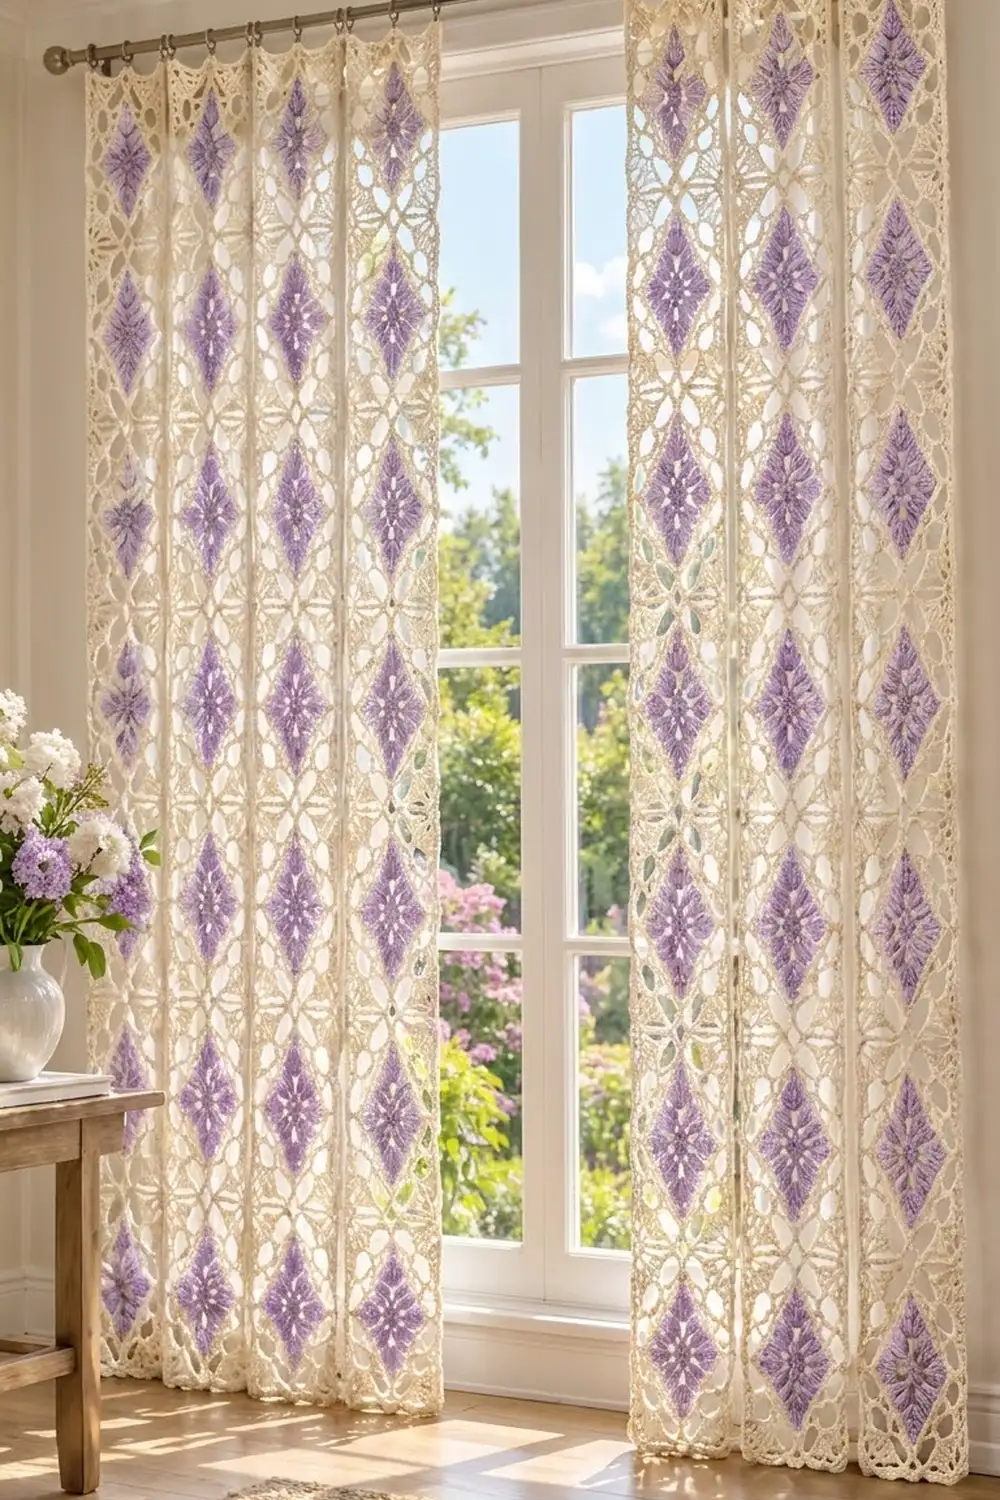
These curtains have a gentle, old-fashioned look. Lilac diamonds stack in neat columns inside a cream lattice, and fans of tall stitches fill the space between them. With daylight behind them, the open lace glows and the lilac centers seem to float.
The palette is just two colors: a soft lilac for the diamond centers and a warm cream for all the lace. Mercerized cotton keeps the stitches crisp and gives a slight sheen that looks lovely against glass.
The pattern uses US crochet terms. Each finished panel measures 25.5 x 85.5 in (64.8 x 217.2 cm), and the instructions make a matching pair.
Each panel is built from one repeating square motif. You work a lilac granny-style square, then turn it into a diamond with cream fans that grow from the middle of each side. A lattice round and a final single crochet round bring the motif to a 6 in (15.2 cm) square. You make 56 motifs per panel, join them with a flat slip stitch seam, and finish with a two-round shell border.
Finished Size and Construction
- Finished panel size: 25.5 x 85.5 in (64.8 x 217.2 cm), blocked
- Skill level: Intermediate
- Terminology: US crochet terms
- Yarn weight: Sport (#2) mercerized cotton
- Hook: 3.5 mm (E/4)
- Number of pieces: 112 motifs total (56 per panel, 2 panels)
- Layout per panel: 4 motifs wide x 14 motifs tall
- Motif size: 6 x 6 in (15.2 x 15.2 cm), blocked
- Panel size before border: 24 x 84 in (61.0 x 213.4 cm)
- Border depth: 0.75 in (1.9 cm) on each edge
Materials
Use a smooth, tightly plied mercerized cotton in sport weight, around 155 m per 50 g. Cotton holds the lace shape, washes well and does not fuzz in sunlight. Avoid splitty or very soft yarns, because the lattice loops need clear definition.
- Lilac: 250 g, about 775 m
- Cream: 550 g, about 1,705 m
These quantities cover both panels and include a margin of about 10%. Buy each color from a single dye lot.
Tools:
– 3.5 mm (E/4) crochet hook
– Tapestry needle
– Stitch markers
– Rustproof pins and a large blocking surface (foam mats or a bed covered with towels)
– Spray bottle
– Measuring tape
– Curtain clip rings for hanging
Abbreviations (US Terms)
- ch – chain
- sl st – slip stitch
- sc – single crochet
- dc – double crochet
- dtr – double treble crochet
- sk – skip
- sp(s) – space(s)
- st(s) – stitch(es)
- rep – repeat
- RS – right side
Special stitches
- Double treble (dtr): Yarn over 3 times, insert the hook in the stitch, pull up a loop, then (yarn over, pull through 2 loops) 4 times.
- 3-dc cluster (cl): (Yarn over, insert the hook in the space, pull up a loop, yarn over, pull through 2 loops) 3 times, then yarn over and pull through all 4 loops on the hook.
- Beginning cluster (beg cl): Ch 2, then work a 2-dc cluster in the same space. Together these count as 1 cl.
Gauge and Checkpoints
Make and block one complete motif before starting the full set. Lace gauge is easiest to read at set checkpoints, so measure at each of these stages:
- After Rnd 4 (lilac square): 2.75 in (7.0 cm) per side.
- After Rnd 7: about 5 in (12.7 cm) per side, laid flat.
- After Rnd 9, unblocked: about 5.75 in (14.6 cm) per side.
- After Rnd 9, blocked: 6 in (15.2 cm) per side. The edge has 35 sts, about 5.8 sc per inch (2.3 per cm).
If your blocked motif is larger than 6 in (15.2 cm), go down to a 3.25 mm hook. If it is smaller, go up to a 3.75 mm hook. A difference of only 0.25 in (0.6 cm) per motif adds up to 3.5 in (8.9 cm) over the 14-motif length, so get this right before moving on.
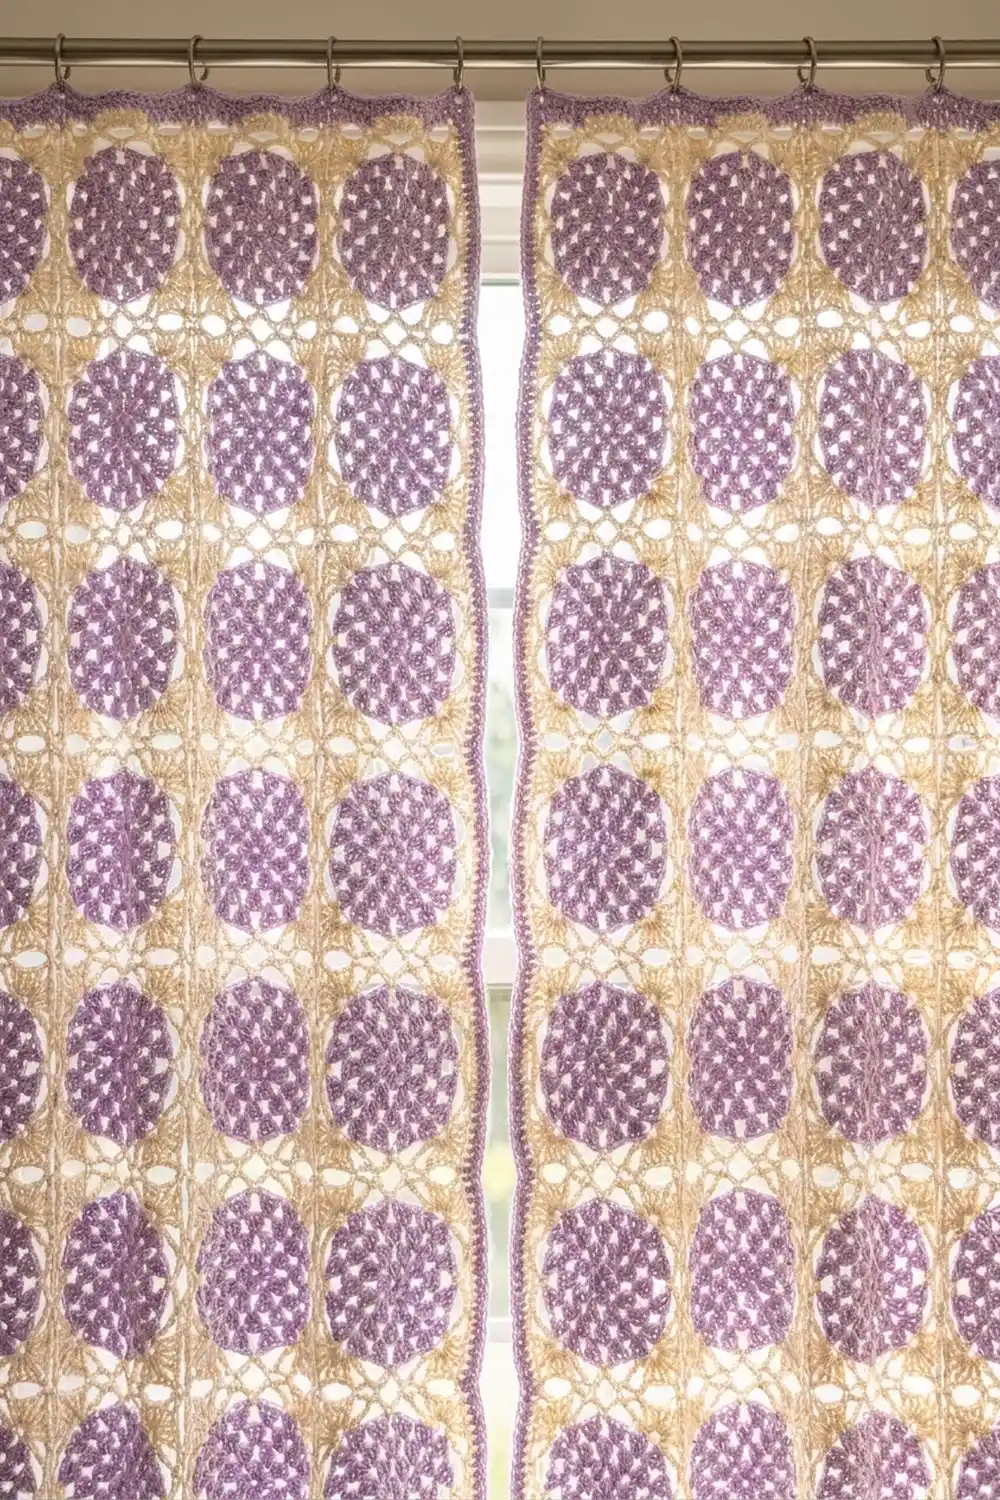
Motif (Make 112)
Lilac Center
With lilac, make a magic ring.
Rnd 1: Ch 3 (counts as dc), 15 dc in the ring, sl st to the top of ch-3. Pull the ring closed. (16 dc)
Rnd 2: Ch 1, sc in the same st, ch 3, sk 1, sc in the next st, ch 3, sk 1; rep from * 6 more times, sl st to the first sc. (8 sc, 8 ch-3 sps)*
Rnd 3: Sl st into the first ch-3 sp, beg cl in the same sp, ch 3, cl in the next ch-3 sp, ch 3; rep from * 6 more times, sl st to the top of beg cl. (8 cl, 8 ch-3 sps)*
These eight clusters are the petals that radiate from the center.
Rnd 4: Sl st into the next ch-3 sp. Ch 3 (counts as dc), (2 dc, ch 2, 3 dc) in the same sp for the first corner, then 3 dc in the next sp. (3 dc, ch 2, 3 dc) in the next sp, 3 dc in the next sp; rep from * 2 more times, sl st to the top of ch-3. Fasten off. (36 dc, 4 ch-2 corner sps)*
Each side now has 9 dc between the corner spaces: 3 from each corner group plus the 3-dc group in the middle. The 5th dc of each side is the center stitch. The lilac square should measure 2.75 in (7.0 cm).
Cream Fans and Lattice
Rnd 5 (fan round): Join cream with sc in any ch-2 corner sp. Ch 4, sk 4 dc, (dtr, ch 1) 6 times in the next dc, dtr in the same dc, ch 4, sk 4 dc, sc in the next ch-2 corner sp; rep from * 2 more times, then rep from * to ** once. Sl st to the first sc. (4 sc, 4 fans of 7 dtr = 28 dtr, 24 ch-1 sps, 8 ch-4 sps)*
Each fan sits on the center dc of a lilac side and grows outward, toward what will become a corner of the motif. The 4 sc at the lilac points will be the midpoints of the motif’s sides, which turns the lilac square on point inside the cream frame.
Rnd 6 (fan growth): Ch 1, sc in the same sc. Ch 5, dc in the first dtr of the fan, [ch 2, dc in the next dtr] 2 times, ch 2, (dc, ch 3, dc) in the next dtr (the center dtr), [ch 2, dc in the next dtr] 3 times, ch 5, sc in the next sc; rep from * 2 more times, then rep from * to ** once. Sl st to the first sc. (4 sc, 32 dc, 24 ch-2 sps, 4 ch-3 corner sps, 8 ch-5 sps)*
You skip the ch-1 spaces of Rnd 5; the ch-2 spaces spread the fan wider. The ch-5 spaces form the first lattice lines from the fan edges to the lilac points.
Rnd 7 (squaring round): Ch 1, sc in the same sc (side midpoint). 5 sc in the ch-5 sp, sc in the next dc, [2 sc in the next ch-2 sp, sc in the next dc] 3 times, (sc, ch 2, sc) in the ch-3 corner sp, sc in the next dc, [2 sc in the next ch-2 sp, sc in the next dc] 3 times, 5 sc in the ch-5 sp, sc in the next sc; rep from * 2 more times, then rep from * to ** once. Sl st to the first sc. (132 sc, 4 ch-2 corner sps)*
Per side, counting from corner space to corner space: 10 (half fan) + 5 + 1 (midpoint) + 5 + 10 (half fan) = 31 sc. Add the 2 corner sc and each side has 33 sts. Check: 4 x 31 + 8 = 132.
Number the 31 stitches of each side 1 to 31, starting after a corner. The midpoint is stitch 16.
Rnd 8 (lattice round): Ch 1, sc in the same st (midpoint, st 16). [Ch 3, sk 3, sc in the next st] 3 times, ch 3, sk 3, (sc, ch 3, sc) in the ch-2 corner sp, ch 3, sk 3, [sc in the next st, ch 3, sk 3] 3 times, sc in the next st (midpoint); rep from * 2 more times, then rep from * to ** once. Sl st to the first sc. (36 sc, 32 ch-3 loops, 4 ch-3 corner sps)*
The sc land on stitches 4, 8, 12, 16, 20, 24 and 28 of each side, so the lattice is symmetrical around the midpoint. Each side has 8 ch-3 loops and 7 sc between the corner sc.
Rnd 9 (joining edge): Ch 1, sc in the same sc (midpoint). [3 sc in the next ch-3 loop, sc in the next sc] 3 times, 3 sc in the next ch-3 loop, sc in the corner sc, (sc, ch 2, sc) in the ch-3 corner sp, sc in the next corner sc, [3 sc in the next ch-3 loop, sc in the next sc] 3 times, 3 sc in the next ch-3 loop, sc in the next sc (midpoint); rep from * 2 more times, then rep from * to ** once. Sl st to the first sc. Fasten off and weave in the ends. (140 sc, 4 ch-2 corner sps)*
Per side: 1 + 15 + 1 (midpoint) + 15 + 1 = 33 sc between the corner spaces, plus 2 corner sc = 35 sts per side. Each corner sc belongs to one side only, so 4 x 35 = 140 with nothing counted twice.
Make All Pieces
Make 112 motifs in total, 56 for each panel. Every motif uses both colors: lilac for Rnds 1–4 and cream for Rnds 5–9. Block a few motifs from the batch partway through to make sure your tension has not drifted.
Layout for one panel (M = motif; 4 columns x 14 rows):
Row 1:   M  M  M  M
Row 2:   M  M  M  M
Row 3:   M  M  M  M
Row 4:   M  M  M  M
Row 5:   M  M  M  M
Row 6:   M  M  M  M
Row 7:   M  M  M  M
Row 8:   M  M  M  M
Row 9:   M  M  M  M
Row 10:  M  M  M  M
Row 11:  M  M  M  M
Row 12:  M  M  M  M
Row 13:  M  M  M  M
Row 14:  M  M  M  M
Turn every motif the same way, RS up. Because the motif is symmetrical, any side can face up.
Joining
Method: Flat slip stitch join in cream, worked on the RS through the back (outer) loops of Rnd 9.
Stitch-to-stitch logic: Hold two motifs side by side, RS up. Start in the matching corner ch-2 spaces and sl st through both. Then sl st through the outer loop of each matching stitch pair: corner sc, 33 sc, corner sc. That is 35 stitches matched one to one. Finish with a sl st through both of the next corner ch-2 spaces.
- Join all horizontal seams first. Work each seam across the 4 motifs in one continuous line, carrying from one motif pair to the next through the corner spaces.
- Then join all vertical seams. Run each one the full 14 motifs. Where it crosses a horizontal seam, sl st through the joined corner spaces so all four corners meet in one neat point.
Tension: Keep each slip stitch as tall as the sc it sits on. If the seam is too tight, the lattice puckers and the panel shortens. If it is too loose, the seam shows as a gap. Check every few seams that the joined edge lies flat with no ripples.
Checkpoint: A joined panel measures 24 x 84 in (61.0 x 213.4 cm), which is 4 x 6 in by 14 x 6 in. The flat join adds no measurable width.
Border
Border gauge: The border keeps the motif edge gauge of about 5.8 sts per inch (2.3 per cm).
Rnd 1: With RS facing, join cream with sc in a top corner ch-2 sp of the panel. Work 1 sc in every Rnd 9 stitch of every motif. At the seams, do not work into the joined corner spaces; go straight from the last stitch of one motif to the first stitch of the next. At each of the 4 outer panel corners, work (sc, ch 2, sc) in the corner ch-2 sp. Sl st to the first sc.
- Short edge: 4 motifs x 35 = 140 sts worked 1-per-stitch, plus 2 corner sc = 142 sts per side.
- Long edge: 14 motifs x 35 = 490 sts worked 1-per-stitch, plus 2 corner sc = 492 sts per side.
- Total: (140 + 140 + 490 + 490) = 1,260 sts worked 1-per-stitch, plus 8 corner sc = 1,268 sts, plus 4 ch-2 corner sps.
Rnd 2 (shell edge): Sl st into the corner ch-2 sp. Ch 3 (counts as dc), 6 dc in the same sp. *Sk the corner sc. Along the side, work [sc in the next st, sk 1, 5 dc in the next st, sk 1, sc in the next st] across to the last st before the next corner sc. Sk the corner sc, 7 dc in the corner ch-2 sp; rep from * around, ending with the last side repeat. Sl st to the top of ch-3. Fasten off and weave in the ends.
- Short edge: 140 sts ÷ 5 = 28 shells, each worked as sc + 5 dc + sc = 7 sts, giving 196 sts per side.
- Long edge: 490 ÷ 5 = 98 shells, giving 686 sts per side.
- Corners: 4 fans x 7 dc = 28 sts.
- Total: 196 + 196 + 686 + 686 + 28 = 1,792 sts.
Why the math works: Rnd 1 works one sc per motif stitch, so it matches the motif gauge and adds no ruffling or pulling. The shell repeat of 5 divides evenly into each motif’s 35 stitches, so every motif side gets exactly 7 shells and the edge looks the same along the whole panel. Because each repeat starts and ends with sc, two sc sit side by side between shells and both ends of every side mirror each other. The 7-dc corner fans give the corners enough stitches to turn flat. The border adds 0.75 in (1.9 cm) per edge, which brings the panel to 25.5 x 85.5 in (64.8 x 217.2 cm).
Final Blocking
- Lay the panel on your blocking surface RS up. Because of its length, you may need to block it in two halves.
- Mist it with water until it is evenly damp but not dripping.
- Pin the four outer corners first, to 25.5 x 85.5 in (64.8 x 217.2 cm).
- Pin along each seam line so every motif measures 6 in (15.2 cm), and check the columns with your tape.
- Pin the tip of each border shell to open the edge.
- Gently open the lattice loops and the fans with your fingers so the lilac diamonds sit straight on point.
- Let it dry completely, then unpin. Repeat for the second panel and compare the two side by side.
Final Quality-Control Checklist
- Every motif has 35 sts per side and 140 sts in Rnd 9.
- All lilac diamonds point straight up and down, and the columns line up.
- Seams lie flat, with all four corners meeting at each intersection.
- Border Rnd 1 has 142 sts on each short edge and 492 on each long edge.
- Each short edge has 28 shells and each long edge has 98.
- Both panels measure 25.5 x 85.5 in (64.8 x 217.2 cm).
- All ends are woven securely, especially where light shows through.
Troubleshooting
- The motif cups: Your Rnd 5 dtr are probably too short. Pull up taller loops or go up a hook size for that round only.
- The motif ruffles: Your ch-5 spaces in Rnd 6 may be too loose. Chain more firmly.
- The diamond sits crooked: The Rnd 5 fan must go in the 5th dc of each lilac side. Recount the 9 dc.
- A side count is off in Rnd 9: Recount Rnd 8. It should have 8 loops and 7 sc between corners.
- The panel is shorter than 84 in (213.4 cm): The seams are too tight. Rework the loosest seams with a larger hook.
- The border waves: Make sure Rnd 1 skips the seam corner spaces and adds no stitches there.
Care
Hand wash in cool water with mild soap, press out the water in a towel, and dry flat, re-pinning to size if needed. Do not tumble dry.
Final Notes
The whole curtain rests on one measurement chain. A lilac center of 2.75 in (7.0 cm) grows into a blocked 6 in (15.2 cm) motif with 35 sts per side. Joining 4 x 14 motifs gives 24 x 84 in (61.0 x 213.4 cm). Border Rnd 1 works exactly 140 and 490 sts along the sides, and the 0.75 in (1.9 cm) shell edge brings each panel to 25.5 x 85.5 in (64.8 x 217.2 cm). If every motif hits its count and size, the panels will hang straight and match.
Happy crocheting!