
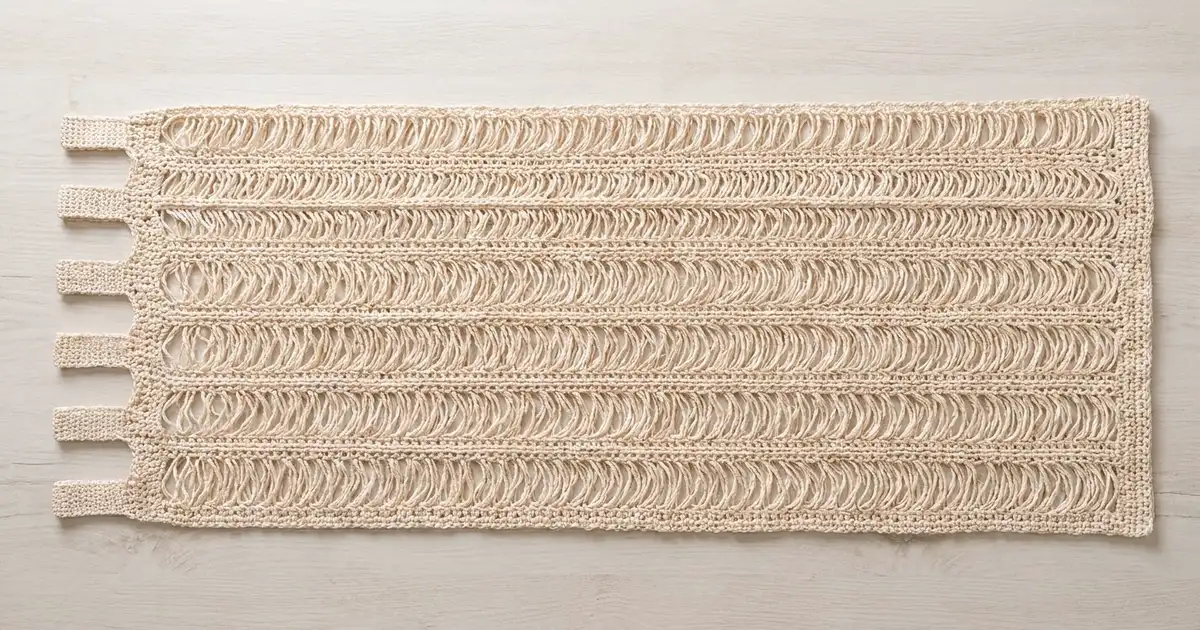
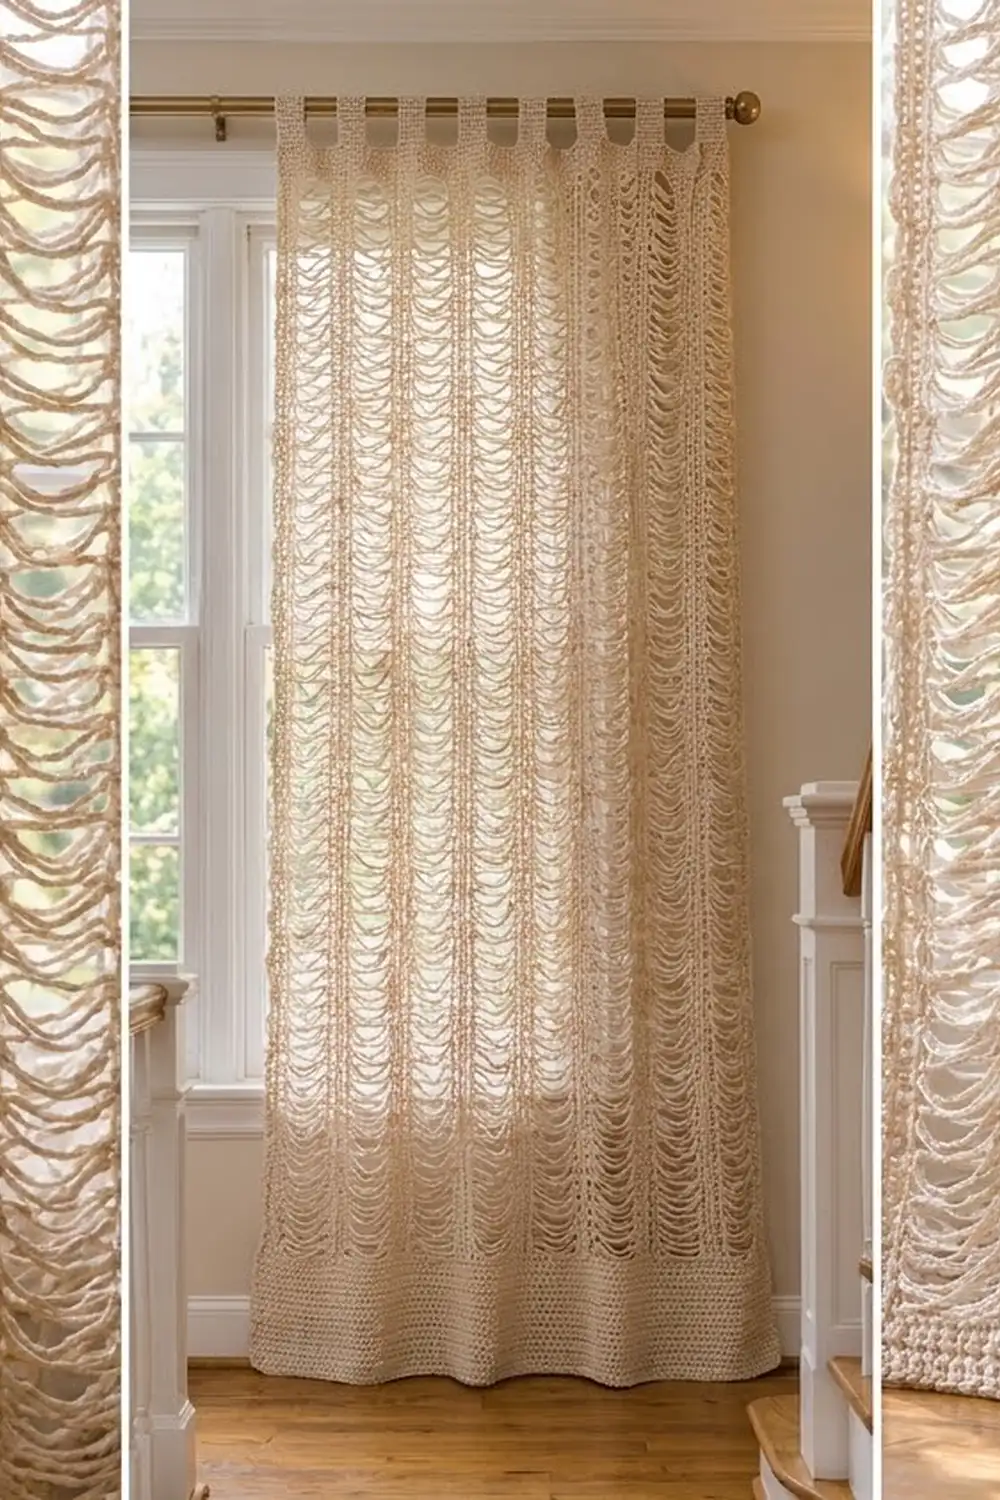
The Linen Ladder Curtain is a light, airy window panel made with hairpin lace. Long open loops run down the panel in tall columns. A solid crocheted spine runs down the middle of each strip, and a firm band sits where each pair of strips meets. The result filters daylight softly without hiding the view.
The panel uses one cream cotton yarn. Because there is only one color, the texture does all the work: open loops, solid spines and a solid bottom band. It suits farmhouse, coastal and neutral rooms, and it looks best hung as a matching pair.
This pattern uses US crochet terms. One finished panel measures 30.5 in (77.5 cm) wide and 85 in (215.9 cm) long, not counting the tabs. The tabs add about 2.5 in (6.4 cm) above the top edge.
Construction is simple. You make eight hairpin lace strips on a loom and edge both long sides of each strip. Then you add a short row to each end and join the strips with slip stitches. A single-crochet border goes around the whole panel, with a deeper band at the bottom, a shorter band at the top and six fold-over tabs.
Finished Size and Construction
- Finished size: 30.5 in × 85 in (77.5 cm × 215.9 cm), plus tabs
- Skill level: Intermediate (hairpin lace basics needed)
- Terminology: US crochet terms
- Yarn weight: Worsted (#4) cotton or cotton blend
- Hook: 5.0 mm (H-8)
- Loom: Adjustable hairpin lace loom set to 3 in (7.6 cm)
- Number of pieces: 8 hairpin lace strips per panel
- Layout: 8 strips side by side, 1 row high
- Strip size (edged): 3.75 in × 81.5 in (9.5 cm × 207.0 cm)
- Size before border: 30 in × 81.5 in (76.2 cm × 207.0 cm)
- Border depth: bottom 2 in (5.1 cm), top 1.5 in (3.8 cm), sides 0.25 in (0.6 cm)
Make two panels for a pair like the one in the photo.
Materials
Yarn: Use a smooth, firmly plied worsted cotton or cotton-linen blend. Cotton holds the loops open and hangs straight. Avoid fuzzy or very stretchy yarns, because the loops will sag and the panel will grow in length.
- Cream: about 500 g, 915 m (1,000 yd) per panel, or roughly five 100 g skeins of about 183 m (200 yd) each
These amounts include a margin of about 15% for gauge differences and the test strip. Buy all skeins from one dye lot.
Tools:
– 5.0 mm (H-8) crochet hook
– Adjustable hairpin lace loom
– Locking stitch markers (at least 10)
– Tapestry needle
– Scissors
– Measuring tape
– Rustproof pins and a large blocking surface (or a clean floor with towels)
– Spray bottle
Abbreviations (US Terms)
- ch – chain
- sc – single crochet
- sl st – slip stitch
- sp – space
- st(s) – stitch(es)
- RS / WS – right side / wrong side
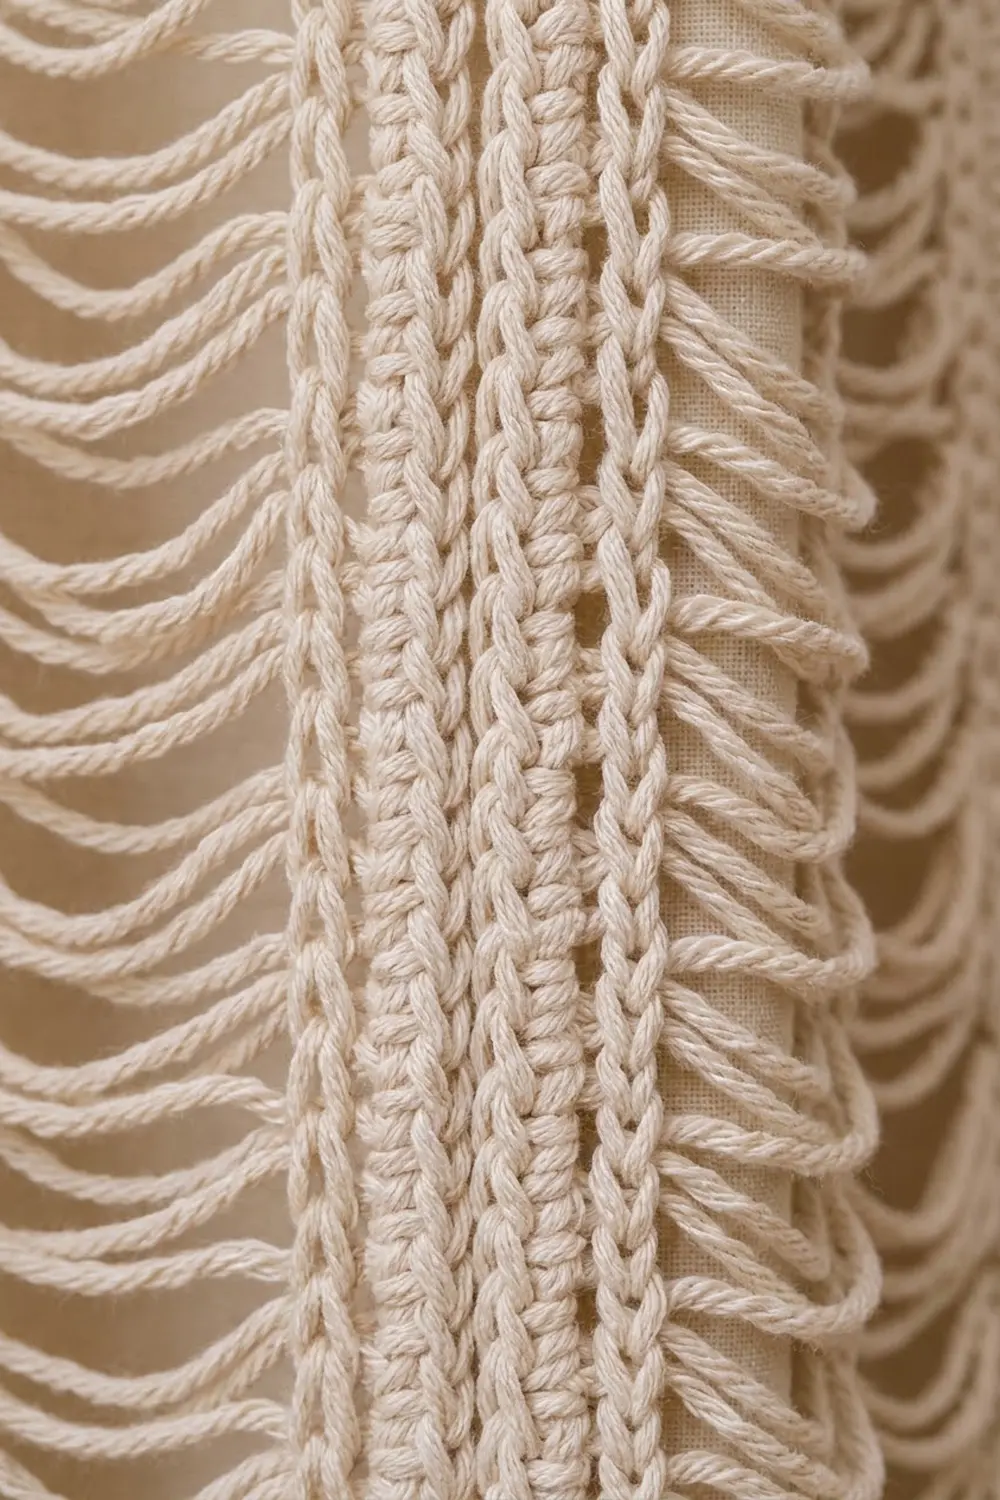
Special technique – Hairpin lace loop: With the loom’s spacer bar at the bottom, wrap the yarn around the right prong. Turn the loom from right to left so the yarn wraps around the new right prong. Insert the hook under the front strand of the loop on the left prong, yarn over and pull up a loop, then yarn over and pull through both loops on the hook. That makes 1 sc for the spine. Each sc adds 1 loop on each side.
Loop group: 3 consecutive loops on the same side of a strip, picked up together without twisting.
Gauge and Checkpoints
Make a test strip before starting the panel.
Loop gauge: 4 loops per side = 1 in (2.5 cm), measured along the spine with the strip relaxed on the loom.
Border gauge: 16 sc and 16 rows = 4 in (10.2 cm).
Test strip: Make 36 loops per side, then work the Long-Side Edging on both sides, giving 12 sc and 11 ch-2 sps per side (34 sts).
- Checkpoint 1: The spine should measure 9 in (22.9 cm).
- Checkpoint 2: The edged strip should measure 3.75 in (9.5 cm) wide.
If your strip is too long, go down a hook size for the spine sc. If it is too short, go up a hook size. If it is too wide, tighten the edging chains, or set the loom to 2.75 in (7.0 cm). If it is too narrow, loosen the edging chains a little.
Check the border gauge on a small sc swatch. If you have more than 16 sc per 4 in (10.2 cm), use a larger hook. If you have fewer, use a smaller hook.
Hairpin Lace Strips (Make 8)
Spine: Set the loom to 3 in (7.6 cm). Make a slipknot and place it centered between the prongs. Following the special technique, work until there are 324 loops on each side, which means 324 spine sc. Fasten off and leave a 6 in (15.2 cm) tail.
When the loom fills up, take off the bottom bar. Slide all but the last 20 loops off the bottom, put the bar back and keep working. Thread a spare strand of contrasting yarn through each side’s loops to keep them in order.
Checkpoint: 324 loops per side, with the spine about 81 in (205.7 cm) long when relaxed.
Long-Side Edging (work on each long side): Hold the strip with the loops lying flat and untwisted.
Row 1: Join the yarn at the first group of 3 loops. Ch 1, sc through the first loop group, ch 2, sc through the next loop group; repeat from * 106 more times. Fasten off.
That gives 108 sc and 107 ch-2 sps, which is 108 + 214 = 322 sts per long side. Count every chain as a stitch, because the joining and border rows work into each one.
Repeat on the other long side, starting at the same end so both edgings run in the same direction.
Short-End Row (work on each short end):
With the RS facing, join the yarn in the row-end of one edging. Ch 1, then work:
- 1 sc in the edging row-end
- 6 sc spread evenly across the end loops on that side
- 1 sc in the end of the spine
- 6 sc spread evenly across the end loops on the other side
- 1 sc in the other edging row-end
That makes 15 sc, and the count includes both corner stitches. Fasten off.
Repeat on the other short end.
Checkpoint: The edged strip is 3.75 in × 81.5 in (9.5 cm × 207.0 cm). Each short end has 15 sts (3.75 in at 4 sts per inch), and each long side has 322 sts.
Weave in the spine tails along the spine.
Make All Pieces
- Cream: 8 strips, all identical
Layout (1 row × 8 strips):
[S1][S2][S3][S4][S5][S6][S7][S8]
Lay the strips out with all spines vertical and all edging rows starting at the bottom. Mark the bottom of each strip with a stitch marker.
Joining
Method: Flat slip-stitch seam, worked from the RS.
Place Strip 1 and Strip 2 side by side with the RS up and the bottoms level. Join the yarn at the bottom corner. Insert the hook through the back loop of the first edging st on Strip 1 and the back loop of the matching st on Strip 2, then sl st.
Stitch-to-stitch logic: Match sc to sc and chain to chain all the way up. Each seam joins 322 sts to 322 sts and has 322 sl sts. Do not add or skip stitches at the ends. The short-end rows are not part of the seam.
Tension: Keep the slip stitches as loose as the edging. Tight slip stitches pull the seam up shorter than the strips and make the panel ripple. If the seam is shorter than the strip beside it, rework it with a hook one size larger.
Join Strip 3 to Strip 2, and continue until all 8 strips are joined with 7 seams. Place a marker every 50 sts on both edges to keep the strips lined up.
Size checkpoint: The panel measures 30 in × 81.5 in (76.2 cm × 207.0 cm). The bottom edge has 8 × 15 = 120 sts, and so does the top edge. Each long side has 1 × 322 = 322 sts.
Border
Border gauge: 16 sc = 4 in (10.2 cm), which is 4 sts per inch (2.5 cm).
Rnd 1 (RS): Join the yarn in the first st at the bottom right corner. Ch 1, then work:
- Bottom: sc in each of the 120 short-end sts across all 8 strips
- Ch 1 for the corner
- Side: sc in each of the 322 edging sts up the outer long side of Strip 8 (skip the short-end row-end)
- Ch 1
- Top: sc in each of the 120 short-end sts
- Ch 1
- Side: sc in each of the 322 edging sts down Strip 1
- Ch 1, then sl st to the first sc
Count: 120 + 322 + 120 + 322 = 884 sc plus 4 corner ch-1 sps. Do not fasten off.
Bottom Band:
Row 2: Sl st into the corner ch-1 sp and turn. Ch 1, sc in the ch-1 sp, sc in each of the 120 bottom sc, then sc in the next corner ch-1 sp. That makes 122 sc (120 worked one per existing st + 2 extra in the corners). Turn.
Rows 3–8: Ch 1, sc in each st across (122 sc). Turn.
Fasten off after Row 8. The bottom band is Rnd 1 plus 7 rows, so it is 8 rows deep: 2 in (5.1 cm).
Top Band:
Row 2: With the RS facing, join the yarn in the top right corner ch-1 sp. Ch 1, sc in the same sp, sc in each of the 120 top sc, then sc in the next corner ch-1 sp (122 sc). Turn.
Rows 3–6: Ch 1, sc in each st across (122 sc). Turn.
Do not fasten off. The top band is 6 rows deep: 1.5 in (3.8 cm).
Tabs (make 6): Each tab is 7 sts wide, with 16 sts between tabs: 6 × 7 + 5 × 16 = 42 + 80 = 122.
Tab 1: Ch 1, sc in the first 7 sts. Turn. Work 23 more rows of 7 sc (24 rows in total), which is 6 in (15.2 cm). Fasten off and leave a 12 in (30.5 cm) tail.
Tabs 2–6: Skip 16 sts after the previous tab. Join the yarn in the next st and work as Tab 1.
Fold each tab to the WS. Overlap 1 in (2.5 cm) of the tab onto the back of the top band and whipstitch it in place with the tail. Each loop now stands 2.5 in (6.4 cm) above the top edge and fits a rod up to 1.25 in (3.2 cm) across.
Why the math works: The strips’ short ends total 120 sts, which is 30 in at 4 sts per inch. The 322-st long sides match 81.5 in at the same gauge. The corner sc on each side add 0.25 in (0.6 cm), giving 30.5 in (77.5 cm). The length is 2 + 81.5 + 1.5 = 85 in (215.9 cm).
Final Blocking
- Weave in all ends along the spines or the bands, never across the open loops.
- Lay the panel flat on towels with the RS up.
- Mist it evenly until it is damp but not dripping.
- Pin the corners to 30.5 in × 85 in (77.5 cm × 215.9 cm).
- Line up each seam as a straight vertical line, and pin it every 6 in (15.2 cm).
- Gently spread each loop group so the loops lie parallel and even.
- Pin the bottom band straight and flat.
- Let it dry completely, which takes 24–48 hours, before unpinning.
- Hang it for one day, then measure again. Cotton may relax by up to 1 in (2.5 cm).
Final Quality-Control Checklist
- 8 strips, each with 324 loops per side
- Every long-side edging has 108 sc and 107 ch-2 sps (322 sts)
- Every short end has 15 sc
- 7 seams, each with 322 sl sts and no puckering
- Border Rnd 1 has 884 sc plus 4 corner sps
- The bottom band has 8 rows of 122 sc
- The top band has 6 rows of 122 sc
- 6 tabs, evenly spaced and securely sewn
- The panel measures 30.5 in × 85 in (77.5 cm × 215.9 cm)
- No twisted loop groups
Troubleshooting
The loops are uneven in length. Keep the spine centered on the loom, and wrap with steady, even tension.
The loop groups twist. Take the edging out and pick up the loops in the same direction (front to back) every time.
The seams pucker. The slip stitches are too tight. Rework them with a larger hook.
The panel is wavy at the bottom. Recount the short ends. Each one must be exactly 15 sc.
The panel grows when hung. The yarn is too stretchy, or the spine is too loose. Block it again and let it dry flat, or switch to a firmer cotton.
The tabs sag unevenly. Check that each tab is 24 rows and that each overlap is exactly 1 in (2.5 cm).
Care
Hand wash in cool water with mild soap, press out the water in a towel, and dry the panel flat. Don’t hang it to dry while wet, because the weight will stretch the loops.
Final Notes
The measurements build on each other. Each strip is 324 loops long (81 in / 205.7 cm) and 3.75 in (9.5 cm) wide once edged. Each long side has 322 sts and each short end has 15. Eight strips joined stitch to stitch make a 30 in × 81.5 in (76.2 cm × 207.0 cm) panel. The border adds 0.25 in (0.6 cm) on each side, 2 in (5.1 cm) at the bottom and 1.5 in (3.8 cm) at the top, for a finished size of 30.5 in × 85 in (77.5 cm × 215.9 cm). If you check your gauge at each stage, the panel will hang straight.
Happy crocheting!