

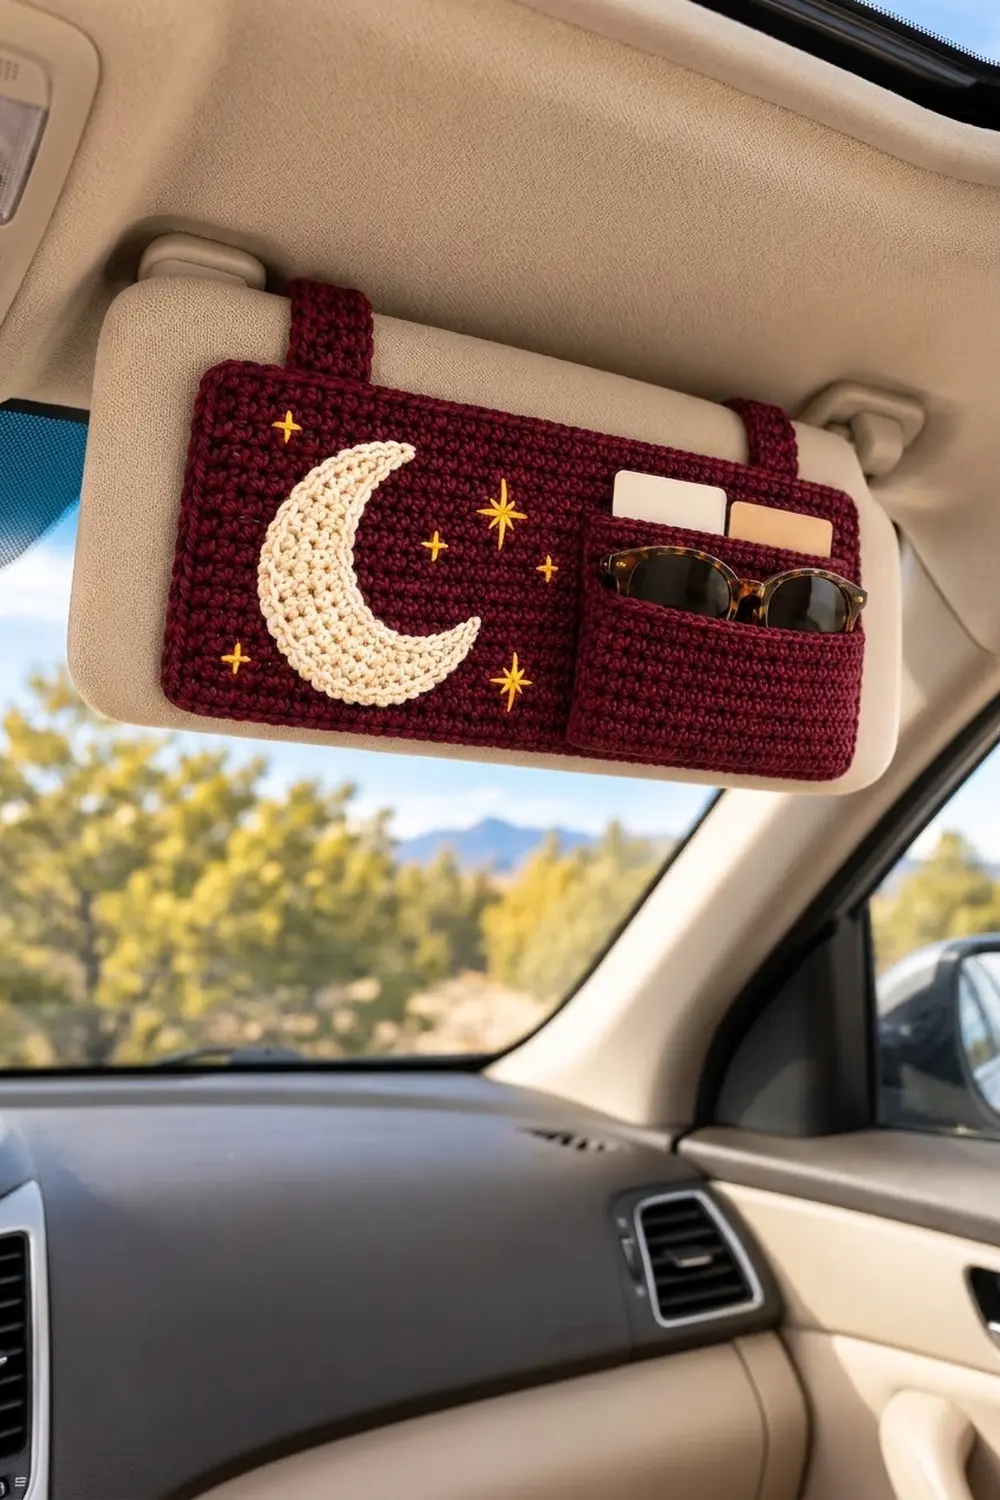
The Midnight Crescent Visor Organizer is a slim crocheted panel that straps onto your car’s sun visor. It keeps sunglasses, cards and receipts within reach. The deep burgundy background shows off a cream crescent moon appliqué and a scatter of golden embroidered stars.
The panel, pocket and straps are wine burgundy, the moon is cream and the stars are golden yellow. The overall look is cozy and a little celestial. Dense single crochet keeps the fabric firm, so it lies flat against the visor without sagging.
This pattern uses US crochet terms. The finished organizer measures 11 in x 5 in (27.9 cm x 12.7 cm), not counting the straps.
You start by crocheting a rectangular back panel in rows and adding a two-round border with rounded corners. Next you make one pocket, two straps and a crescent moon. The pocket and moon are sewn to the front and the stars are embroidered on. The straps are sewn to the back, and snaps on their free ends fasten them around the visor.
Finished Size and Construction
- Finished size: 11 in x 5 in (27.9 cm x 12.7 cm), not counting the straps
- Skill level: Easy / advanced beginner
- Terminology: US crochet terms
- Yarn weight: Worsted (#4) for the crochet; DK (#3) yarn or embroidery floss for the stars
- Hook: 4.0 mm (US G-6)
- Number of pieces: 1 finished organizer made from 5 crocheted parts: 1 back panel, 1 pocket, 2 straps, 1 moon
- Layout: Moon on the left half, pocket on the right half, straps along the top edge
- Back panel before border: 10 in x 4 in (25.4 cm x 10.2 cm)
- Border depth: 0.5 in (1.3 cm) on every edge (2 rounds)
- Pocket: 4.5 in x 3 in (11.4 cm x 7.6 cm) finished
- Straps: 1.25 in x 10 in (3.2 cm x 25.4 cm) each
- Moon: about 3.75 in (9.5 cm) tall and 1.25 in (3.2 cm) at its widest
Materials
Choose a smooth worsted yarn with good stitch definition. A cotton or cotton-acrylic blend holds up well to the heat and sun inside a car. Fuzzy yarns hide the stitches and can shed lint onto your sunglasses.
- Burgundy (main color): 80 g, about 160 m
- Cream (moon): 10 g, about 20 m
- Golden yellow (stars): 5 g, about 10 m of DK yarn, or 1 skein of 6-strand embroidery floss
Tools:
- 4.0 mm (US G-6) crochet hook
- Tapestry needle
- Sharp embroidery needle (if using floss)
- 2 sew-on snaps, 0.5 in (1.3 cm), or 2 small squares of hook-and-loop tape
- Sewing thread to match the burgundy
- Locking stitch markers
- Straight pins
- Measuring tape
The quantities include a margin of about 20 percent to cover your swatch and small differences in tension.
Abbreviations (US Terms)
- ch = chain
- sl st = slip stitch
- sc = single crochet
- hdc = half double crochet
- dc = double crochet
- st(s) = stitch(es)
- Rnd = round
- RS / WS = right side / wrong side
Special technique: 3-sc corner. Work 3 sc into the same corner stitch. The middle sc of the group becomes the new corner stitch. On the next round, work the next 3-sc corner into that middle sc. These corner groups give the panel its soft rounded corners.
Gauge and Checkpoints
Gauge: 16 sc and 16 rows = 4 in (10.2 cm) in sc with a 4.0 mm hook.
Crochet tightly. The fabric needs to be firm enough to keep its shape on the visor.
Make one strap first and use it as your gauge swatch. It is quick to make and it shows your row gauge. After 16 rows, the strap should measure 4 in (10.2 cm) long and 1.25 in (3.2 cm) wide.
Checkpoints:
- Panel, Row 1: 40 sc = 10 in (25.4 cm)
- Panel, Row 16: 10 in x 4 in (25.4 cm x 10.2 cm)
- Panel after border: 11 in x 5 in (27.9 cm x 12.7 cm)
- Pocket before edging: 4 in x 2.5 in (10.2 cm x 6.4 cm)
- Pocket after edging: 4.5 in x 3 in (11.4 cm x 7.6 cm)
If your piece comes out too big, switch to a hook 0.5 mm smaller. If it comes out too small, switch to a hook 0.5 mm larger. Keep the stitch counts as written, because the placement of the pocket and moon depends on these exact sizes.
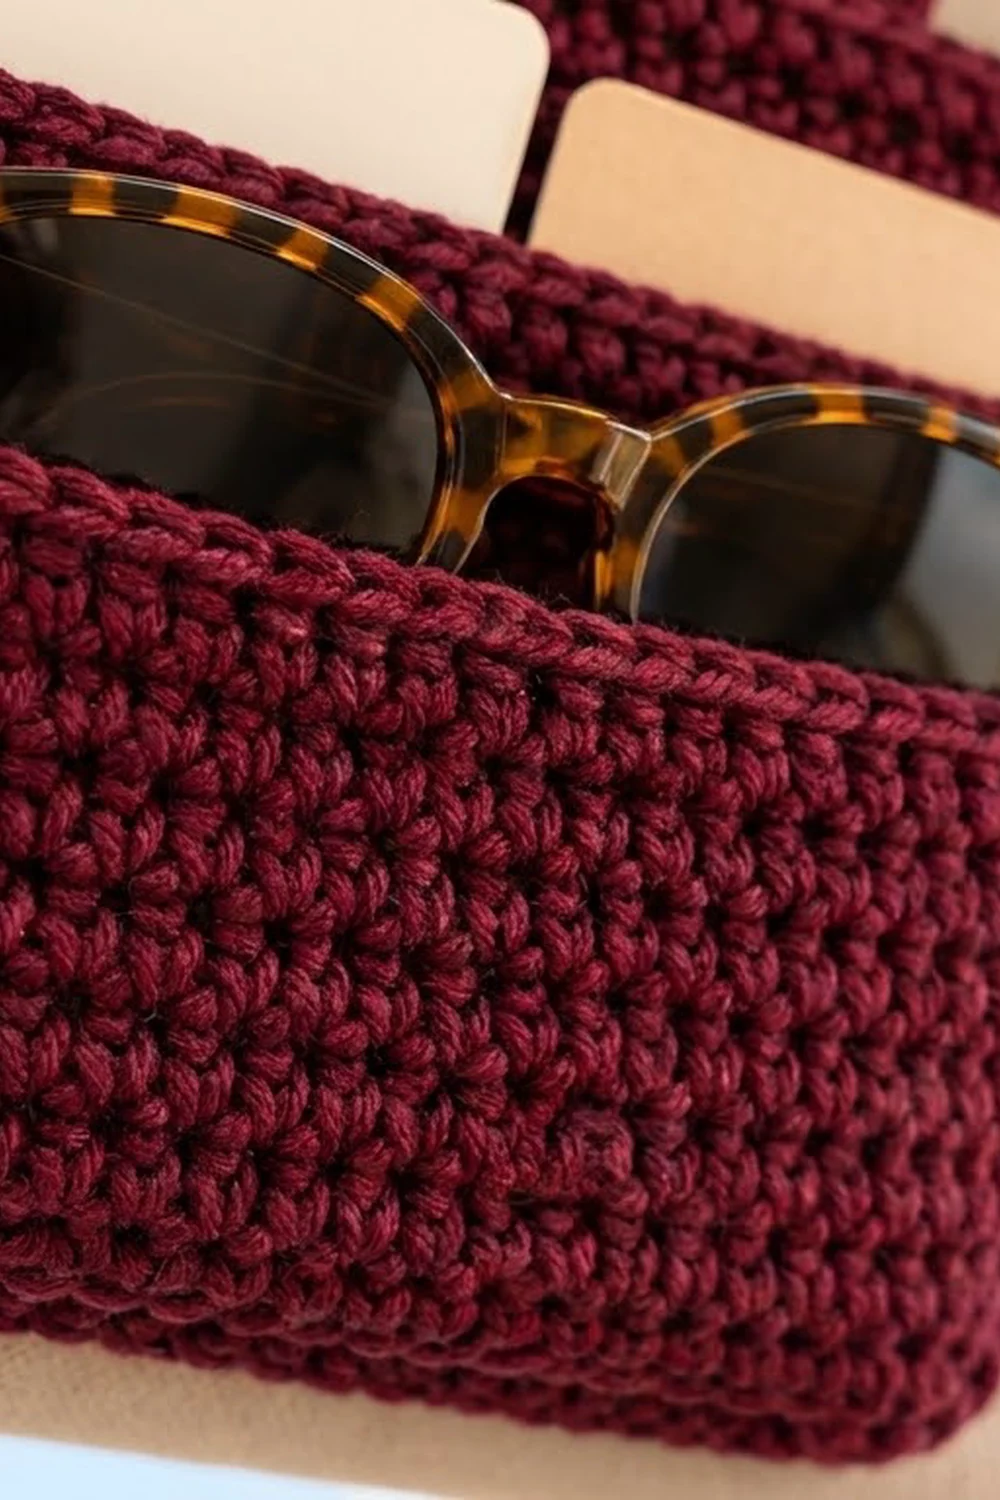
Strap (Make 2)
With burgundy, ch 6.
Row 1: Sc in the 2nd ch from hook and in each ch across, turn. (5 sc)
Rows 2–40: Ch 1 (does not count as a st), sc in each st across, turn. (5 sc)
Fasten off, leaving a 12 in (30.5 cm) tail for sewing. Each strap measures 1.25 in x 10 in (3.2 cm x 25.4 cm).
Back Panel
With burgundy, ch 41.
Row 1 (RS): Sc in the 2nd ch from hook and in each ch across, turn. (40 sc)
Rows 2–16: Ch 1, sc in each st across, turn. (40 sc)
The panel should now measure 10 in x 4 in (25.4 cm x 10.2 cm). Do not fasten off. Continue to the Border section below.
With burgundy, ch 17.
Row 1: Sc in the 2nd ch from hook and in each ch across, turn. (16 sc)
Rows 2–10: Ch 1, sc in each st across, turn. (16 sc)
The pocket should now measure 4 in x 2.5 in (10.2 cm x 6.4 cm). Do not fasten off.
Pocket Edging Rnd (conversion round): Work this round in four parts, then join.
- Top: Ch 1. Work a 3-sc corner in the first st, sc in the next 14 sts, then work a 3-sc corner in the last st.
- First side: Turn the piece and work 1 sc in the row end of each of Rows 9 through 2 (8 sc).
- Bottom: Work a 3-sc corner in the first foundation ch, sc in the next 14 free loops, then work a 3-sc corner in the last foundation ch.
- Second side: Work 1 sc in the row end of each of Rows 2 through 9 (8 sc).
Sl st to the first sc to join.
Count: 48 sts worked 1 per existing st or row end + 8 extra corner sts = 56 sc. That is 14 sc between corner groups on the top and on the bottom, 8 sc on each side, and 4 corner groups of 3 sc.
Fasten off, leaving a 24 in (61.0 cm) tail for sewing. The pocket should measure 4.5 in x 3 in (11.4 cm x 7.6 cm).
Crescent Moon
With cream, ch 18. Work Row 1 into the back bumps of the chain. This keeps the front loops free and neat for the edging.
Row 1: Sl st in the 2nd ch from hook, sc in the next 2 ch, hdc in the next 3 ch, dc in the next 6 ch, hdc in the next 3 ch, sc in the next 2 ch, turn. (17 sts)
Row 2 (growth row): Ch 1, sc in the first 2 sts, hdc in the next 3 sts, 2 dc in each of the next 6 sts, hdc in the next 3 sts, sc in the next 2 sts, sl st in the sl st, turn. (23 sts)
The extra stitches in the middle of Row 2 make that edge longer, so it bows outward into the moon’s outer curve. The shorter foundation chain becomes the inner curve.
Rnd 3 (edging, conversion round): Ch 1. Sc in each of the 23 sts of Row 2. At the thick tip, work 3 sc across the row ends. Sc in each of the 17 free loops of the foundation chain. Work 1 sc at the thin tip, then sl st to the first sc to join.
Count: 40 sts worked 1 per existing st + 4 extra sts at the tips = 44 sc.
Fasten off, leaving an 18 in (45.7 cm) tail. Steam the moon lightly and shape it into a C curve about 3.75 in (9.5 cm) tall and 1.25 in (3.2 cm) at its widest.
Border (Back Panel)
Border gauge: The border uses the same gauge of 16 sc = 4 in (10.2 cm). Each round of sc adds 0.25 in (0.6 cm) to every edge.
Begin with the loop still on your hook from Row 16.
Rnd 1 (conversion round): Work this round in four parts, then join.
- Top: Ch 1. Work a 3-sc corner in the first st, sc in the next 38 sts, then work a 3-sc corner in the last st.
- First side: Work 1 sc in the row end of each of Rows 15 through 2 (14 sc).
- Bottom: Work a 3-sc corner in the first foundation ch, sc in the next 38 free loops, then work a 3-sc corner in the last foundation ch.
- Second side: Work 1 sc in the row end of each of Rows 2 through 15 (14 sc).
Sl st to the first sc to join.
Count: 108 sts worked 1 per existing st or row end + 8 extra corner sts = 116 sc. That is 38 sc between corner groups on the top and on the bottom, 14 sc on each side, and 4 corner groups of 3 sc.
Rnd 2 (conversion round): Ch 1. Sc in each st around, working a 3-sc corner in the middle sc of each corner group. Sl st to the first sc to join.
Count: 116 sts worked 1 per st + 8 extra corner sts = 124 sc.
- Top and bottom: 40 sc each between corner groups (the 38 from Rnd 1 plus the 2 outer sts of the old corner groups)
- Each side: 16 sc (14 + 2)
- Corners: 4 groups of 3 sc (12)
Check: 40 + 40 + 16 + 16 + 12 = 124.
Fasten off and weave in the ends.
Why the math works: A 90-degree corner needs 2 extra stitches per round to lie flat. That makes 8 extra stitches per round, and those are the only increases in the border. Two rounds at 0.25 in (0.6 cm) each add 0.5 in (1.3 cm) to every edge. That takes the 10 in x 4 in (25.4 cm x 10.2 cm) panel to 11 in x 5 in (27.9 cm x 12.7 cm).
Assembly and Embroidery
Pocket: Lay the panel RS up with the long edges running side to side. Pin the pocket on the right half, 0.25 in (0.6 cm) in from the right edge and 0.25 in (0.6 cm) up from the bottom edge. Whipstitch the right side, bottom and left side of the pocket to the panel. Go through the outer loops of the pocket edging and the matching stitches on the panel. Leave the top of the pocket open. Keep your sewing tension even: stitches that are too tight make the panel pucker, and stitches that are too loose let the pocket gape.
Moon: Pin the moon on the left half with the opening of the C facing right. Place it 1 in (2.5 cm) in from the left edge and center it between the top and bottom. Whipstitch all the way around through the edging round.
Stars: Using golden yellow, embroider 7 four-point stars around the moon:
- 3 large stars, 0.75 in (1.9 cm) tall: Make one vertical straight stitch and a shorter horizontal straight stitch across it. Then add a tiny diagonal stitch in each of the four angles to fill in the center.
- 4 small stars, 0.5 in (1.3 cm) tall: Make a simple cross of 2 straight stitches.
Place the large stars between the moon and the pocket, and spread the small stars toward the corners. Keep the stitches on the surface so nothing shows through on the back.
Straps: Turn the panel WS up.
- Lay the end of one strap over the top edge of the panel so it overlaps by 0.75 in (1.9 cm). Its outer edge should be 2 in (5.1 cm) in from the left side.
- Sew the overlap down firmly on all sides.
- Repeat with the second strap, 2 in (5.1 cm) in from the right side.
- Sew one half of a snap to the WS of each strap’s free end.
- Sew the matching half to the WS of the panel, just above the bottom border and directly below that strap.
Fit check: Set the panel on the visor. Bring each strap over the top of the visor, down the back and under the bottom edge, then snap it closed. If the straps are too long, unravel a few rows before you sew on the snaps. If they are too short, add rows. Each row changes the length by 0.25 in (0.6 cm).
Final Blocking
- Pin the panel RS up to a blocking mat at 11 in x 5 in (27.9 cm x 12.7 cm).
- Pin each rounded corner into a smooth, even curve.
- Smooth the pocket flat. Check that its top edge runs parallel to the top of the panel.
- Hold a steam iron 1 in (2.5 cm) above the fabric and steam evenly. Don’t press down on it.
- Let the piece dry completely before removing the pins, about 1–2 hours.
Final Quality-Control Checklist
- The panel measures 11 in x 5 in (27.9 cm x 12.7 cm).
- All four corners are evenly rounded.
- The pocket sits 0.25 in (0.6 cm) from the right and bottom edges and is open only at the top.
- The moon opens to the right and is centered between the top and bottom.
- All 7 stars are secure, with no loose loops on the back.
- The straps are 2 in (5.1 cm) in from each side, and the snaps line up.
- All ends are woven in.
Troubleshooting
- Wavy side edges: You worked too many sts into the row ends. Use exactly 14 per side in Rnd 1.
- Cupped corners: The 3-sc corners are too tight. Loosen your tension at the corners only.
- Moon won’t curve: Make sure Row 2 has 12 dc in the middle, then steam the moon into shape.
- Pocket gapes at the top: Add a few hidden tacking stitches at each top corner of the pocket.
- Twisted strap: Steam it flat and sew down both long edges of the overlap.
- Organizer slides on the visor: Shorten the straps by 1–2 rows.
Care
Spot clean with mild soap and cool water, then lay flat to dry. Don’t put it in the dryer.
Final Notes
Every size in this pattern comes from the gauge of 16 sc and 16 rows = 4 in (10.2 cm). At that gauge, the 40-stitch, 16-row panel measures 10 in x 4 in (25.4 cm x 10.2 cm). The two border rounds bring it to 11 in x 5 in (27.9 cm x 12.7 cm). The 4.5 in x 3 in (11.4 cm x 7.6 cm) pocket and the 3.75 in (9.5 cm) moon fit side by side on the panel, and the 10 in (25.4 cm) straps hold it on the visor. If you check each measurement as you go, your organizer will fit together as planned.
Happy crocheting!