
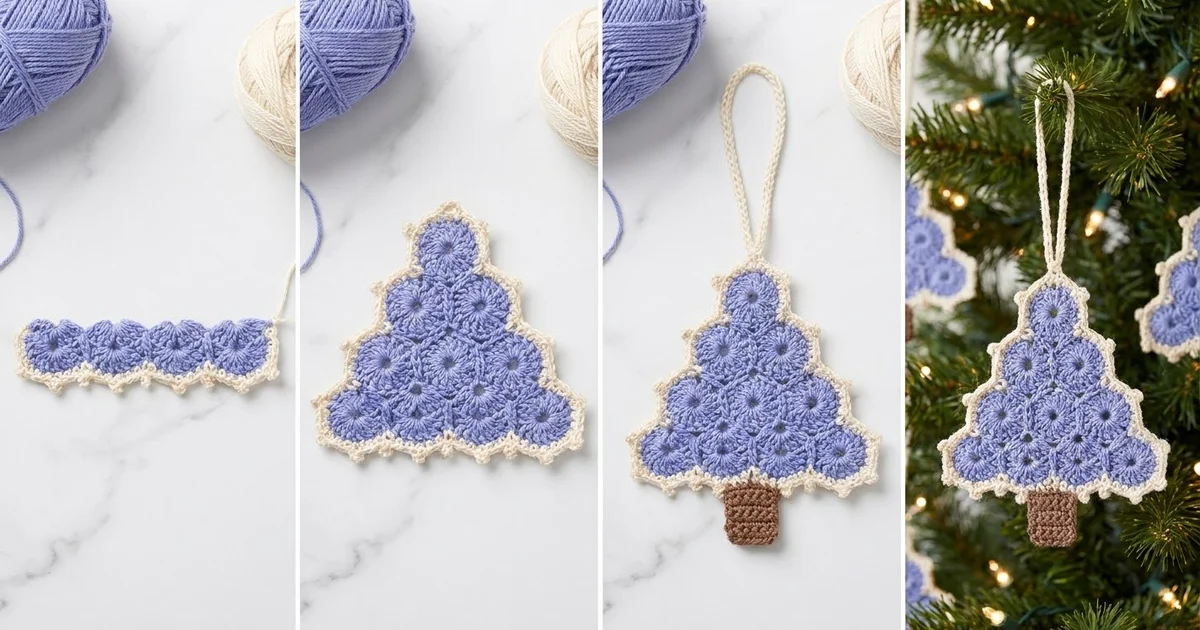
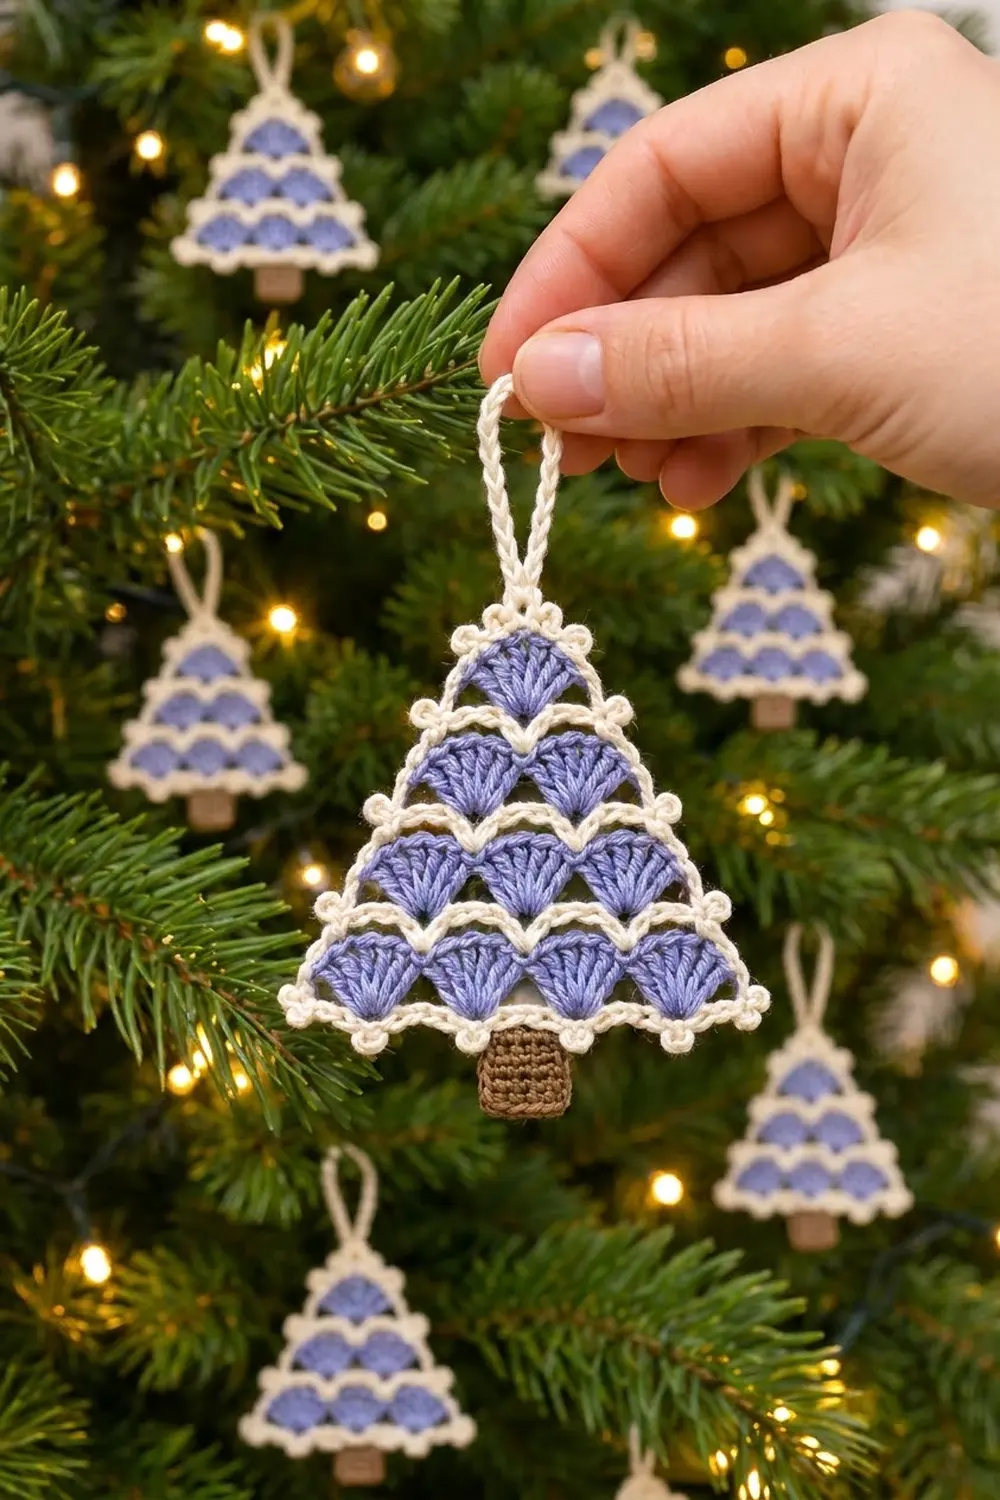
This little Christmas tree ornament is made of rows of soft periwinkle shells framed by crisp cream lines. Four tiers of shells step down from one shell at the top to four at the base. The triangle shape comes from the stitch pattern itself, so you never need to decrease.
A cream border with tiny picots outlines the tree and adds a small bump at the outer tip of every tier. The tree is finished with a chain hanging loop at the peak and a short brown single crochet trunk at the base. The look is light and lacy, and the calm, wintry colors work on a tree, a gift tag, or a window.
The pattern uses US crochet terms. The tree measures about 4.9 in (12.4 cm) wide and 4.8 in (12.2 cm) tall with the trunk. With the hanging loop it is about 6.8 in (17.3 cm) tall.
Construction is simple. You work eight rows from the base upward, with the right side always facing, switching between cream rows and periwinkle shell rows. Next you work one cream border round with picots and the hanging loop. Last, you work a brown trunk straight into the bottom edge of the border.
Finished Size and Construction
- Finished size: tree is 4.9 in (12.4 cm) wide x 3.8 in (9.7 cm) tall; 4.8 in (12.2 cm) tall with the trunk; 6.8 in (17.3 cm) tall with the loop
- Skill level: Easy (confident beginner)
- Terminology: US crochet terms
- Yarn weight: Sport weight (#2) cotton
- Hook: 3.0 mm (US C/2 or D/3)
- Number of pieces: 1. The trunk and loop are worked onto the tree, so there is no sewing.
- Layout: one triangular tree with 4 shell tiers of 4, 3, 2, and 1 shells
- Size before border: 4.5 in (11.4 cm) wide x 3.4 in (8.6 cm) tall
- Border depth: about 0.2 in (0.5 cm); picots stick out about 0.1 in (0.3 cm) more
- Trunk: 0.9 in (2.3 cm) wide x 1 in (2.5 cm) tall
Materials
Choose a smooth, mercerized or combed sport weight cotton. Cotton shows the shells clearly and holds the triangle shape after blocking. Avoid fuzzy or very stretchy yarns, which blur the cream outlines.
- Color A, Periwinkle: 5 g, about 16 m (17.5 yd)
- Color B, Cream: 6 g, about 19 m (20.8 yd)
- Color C, Brown: 2 g, about 6 m (6.6 yd)
These amounts include a margin for a gauge swatch and weaving in ends. One standard ball of each color makes many ornaments.
Tools:
- 3.0 mm crochet hook
- Tapestry needle
- Scissors
- 2 stitch markers
- Blocking mat, rustproof pins, and a spray bottle
- Ruler or tape measure
Abbreviations (US Terms)
- ch – chain
- sl st – slip stitch
- sc – single crochet
- dc – double crochet
- sk – skip
- sp(s) – space(s)
- st(s) – stitch(es)
- RS – right side
Special stitches:
- Shell: 7 dc in the same stitch.
- Picot: ch 3, sl st in 3rd ch from hook.
Gauge and Checkpoints
Gauge: 22 sc and 24 rows = 4 in (10.2 cm) in single crochet with a 3.0 mm hook. One shell row is about 0.65 in (1.7 cm) tall.
Exact gauge isn’t critical for an ornament, but it sets the finished size and how much yarn you use. Make one complete tree before you make a set, and measure it at each stage:
- After Row 1: the 25 sc measure 4.5 in (11.4 cm).
- After Row 2: the four shells span the same 4.5 in (11.4 cm) and lie flat without ruffling.
- After Row 8: the tree is 3.4 in (8.6 cm) tall from the foundation to the top of the last shell.
- After the border: the tree is 4.9 in (12.4 cm) wide x 3.8 in (9.7 cm) tall.
- After the trunk: the total height without the loop is 4.8 in (12.2 cm).
If Row 1 is longer than 4.5 in (11.4 cm), go down a hook size. If it is shorter, go up a hook size. If only the shells ruffle, try working the dc a little tighter instead of changing hooks.

Tree Body
Work every row with the RS facing. Fasten off at the end of each row and join the next color at the right-hand edge. Leave 4 in (10.2 cm) tails; you will crochet over most of them in the border.
Foundation (Color B, Cream): Ch 26.
Row 1 (Cream): Sc in 2nd ch from hook and in each ch across. Fasten off. (25 sc)
This row is the cream line under the bottom tier.
Row 2 (Periwinkle): Join Color A in the first sc. Ch 1, sc in same st, sk 2 sts, shell in next st, sk 2 sts, sc in next st; repeat from * 3 more times. Fasten off. (4 shells, 5 sc = 33 sts)*
The shells go into sc 4, 10, 16, and 22. The single sc go into sc 1, 7, 13, 19, and 25.
Row 3 (Cream): Join Color B in the 4th (center) dc of the first shell. Ch 1, sc in same st, ch 3, sc in next sc between shells, ch 3, sc in center dc of next shell; repeat from * 2 more times. Fasten off. (7 sc: 4 on shell centers and 3 in valleys; 6 ch-3 sps)*
The ch-3 arcs drape over each shell top and dip into the valleys, making the scalloped cream line between tiers.
Row 4 (Periwinkle): Join Color A in the first sc. Ch 1, sc in same st, sk ch-3 sp, shell in next sc (a valley sc), sk ch-3 sp, sc in next sc (a shell-center sc); repeat from * 2 more times. Fasten off. (3 shells, 4 sc = 25 sts)*
Each new shell sits in a valley between two shells below. This staggers the tiers and narrows the tree.
Row 5 (Cream): Join Color B in the center dc of the first shell. Ch 1, sc in same st, ch 3, sc in next sc, ch 3, sc in center dc of next shell; repeat from * once more. Fasten off. (5 sc: 3 on shell centers and 2 in valleys; 4 ch-3 sps)*
Row 6 (Periwinkle): Join Color A in the first sc. Ch 1, sc in same st, sk ch-3 sp, shell in next sc, sk ch-3 sp, sc in next sc; repeat from * once more. Fasten off. (2 shells, 3 sc = 17 sts)*
Row 7 (Cream): Join Color B in the center dc of the first shell. Ch 1, sc in same st, ch 3, sc in next sc, ch 3, sc in center dc of next shell. Fasten off. (3 sc: 2 on shell centers and 1 in the valley; 2 ch-3 sps)
Row 8 (Periwinkle): Join Color A in the first sc. Ch 1, sc in same st, sk ch-3 sp, shell in next sc, sk ch-3 sp, sc in last sc. Fasten off. (1 shell, 2 sc = 9 sts)
Checkpoint: The tree is 4.5 in (11.4 cm) wide at the base and 3.4 in (8.6 cm) tall. Each tier starts at the center of the outer shell below it, so each side steps inward in four small points.
Border
The border is one cream round of sc. It has a picot at the outer tip of each tier, two small picots at the peak, and the hanging loop.
Border gauge: 5.5 sc per inch (2.5 cm), the same as the body gauge. Each tier’s slanted edge is about 1 in (2.5 cm) long, so it takes 6 sc plus a picot.
Border Round (Cream): With RS facing, join Color B in the free loop of the foundation ch under the last sc of Row 1 (the bottom right corner).
Right side, going up:
- In the bottom right corner: (sc, picot, sc).
- Work 4 sc evenly along the outer edge of the end shell in Row 2: 1 sc in the end sc of Row 2 and 3 sc spaced along the side of the outer dc.
- In the end sc of Row 3: (sc, picot, sc).
- Work 4 sc evenly along the outer edge of the end shell in Row 4.
- In the end sc of Row 5: (sc, picot, sc).
- Work 4 sc evenly along the outer edge of the end shell in Row 6.
- In the end sc of Row 7: (sc, picot, sc).
- Work 4 sc evenly along the outer edge of the shell in Row 8.
Right side count: 24 sc (8 sc in the 4 corner groups + 16 edge sc) and 4 picots.
Top, across the 7 dc of the top shell: Sc in dc 1 and dc 2, (sc, picot) in dc 3, (sc, ch 30, sc) in dc 4, (sc, picot) in dc 5, sc in dc 6 and dc 7.
Top count: 8 sc, 2 picots, and 1 ch-30 loop.
Left side, going down: Mirror the right side:
- Work 4 sc evenly along the edge of the shell in Row 8.
- In the end sc of Row 7: (sc, picot, sc).
- Work 4 sc along the edge of the shell in Row 6.
- In the end sc of Row 5: (sc, picot, sc).
- Work 4 sc along the edge of the shell in Row 4.
- In the end sc of Row 3: (sc, picot, sc).
- Work 4 sc along the edge of the shell in Row 2.
- In the free loop of the first foundation ch (the bottom left corner): (sc, picot, sc).
Left side count: 24 sc and 4 picots.
Bottom: Sc in the free loop of each of the next 23 foundation chs. Sl st to the first sc. Fasten off.
Bottom count: 23 sc between the corner groups.
Round total: 24 + 8 + 24 + 23 = 79 sc, 10 picots, and 1 loop.
Why the math works:
- Bottom: Row 1 used 25 foundation chs. The two outer chs hold the corner groups, which are counted with the sides. That leaves exactly 1 sc for each remaining ch: 25 − 2 = 23.
- Sides: 4 tiers x (4 edge sc + 2 corner sc) = 24 sc per side. Each tier is about 1 in (2.5 cm) along the slant, and 6 sc per tier matches the gauge of 5.5 sc per inch, so the edge lies flat without cupping or rippling.
- Top: The top shell has 7 dc. You work 1 sc in each dc plus 1 extra sc in the center dc: 7 + 1 = 8 sc.
Trunk
Checkpoint before the trunk: The 23 bottom sc should measure about 4.2 in (10.7 cm). The trunk uses the center 5 of these, sc 10 through 14, which leaves 9 sc on each side. Place markers in sc 10 and sc 14.
Row 1 (Color C, Brown): Turn the tree upside down with the RS facing and join Color C in sc 10. Ch 1, sc in same st and in each of the next 4 sts, ending in sc 14. Turn. (5 sc)
Rows 2–6: Ch 1, sc in each st across. Turn. (5 sc)
Fasten off after Row 6, leaving a short tail. The trunk measures 0.9 in (2.3 cm) wide x 1 in (2.5 cm) tall. The cream border line stays visible between the shells and the trunk.
Final Blocking
- Weave in all remaining ends, keeping each tail inside its own color.
- Mist the ornament lightly until it is damp but not soaked.
- Lay it RS up on the blocking mat.
- Pin the bottom corners 4.9 in (12.4 cm) apart. Then pin the peak so the tree is 3.8 in (9.7 cm) tall.
- Pin the outer tip of each tier so both sides are straight and match each other.
- Use your fingers to ease each shell open so the 7 dc fan out evenly.
- Pin the trunk square at 0.9 in (2.3 cm) x 1 in (2.5 cm).
- Lay the hanging loop flat in a neat teardrop shape.
- Let it dry completely before you remove the pins. For a firmer ornament, spray lightly with starch before drying.
Final Quality-Control Checklist
- 4 shell tiers with 4, 3, 2, and 1 shells, and 7 dc in every shell
- Every cream arc row drapes over the shell tops and dips into the valleys
- Border has 79 sc: 24 on each side, 8 across the top, and 23 along the bottom
- 4 picots on each side and 2 at the peak, for 10 picots in total
- Trunk is 5 sc wide x 6 rows tall and centered on the bottom edge
- Tree measures 4.9 in (12.4 cm) x 3.8 in (9.7 cm), not counting the trunk
- Hanging loop is centered and firmly anchored
- No ends show on the front
Troubleshooting
Shells ruffle or curl: Your dc are looser than your sc. Work the dc more snugly, or go down a hook size for the shell rows only.
Tree leans to one side: Check that each shell went into a valley sc and that you skipped exactly one ch-3 sp on each side of it.
Side edges wave: There are too many sc on the slanted edges. Keep to 4 sc per tier edge plus the corner groups.
Side edges pull in: There are too few sc, or the border is too tight. Loosen your tension slightly and confirm 24 sc per side.
Trunk is off center: Recount the 23 bottom sc and restart in sc 10.
Loop twists: Block it flat, or work a row of sl st back along the ch-30 to make the loop firmer.
Care
Hand wash in cool water with mild soap, press the water out in a towel, and dry flat, reshaping as needed. Store the ornament flat to keep the points crisp.
Final Notes
The measurements build up in a short chain:
- Row 1 sets the width at 25 sc, or 4.5 in (11.4 cm).
- The four shell tiers bring the body to 3.4 in (8.6 cm) tall.
- The border adds 0.2 in (0.5 cm) on every edge, giving a tree of 4.9 in (12.4 cm) x 3.8 in (9.7 cm).
- The trunk adds 1 in (2.5 cm) and the loop adds about 2 in (5.1 cm), for a total of 6.8 in (17.3 cm).
Make one ornament, check it against these numbers, and the rest of your set will match.
Happy crocheting!