

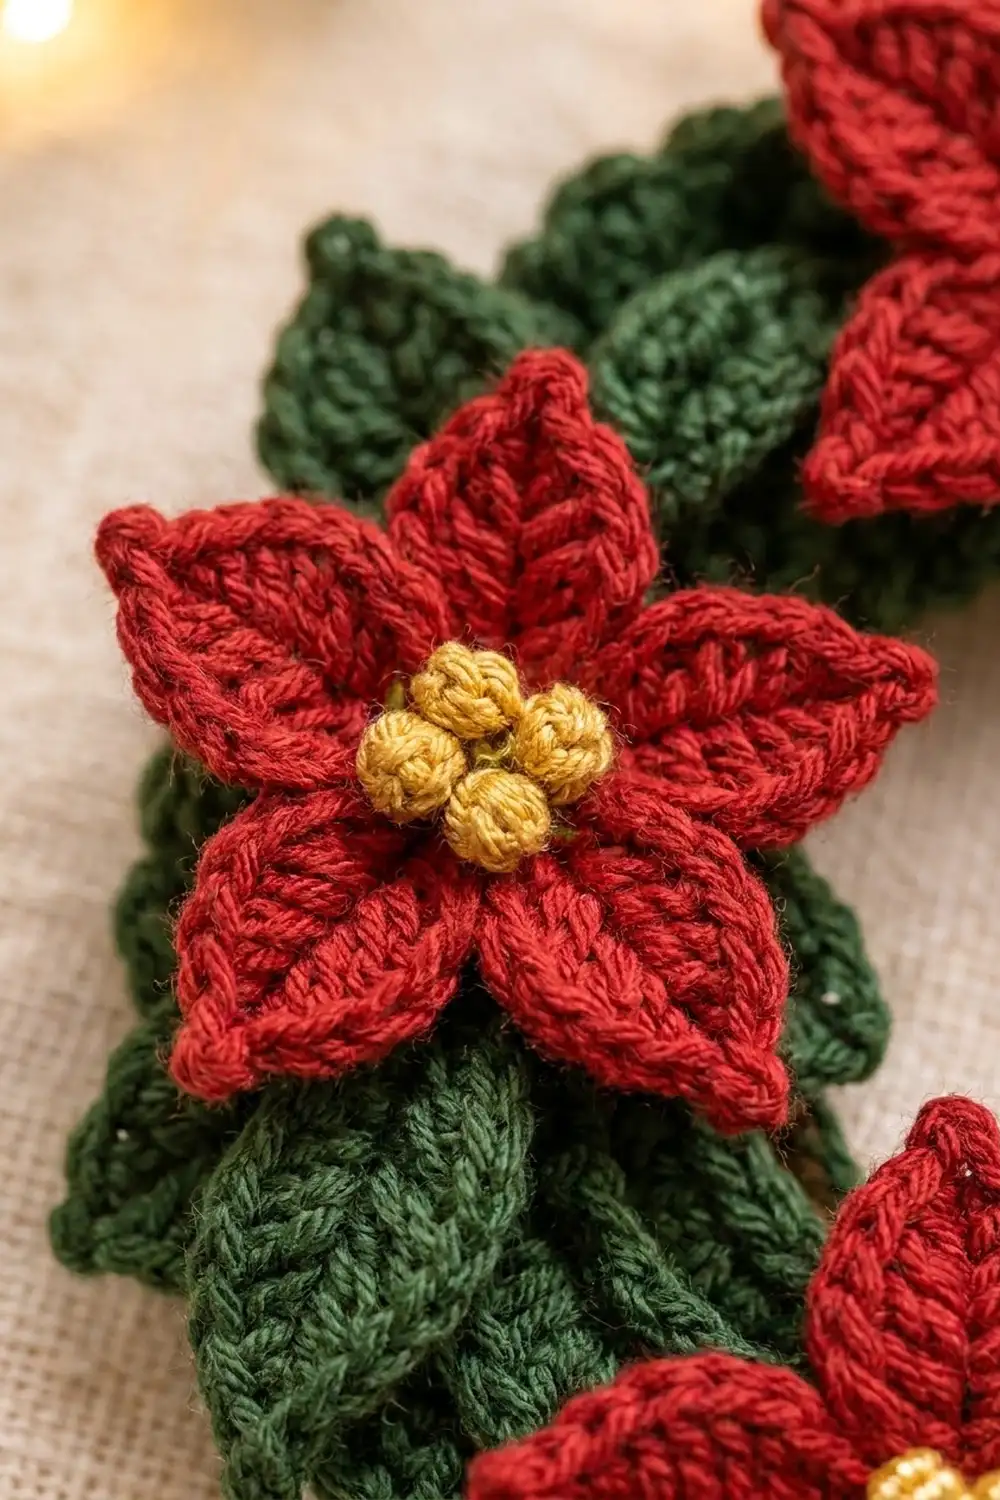
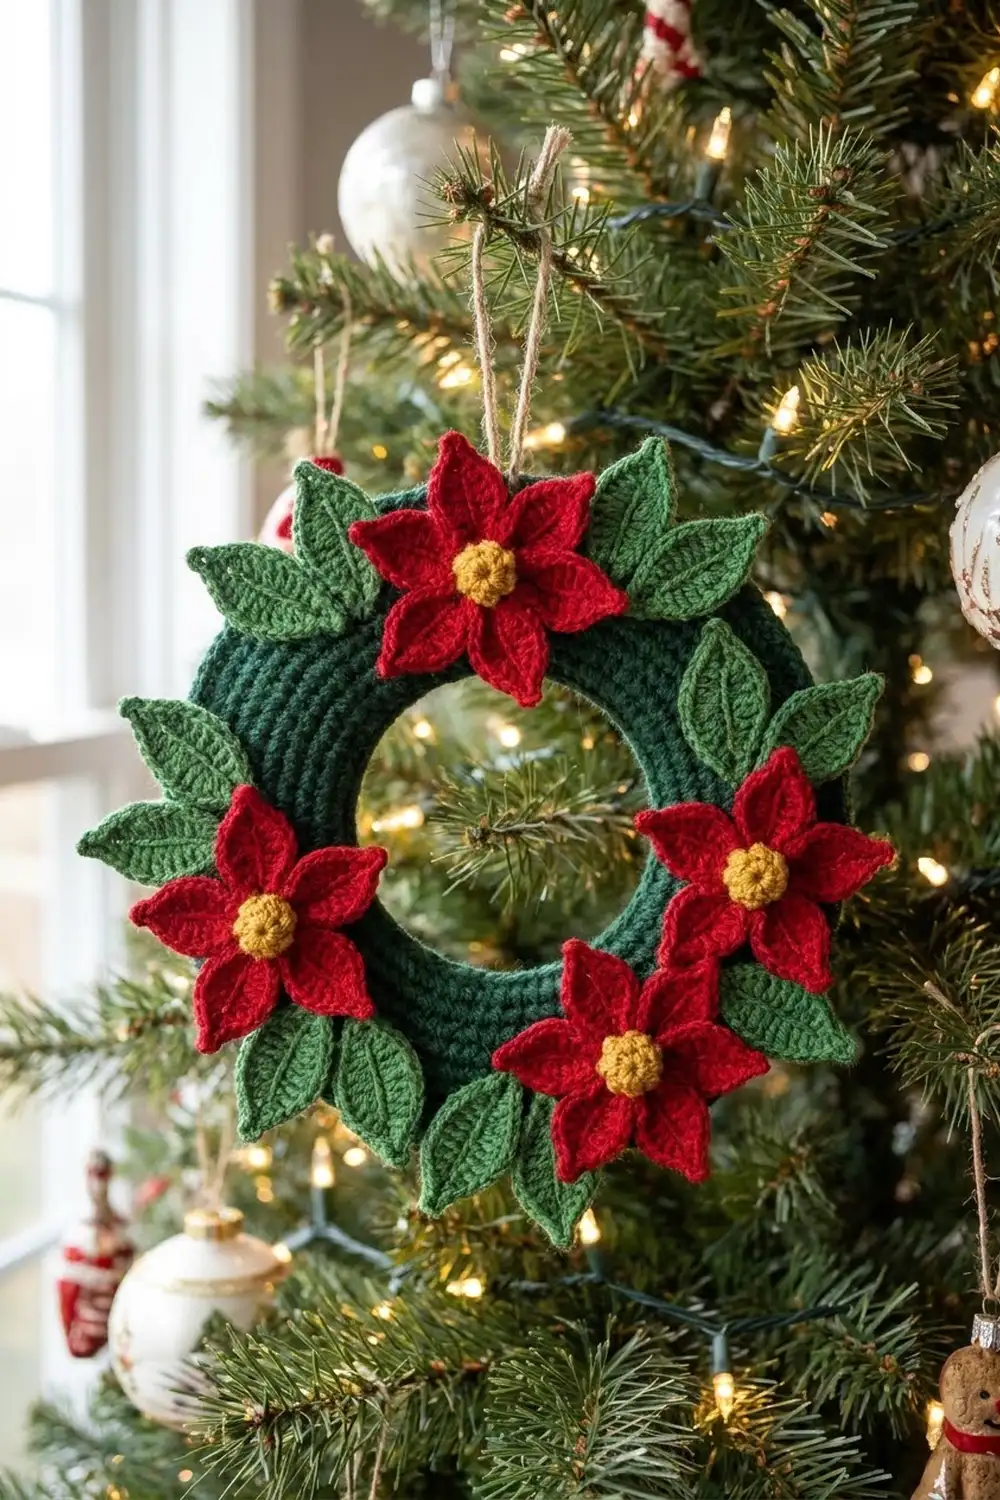
This little wreath packs a lot of holiday color into an ornament that fits in your palm. A solid green ring is circled with pointed leaves, and five bright red poinsettias sit around it, each with a small cluster of three gold bobbles in the middle. It looks full and dimensional, but every part is small and quick to make.
The colors are classic Christmas: deep forest green, true red and warm mustard gold. The style is cozy and traditional, and the stitch texture shows clearly on a tree, a gift bag or a window hook.
All instructions use US crochet terms. The finished ring is 4 in (10.2 cm) across. With the leaves and petals, the whole ornament is about 4.75 in (12.1 cm) across.
You’ll crochet a flat ring in joined rounds and add a two-round border. Then you’ll make 10 leaves, 5 poinsettias and 5 gold centers. Everything gets sewn onto the ring, and a hanging loop finishes it.
Finished Size and Construction
- Finished size: ring 4 in (10.2 cm) across; ornament about 4.75 in (12.1 cm) across overall
- Center opening: about 2 in (5.1 cm) before the flowers go on; about 1.25 in (3.2 cm) visible after assembly
- Skill level: Easy-Intermediate
- Terminology: US
- Yarn weight: DK (#3, light)
- Hook: 3.5 mm (E-4)
- Number of pieces: 1 finished wreath, built from 21 small parts (1 ring, 10 leaves, 5 flowers, 5 centers)
- Layout: 5 flowers spaced evenly, with 2 leaves tucked behind each flower
- Ring width: 1 in (2.5 cm) after the border
- Ring size before border: 3.33 in (8.5 cm) across
- Border depth: about 0.33 in (0.8 cm), 2 rounds
- Flower size: 1.75 in (4.4 cm) across
- Leaf size: 1.5 in (3.8 cm) long, 0.6 in (1.5 cm) wide
Materials
Choose a smooth DK yarn that shows stitches clearly. Cotton or a cotton blend gives crisp petal points. Acrylic gives a softer, slightly fuller look. Avoid fuzzy or splitty yarns, because the petals and leaves are tiny.
- Green: 8 g / 20 m (21.9 yd) – ring, border, leaves, hanging loop
- Red: 8 g / 20 m (21.9 yd) – 5 poinsettias
- Gold: 2 g / 5 m (5.5 yd) – 5 bobble centers
These amounts include about 30% extra for the test piece and sewing tails.
Tools:
- 3.5 mm (E-4) crochet hook
- Tapestry needle
- 6 locking stitch markers
- Scissors
- Pins
- Optional: twine or ribbon for hanging, fabric glue
Abbreviations (US Terms)
- ch – chain
- sl st – slip stitch
- sc – single crochet
- hdc – half double crochet
- dc – double crochet
- tr – treble crochet
- sk – skip
- sp – space
- st(s) – stitch(es)
- MR – magic ring
- rev sc – reverse single crochet (crab stitch)
Special stitches:
- Bobble (3-dc bobble): Yarn over, insert the hook in the ring and pull up a loop. Yarn over and pull through 2 loops (2 loops left on hook). Repeat 2 more times in the same place (4 loops on hook). Yarn over and pull through all 4 loops.
- Picot: Ch 3, sl st in 3rd ch from hook.
- Reverse sc: Work from left to right (if you’re right-handed). Insert the hook in the next st to the right, pull up a loop, yarn over and pull through both loops.
Gauge and Checkpoints
Gauge: 22 sc and 24 rounds = 4 in (10.2 cm), in sc worked in rounds with a 3.5 mm hook. That’s 5.5 sts per inch and 6 rounds per inch.
Test one piece first: crochet the ring through Round 4 before you make anything else. It tells you more than a swatch, because it shows whether the ring lies flat.
Checkpoints:
- Ring after Round 1: opening about 2 in (5.1 cm) across
- Ring after Round 4: 3.33 in (8.5 cm) across, lying flat
- Ring after border: 4 in (10.2 cm) across
- Leaf: 1.5 in (3.8 cm) long
- Flower after Round 1: 0.5 in (1.3 cm) across
- Finished flower: 1.75 in (4.4 cm) across
If your piece is too big: go down to a 3.25 mm (D-3) hook. If it’s too small: go up to a 3.75 mm (F-5) hook. If the ring ruffles, your rounds are too short for how wide your stitches are, so go down a hook size. If it cups into a bowl, go up a hook size.
Wreath Ring
Work in joined rounds with the right side facing you. Don’t turn. The ch-1 at the start of each round does not count as a stitch.
With green, ch 36. Sl st in the first ch to form a ring. Make sure the chain isn’t twisted.
Round 1: Ch 1, sc in each ch around, sl st in first sc to join. (36 sc)
Round 2: Ch 1, [sc in next 5 sts, 2 sc in next st] 6 times, join. (42 sc)
Round 3: Ch 1, [sc in next 6 sts, 2 sc in next st] 6 times, join. (48 sc)
Round 4: Ch 1, [sc in next 7 sts, 2 sc in next st] 6 times, join. (54 sc)
Checkpoint: The ring should be 3.33 in (8.5 cm) across and lie flat. Each round adds 6 sts for this reason: at 6 rounds per inch, each round adds about 1.05 in of circumference, and 1.05 in × 5.5 sts per inch is about 6 sts.
Don’t fasten off. Go straight on to the border.
Border
The border uses the same gauge as the ring: 5.5 sts per inch and 6 rounds per inch. Its two rounds add about 0.33 in (0.8 cm) on each side of the ring. That takes the ring from 3.33 in (8.5 cm) to 4 in (10.2 cm) across.
A circle has no real sides, so here a “side” is one of 6 equal sections, each one increase repeat wide.
Border Round 1 (Round 5): Ch 1, [sc in next 8 sts, 2 sc in next st] 6 times, join. (54 sts worked one per stitch + 6 added = 60 sc; 10 sc per section)
Border Round 2 (Round 6): Ch 1, rev sc in each st around, join. (60 rev sc; 10 per section, no increases)
Fasten off and weave in the ends.
Why the math works: The ring ends on 60 sts. Split among 5 flowers, that’s exactly 12 sts per flower, so every poinsettia sits on an identical slice of the ring. The reverse sc round needs no increases. It’s worked one per stitch and makes a firm, rope-like edge that stops the outer edge from flaring.
Checkpoint: 4 in (10.2 cm) across, opening about 2 in (5.1 cm), ring width 1 in (2.5 cm).
Leaves (Make 10)
Each leaf is worked along both sides of a starting chain. The chain becomes a center vein line, and the taller stitches in the middle give the leaf its oval shape.
With green, leave an 8 in (20.3 cm) tail and ch 9. The first ch you made is the base of the leaf. The end near your hook is the tip.
Side A (tip to base): Sl st in 2nd ch from hook, sc in next ch, hdc in next ch, dc in next 2 chs, hdc in next ch, sc in next ch, sc in last ch. (8 sts)
Turn the corner: Ch 1 and rotate the leaf so you can work into the free loops on the other side of the chain.
Side B (base to tip): Sc in next ch, sc in next ch, hdc in next ch, dc in next 2 chs, hdc in next ch, sc in next ch, sl st in last ch. (8 sts)
Tip: Ch 2, sl st in 2nd ch from hook to make a small point, then sl st in the first sl st of Side A. (16 sts + point)
Fasten off, leaving an 8 in (20.3 cm) tail for sewing. Weave the starting tail into the back of the leaf.
Checkpoint: 1.5 in (3.8 cm) long and 0.6 in (1.5 cm) wide.
Poinsettias (Make 5)
Each flower has 5 pointed petals worked into chain loops. Working up one side of each loop and back down the other gives a symmetrical petal with a center line and a sharp picot tip.
Round 1: With red, MR, ch 1, 10 sc in ring. Pull the ring closed and sl st in first sc to join. (10 sc)
Checkpoint: 0.5 in (1.3 cm) across.
Round 2: Ch 1, [sc in next st, ch 6, sk next st] 5 times, sl st in first sc to join. (5 sc + 5 ch-6 loops)
Round 3: In each ch-6 loop work: sc, hdc, dc, tr, picot, tr, dc, hdc, sc. Then sl st in the next sc of Round 2. (5 petals; 8 sts + 1 picot each = 40 sts + 5 picots)
Fasten off, leaving a 10 in (25.4 cm) tail for sewing.
Checkpoint: 1.75 in (4.4 cm) from a petal tip to the gap on the opposite side. Pinch each picot to sharpen the point.
Gold Centers (Make 5)
Round 1: With gold, MR, [ch 2, bobble in ring, ch 2, sl st in ring] 3 times. (3 bobbles)
Pull the ring closed tightly so the 3 bobbles bunch into a triangle. Fasten off, leaving a 6 in (15.2 cm) tail.
Checkpoint: about 0.4 in (1.0 cm) across.
Use the tail to sew the cluster to the middle of a poinsettia, stitching through Round 1 only. Weave the end into the back of the flower.
Assembly
- Lay the ring flat, right side up. Place a marker in Border Round 1 at stitches 1, 13, 25, 37 and 49. These mark the centers of the 5 flowers, 12 sts apart.
- Pin 2 leaves at each marker, with their bases meeting in the middle of the ring’s width. Point one leaf tip toward each neighboring marker so the leaves fan outward. They should stick out about 0.5 in (1.3 cm) past the outer edge.
- Sew each leaf base down with small stitches through the ring. Add 2 tacking stitches halfway up the leaf so it stays flat.
- Center a poinsettia over each marker so it covers the leaf bases. The flower will hang over the ring by about 0.375 in (1.0 cm) on both edges.
- Sew around Round 1 of each flower, then tack each petal near its base. Leave the petal tips free so they stand up a little.
- Hanging loop: At the top, between two flowers, join green with a sl st in the back of Border Round 1. Ch 15 and sl st in the same st. Fasten off. The 15 chains are about 2.75 in (7.0 cm) long and fold into a loop about 1.25 in (3.2 cm) tall. Twine or ribbon also works.
Final Blocking
- Mist the wreath lightly with water, or steam it from 1 in (2.5 cm) above. Don’t touch acrylic yarn with an iron.
- Lay it face up on a blocking mat or a folded towel.
- Shape the ring into a true circle 4 in (10.2 cm) across, and pin the outer edge in 6 places.
- Pull each petal picot out to a point and pin the tip.
- Smooth the leaves flat and pin their tips.
- Let it dry completely, for at least 4 hours.
- Unpin it and fluff the gold bobbles with a fingertip.
Final Quality-Control Checklist
- The ring is 4 in (10.2 cm) across and lies flat
- Border Round 2 has 60 rev sc with no gaps
- 10 leaves, each 1.5 in (3.8 cm) long, with a visible center line
- 5 poinsettias, each 1.75 in (4.4 cm) across with 5 pointed petals
- 5 gold centers with 3 bobbles each, sewn on securely
- Flowers are spaced 12 sts apart
- No sewing stitches show on the front
- The hanging loop is centered between two flowers at the top
- All ends are woven in on the back
Troubleshooting
Ring ruffles: Your rounds are too short for how wide your stitches are. Go down a hook size or tighten the joins.
Ring cups: Go up a hook size, or work the increase stitches more loosely.
Starting chain is twisted: Check before the first join. Once Round 1 is done, you can’t fix a twist, so start again.
Petals look round instead of pointed: Keep the picot snug and pinch it during blocking. Check that there’s a tr on each side of the picot.
Petals flip forward: The ch-6 loops are too tight. Chain more loosely, or use a 3.75 mm (F-5) hook for Round 2 only.
Bobbles look flat: Pull the magic ring tighter and keep the yarn overs in each bobble even.
Leaves curl: Pin them flat during blocking, or tack them halfway up as described in Assembly.
Ornament tilts when hung: Move the loop so it sits exactly between two flowers, or add a small tacking stitch to a leaf that’s pulling.
Care
Spot clean with cool water and mild soap, then reshape and dry flat. Store the wreath flat or hanging, away from heavy items that could crush the petals.
Final Notes
The measurements build step by step. The ring starts with 36 sts and a 2 in (5.1 cm) opening. Three rounds of 6 increases bring it to 54 sts and 3.33 in (8.5 cm) across. The two border rounds bring it to 60 sts and 4 in (10.2 cm) across, split into 5 equal slices of 12 sts. Each slice holds 2 leaves 1.5 in (3.8 cm) long and one poinsettia 1.75 in (4.4 cm) across, for a full ornament about 4.75 in (12.1 cm) across.
Check the ring first, and everything else falls into place. Make one, then make a set to hang together.
Happy crocheting!