
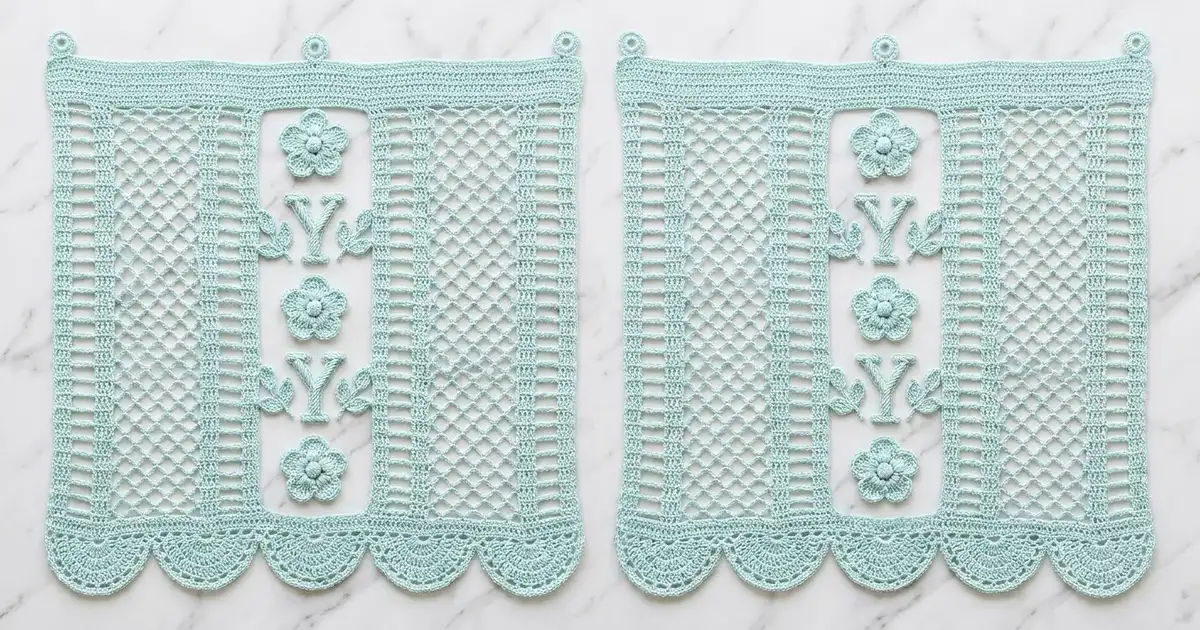
This pair of lace curtain panels combines an open diamond net with raised appliqué details. Down the center of each panel, four five-petal flowers alternate with four serif “Y” monograms, and leafy sprigs sit on either side of each letter. Ladder bands frame the long sides, a solid header with three tabs runs across the top, and six fan scallops edge the bottom.
Both panels use one soft mint-aqua cotton thread, so the texture creates all the contrast. The style is light and romantic, somewhere between vintage filet and Irish-style raised lace.
The pattern uses US crochet terms. Each panel measures 13.2 in (33.5 cm) wide by 52.75 in (134.0 cm) long without the tabs, or 54.25 in (137.8 cm) to the top of the tabs.
You work each body in rows from the bottom up, then add a two-round border, a scallop outline and the tabs. The flowers, letters and sprigs are made separately and sewn on. The two panels hang side by side and are never joined to each other.
Finished Size and Construction
- Finished size (each panel): 13.2 in x 52.75 in (33.5 cm x 134.0 cm), plus 1.5 in (3.8 cm) tabs
- Skill level: Intermediate
- Terminology: US
- Yarn weight: Size 3 crochet cotton (Super Fine / CYC 1)
- Hook: 2.75 mm (US C-2)
- Number of pieces: 2 separate panels. Each panel has 1 body, 4 flowers, 4 letters (3 strips each) and 8 leaf sprigs (2 leaves + 1 stem each).
- Layout: One vertical motif column per panel; the panels hang separately
- Body size before border: 12.2 in x 51 in (31.0 cm x 129.5 cm)
- Border depth: 0.5 in (1.3 cm) on the sides and top, 1.25 in (3.2 cm) at the bottom
Materials
Use a mercerized size 3 cotton of about 280 m per 100 g. Mercerized cotton gives crisp stitches, blocks flat and supports the raised appliqués. Avoid fuzzy or stretchy fibers, because a long net will sag.
- Mint aqua: 500 g (about 1,400 m) for both panels, or 250 g (about 700 m) per panel
These quantities include a margin of roughly 15% for gauge differences and swatching.
Tools: 2.75 mm (US C-2) hook, tapestry needle, stitch markers, rust-proof pins, blocking mats, spray bottle and measuring tape.
Abbreviations (US Terms)
- ch: chain
- sl st: slip stitch
- sc: single crochet
- hdc: half double crochet
- dc: double crochet
- tr: treble crochet
- sp(s): space(s)
- st(s): stitch(es)
- FL / BL: front loop / back loop
- RS: right side
Bobble: Work 3 dc in the same stitch, leaving the last 2 loops of each dc on the hook (4 loops on hook). Yarn over and pull through all 4 loops.
Net loop: Ch 5, then work the next sc or dc where stated. One net loop spans 4 sts of the row below.
Gauge and Checkpoints
- Dc: 6 dc = 1 in (2.5 cm); 3 rows = 1 in (2.5 cm)
- Net: 3 net loops = 2 in (5.1 cm); 12 rows = 4 in (10.2 cm)
- Border: 6 sc = 1 in (2.5 cm) along every edge
The first rows of the body work as your test piece. After Row 1, the 73 dc should measure 12.2 in (31.0 cm). Work through Row 12, pin the piece flat, and check the 4 in (10.2 cm) height and the 3-loop width.
If your piece is too big, go down 0.25 mm. If it’s too small, go up 0.25 mm. Start over if the width is off by more than 0.25 in (0.6 cm), because small errors add up over 153 rows.
Checkpoints:
– Row 1: 12.2 in (31.0 cm) wide
– Row 30: 10 in (25.4 cm) tall
– Row 150: 50 in (127.0 cm) tall
– Row 153: 12.2 in x 51 in (31.0 cm x 129.5 cm)
– After the border: 13.2 in x 52.75 in (33.5 cm x 134.0 cm)
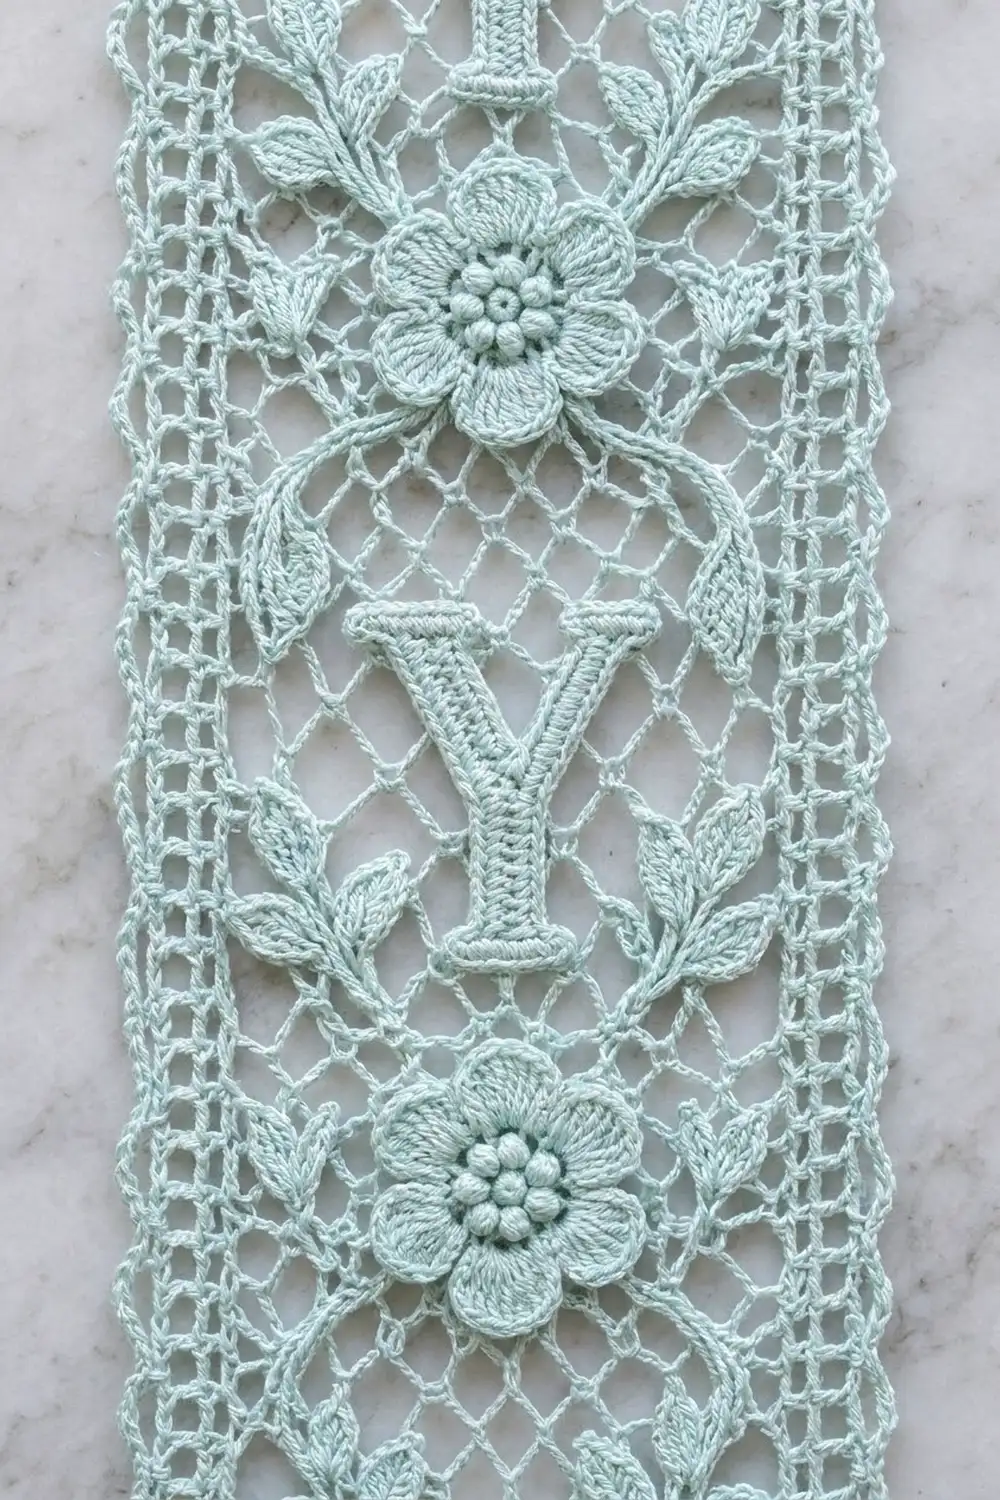
Panel Body (make 2)
Each row is 73 sts wide:
– Left band: 7 sts, ending on the inner rail dc
– Net: 15 net loops spanning 60 sts, ending on the right inner rail dc
– Right band: 6 sts
That gives 7 + 60 + 6 = 73.
Foundation: Ch 75.
Row 1 (RS): Dc in 4th ch from hook and in each ch across. Turn. (73 sts; the skipped 3 ch count as 1 dc)
Row 2 (net row A): Ch 5 (counts as dc + ch 2), skip 2 sts, dc in next st, ch 2, skip 2, dc in next st (the 7th st). Ch 5, skip 3, sc in next st; repeat from * 13 more times. Ch 5, skip 3, dc in next st (the 67th st). Ch 2, skip 2, dc in next st, ch 2, skip 2, dc in top of turning ch. Turn.
(6 dc, 4 ch-2 sps, 15 net loops, 14 sc)*
Row 3 (net row B): Ch 5 (counts as dc + ch 2), dc in next dc, ch 2, dc in next dc (the inner rail). Ch 2, sc in first net loop, ch 5, sc in next net loop; repeat from * 13 more times. Ch 2, dc in next dc (the inner rail), ch 2, dc in next dc, ch 2, dc in 3rd ch of turning ch. Turn.
(6 dc, 4 band ch-2 sps, 15 sc, 14 net loops, 2 ch-2 half loops)*
Row 4 (net row A): Work the band as in Row 3 up to the inner rail. Ch 5, sc in next net loop; repeat from * 13 more times. Ch 5, dc in the inner rail dc. Finish the band as in Row 3. Turn.
(6 dc, 4 ch-2 sps, 15 net loops, 14 sc)*
Each B row places its sc in the centers of the loops below, which forms the diamond trellis. The stacked band dc make the ladder rails, and the ch-2 sps make the rungs.
Rows 5–150: Repeat Rows 3–4. You will end on Row 150, an A row, for 149 net rows in total.
Row 151 (conversion row): Ch 3 (counts as the first dc). Work as follows, then turn:
– 1 dc in each dc and sc: 6 dc + 14 sc = 20 sts
– 2 dc in each ch-2 sp: 8 sts
– 3 dc in each net loop: 45 sts
(20 + 8 + 45 = 73 dc)
Rows 152–153: Ch 3 (counts as dc), dc in each st across. Turn. (73 dc)
Do not fasten off. The body measures 12.2 in x 51 in (31.0 cm x 129.5 cm).
Appliqués
Flower (make 4 per panel)
Rnd 1: Magic ring, ch 1, 10 sc in ring. Join with sl st. (10 sc)
Rnd 2 (BL only): Ch 1, sc in next st, ch 3, skip next st; repeat from * 4 more times. Join. (5 sc, 5 ch-3 sps)*
Rnd 3: In each ch-3 sp, work (sc, hdc, 5 dc, hdc, sc). Join. (5 petals, 45 sts)
Center: Working in the free front loops of Rnd 1, bobble in next FL, sl st in next FL; repeat from * 4 more times. Fasten off. (5 bobbles)*
The flower is 2.5 in (6.4 cm) across, with a raised cluster of bobble “beads” in the center.
Letter Y (make 4 per panel)
Stem: Ch 13. Row 1: sc in 2nd ch from hook and in each ch across. Rows 2–3: ch 1, turn, sc in each sc. (12 sc per row)
Arms (make 2): Ch 11. Work Rows 1–3 as for the stem. (10 sc per row)
Edging: Work 1 round of sc around each strip, with 3 sc in each corner. This rounds the strips into a corded look.
Sew the arms to the top of the stem in a V. The letter is 3 in (7.6 cm) tall.
Leaf Sprig (make 8 per panel)
Leaf (make 2 per sprig): Ch 9. Sc in 2nd ch from hook, hdc in next ch, dc in next 3 ch, hdc in next ch, sc in next ch, 3 sc in last ch. Working along the other side of the chain, work sc, hdc, 3 dc, hdc, sc. Sl st to first sc. (17 sts) Each leaf is 1.5 in (3.8 cm) long.
Stem: Ch 10, sl st in 2nd ch from hook and in each ch across. (9 sl st)
Sew 2 leaves to the top of each stem in a V.
Make All Pieces
- Per panel: 1 body, 4 flowers, 4 letters (12 strips), 8 stems, 16 leaves
- For the pair: 2 bodies, 8 flowers, 8 letters (24 strips), 16 stems, 32 leaves, all in mint aqua
Layout (each panel). Motif centers are measured down from the lower edge of Row 151:
 [tab]        [tab]        [tab]
 =======  header band  =======
 ||   FLOWER    3 in (7.6 cm)   ||
 ||  ~  Y  ~    9 in (22.9 cm)  ||
 ||   FLOWER   15 in (38.1 cm)  ||
 ||  ~  Y  ~   21 in (53.3 cm)  ||
 ||   FLOWER   27 in (68.6 cm)  ||
 ||  ~  Y  ~   33 in (83.8 cm)  ||
 ||   FLOWER   39 in (99.1 cm)  ||
 ||  ~  Y  ~   45 in (114.3 cm) ||
 \/\/\/\/   6 scallops   \/\/\/\/
The centers are 6 in (15.2 cm) apart. Each “~” is one leaf sprig, placed at the lower outer side of a letter and angled outward.
Joining: Attaching the Appliqués
The two panels are not joined to each other. Here, “joining” means sewing the motifs onto each body.
- Block the body and all appliqués first.
- Lay the body RS up and center each motif over the 8th of the 15 net loops, at the distance shown in the layout. Pin it in place.
- Sew with a 20 in (50.8 cm) length of the same thread. Take small stitches through the back loops of the motif’s outer stitches and around the net strand directly underneath.
- Sew only through net strands that touch the motif. Never pull a whole loop closed, or the trellis will distort.
Keep the sewing tension snug but relaxed. If the net puckers, loosen those stitches.
Checkpoint: The body should still lie flat at 12.2 in x 51 in (31.0 cm x 129.5 cm).
Border
The border gauge is 6 sc = 1 in (2.5 cm). The body has 3 rows per inch, so 2 sc per row-end gives exactly 6 sc per inch.
Rnd 1: Ch 1, rotate the work and continue around the body:
– Down the first side: 2 sc in each row-end, then ch 2 at the corner. (153 x 2 = 306 sc)
– Bottom: sc in each free loop of the foundation ch, then ch 2. (73 sc)
– Up the second side: 2 sc in each row-end, then ch 2. (306 sc)
– Top: sc in each st, then ch 2. (73 sc)
Join with sl st to the first sc. The side counts do not include the ch-2 corner sps. (758 sc, 4 corner sps)
Rnd 2: Ch 1, then:
– Down the first side: sc in each sc. (306)
– Corner: sc in the corner sp, then sc in the first bottom sc.
– Bottom: skip 5 sc, 13 tr in next sc, skip 5 sc, sc in next sc; repeat from * 5 more times.
– Corner: sc in the corner sp.
– Up the second side: sc in each sc. (306)
– Top corner: (sc, ch 2, sc) in the corner sp.
– Top: sc in each sc. (73)*
– Last corner: (sc, ch 2, sc) in the corner sp.
Join and fasten off.
Why the math works:
– The fans use 1 + (6 x 12) = 73 bottom sts exactly, with nothing left over.
– 306 sc ÷ 6 = 51 in, which matches the body length, so the sides won’t ripple.
– 73 sc ÷ 6 = 12.2 in, which matches the body width.
Scallop outline (bottom only): With RS facing, join with sl st in the first bottom sc of Rnd 2. (Ch 3, skip 1 tr, sc in next tr) 6 times, ch 3, skip last tr, sc in next sc; repeat from * 5 more times. Fasten off. (7 ch-3 loops per fan, 42 total)*
Tabs (make 3): Work into the 73 top sc of Rnd 2. Join at st 3, ch 20, skip 3 sts, sl st in st 7. Turn, work 30 sc over the chain loop, then sl st in st 3. Fasten off.
Repeat at sts 35 and 39 for the center tab, and at sts 67 and 71 for the third tab. Each tab rises 1.5 in (3.8 cm).
Final Blocking
- Weave in ends through solid stitches, never across the open net.
- Soak the panel in cool water for 15 minutes, then press the water out in a towel. Do not wring.
- Pin both long sides to 52.75 in (134.0 cm), then pin the width to 13.2 in (33.5 cm).
- Pin each fan point and open every net loop into an even diamond.
- Shape the petals and leaves with your fingers and fluff the bobbles.
- Dry flat for 24 hours. Block the second panel to the same pin marks.
Final Quality-Control Checklist
- Each body is 73 sts wide and 153 rows long.
- Every A row has 15 net loops, and every B row has 15 sc.
- Border Rnd 1 has 306 sc on each side and 73 sc across the top and bottom.
- There are 6 even fans and 42 outline loops.
- The 3 tabs are symmetrical and the same size.
- Motifs are centered and 6 in (15.2 cm) apart.
- The two panels match within 0.25 in (0.6 cm).
Troubleshooting
- Net slants: Recount the sc in each B row. There must be 15.
- Sides ripple or pull in: Rework Rnd 1 with exactly 2 sc per row-end.
- Fans are crowded or gapped: The bottom must have exactly 73 sc.
- Puckering around a motif: Loosen the sewing stitches and reblock.
- Panel stretches when hung: Reblock. If needed, omit 2 net rows on the next panel and on this one.
- Tabs are too small for the rod: Use ch 24 and 36 sc.
Care
Hand wash in cool water with mild soap, then pin flat to dry. Never tumble dry or hang the panels wet.
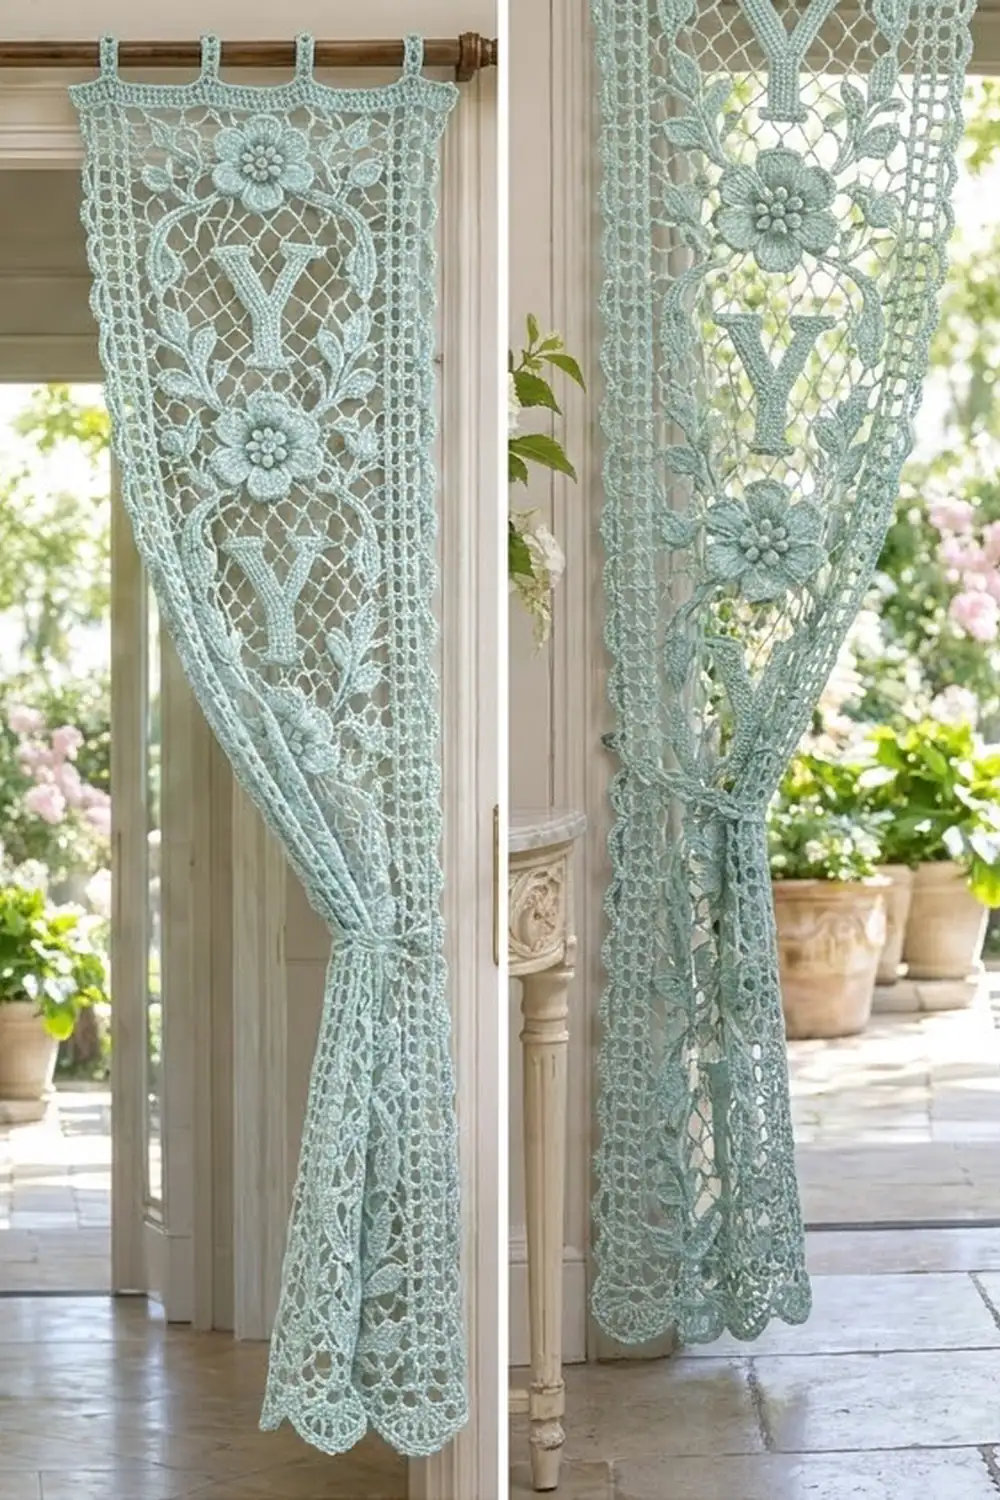
Final Notes
The measurements build on each other:
1. 6 dc per inch makes 73 sts = 12.2 in (31.0 cm).
2. 3 rows per inch makes 153 rows = 51 in (129.5 cm).
3. 2 sc per row-end keeps the border at 6 sc per inch.
4. 73 bottom sts fit exactly 6 fans.
5. The border brings each panel to 13.2 in x 52.75 in (33.5 cm x 134.0 cm).
Check each stage and both panels will hang straight and match.
Happy crocheting!