

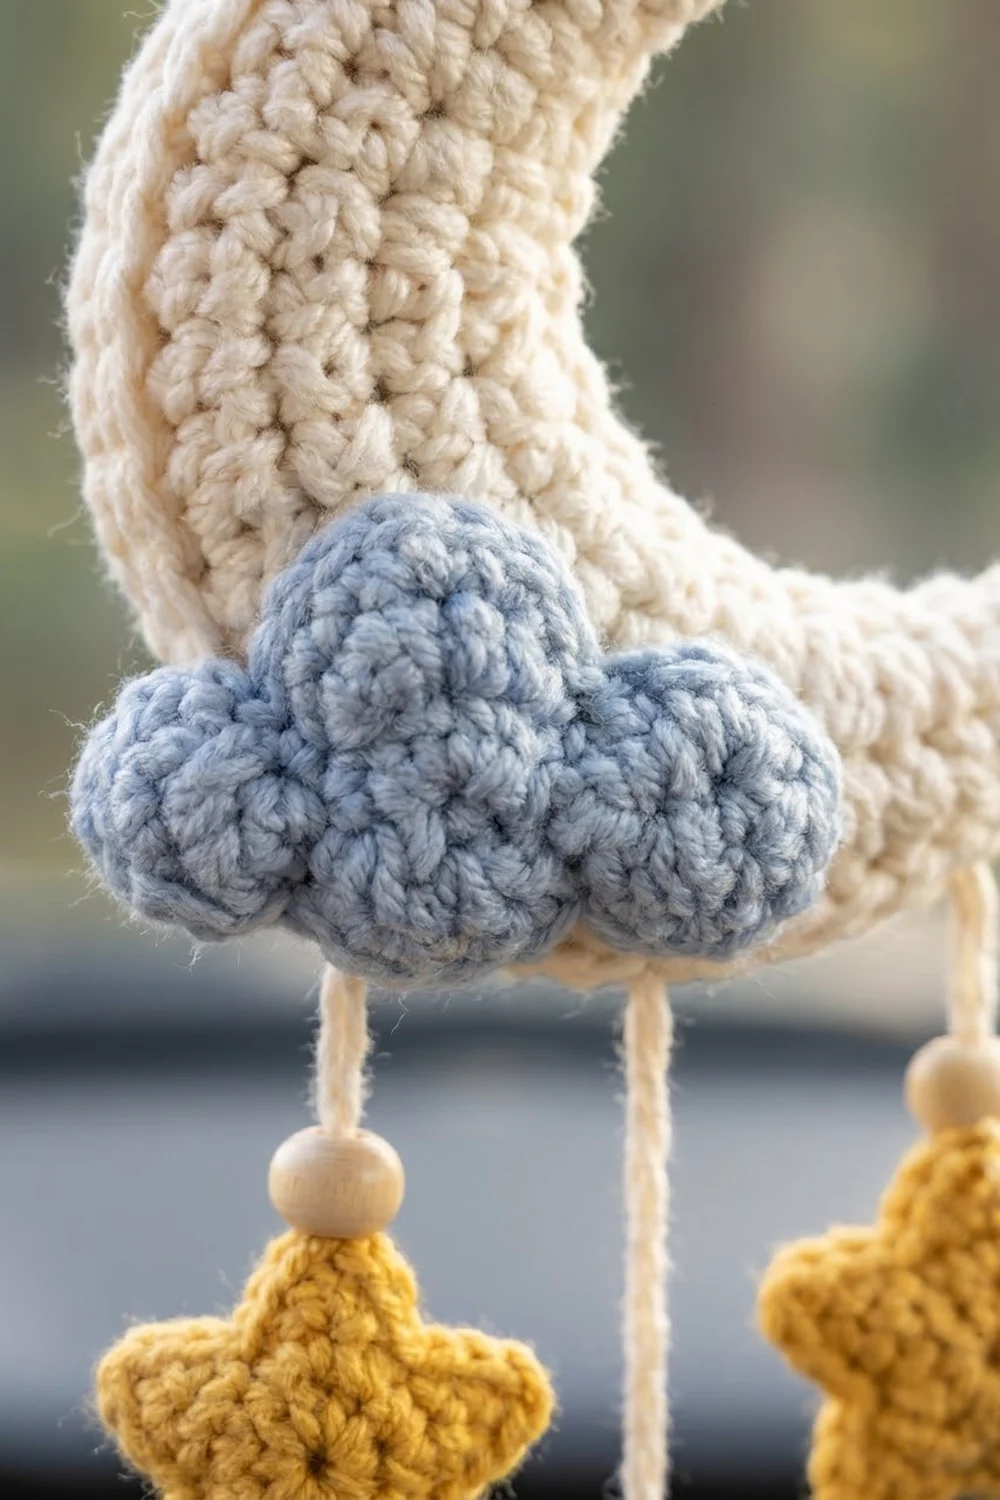
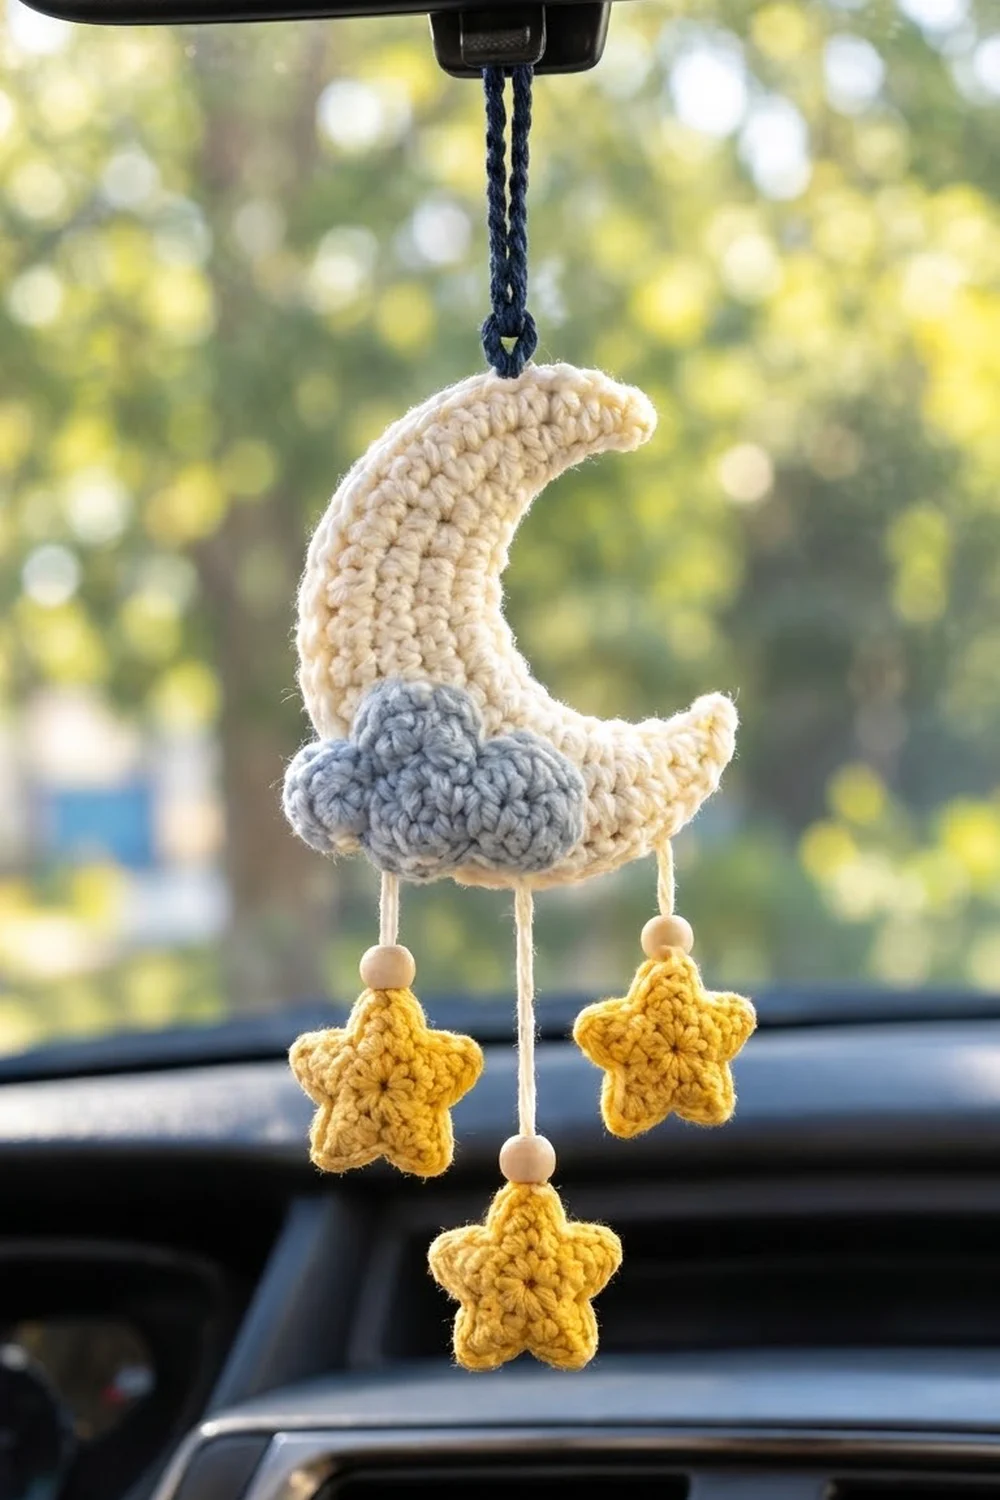
This little charm hangs a soft night sky from your rear-view mirror. A plump cream crescent moon sits at the top, and a puffy light blue cloud covers part of its lower curve. Below them, three mustard-yellow stars swing on cream cords, each topped with a natural wooden bead.
The colors are gentle and cozy: cream, powder blue, warm yellow, and a navy hanging loop that hints at the night. The style is simple, rounded, and lightly padded, so the charm is easy to see from the driver’s seat without looking bulky.
This pattern uses US crochet terms. The moon measures about 4 in (10.2 cm) tall from tip to tip and 2.5 in (6.4 cm) wide. From the top tip of the moon to the bottom of the middle star, the charm is about 8.5 in (21.6 cm) long. The navy loop adds about 4 in (10.2 cm) above that.
Construction is simple. You work two identical crescent layers in short rows, join them with a single crochet edging round, and add a little stuffing. You then sew on a bobble-textured cloud with three scalloped puffs. Last, you work three small stars in the round and hang them from chain cords with wooden beads.
Finished Size and Construction
- Finished moon size: 4 in (10.2 cm) tall x 2.5 in (6.4 cm) wide
- Total hanging length: about 8.5 in (21.6 cm), plus a 4 in (10.2 cm) loop
- Skill level: Easy to intermediate
- Terminology: US crochet terms
- Yarn weight: Worsted (#4) cotton or cotton blend
- Hook: 4.0 mm (G-6)
- Number of pieces: 2 moon layers, 1 cloud, 3 stars, 3 cream cords, 1 navy hanging cord
- Layout: Moon at the top, cloud on the lower outer curve, three stars hanging below (short, long, short)
- Piece sizes: Cloud 3 in (7.6 cm) x 1.5 in (3.8 cm); each star 1.75 in (4.4 cm) point to point
- Moon size before border: about 3.5 in (8.9 cm) tip to tip
- Border depth: 1 round of sc, about 0.25 in (0.6 cm)
Materials
Choose a smooth worsted-weight cotton. Cotton keeps the crescent’s crisp shape, shows each stitch clearly, and handles the heat behind a sunny windshield better than most acrylics. The amounts below assume a yarn of about 85 m per 50 g.
- Cream: 12 g, about 20 m (moon layers and star cords)
- Light blue: 4 g, about 7 m (cloud)
- Mustard yellow: 6 g, about 10 m (three stars)
- Navy: 3 g, about 5 m (hanging cord)
These amounts include extra for gauge testing and sewing tails.
Tools:
- 4.0 mm (G-6) crochet hook
- Tapestry needle
- Scissors
- 3 natural wooden beads, 10 mm, with holes wide enough for a doubled strand of yarn
- A small pinch of polyester fiberfill
- Stitch marker
- Pins and a blocking mat or folded towel
Abbreviations (US Terms)
- ch – chain
- sl st – slip stitch
- sc – single crochet
- hdc – half double crochet
- dc – double crochet
- MR – magic ring
- st(s) – stitch(es)
- sp – space
- RS / WS – right side / wrong side
- bob – bobble
Special stitch – Bobble (bob): [Yarn over, insert hook in the st, yarn over and pull up a loop, yarn over and pull through 2 loops] 4 times in the same st. Then yarn over and pull through all 5 loops on the hook. A bobble counts as 1 st. When you work it on a WS row, it pops out on the RS.
Gauge and Checkpoints
Gauge: 18 sc and 20 rows = 4 in (10.2 cm) in sc, worked fairly firmly.
Make one star first. It’s the quickest piece and shows right away whether your tension matches.
- Star after Rnd 2: about 1 in (2.5 cm) across
- Finished star: 1.75 in (4.4 cm) point to point
- Moon foundation chain: 16 ch laid straight is about 3.5 in (8.9 cm)
- Moon after Row 3: about 3.5 in (8.9 cm) tip to tip
- Cloud after Row 1: about 2.75 in (7.0 cm) wide
If your star is bigger than 1.75 in (4.4 cm), switch to a 3.75 mm hook. If it’s smaller than 1.5 in (3.8 cm), switch to a 4.5 mm hook. Either way, keep your stitches firm. Loose stitches let the stuffing show through and make the stars floppy.
Moon (Make 2)
With cream, make two identical layers. Every row is symmetrical, so you can flip the second layer over and place it behind the first.
Row 1 (RS): Ch 17. Starting in the 2nd ch from the hook and working in the back bumps: sl st in next ch, sc in next 2 ch, hdc in next 2 ch, dc in next ch, 2 dc in each of next 4 ch, dc in next ch, hdc in next 2 ch, sc in next 2 ch, sl st in last ch. Turn. (20 sts)
The increases in the center make the outer edge longer than the inner edge, so the strip curves into a thin crescent.
Row 2: Ch 1 (does not count as a st). Sl st in first st, sc in next 2 sts, hdc in next st, 2 hdc in next st, 2 dc in next st, [dc in next st, 2 dc in next st] 4 times, dc in next st, 2 hdc in next st, hdc in next st, sc in next 2 sts, sl st in last st. Turn. (27 sts)
Check: you worked into all 20 sts and made 7 increases, so 20 + 7 = 27.
Row 3: Ch 1. Sl st in first st, sc in next 2 sts, hdc in next 2 sts, dc in next 2 sts, [2 dc in next st, dc in next 3 sts] 3 times, 2 dc in next st, dc in next 2 sts, hdc in next 2 sts, sc in next 2 sts, sl st in last st. (31 sts)
Check: 5 sts at the start, then 17 sts in the middle with 4 increases (21 sts made), then 5 sts at the end: 5 + 21 + 5 = 31. Fasten off the first layer. Don’t fasten off the second layer. Keep its loop live for the border.
Checkpoint: Each layer is about 3.5 in (8.9 cm) from tip to tip. The sl sts and sc at the ends of each row taper the tips to points.
Cloud (Make 1)
With light blue:
Row 1 (RS): Ch 14. Sc in 2nd ch from hook and in each ch across. Turn. (13 sc)
Row 2 (WS): Ch 1. Sc in first st, [bob in next st, sc in next st] 6 times. Turn. (13 sts: 6 bobbles, 7 sc)
Row 3 (RS): Ch 1. Sc in each st across. Turn. (13 sc)
Row 4 (scallop puffs): Sl st in first st, [skip next st, 7 dc in next st, skip next st, sl st in next st] 3 times. (25 sts: 3 shells of 7 dc, plus 4 sl sts)
Check: 1 + (3 x 4) = 13 sts used, so the scallops fit exactly. Fasten off and leave a 12 in (30.5 cm) tail for sewing.
Checkpoint: The cloud is about 3 in (7.6 cm) wide and 1.5 in (3.8 cm) tall. It has three rounded puffs on top and a bumpy band of bobbles across the body.
Stars (Make 3)
With mustard yellow:
Rnd 1: Work 10 sc in a MR. Pull the ring closed, leaving a small hole in the center. Sl st to first sc. (10 sc)
Rnd 2: Ch 1, 2 sc in each st around. Sl st to first sc. (20 sc)
Rnd 3 (points): [Sl st in next st, (hdc, dc) in next st, ch 2, (dc, hdc) in next st, sl st in next st] 5 times. (30 sts and 5 ch-2 tips)
Check: each point uses 4 sts, and 5 x 4 = 20. Each point makes 6 sts (1 + 2 + 2 + 1), so 5 x 6 = 30. Fasten off and weave in the ends.
Checkpoint: Each star is 1.75 in (4.4 cm) point to point.
Make All Pieces
Before you start assembly, lay out all the pieces and check the count:
- Cream: 2 moon layers + 3 chain cords
- Light blue: 1 cloud
- Mustard yellow: 3 stars
- Navy: 1 twisted hanging cord
Cream cords: Leave an 8 in (20.3 cm) tail, chain the length listed below, then fasten off and leave another 8 in (20.3 cm) tail.
- Left cord: ch 8, about 1.5 in (3.8 cm)
- Middle cord: ch 15, about 3 in (7.6 cm)
- Right cord: ch 8, about 1.5 in (3.8 cm)
Navy hanging cord: Cut 2 strands, each 30 in (76.2 cm) long. Knot them together at one end and twist them firmly. Fold the twisted strand in half and let it twist back on itself, then knot the ends. The finished cord is about 9 in (22.9 cm) long and folds into a loop of about 4 in (10.2 cm).
Layout grid (front view):
              [navy loop]
                  |
            ( top moon tip )
          (  cream crescent  )
     [ blue cloud ]   ( lower moon tip )
        |       |            |
      1.5 in   3 in        1.5 in
      bead      |           bead
      STAR     bead         STAR
               STAR
Joining
Cloud to moon: Lay one moon layer RS up with the tips pointing right. Pin the cloud over the lower outer curve. Its left puff should stick out about 0.5 in (1.3 cm) past the moon’s outer edge, and its lower edge should line up with the lowest edge of the moon. Whipstitch around the cloud through the front loops of the moon stitches only, so nothing shows on the back. Keep the stitches snug but not tight so the cloud stays puffy.
Cords: Thread the top tail of each cream cord onto a tapestry needle. Sew the left cord under the left third of the cloud and the middle cord under the right third, stitching both through the front moon layer only. Attach the right cord at the lower moon tip. Knot each one securely on the WS of the front layer.
Beads and stars: Thread the bottom tail of each cord through a wooden bead and slide the bead down to the end of the chain. Sew the tail into the top point of a star and knot it on the back. The bead should sit snugly between the cord and the star.
Hanging loop: Tuck the knotted end of the navy cord between the two moon layers at the top tip, with the loop standing out of the point. The border round will catch it.
Size checkpoint: Hold up the front layer. The middle star should hang about 8.5 in (21.6 cm) below the top tip.
Border
The border round joins the two moon layers and frames the crescent. Border gauge is the same as the main gauge: 18 sc = 4 in (10.2 cm).
Hold the layers WS together with the decorated layer facing you. The back layer’s live loop sits at the tip where Row 3 ended. Put that loop on your hook and work through both layers the whole way around.
Border Rnd: Ch 1, then work:
- First tip: 3 sc in the tip point. (3 sc)
- Inner curve: sc in each of the 16 remaining loops of the foundation chain. (16 sc)
- Second tip: 3 sc in the tip point. If this is the top tip, catch the navy cord ends in these stitches. (3 sc)
- Outer curve: sc in each of the 31 sts of Row 3. (31 sc)
Before you close the outer curve, push a small pinch of fiberfill into the middle of the moon. Sl st to first sc. (53 sc total)
Why the math works: 3 + 16 + 3 + 31 = 53. Row 3 already has all the increases the convex outer edge needs, so 1 sc per st keeps it flat. On the concave inner edge, 1 sc per foundation chain hugs the curve without rippling. The 3 sc at each tip turn the sharp point without adding bulk. The border adds about 0.25 in (0.6 cm) at each tip, which takes the moon from 3.5 in (8.9 cm) to 4 in (10.2 cm) tip to tip.
Fasten off and weave the tail in between the layers.
Final Blocking
- Lightly mist the moon, cloud, and stars with water.
- Lay the moon flat on a blocking mat. Pin each tip so the moon measures 4 in (10.2 cm) tip to tip.
- Shape the cloud puffs into rounded bumps with your fingers.
- Pin each star at its five points to 1.75 in (4.4 cm).
- Let everything dry completely, then remove the pins.
- Hang the charm and let the weight of the stars straighten the cords.
Final Quality-Control Checklist
- The moon is 4 in (10.2 cm) tip to tip and 2.5 in (6.4 cm) wide.
- The border has 53 sc and no gaps between the layers.
- The stuffing is light and doesn’t show between stitches.
- The cloud is secure, and all three puffs are rounded.
- Each star has 5 even points and measures 1.75 in (4.4 cm).
- The side cords are about 1.5 in (3.8 cm) and the middle cord about 3 in (7.6 cm).
- Each bead sits snugly above its star.
- The navy loop is held firmly in the top tip.
- All tails are woven in and trimmed.
Troubleshooting
Moon curls into a cone: It has too many increases, or your outer curve is too tight. Recount Row 2 (27) and Row 3 (31), and relax your tension on the dc.
Moon is too straight: Check that the 2-dc groups in Row 1 are in the center 4 chains.
Inner curve ripples: You probably added extra sc. Work exactly 1 sc per foundation chain, 16 in total.
Bobbles face the back: Bobbles must be worked on a WS row. Make sure Row 1 is your RS.
Star points are uneven: Recount Rnd 2 (20 sc). Each point must use exactly 4 sts.
Charm hangs crooked: Move the right cord a little, or shorten the middle cord by 1 ch, until the moon hangs level.
Care
Spot clean with mild soap and cool water, press out the water in a towel, and dry flat. Don’t leave the charm in strong, direct sun for long periods, so the colors don’t fade.
Final Notes
Everything starts with gauge: 18 sc = 4 in (10.2 cm). That gauge gives you a 1.75 in (4.4 cm) star and a 3.5 in (8.9 cm) moon layer before the border. The 53-st border brings the moon to 4 in (10.2 cm), and the 3 in (7.6 cm) cloud sits on its lower curve. The 1.5 in (3.8 cm) and 3 in (7.6 cm) cords hang the stars to a full length of about 8.5 in (21.6 cm), with a 4 in (10.2 cm) loop on top. Check each stage as you go, and the charm will come together easily.
Happy crocheting!