

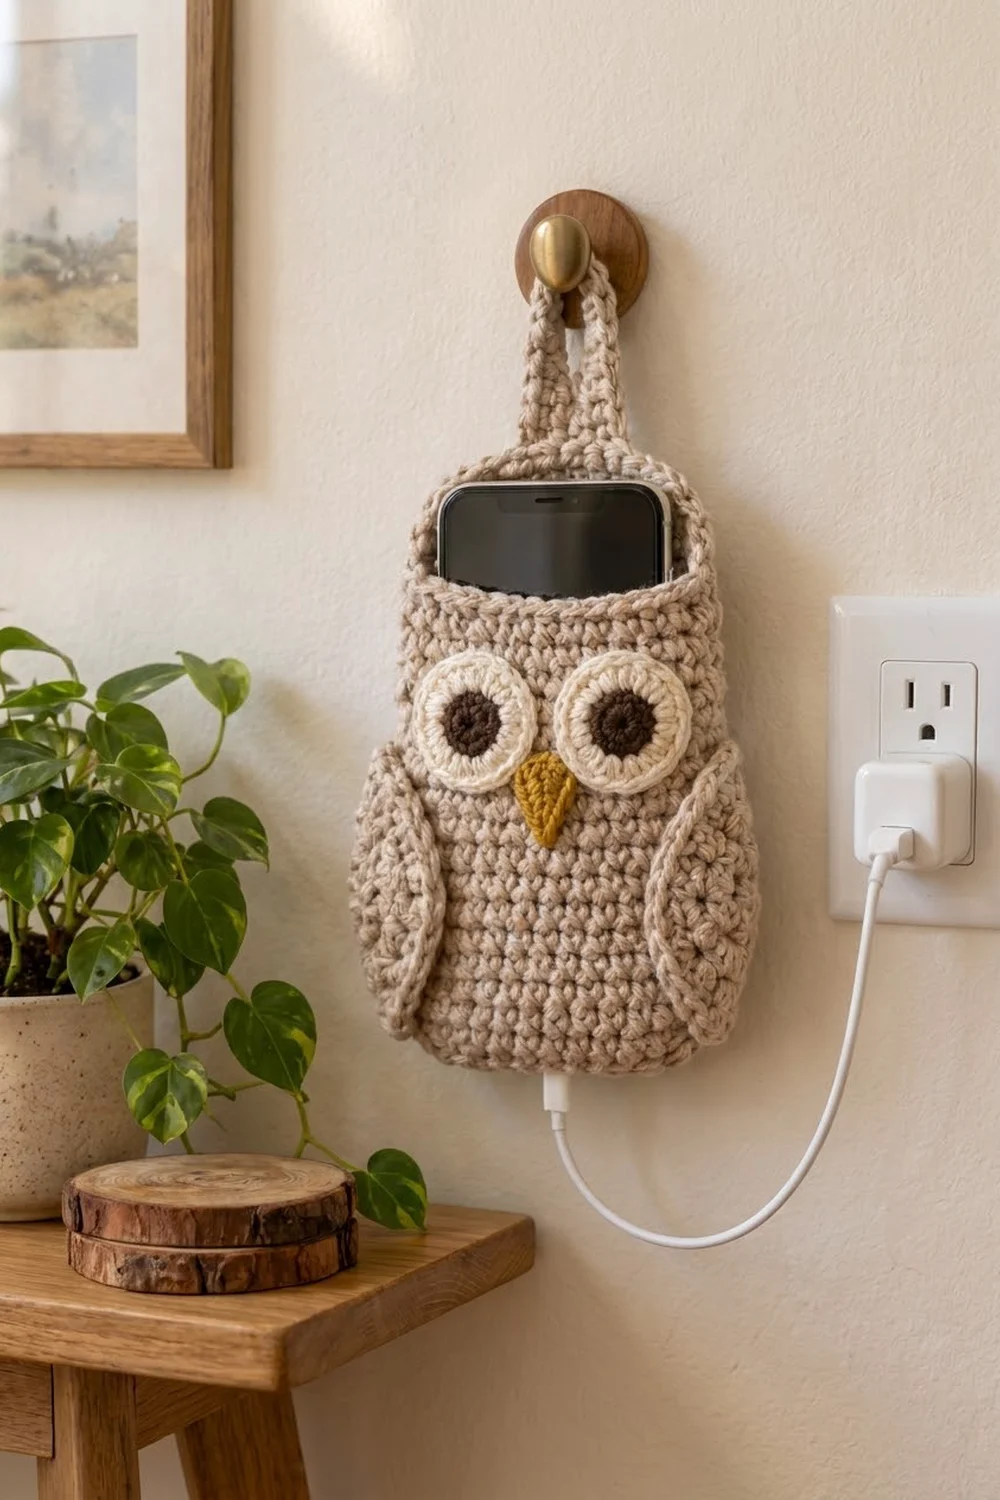
This little owl holds your phone upright and off the counter while it charges. It hangs from a wall hook by a sturdy strap loop. The phone slides into the open top so the screen peeks out, as if the owl is guarding it.
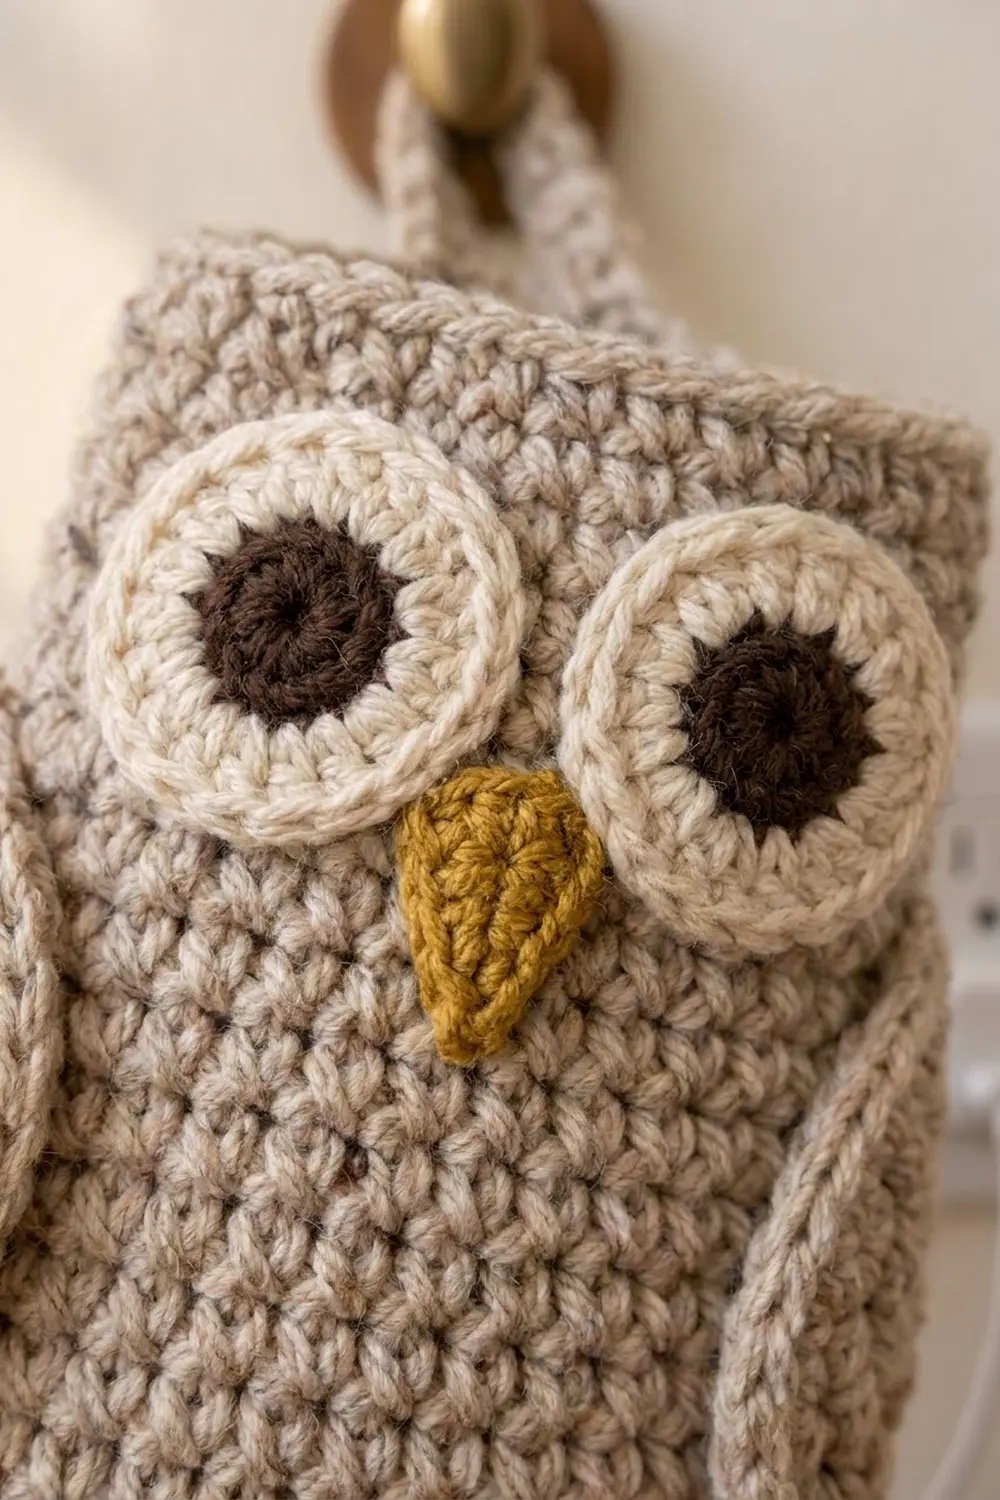
The body is a heathered oatmeal beige in dense single crochet. The face has two big eyes with chocolate-brown centers and cream outer rings, plus a small mustard-gold triangle beak. Two oval wings in the body color sit along the sides, and each one has a raised slip-stitch outline.
The style is cozy and calm, with a rustic, natural-fiber look. All instructions use US crochet terms. The finished pouch measures about 5 in (12.7 cm) wide and 5.75 in (14.6 cm) tall. With the hanging loop it is 7.75 in (19.7 cm) tall.
The construction is simple:
1. Start with an oval base.
2. Work one back-loop round to make a sharp bottom edge.
3. Work the body straight up in joined rounds.
4. Finish the rim with two border rounds.
5. Work a short strap from the back of the rim and fold it into a loop.
The eyes, beak and wings are small appliqués that you sew onto the front.
Finished Size and Construction
- Finished size: pouch 5 in (12.7 cm) wide x 5.75 in (14.6 cm) tall; 7.75 in (19.7 cm) tall with the loop
- Skill level: easy / advanced beginner
- Terminology: US crochet terms
- Yarn weight: worsted (medium #4)
- Hook: 4.0 mm (G-6)
- Number of pieces: 1 pouch with attached loop, plus 5 sewn appliqués (2 eyes, 1 beak, 2 wings)
- Layout: one item; the pouch flattens to a 20-stitch front and a 20-stitch back
- Piece size: base oval 4.25 in (10.8 cm) x 1.25 in (3.2 cm); circumference 10 in (25.4 cm)
- Size before border: 5 in (12.7 cm) wide x 5.25 in (13.3 cm) tall
- Border depth: 0.5 in (1.3 cm), plus a 2 in (5.1 cm) hanging loop
Materials
Choose a smooth worsted yarn with some structure. A cotton or cotton-acrylic blend holds the pouch shape best and won’t stretch much under the weight of a phone. A heathered or tweedy beige gives the soft, feathery look. The amounts below assume a yarn of about 170 m per 100 g.
- Color A, oatmeal beige (body, wings, loop): 60 g, about 102 m
- Color B, cream (outer eye rings): 8 g, about 14 m
- Color C, chocolate brown (eye centers): 5 g, about 9 m
- Color D, mustard gold (beak): 3 g, about 5 m
All amounts include a comfortable margin above what the sample used.
Tools:
- 4.0 mm (G-6) crochet hook
- Tapestry needle
- Scissors
- 4 locking stitch markers
- Straight pins
- Tape measure
- Cardboard about 4.75 in (12.1 cm) x 5.5 in (14.0 cm), for blocking
- Wall hook, for display
Abbreviations (US Terms)
- ch: chain
- sc: single crochet
- sl st: slip stitch
- st(s): stitch(es)
- inc: 2 sc in the same stitch
- BLO: back loop only
- MR: magic ring
- rnd(s): round(s)
- [ ]: repeat the steps in brackets the stated number of times
Special stitch, joined round: At the end of each round, sl st into the first sc to join, then ch 1. The ch 1 does not count as a stitch. Work the first sc of the next round into the same stitch as the join.
Gauge and Checkpoints
Gauge: 16 sc and 18 rnds = 4 in (10.2 cm), in sc worked in joined rounds.
Test one piece first. An eye is the quickest test. Work all 4 rounds and measure it: it should be 1.75 in (4.4 cm) across. If it is close, start the base.
Checkpoints:
- After Base Rnd 3: the oval is about 4.25 in (10.8 cm) long x 1.25 in (3.2 cm) wide, with 40 sts.
- After Body Rnd 15: the tube flattens to 5 in (12.7 cm) wide.
- After Body Rnd 27: the pouch is 5.25 in (13.3 cm) tall from the bottom fold.
- After Border Rnd 29: the pouch is 5.75 in (14.6 cm) tall.
If your work is too big: go down one hook size, for example to 3.75 mm (F-5). A loose pouch sags, and the phone tips forward.
If your work is too small: go up one hook size, to 4.5 mm (7). If the tube is too narrow, the phone won’t slide in. The 10 in (25.4 cm) circumference fits a standard phone up to 3 in (7.6 cm) wide.
Don’t change the width by adding stitches. The face layout and the border math both depend on 40 stitches.
Base
With Color A, ch 14.
Rnd 1: Sc in 2nd ch from hook, sc in next 11 ch, 3 sc in last ch. Turn the work and continue along the other side of the chain: sc in next 11 ch, 2 sc in the same ch as the first sc. Join. (28 sts)
Rnd 2: Inc in first st, sc in next 11, inc in each of next 3, sc in next 11, inc in each of last 2. Join. (34 sts)
Rnd 3: Sc in first st, inc in next, sc in next 11, [sc in next, inc in next] 3 times, sc in next 11, [sc in next, inc in next] 2 times. Join. (40 sts)
The oval now measures 4.25 in (10.8 cm) x 1.25 in (3.2 cm). The round starts at one curved end, which becomes a side of the pouch.
Place a marker in st 1 and another in st 21. Sts 1–20 make one half and sts 21–40 make the other. Choose one half as the front.
Body
Rnd 4: Working in BLO, sc in each st around. Join. (40 sts: 40 worked 1-per-stitch + 0 added)
The unused front loops form a crisp ridge. This lets the base sit flat and the sides rise straight up.
Rnds 5–27: Sc in each st around. Join. (40 sts each round)
Keep the joins stacked on the same side, where a wing will hide them. Move your markers up every few rounds to keep the 20/20 split clear.
Checkpoint: The tube flattens to 5 in (12.7 cm) wide and is 5.25 in (13.3 cm) tall from the bottom fold. Don’t fasten off. Put the live loop on a marker while you make the appliqués.
Eyes (make 2)
Rnd 1: With Color C, 6 sc in MR. Join. (6 sts)
Rnd 2: Inc in each st around. Join. Fasten off Color C. (12 sts)
The brown center now measures 0.75 in (1.9 cm).
Rnd 3: Join Color B in any st. [Sc in next, inc in next] 6 times. Join. (18 sts)
Rnd 4: [Sc in next 2, inc in next] 6 times. Join. (24 sts)
Fasten off, leaving a 12 in (30.5 cm) tail of Color B for sewing. Each eye measures 1.75 in (4.4 cm) across.
Beak (make 1)
The beak is worked in rows from the tip up, so the point faces down.
With Color D, ch 2.
Row 1: Sc in 2nd ch from hook, turn. (1 st)
Row 2: Ch 1, 3 sc in the st, turn. (3 sts)
Row 3: Ch 1, sc in each st, turn. (3 sts)
Row 4: Ch 1, inc in first st, sc in next, inc in last. (5 sts)
Fasten off, leaving a 10 in (25.4 cm) tail. The beak is a triangle 1.25 in (3.2 cm) wide x 1 in (2.5 cm) tall.
Wings (make 2)
With Color A, ch 11.
Rnd 1: Sc in 2nd ch from hook, sc in next 8 ch, 3 sc in last ch. Continue along the other side of the chain: sc in next 8 ch, 2 sc in the same ch as the first sc. Join. (22 sts)
Rnd 2: Inc in first st, sc in next 8, inc in each of next 3, sc in next 8, inc in each of last 2. Join. (28 sts)
Rnd 3: Sc in first st, inc in next, sc in next 8, [sc in next, inc in next] 3 times, sc in next 8, [sc in next, inc in next] 2 times. Join. (34 sts)
Rnd 4 (outline trim): Sl st in each st around, keeping the tension slightly firm. Join. (34 sts: 34 worked 1-per-stitch + 0 added)
This slip-stitch round forms a raised outline that gives each wing a defined rim. Fasten off, leaving a 14 in (35.6 cm) tail. Each wing measures 3.75 in (9.5 cm) long x 1.5 in (3.8 cm) wide.
Attaching the Appliqués
Sew everything on now, while the top of the tube is still open and easy to reach. Slide your blocking cardboard inside so you don’t stitch through to the back.
- Eyes: Pin both eyes on the front so their top edges sit 0.25 in (0.6 cm) below Rnd 27. Center them across the 20 front sts, with the eyes just touching in the middle. Use the cream tail to whipstitch around the outer edge of Rnd 4.
- Beak: Center the wide edge of the beak under the eyes, so it overlaps the lower inner curve of each eye by about 0.25 in (0.6 cm). Pin it and sew around all three sides.
- Wings: Pin one wing at each side, long side vertical. Place the top tip level with the eye centers and the bottom tip 0.5 in (1.3 cm) above the base ridge. Let each wing stick out about 0.5 in (1.3 cm) past the side fold. Sew only the inner long edge plus 0.75 in (1.9 cm) around each tip, so the outer edge stands slightly free.
Weave in all appliqué tails on the inside of the pouch.
Border
Border gauge: the same as the body, 4 sc per 1 in (2.5 cm). Each half of the rim has 20 sts, which equals 5 in (12.7 cm).
Put the live loop back on your hook.
Rnd 28: Sc in each st around. Join. (40 sts: 20 front + 20 back)
Rnd 29: Sc in each st around, working firmly so the rim curls in very slightly. Join. (40 sts: 40 worked 1-per-stitch + 0 added; 20 front + 20 back)
Fasten off. The rim adds 0.5 in (1.3 cm), which brings the pouch to 5.75 in (14.6 cm) tall.
Why the math works:
– The base ends with 40 sts.
– Every body and border round is worked one stitch into each stitch, with no increases or decreases.
– So the flattened pouch always has 20 sts per side, and at 4 sc per inch, 20 sts is 5 in (12.7 cm).
– The side folds are not extra stitches. Each fold is just the last stitch of one half and the first stitch of the next.
– Because nothing is added, the rim lies flat instead of rippling.
Hanging Loop
Flatten the pouch with the back facing you. Count the 20 back sts of Rnd 29 and find sts 8–12, the center 5.
Row 1: Join Color A in back st 8. Ch 1, sc in sts 8, 9, 10, 11 and 12. Turn. (5 sts)
Rows 2–20: Ch 1, sc in each st across. Turn. (5 sts each row)
The strap is now about 4.5 in (11.4 cm) long and 1.25 in (3.2 cm) wide. Fasten off, leaving a 14 in (35.6 cm) tail.
Fold the strap over toward the back and down, so Row 20 lies on the outside of the back wall. It should overlap by 0.5 in (1.3 cm), covering Rnds 28–29. Whipstitch all four edges of the overlap. The loop now rises 2 in (5.1 cm) above the rim.
Final Blocking
- Insert the cardboard so the pouch holds its 5 in (12.7 cm) width.
- Pin the wings flat against a towel so their outer edges curve smoothly.
- Hold a steamer or iron about 1 in (2.5 cm) above the work and steam lightly. Don’t press.
- Pat the eyes into round shapes and nudge the beak point straight down.
- Shape the loop into a neat teardrop.
- Let it dry completely, at least 2 hours, before you remove the cardboard.
Final Quality-Control Checklist
- The pouch is 5 in (12.7 cm) wide and 5.75 in (14.6 cm) tall.
- The base sits flat, with a visible ridge from Rnd 4.
- The round joins are hidden under one wing.
- Every body and border round has 40 sts.
- The eyes are 1.75 in (4.4 cm) across and level with each other.
- The beak is centered, with the point down.
- The wings are mirrored and stick out about 0.5 in (1.3 cm) on each side.
- The loop is centered on the back and sewn securely on all four edges.
- The phone slides in easily and stands upright.
Troubleshooting
The pouch flares at the top. Your tension loosened in later rounds. Redo the border with the next smaller hook.
The join line drifts diagonally. Check that you work the first sc into the same stitch as the join, not the next one.
The eyes cup instead of lying flat. Your increases are too tight. Go up one hook size for the eyes only.
The beak looks lopsided. Check that Row 4 has an increase at each end, for 5 sts in total.
The wing outline disappears. Work Rnd 4 a little firmer, keeping each sl st snug.
The loop stretches over time. Sew the overlap with doubled yarn, or use cotton yarn for the strap.
The phone tips forward. Cut plastic canvas to 4.25 in (10.8 cm) x 1.25 in (3.2 cm) and slip it into the base.
Care
Hand wash in cool water with mild soap. Lay it flat to dry over the cardboard, and keep it out of the dryer, which can shrink cotton and pull the appliqués out of shape.
Final Notes
The whole design follows one short measurement chain:
1. The 40-stitch base is 4.25 in (10.8 cm) x 1.25 in (3.2 cm).
2. It grows into a 10 in (25.4 cm) tube that flattens to 5 in (12.7 cm) wide.
3. The body reaches 5.25 in (13.3 cm) before the border.
4. The 0.5 in (1.3 cm) rim finishes the pouch at 5.75 in (14.6 cm).
5. The 2 in (5.1 cm) loop brings the total to 7.75 in (19.7 cm).
Check your gauge on the first eye and the rest will fall into place.
Happy crocheting!