

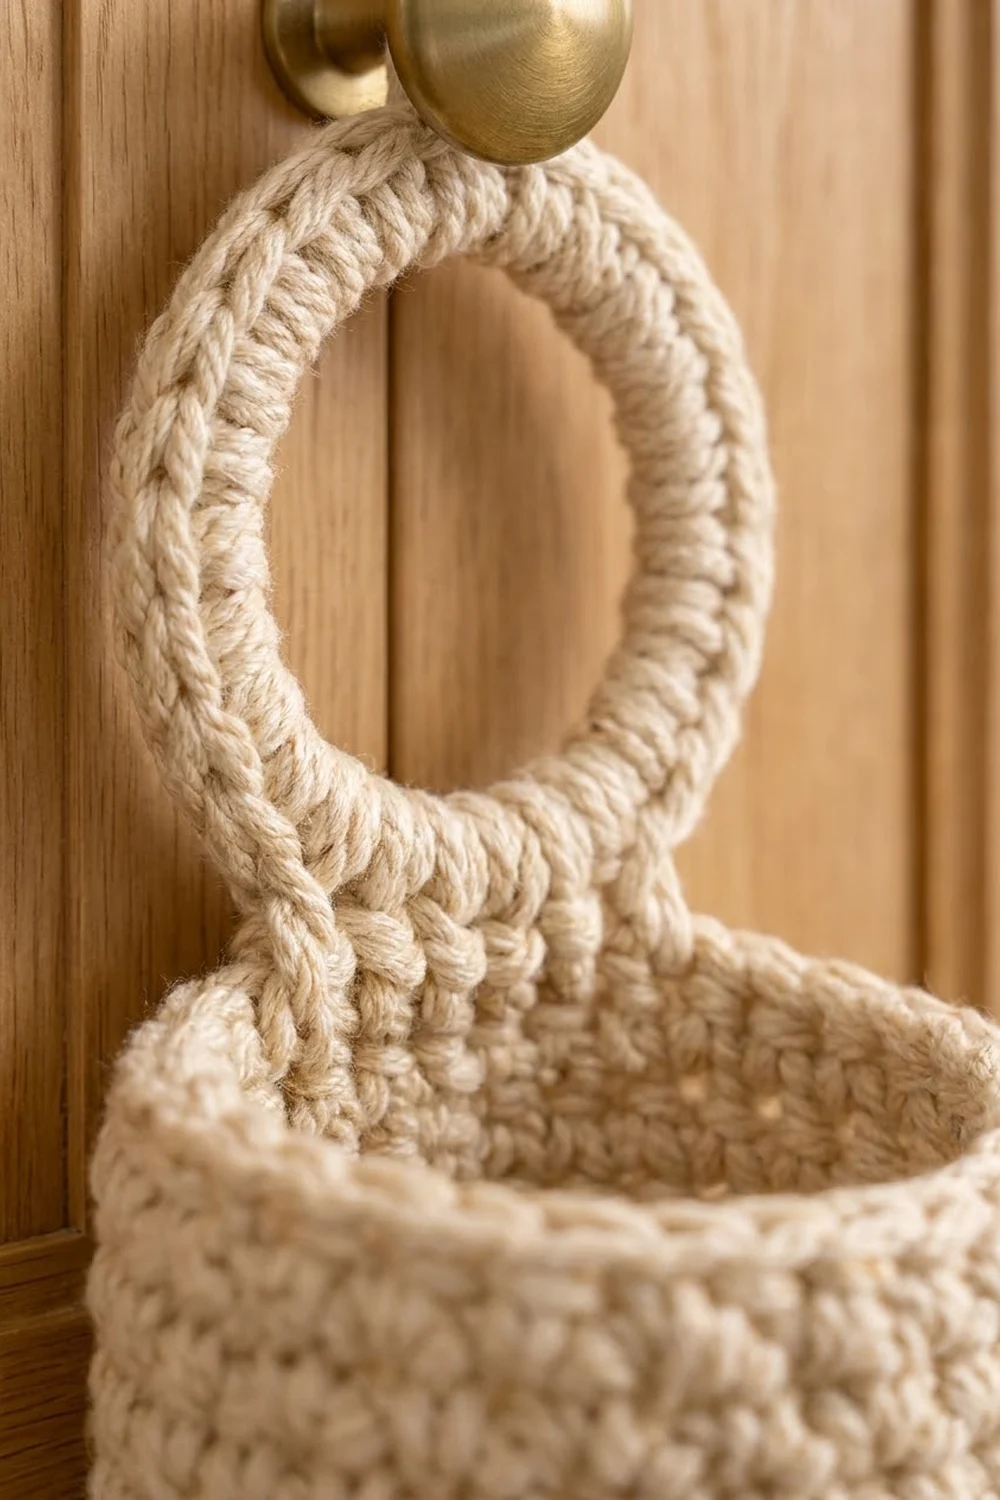
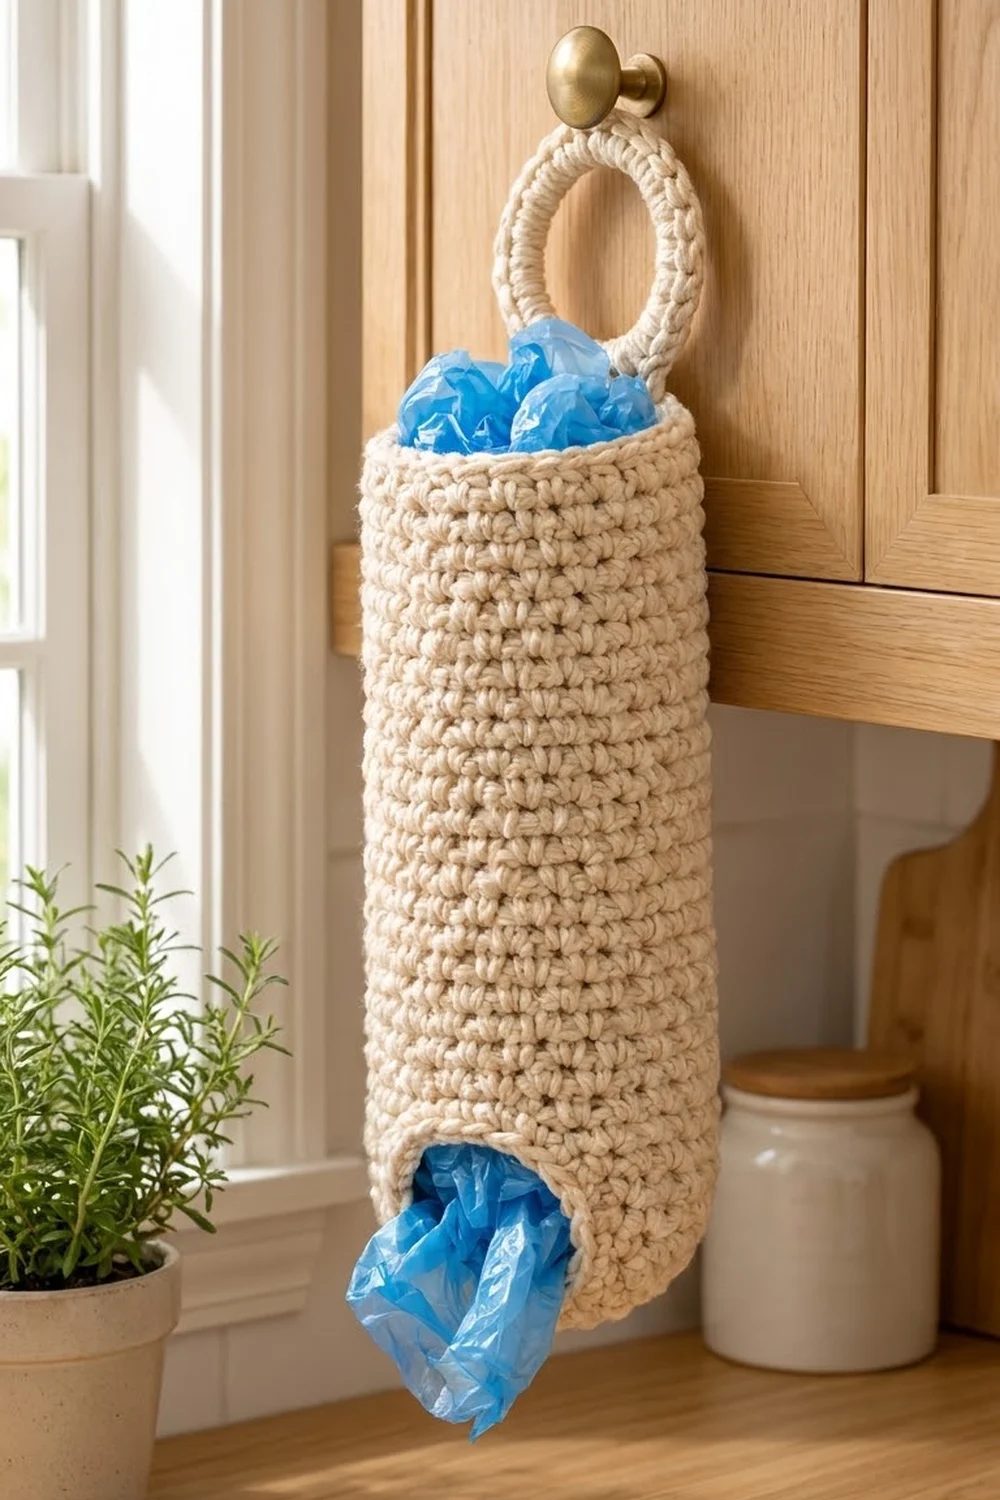
This hanging bag holder is a tidy, practical way to deal with a drawer full of plastic grocery bags. You stuff bags in through the open top and pull them out one at a time through the round opening in the base. A sturdy crocheted ring at the top hangs it from a cabinet knob, hook or door handle.
The holder is worked in one soft cream cotton in dense single crochet. The fabric is firm, textured and easy to wash. The style is simple farmhouse kitchen, so it looks at home next to wooden spoons and potted herbs. It is a quick, satisfying project for an advanced beginner.
The pattern uses US crochet terms. The body is 4.4 in (11.2 cm) in diameter and 12 in (30.5 cm) tall. With the hanging ring, the total hanging length is 15.3 in (38.9 cm).
You start at the bottom with a ring-shaped base worked around a foundation chain. A back-loop round turns the base into a straight tube. You then work even rounds up to the rim and finish with a short edging. Last, you make a separate hanging ring with a small tab and sew it to the inside back of the rim.
Finished Size and Construction
- Finished size: Body 4.4 in (11.2 cm) diameter × 12 in (30.5 cm) tall; 15.3 in (38.9 cm) total with the ring
- Skill level: Advanced beginner
- Terminology: US crochet terms
- Yarn weight: Worsted (medium, #4) cotton
- Hook: 5.0 mm (US H-8)
- Number of pieces: 2 (body with base, and hanging ring)
- Layout: Ring sewn centered at the back of the top rim
- Piece sizes: Body 4.4 in (11.2 cm) × 12 in (30.5 cm); ring 3.3 in (8.4 cm) outer diameter
- Size before border: Body 11.5 in (29.2 cm) tall
- Border depth: 0.5 in (1.3 cm), which makes up the last 0.5 in (1.3 cm) of the height
Materials
Use a smooth worsted yarn that is 100% cotton or a cotton blend. Cotton holds its shape, doesn’t stretch much under the weight of the bags, and washes well. Avoid very fuzzy or loosely plied yarn, because fuzz makes stitches hard to see and loose plies split under the hook.
- Cream / oatmeal: about 150 g, approx. 260 m (284 yd)
The quantity includes a margin of about 10% to cover your gauge check and small differences in tension.
Tools:
- 5.0 mm (US H-8) crochet hook, plus 4.5 mm and 5.5 mm hooks if you need to adjust gauge
- Stitch markers (2)
- Tapestry needle
- Scissors
- Measuring tape
- Rustproof pins and a spray bottle for blocking
- Optional: a rolled towel or a 4 in (10.2 cm) wide jar for shaping
Abbreviations (US Terms)
- ch – chain
- sl st – slip stitch
- sc – single crochet
- BLO – back loop only
- st(s) – stitch(es)
- rnd(s) – round(s)
- inc – increase: work 2 sc in the same stitch
- rep – repeat
Special technique: joined rounds. At the end of each round, sl st into the first sc to join. Ch 1 to start the next round. The ch 1 never counts as a stitch, and the first sc of each round goes into the same stitch as the join. Joined rounds keep the rim level and stack the seam in one straight line, which the hanging ring later hides.
Gauge and Checkpoints
Gauge: 14 sc and 16 rnds = 4 in (10.2 cm) in joined rounds with a 5.0 mm hook. That is 3.5 sts and 4 rnds per inch (2.5 cm).
Use the base as your test piece. It takes only five rounds, so measure it before you commit to the tube. Single crochet in cotton tends to tighten as you relax into the work, so measure again partway up the body.
Checkpoint 1, after Rnd 1: The center opening is about 2.2 in (5.6 cm) across, and the inner circumference is about 6.9 in (17.5 cm).
Checkpoint 2, after Rnd 5: Lay the base flat. The outer diameter should be 4.4 in (11.2 cm) and the circumference about 13.7 in (34.8 cm). The band of fabric between the opening and the outer edge is about 1.1 in (2.8 cm) wide.
Checkpoint 3, after Rnd 29: The tube is 6 in (15.2 cm) tall, measured from the fold ridge. Flattened, it is about 6.9 in (17.5 cm) wide.
Checkpoint 4, after Rnd 51: The tube is 11.5 in (29.2 cm) tall, measured from the fold ridge.
If your base is too big (more than 4.6 in / 11.7 cm), go down to a 4.5 mm hook and start again. If it is too small (less than 4.2 in / 10.7 cm), go up to a 5.5 mm hook. If only your round height is off, add or remove even rounds in the tube until it reaches 11.5 in (29.2 cm).
Body Pattern
Base (worked flat in the round)
Foundation: Ch 24 and sl st into the first ch to form a ring. Make sure the chain is not twisted.
Rnd 1: Ch 1, sc in each ch around, join. (24 sts)
Rnd 2: Ch 1, sc in next 3 sts, inc in next st; rep from * 5 more times, join. (30 sts)
Rnd 3: Ch 1, sc in next 4 sts, inc in next st; rep from * 5 more times, join. (36 sts)
Rnd 4: Ch 1, sc in next 5 sts, inc in next st; rep from * 5 more times, join. (42 sts)
Rnd 5: Ch 1, sc in next 6 sts, inc in next st; rep from * 5 more times, join. (48 sts)
Each round adds exactly 6 stitches. At this gauge, that matches how fast a flat ring grows outward, so the base lies flat without ruffling or cupping. Stop here and check Checkpoint 2.
Turning Round
Rnd 6: Ch 1, sc BLO in each st around, join. (48 sts)
The unused front loops form the crisp ridge at the bottom edge, and the work starts to rise as a wall. Place a marker in the first stitch.
Tube
Rnds 7–51: Ch 1, sc through both loops in each st around, join. (48 sts in each round)
Rounds 6 to 51 add up to 46 rounds, which at 4 rounds per inch gives 11.5 in (29.2 cm) of height. Move your marker up every few rounds and keep the joins stacked at the back. Count to 48 every ten rounds; one lost or extra stitch is easy to fix early and hard to fix late. Don’t fasten off. Go straight on to the border.
Hanging Ring
Foundation: Leave a 6 in (15.2 cm) tail, ch 24 and sl st into the first ch to form a ring. Do not twist the chain.
Rnd 1: Ch 1, work 36 sc into the center of the ring, around the chain rather than into its stitches, join. (36 sts) Push the stitches together as you go so they cover the chain completely. This gives the thick, rope-wrapped look.
Rnd 2: Ch 1, sc in each st around, join. (36 sts) This round firms up the outer edge. The ring is now 3.3 in (8.4 cm) across the outside and about 2.2 in (5.6 cm) across the opening.
Tab: Work back and forth in rows from the last 4 stitches of Rnd 2.
- Row 1: Ch 1, sc in next 4 sts. (4 sts)
- Rows 2–4: Ch 1, turn, sc in each st across. (4 sts)
The tab is about 1.1 in (2.8 cm) wide and 1 in (2.5 cm) long. Fasten off, leaving a 12 in (30.5 cm) tail for sewing.
Make All Pieces
Make one of each, all in cream:
- Body with base: 1
- Hanging ring with tab: 1
Back view of how the pieces fit together:
      ( O )    <- hanging ring, 3.3 in / 8.4 cm
       |#|     <- tab, sewn inside the rim
   |=========| <- top rim (border)
   |         |
   |  tube   |  11.5 in / 29.2 cm + 0.5 in / 1.3 cm border
   |         |
   \___( )___/ <- base with 2.2 in / 5.6 cm opening
Joining
Finish the border (next section) before you sew on the ring.
Method: Whipstitch with the 12 in (30.5 cm) tail.
- Flatten the body so the stacked joins run down the center of the back.
- Slip the tab inside the rim, centered over the joins, so the base of the ring sits level with the top edge. The whole 1 in (2.5 cm) tab overlaps the inside wall.
- Match the 4 tab stitches to 4 rim stitches, one to one. Whipstitch along both side edges of the tab and across its lower edge, catching only the inner loops so nothing shows on the outside.
- Make a second pass along the top edge of the rim, where the load is greatest.
Tension: Pull each stitch snug but not tight. If the rim puckers, it will pull inward and the holder won’t hang straight.
Size check: Hang the holder on a knob. From the top of the ring to the base, it should measure 15.3 in (38.9 cm), and the ring should sit centered above the back seam.
Border
Border gauge: Same as the body, 3.5 sts and 4 rnds per inch. The border adds 0.5 in (1.3 cm) of height.
Border Rnd 1 (Rnd 52): Ch 1, sc in each st around, join. (48 sts)
Border Rnd 2 (Rnd 53): Ch 1, sc in each st around, join. (48 sts)
Border Rnd 3 (Rnd 54): Sl st loosely in each st around. (48 sl sts) Finish with an invisible join: thread the tail on a needle and pass it through the first sl st.
Why the math works: The rim stays at 48 stitches, the same as the base’s final count, so every round from the fold to the top has a 13.7 in (34.8 cm) circumference and the wall stays straight. Adding stitches would flare the rim, and skipping them would pull it in. The slip-stitch round is a trim worked one stitch into each existing stitch with nothing added, so it firms the edge without changing its size. The two sc rounds take the body from 11.5 in (29.2 cm) to 12 in (30.5 cm).
Opening trim: Turn the holder upside down. Join yarn in any foundation chain and sl st loosely into each of the 24 unused chain loops around the opening. (24 sl sts) This stops the bag opening from stretching out of shape.
Final Blocking
- Weave in all ends on the inside, following the direction of the stitches.
- Mist the whole holder until it is damp but not soaked.
- Slide a rolled towel or a 4 in (10.2 cm) wide jar inside the tube to round it out.
- Press the base flat and pinch the fold ridge to sharpen it.
- Lay the ring flat and pin it into a 3.3 in (8.4 cm) circle with the tab straight.
- Let everything dry completely, then remove the form.
Final Quality-Control Checklist
- Body diameter is 4.4 in (11.2 cm), and flattened width is 6.9 in (17.5 cm)
- Body height is 12 in (30.5 cm) from the fold ridge
- The base opening is round and about 2.2 in (5.6 cm) across
- Every round from Rnd 5 to Rnd 54 has 48 sts
- The joins are stacked in a straight line at the back
- The ring is centered over the seam and sewn on firmly
- No yarn ends show on the outside
Troubleshooting
The base ruffles: Your tension is loose or you added extra increases. Recount to 48 sts and go down a hook size.
The base cups up before Rnd 6: You missed increases. Check that each repeat ends with an inc.
The joins drift into a diagonal: Make sure the first sc of each round goes into the same stitch as the join, not the next stitch.
The tube flares at the top: Your tension loosened as you worked. Recount the stitches and work the border with a 4.5 mm hook.
The ring droops forward: Sew the tab lower on the inside wall and add a second line of stitches along the rim.
Bags won’t feed out: The opening is too tight. Redo the opening trim more loosely, or leave it off.
Care
Hand wash, or machine wash on a gentle cycle in cool water. Reshape the holder over a jar while it is damp and let it air dry.
Final Notes
The whole pattern follows one measurement chain. A 24-stitch opening of 2.2 in (5.6 cm) grows to a 48-stitch base of 4.4 in (11.2 cm). Those 48 stitches rise straight for 11.5 in (29.2 cm), and the border brings the body to 12 in (30.5 cm). The 3.3 in (8.4 cm) ring makes the total hanging length 15.3 in (38.9 cm). If your base passes Checkpoint 2, the rest of the holder will come out the right size. Make one for the pantry, one for the laundry room and one as a housewarming gift.
Happy crocheting!