

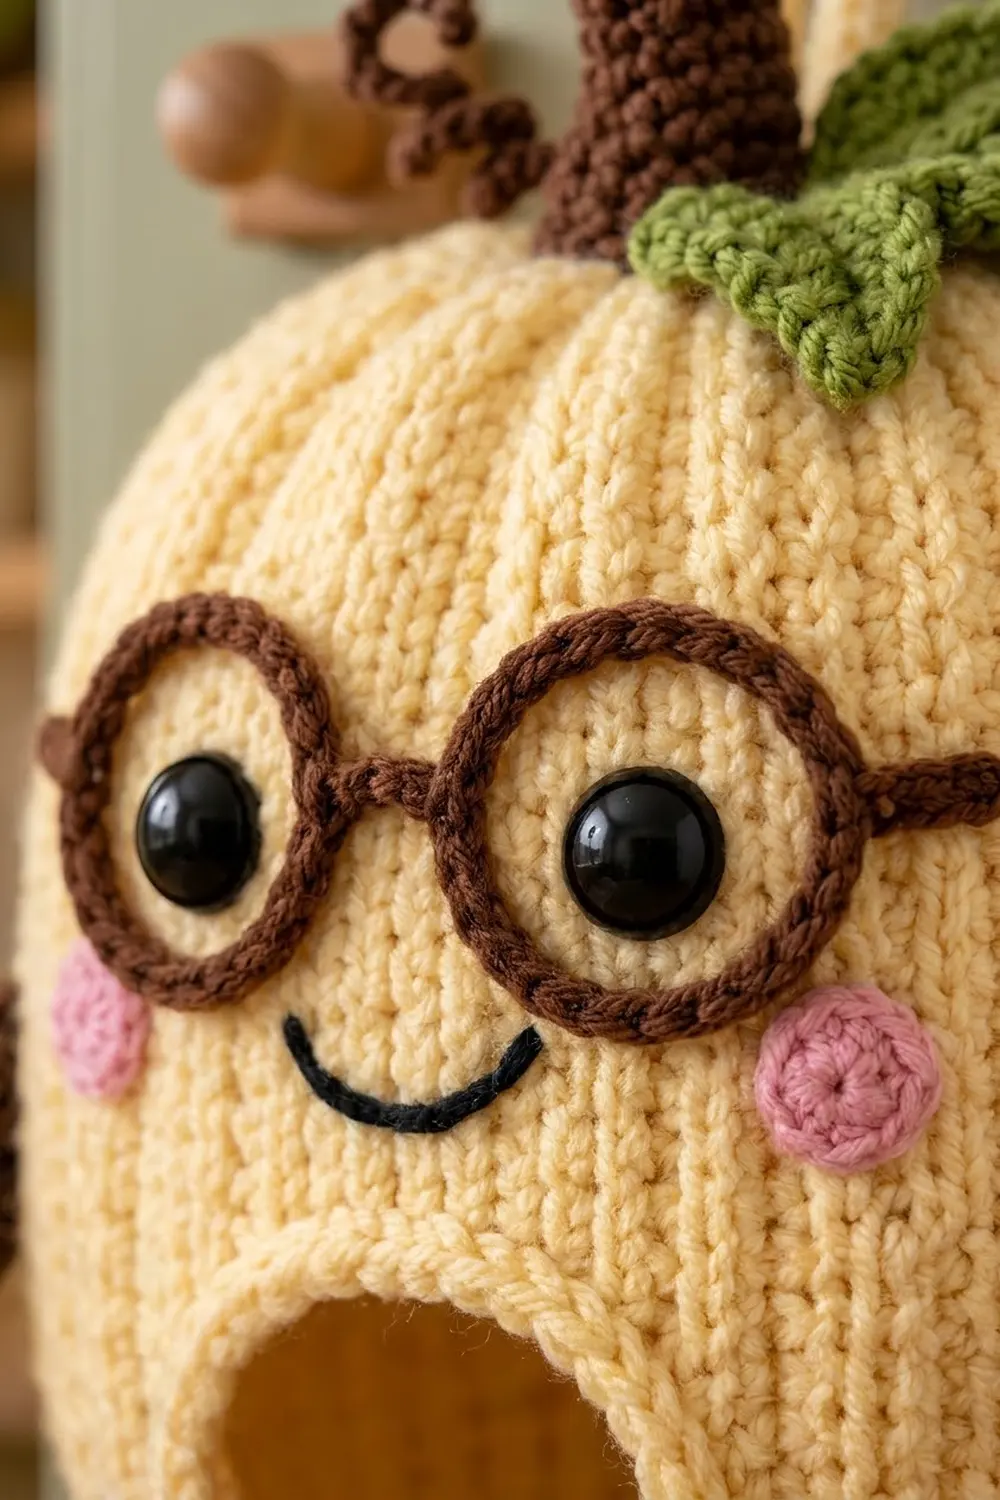
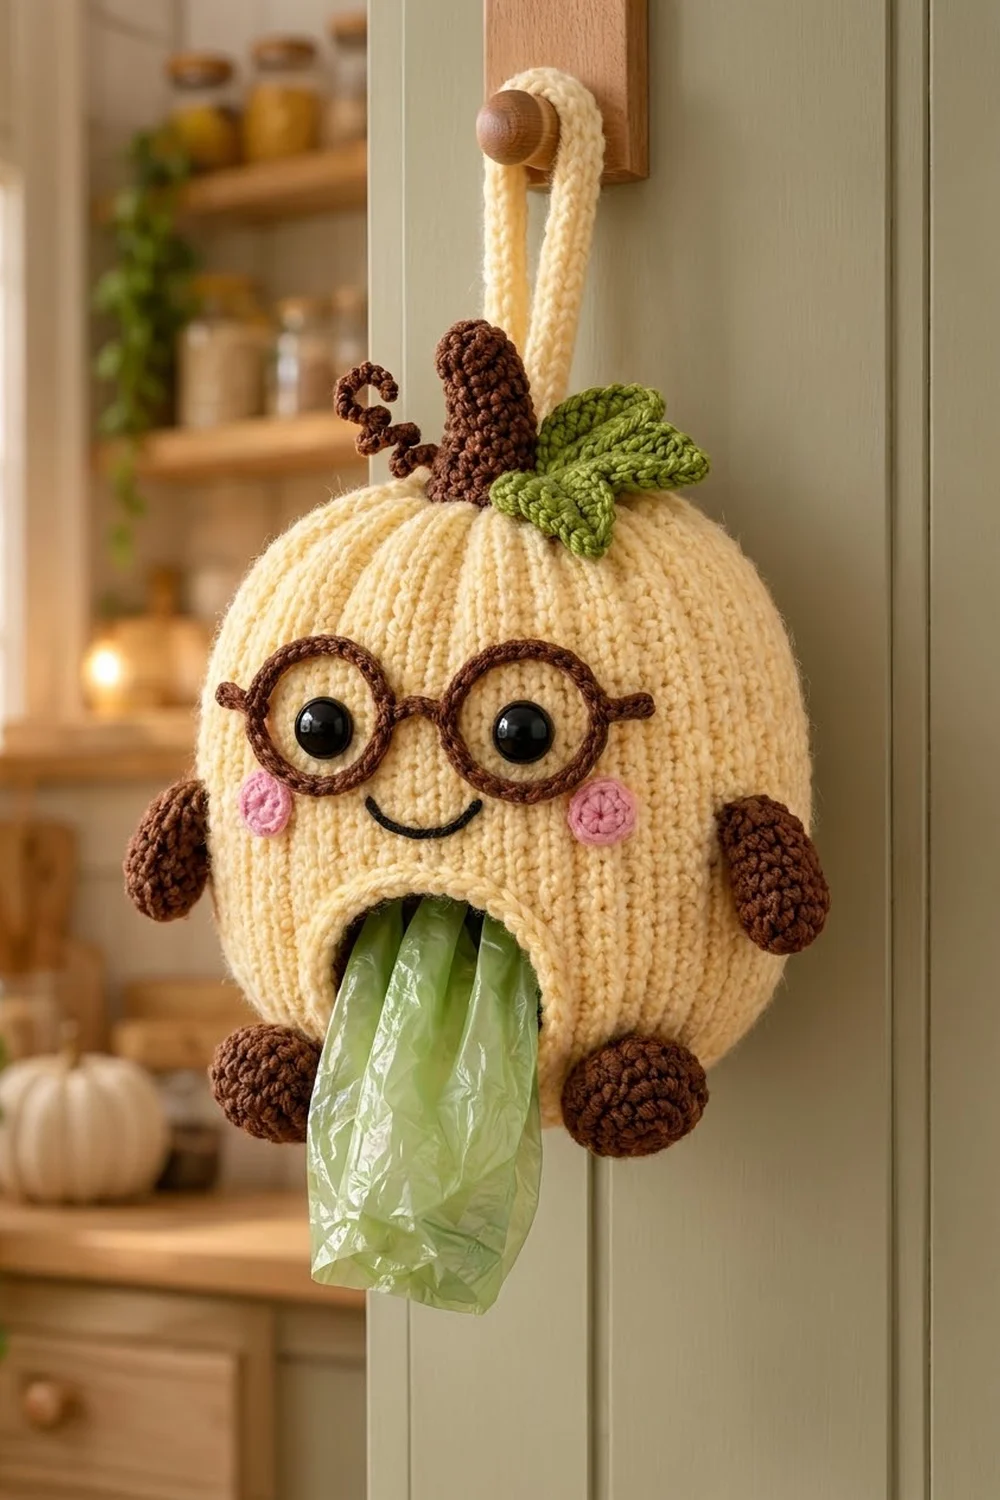
Professor Pumpkin is a small plastic grocery bag holder with a big personality. The body is a soft butter-cream pumpkin with vertical ribs. It wears round brown glasses, has pink cheeks, a small smile, a curly brown stem and two green leaves. You push bags in through the top and pull them out one at a time through the round “mouth” opening on the front.
The colors are warm and simple: cream for the body, chocolate brown for the stem, glasses, arms and feet, leaf green, soft pink and a little black. The look is cozy farmhouse kitchen, cute enough to keep out all autumn.
This pattern uses US crochet terms. The finished body measures about 6.5 in (16.5 cm) wide and 6 in (15.2 cm) tall, and about 8.5 in (21.6 cm) tall to the top of the stem. The hanging loop adds about 5 in (12.7 cm).
Construction is simple. You crochet one flat rectangle in single crochet through the back loop, working sideways so the ribs run vertically, and build the bag opening into it as you go. You then seam the panel into a tube, gather the bottom closed, crochet a rim at the top and sew on the small parts.
Finished Size and Construction
- Finished size: about 6.5 in (16.5 cm) wide × 6 in (15.2 cm) tall (body)
- Skill level: Intermediate (easy stitches, careful assembly)
- Terminology: US crochet terms
- Yarn weight: Worsted (#4)
- Hooks: 4.5 mm (US 7) for the body; 3.5 mm (US E-4) for the small parts
- Number of pieces: 1 main body plus sewn-on parts (stem, tendril, 2 leaves, 2 lenses, 2 arms, 2 feet, 2 cheeks, hanging cord)
- Layout: single piece, no motif grid
- Flat panel size: 8 in (20.3 cm) tall × 20 in (50.8 cm) long
- Size before rim: a 20 in (50.8 cm) round tube, 8 in (20.3 cm) tall
- Rim depth (border): about 0.75 in (1.9 cm) at the top; the bag-opening edging adds about 0.5 in (1.3 cm)
Materials
Pick a smooth worsted-weight acrylic or cotton-acrylic blend. Acrylic keeps its shape and copes with kitchen dust and washing. Avoid fuzzy yarns, because they hide the ribs.
- Cream (main color): 110 g / 200 m
- Chocolate brown: 30 g / 55 m
- Leaf green: 8 g / 15 m
- Soft pink: 3 g / 6 m
- Black: 2 g / 4 m (or black embroidery floss)
All quantities include a margin of about 15 percent for swatching and joins.
Tools:
- 4.5 mm (US 7) and 3.5 mm (US E-4) hooks
- Two 12 mm black safety eyes with washers
- A small handful of polyester fiberfill
- Tapestry needle, scissors, 6 locking stitch markers
- Straight pins and a tape measure
Abbreviations (US Terms)
- ch: chain
- sl st: slip stitch
- sc: single crochet
- hdc: half double crochet
- dc: double crochet
- inc: 2 sc in the same stitch
- sc2tog: single crochet 2 together
- MR: magic ring
- st(s): stitch(es)
- RS: right side
Special stitch – sc blo (single crochet through the back loop only): Insert the hook under the back loop only, then complete a normal sc. Every 2 rows form one raised vertical rib.
Gauge and Checkpoints
Body gauge: 16 sc blo × 18 rows = 4 in (10.2 cm) with the 4.5 mm hook.
Small-parts gauge: about 5 sc and 5.5 rounds = 1 in (2.5 cm) with the 3.5 mm hook.
Test first: Treat the first 18 rows of the body as your swatch. Then check:
- Checkpoint 1 (after Row 1): 32 sts measure 8 in (20.3 cm).
- Checkpoint 2 (after Row 18): the panel is 4 in (10.2 cm) long.
- Checkpoint 3 (after Row 36): the panel is 8 in (20.3 cm) long.
- Checkpoint 4 (after Row 90): the panel is 20 in (50.8 cm) long.
If your panel is too big, go down 0.5 mm in hook size and start again. If it is too small, go up 0.5 mm. Don’t change the stitch counts, because every later round depends on 32 sts and 90 rows.
Main Pattern: The Body Panel
The panel is worked sideways. The 32 stitches make the height of the pumpkin, and the 90 rows go around its circumference. Turn at the end of every row. The ch 1 at the start of a row does not count as a stitch.
Foundation: With cream and the 4.5 mm hook, ch 33.
Row 1: Sc in the 2nd ch from the hook and in each ch across, turn. (32 sts)
Place a marker on the edge where Row 1 ended and label it BOTTOM. The other edge is the TOP. Odd rows run from top to bottom, and even rows run from bottom to top.
Rows 2–39: Ch 1, sc blo in each st across, turn. (32 sts per row)
Row 39 ends at the bottom edge.
Bag Opening (Rows 40–51)
The opening is 10 sts tall and 12 rows wide. You work two separate strips, one above it and one below it.
Lower strip, Rows 40–51 (main yarn): Ch 1, sc blo in the first 4 sts only, turn. Repeat for 12 rows. (4 sts per row)
Row 51 ends at the bottom edge. Put the live loop on a stitch marker, but don’t cut the yarn.
Upper strip, Rows 40–51 (new strand): Leave the next 10 sts of Row 39 unworked. Join a new strand of cream in the back loop of the first stitch at the top edge of Row 39. Ch 1, sc blo in that stitch and the next 17, turn. (18 sts) Work 11 more rows of 18 sc blo. Fasten off, leaving a 6 in (15.2 cm) tail to weave in.
Row 52: Pick up the main loop. Ch 1, sc blo in the 4 lower-strip sts, ch 10, then sc blo in the 18 upper-strip sts, turn. That is 4 + 10 ch + 18 = 32 sts.
Row 53: Ch 1, sc blo in 18 sts, sc in the back bump of each of the 10 ch, sc blo in 4 sts, turn. (32 sts)
Rows 54–90: Ch 1, sc blo in each st across, turn. (32 sts per row)
Check: 39 rows + 12 opening rows + 39 rows = 90 rows. The opening sits exactly at the center front, and the panel is 20 in (50.8 cm) long. Don’t fasten off yet.
Seam the Tube
Fold the panel with the right sides together so Row 90 lines up with the foundation chain. Sl st through each stitch of Row 90 and the matching free loop of the foundation chain. That is 32 sl sts for 32 stitches, one to one. Fasten off and turn right side out. The seam is the center back.
Safety Eyes
Count up from the bottom edge to stitch 21. Insert the eyes at stitch 21 in Rows 41 and 50. They sit 9 rows apart, about 2 in (5.1 cm). Reach in through the open top to snap on the washers.
Close the Bottom
Join cream at the seam on the bottom edge. Work into the row ends:
Rnd 1: Sc in the next row end, sc2tog over the next 2 row ends 30 times; join with a sl st. (60 sts)
Rnd 2: Sc2tog 30 times. (30 sts)
Rnd 3: Sc2tog 15 times. (15 sts)
Fasten off with a long tail. Weave it through the front loops of all 15 sts, pull tight and secure.
Small Parts (3.5 mm Hook)
Stem (brown):
- Rnd 1: 6 sc in MR. (6)
- Rnd 2: Sc, inc 3 times. (9)
- Rnds 3–7: Inc, sc 6, sc2tog. (9 sts each round; this shaping curves the stem)
- Rnd 8: Sc 2, inc 3 times. (12)
- Rnds 9–10: Sc around. (12)
Stuff lightly. The stem is about 2 in (5.1 cm) tall.
Tendril (brown): Ch 16. Work 2 sc in the 2nd ch from the hook and in each ch across. (30 sts) The strip curls into a corkscrew as you work.
Leaf (green, make 2): Ch 9. Starting in the 2nd ch from the hook (this end is the tip), work sc, hdc, dc, dc, dc, hdc, sc. Work 3 sc in the last ch. Turn the chain and work along the free loops on the other side: sc, hdc, dc, dc, dc, hdc, sc. That is 7 + 3 + 7 = 17 sts. For the pointed tip, ch 2 and sl st in the 2nd ch from the hook, then sl st into the first sc. Each leaf is about 1.75 in (4.4 cm) long.
Lens (brown, make 2): Ch 12 and join with a sl st to form a ring. Ch 1, work 20 sc into the ring and sl st to the first sc. (20) Each lens is about 1.25 in (3.2 cm) across.
Bridge and side arms of the glasses (brown): Make one ch 4 for the bridge and two ch 6 cords for the side arms.
Arm (brown, make 2):
- Rnd 1: 6 sc in MR. (6)
- Rnd 2: Sc, inc 3 times. (9)
- Rnd 3: Sc 2, inc 3 times. (12)
- Rnds 4–7: Sc around. (12)
- Rnd 8: Sc, sc2tog 4 times. (8)
Stuff lightly. Flatten and close with 4 sc worked through both layers. Each arm is about 1.75 in (4.4 cm) long.
Foot (brown, make 2):
- Rnd 1: 6 sc in MR. (6)
- Rnd 2: Inc around. (12)
- Rnd 3: Sc, inc 6 times. (18)
- Rnd 4: Sc 2, inc 6 times. (24)
- Rnds 5–7: Sc around. (24)
- Rnd 8: Sc 2, sc2tog 6 times. (18)
- Rnd 9: Sc, sc2tog 6 times. (12) Stuff firmly.
- Rnd 10: Sc2tog 6 times. (6)
Close the hole. Each foot is about 1.5 in (3.8 cm) across.
Cheek (pink, make 2): Work 8 hdc in MR and sl st to join. Each cheek is about 0.6 in (1.5 cm) across.
Hanging cord (cream, 4.5 mm hook): Ch 50, then sl st in the back bump of each ch. (50) The cord is about 10 in (25.4 cm) long.
Border: Top Rim and Bag-Opening Edging
Border gauge: 4 sc = 1 in (2.5 cm), working through both loops with the 4.5 mm hook.
Top Rim
Join cream at the seam on the top edge and work into the row ends:
- Rnd 1: Sc in the next row end, sc2tog over the next 2 row ends 30 times; join. (60 sts)
- Rnd 2: Sc2tog 30 times; join. (30 sts)
- Rnds 3–4: Sc in each st around; join. (30 sts)
Fasten off.
Why the math works: 90 row ends ÷ 3 = 30 repeats, which gives 60 sts after Rnd 1. Halving that gives 30. Thirty sts at 4 sc per inch leave a round opening about 2.4 in (6.1 cm) across, wide enough to push bags in. The rim stands about 0.75 in (1.9 cm) tall.
Bag-Opening Edging
Join cream at the top-left corner of the opening. The opening has four sides:
- Rnd 1: Work 10 sc along the unworked sts of Row 39, 12 sc along the row ends of the lower strip, 10 sc into the free loops of the Row 52 chain and 12 sc along the row ends of the upper strip; join. That is 10 + 12 + 10 + 12 = 44 sts.
- Rnd 2: Sc 9, sc2tog 4 times; join. (40 sts, 10 per quarter)
Why the math works: each side gets one stitch per stitch or row end, so the edge lies flat. The four sc2tog round off the corners, turning the rectangle into the soft circle in the photo. The finished opening is about 2.5 in (6.4 cm) across.
Assembly
- Sew the stem to the front of the top rim, slightly left of center. Sew the tendril just left of the stem.
- Overlap the two leaves to the right of the stem and sew them on along their bases.
- Sew one end of the hanging cord to each side of the rim, so it forms a handle-style loop rising about 5 in (12.7 cm).
- Center a lens around each eye. Sew the ch-4 bridge between the lenses. Sew a ch-6 side arm outward from the outer edge of each lens.
- Sew the cheeks at about stitch 17, below the outer edge of each lens (Rows 38 and 53).
- With black, backstitch a smile about 1 in (2.5 cm) wide at stitch 18, centered between Rows 44 and 47.
- Sew the arms flat against the sides at Rows 23 and 68, at mid-height.
- Sew the feet low on the front, at Rows 36 and 55, so they rest on the gathered base.
Final Blocking
- Fill the body with plastic bags or a small towel so it is pumpkin-round.
- Mist the cream body lightly with water. Don’t soak acrylic, and never steam it near the safety eyes.
- Press the bag opening into a circle with your fingers and pin it if needed.
- Shape the top rim so it is level and round.
- Let it dry completely, then curl the tendril around a pencil and mist it again.
Final Quality-Control Checklist
- The panel has 32 sts and 90 rows, and it measured 20 in (50.8 cm) before seaming.
- The opening is centered between Rows 40 and 51 and measures about 2.5 in (6.4 cm) across.
- The bottom is fully closed with no gap.
- The top rim has 30 sts and an opening about 2.4 in (6.1 cm) across.
- The eyes are level, and each one sits in the middle of its lens.
- The arms and feet are symmetrical.
- The hanging loop holds firm when you tug it.
- All ends are woven in on the inside.
Troubleshooting
- Ribs look flat: You may be working through both loops. Use the back loop only on every body row.
- Panel edges slant: Check that you have 32 sts every row. A ch 1 accidentally counted as a stitch adds one.
- The opening is lopsided: Re-count the strips. You need 4 sts in the lower strip and 18 in the upper strip, both for exactly 12 rows.
- Top rim ruffles: Make sure Rnd 1 has 30 decreases. Go down 0.5 mm for the rim if needed.
- Bottom won’t close neatly: Cinch through the front loops only and add a few extra stitches across the center.
- Glasses droop: Tack each lens down at 4 points around its circle.
Care
Spot clean with mild soap and cool water, then reshape and air dry. Hand washing is fine too. Avoid the dryer, because heat can loosen the safety eyes and stretch the ribs.
Final Notes
The measurement chain is short. The 16-stitch gauge gives a 32-stitch panel 8 in (20.3 cm) tall, and 90 rows give a tube 20 in (50.8 cm) around. The bottom gathers 90 → 60 → 30 → 15, and the top gathers 90 → 60 → 30 for an opening about 2.4 in (6.1 cm) wide. The 44-to-40-stitch edging rounds the front opening. If your gauge is right at the first checkpoint, everything after it will fit. Hang Professor Pumpkin on a cabinet peg, fill him with bags, and enjoy him all season.
Happy crocheting!