
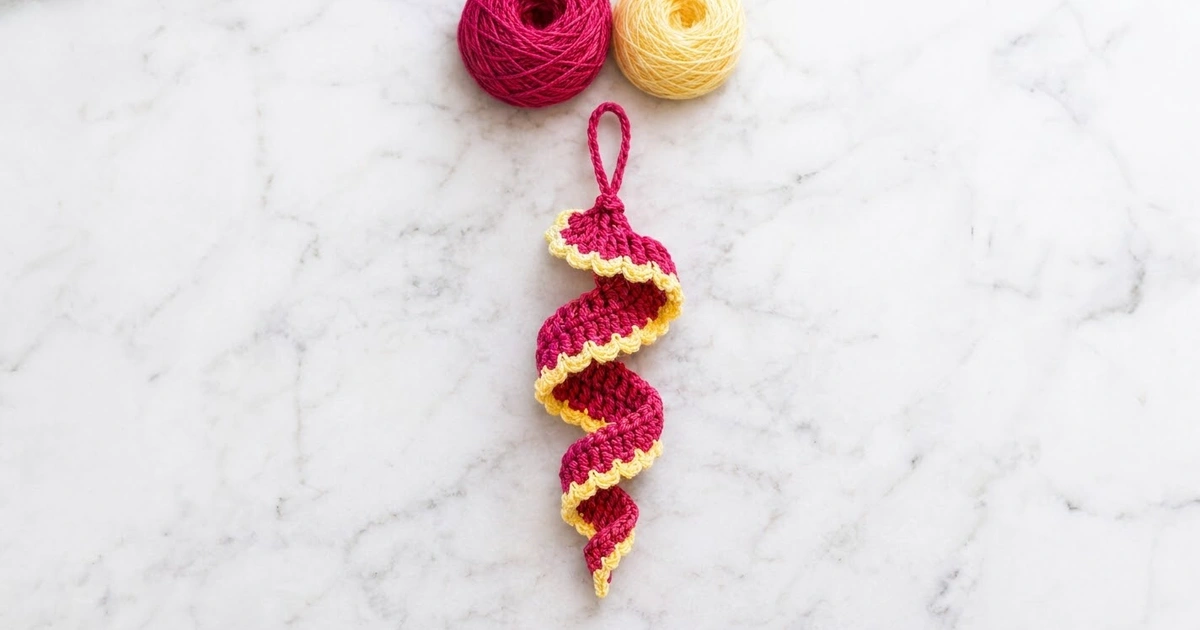
This little spiral ornament looks like a curl of ribbon caught mid-twist. One raspberry strip winds down in about three turns, wide at the top and narrowing to a fine point. A row of tiny butter-yellow scallops runs along the outer edge all the way down.
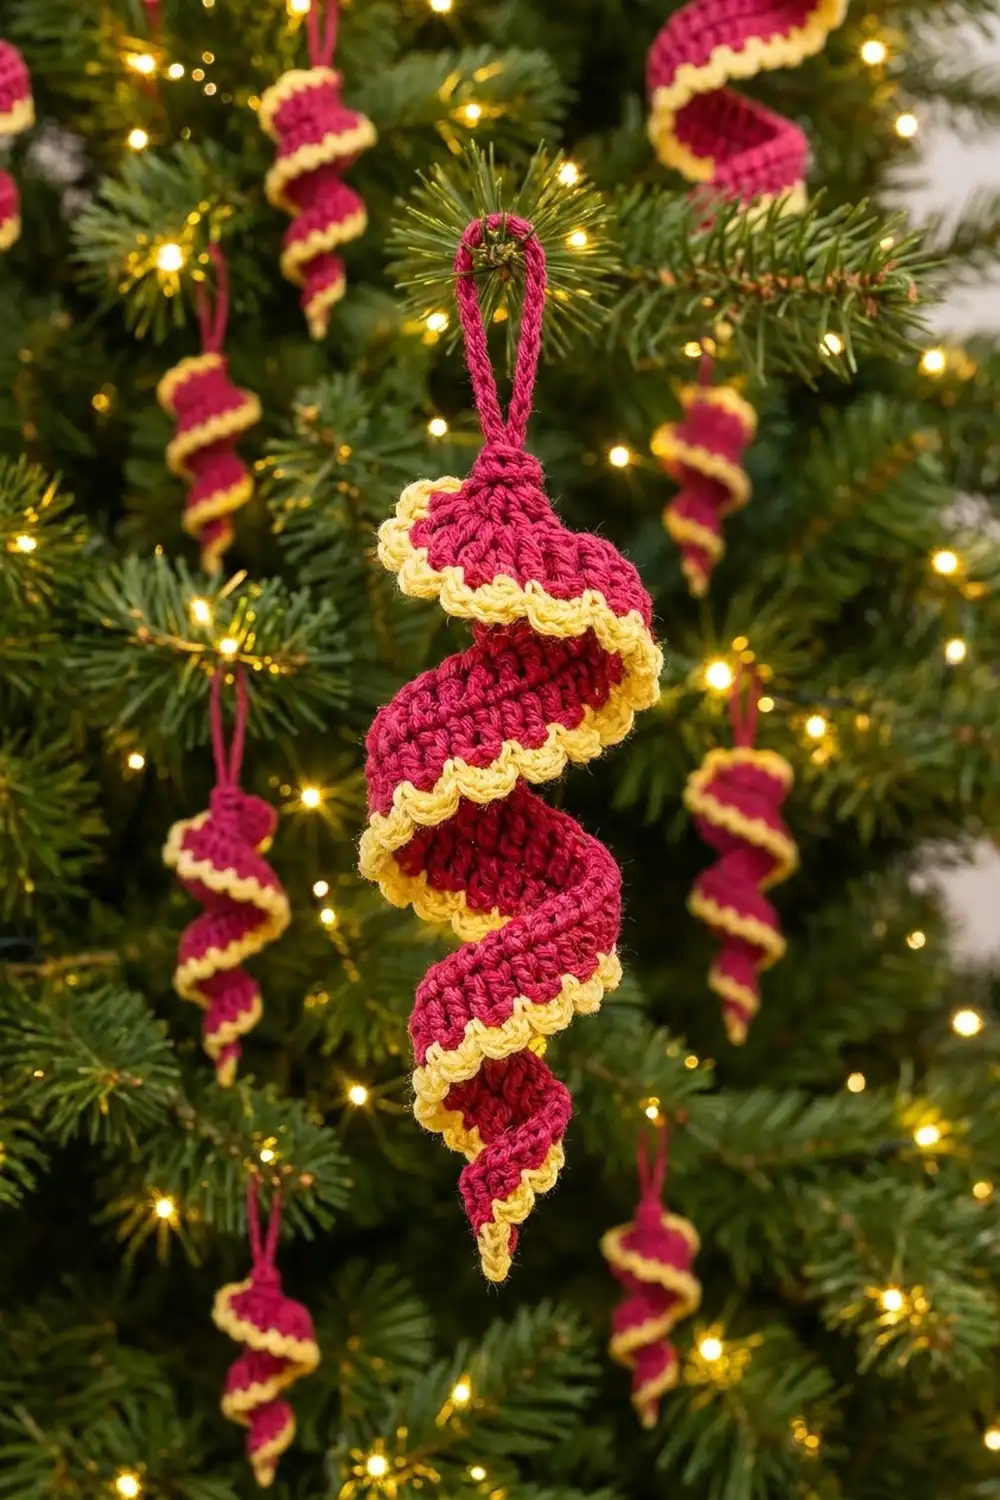
The colors are bright and festive without being the usual red and green. The ornament catches the tree lights as it slowly turns on its loop. It is quick to make, so you can stitch a whole batch in an evening.
The pattern uses US crochet terms. The finished spiral is about 5.5 in (14.0 cm) long and 2 in (5.1 cm) across at its widest. Including the hanging loop, it is about 7.75 in (19.7 cm) long.
Construction is simple:
– Crochet one straight strip of graduated stitches on a foundation chain.
– Double every stitch in the second row so the strip twists on its own.
– Add a yellow scalloped edge.
– Gather the top and add a chain loop.
Finished Size and Construction
- Finished size: 5.5 in (14.0 cm) long x 2 in (5.1 cm) wide, plus a 2.25 in (5.7 cm) loop
- Overall length: about 7.75 in (19.7 cm)
- Skill level: Easy
- Terminology: US crochet terms
- Yarn weight: DK (light, #3)
- Hook: 3.5 mm (E-4)
- Number of pieces: 1
- Layout: one tapered strip that twists into a corkscrew
- Flat strip length (Row 1): 7 in (17.8 cm)
- Band width before border: 1 in (2.5 cm) at the wide end
- Border depth: about 0.3 in (0.8 cm)
- Band width after border: 1.3 in (3.3 cm) at the wide end
Materials
Choose a smooth, tightly plied DK yarn. Cotton or a cotton blend gives the crispest scallops and holds the twist best. Acrylic works too, but it may need a little more steam to set the spiral.
- Color A, raspberry/magenta: 8 g, about 18 m (19.7 yd)
- Color B, pale butter yellow: 3 g, about 7 m (7.7 yd)
These amounts are for one ornament. They include extra for tails, a gauge test, and the hanging loop.
Tools:
- 3.5 mm (E-4) crochet hook
- Tapestry needle
- Scissors
- Stitch marker (optional)
- Pencil, chopstick, or 0.5 in (1.3 cm) wooden dowel for blocking
- Spray bottle or steam iron
Abbreviations (US Terms)
- ch: chain
- sl st: slip stitch
- sc: single crochet
- hdc: half double crochet
- dc: double crochet
- st(s): stitch(es)
- sk: skip
- RS / WS: right side / wrong side
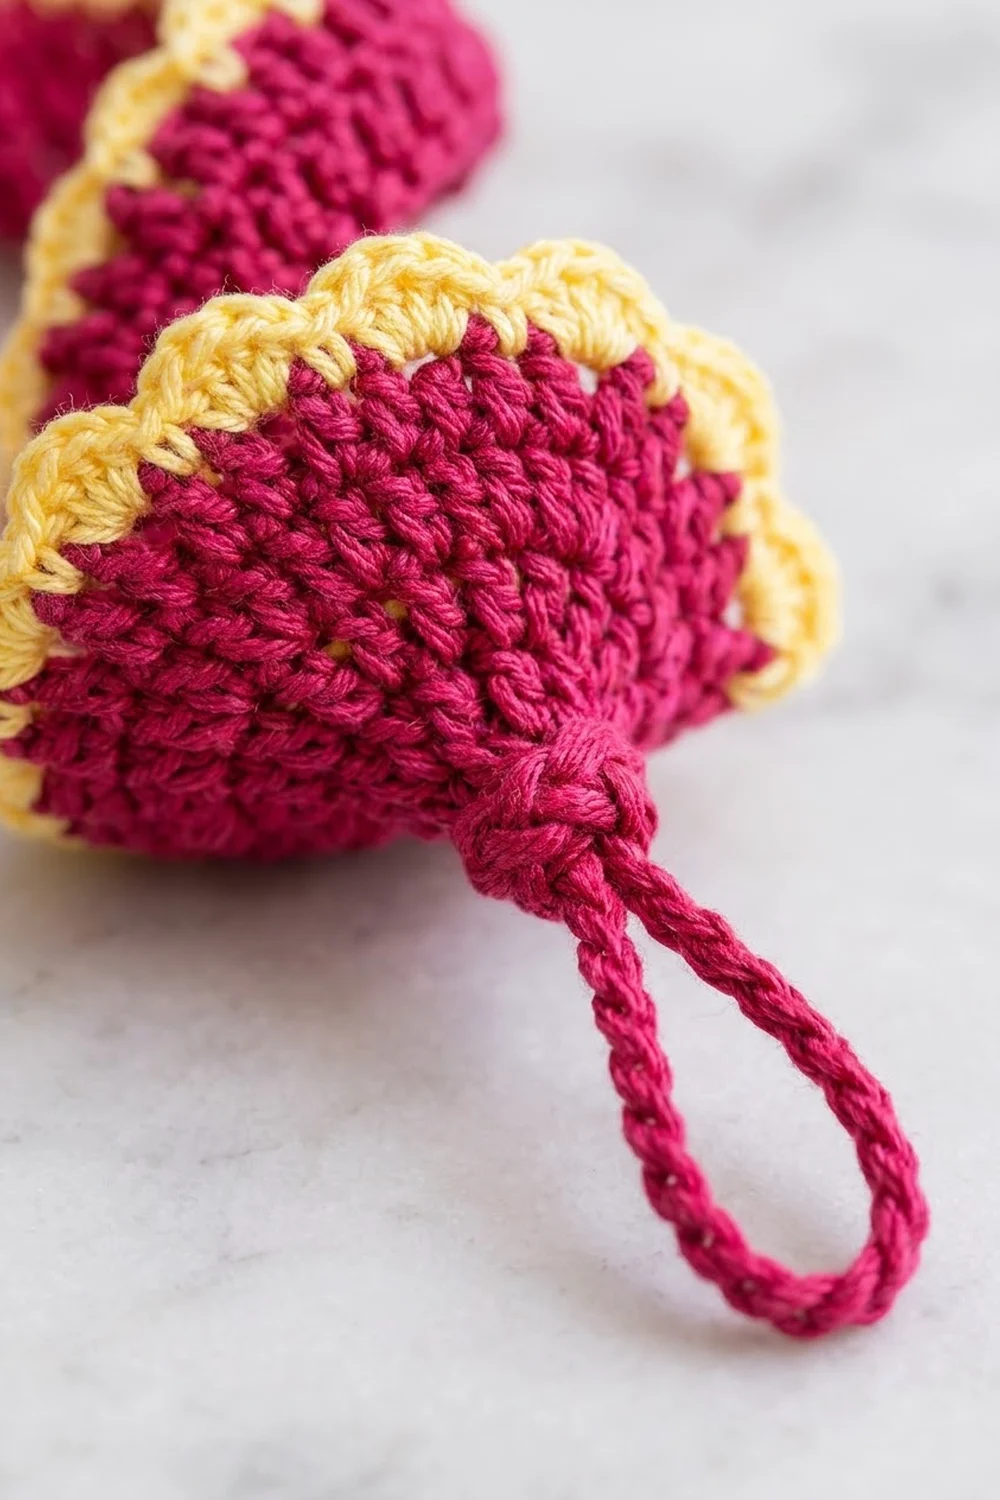
Special stitch: Scallop. Work 3 hdc into the same stitch. Each scallop sits between two sc and forms one small rounded bump on the yellow edge.
Gauge and Checkpoints
This is a single small piece, so your first ornament is your gauge test. Work Row 1 and measure it before you continue.
Gauge: 20 sts = 4 in (10.2 cm) along the Row 1 edge. One row of dc is 0.5 in (1.3 cm) tall.
Checkpoint 1 (after Row 1): The flat strip measures 7 in (17.8 cm) long and 0.5 in (1.3 cm) tall at the dc end. It should lie flat or curve only slightly.
Checkpoint 2 (after Row 2): The band is 1 in (2.5 cm) wide at the wide end. The strip should already be twisting on its own into about 2.5 to 3 turns.
Checkpoint 3 (after the border): The band is 1.3 in (3.3 cm) wide at the wide end, with 17 even scallops along the outer edge.
Checkpoint 4 (finished): The twisted body hangs about 5.5 in (14.0 cm) long and 2 in (5.1 cm) wide at the top.
If Row 1 is longer than 7.25 in (18.4 cm): Your stitches are too loose. Go down to a 3.25 mm hook and start again.
If Row 1 is shorter than 6.75 in (17.1 cm): Your stitches are too tight. Go up to a 3.75 mm hook.
A small size difference is not critical for an ornament. Tension that is too loose, though, makes a floppy spiral that will not hold its shape.
The Spiral Strip
Leave a 12 in (30.5 cm) starting tail. You will use it later to gather the top of the ornament.
Foundation: With Color A, ch 36.
Row 1 (RS): Sl st in 2nd ch from hook, sc in next 5 ch, hdc in next 8 ch, dc in next 21 ch. Turn. (35 sts: 1 sl st, 5 sc, 8 hdc, 21 dc)
The sl st end is the narrow bottom tip. The dc end, where your starting tail hangs, is the wide top.
The graduated stitch heights create the taper. Each group is one stitch height taller than the last, so the strip gets taller step by step from tip to top.
Row 2 (WS, twist row): Ch 2 (does not count as a st). Work 2 dc in each of the 21 dc, 2 hdc in each of the next 8 hdc, 2 sc in each of the next 5 sc, then sc in the last sl st. (69 sts: 42 dc, 16 hdc, 10 sc, 1 sc)
On the final sc, change to Color B:
1. Insert hook, yarn over with A and pull up a loop.
2. Yarn over with B and pull through both loops.
3. Cut A, leaving a 4 in (10.2 cm) tail. Turn.
Row 2 makes the twist. Its outer edge has 69 stitches sitting on top of only 35, so the outer edge becomes about twice as long as the foundation edge. That extra length cannot lie flat, so the strip coils into a corkscrew. Don’t fight it; let the strip curl as you work.
Now do Checkpoint 2. The band should be 1 in (2.5 cm) wide at the wide end.
Border: Yellow Scalloped Edge
Work the scalloped edge only along the outer (Row 2) edge. The foundation-chain edge, the narrow tip, and the short top edge get no border.
Border gauge: One repeat (sc + scallop) covers 4 sts of Row 2 and measures about 0.4 in (1.0 cm). The border adds about 0.3 in (0.8 cm) to the band width.
Row 3 (RS, border): With Color B, ch 1. Sc in first st, sk next st, 3 hdc in next st (scallop), sk next st, sc in next st; rep from * 16 more times. (17 repeats: 18 sc + 17 scallops of 3 hdc = 69 sts)* Fasten off, leaving a 4 in (10.2 cm) tail.
This row starts at the narrow tip and ends at the wide top. The first scallop sits right near the point, which gives the ornament its yellow tip.
Why the math works: Each repeat uses 4 stitches, plus 1 stitch for the opening sc, so the edge needs a multiple of 4 plus 1. Row 2 has 69 sts: 1 + (17 x 4) = 69. The final sc lands exactly in the last stitch of Row 2, so there is no partial repeat at the top.
The border row also keeps the stitch count the same. Each repeat replaces 4 stitches with 1 sc and 3 hdc, so Row 3 still has 69 stitches. That is why the edge stays a steady spiral instead of flaring out further.
Top Finish and Hanging Loop
Do this after the border is complete.
Gather the top:
1. Thread the 12 in (30.5 cm) starting tail onto a tapestry needle.
2. Weave it in and out along the short top edge, through the side of the Row 1 dc, the Row 2 dc, and the yellow sc at the end of Row 3.
3. Pull firmly to gather this edge into a small rounded cap.
4. Take two small stitches to lock it. Leave the rest of the tail hanging for now.
Hanging loop: With Color A, join with a sl st at the center of the gathered cap. Ch 22, then sl st in the same spot. Fasten off, leaving an 8 in (20.3 cm) tail. The loop stands about 2.25 in (5.7 cm) tall.
Wrapped knot:
1. Thread the loop tail onto the needle.
2. Wrap it snugly 4 times around the base of the loop, just above the cap.
3. Pass the needle up under the wraps, then back down through the cap to secure.
This makes the neat magenta knot between the cap and the loop. Weave in this tail and the rest of the starting tail inside the cap.
Weave in the Color A and Color B tails at the tip through stitches of the same color, so nothing shows on the other color.
Final Blocking
Blocking sets the corkscrew so the turns stay even and the ornament hangs straight.
- Lightly spritz the ornament until it is damp, not wet. For acrylic, plan to steam it instead.
- Hold the gathered top against the end of a pencil, chopstick, or 0.5 in (1.3 cm) dowel.
- Wrap the strip around the dowel in a spiral, with the foundation edge against the wood and the yellow scallops facing out.
- Space the turns evenly so the body covers about 5.5 in (14.0 cm) of the dowel. Aim for about three full turns.
- Pin or tie the tip in place with a scrap of yarn.
- Gently press each scallop so it points outward and sits rounded.
- For acrylic, hold a steam iron about 1 in (2.5 cm) above the piece for a few seconds. Never let the iron touch the yarn.
- Let it dry completely on the dowel, usually several hours.
- Slide it off, hang it by the loop, and do Checkpoint 4.
Final Quality-Control Checklist
- Row 1 has 35 sts: 1 sl st, 5 sc, 8 hdc, 21 dc.
- Row 2 has 69 sts, with every Row 1 st doubled except the sl st.
- Row 3 has 17 scallops and 18 sc, with the last sc in the last st.
- Yellow appears only on the outer edge, from the tip to the top.
- The band is 1.3 in (3.3 cm) wide at the wide end.
- The spiral makes about three even turns.
- The body hangs 5.5 in (14.0 cm) long and 2 in (5.1 cm) wide.
- The top cap is fully closed, with no gap showing.
- The loop is about 2.25 in (5.7 cm) tall and firmly anchored.
- All tails are woven in and hidden.
Troubleshooting
The strip does not twist. You probably missed some increases in Row 2. Count again; it must have 69 sts.
The spiral is too tight and bunched. Your Row 2 tension is too tight. Work Row 2 with a hook 0.25 mm larger, or block it around a thicker dowel.
The scallops don’t end evenly. Recount Row 2. If it isn’t 69 sts, the 4-stitch repeat won’t finish cleanly.
Yellow shows on the magenta side. Weave each tail only through stitches of its own color.
The ornament hangs crooked. Block it again with more even spacing, and make sure the loop is centered on the gathered cap.
There’s still a hole at the top. Pull the gathering tail tighter and add one more locking stitch through the center.
Care
Spot clean with cool water and mild soap, then reshape around a dowel and let it dry. Store it flat or hanging, not crushed in a box, so the spiral stays crisp.
Final Notes
Every stage builds on the one before:
– Row 1 sets the flat length at 7 in (17.8 cm).
– Row 2 doubles the outer edge to 69 sts and widens the band to 1 in (2.5 cm), which creates the twist.
– The scalloped border adds 0.3 in (0.8 cm), for a band 1.3 in (3.3 cm) wide.
– Blocking turns the strip into a spiral 5.5 in (14.0 cm) long and 2 in (5.1 cm) wide.
– The 2.25 in (5.7 cm) loop brings the total length to 7.75 in (19.7 cm).
Check each stage, and every ornament in your batch will match.
Happy crocheting!