
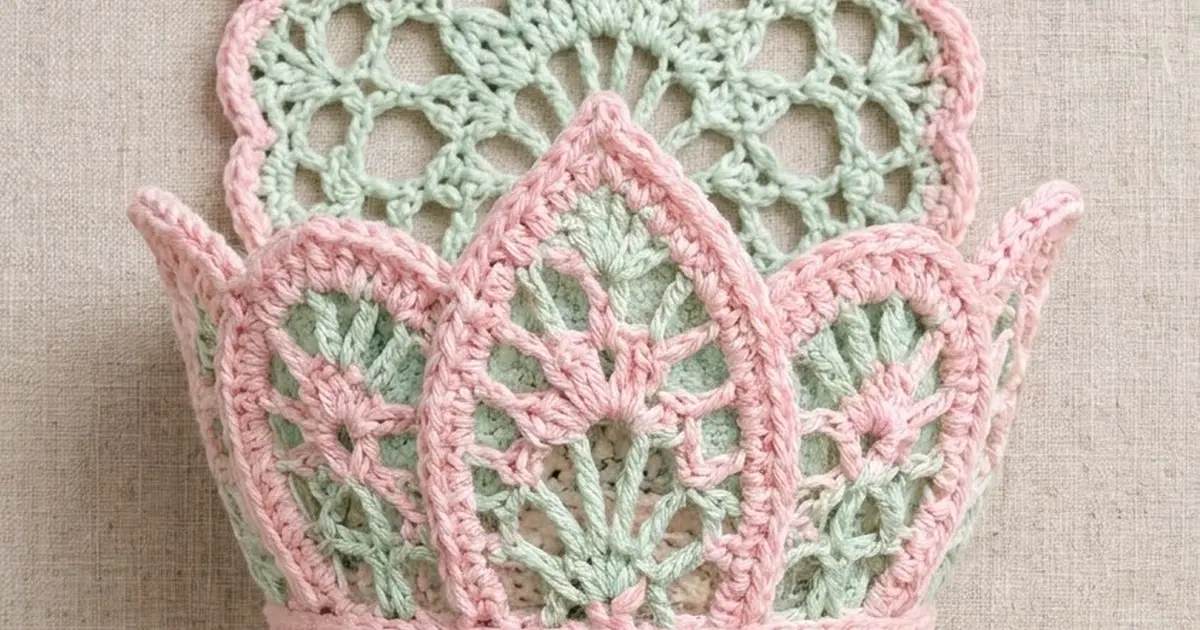
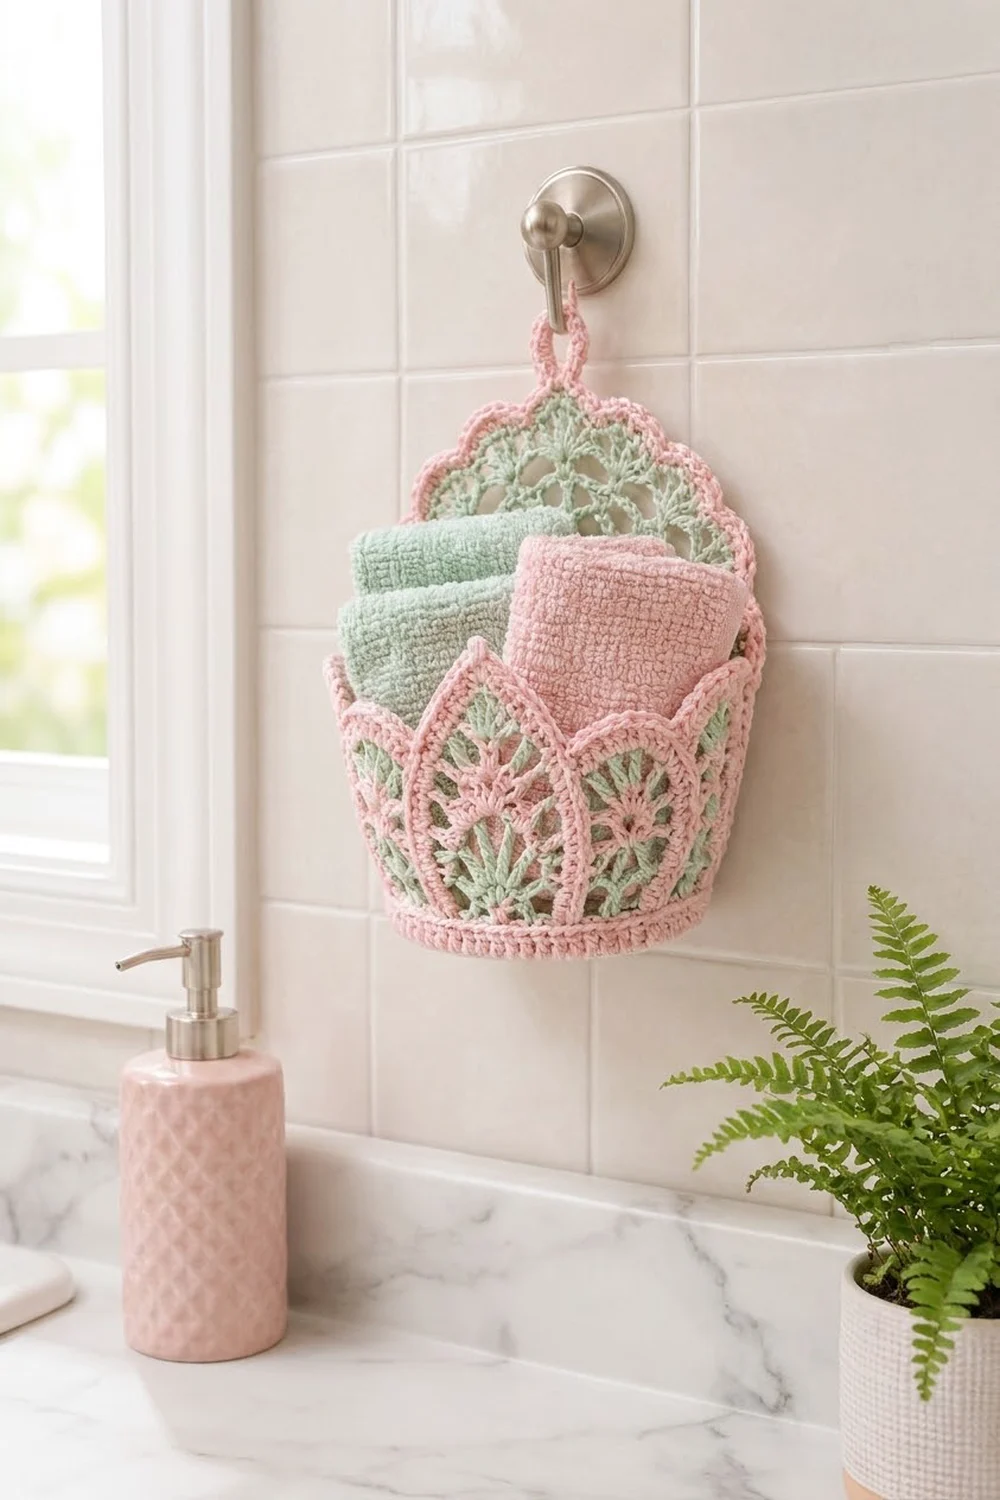
This hanging basket pairs soft mint lace with pink edging. A tall arched back panel hangs from a hook and a crown of pointed petals curves around the front. A firm round base holds the shape. It works well for washcloths, cotton pads, or small toiletries.
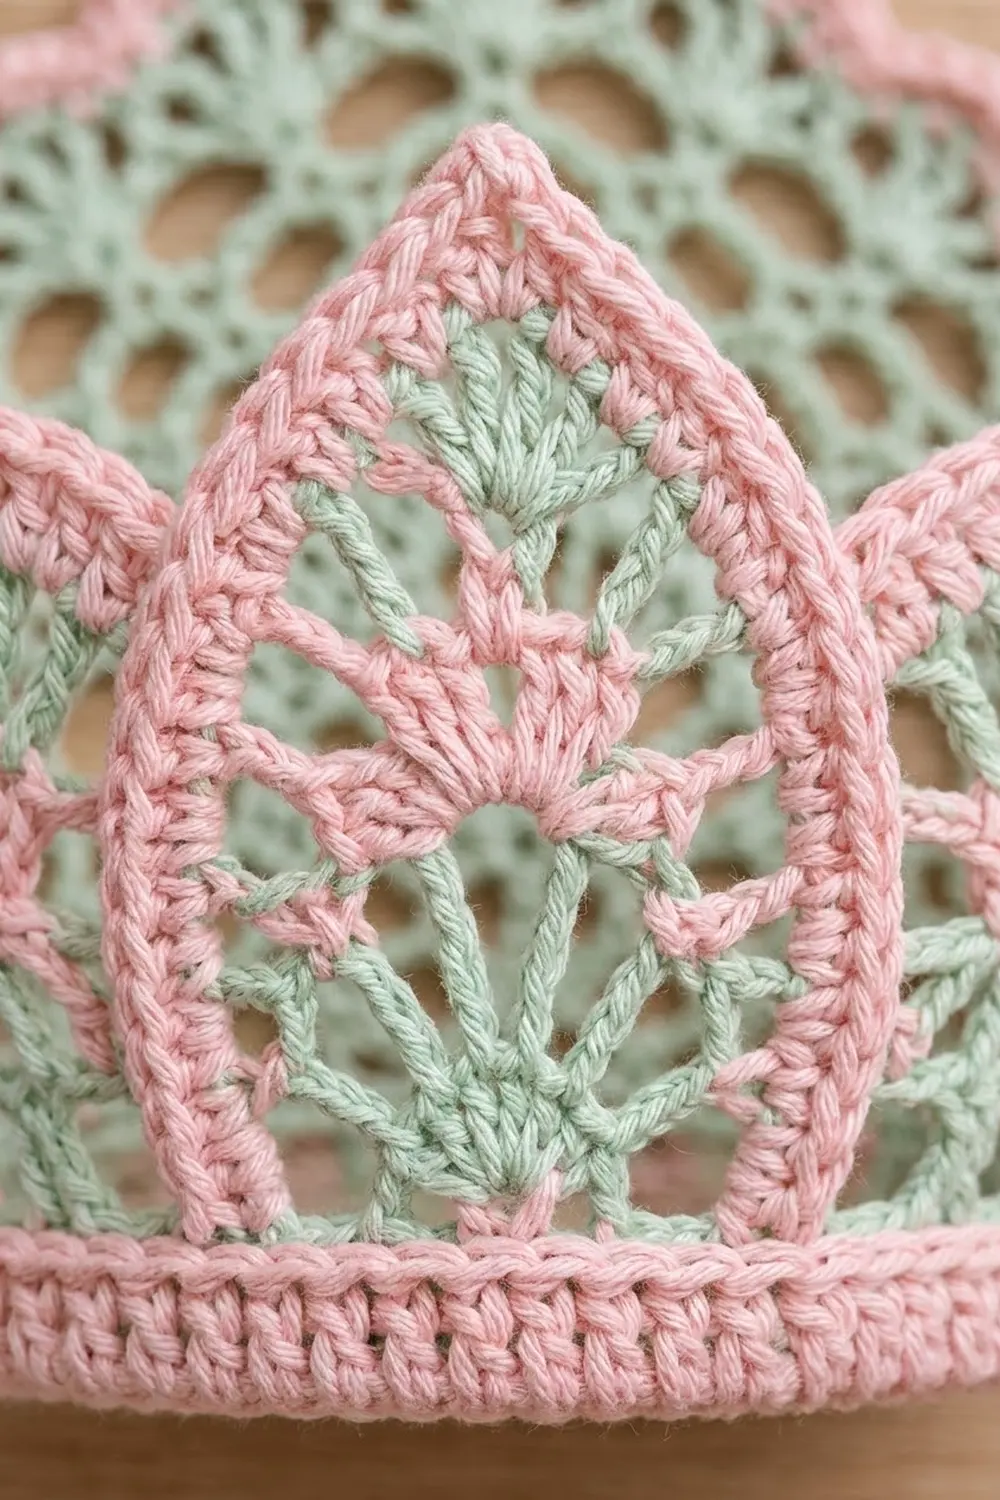
The style is light and vintage: a central fan, an open chain lattice, rounded pink scallops, and clean pink petal outlines. Mint is used for the lace. Pink is used for structure and trim.
The pattern uses US crochet terms. The finished basket measures about 6 in (15.2 cm) across at the base and 11 in (27.9 cm) tall including the hanging loop. The front band stands about 4.75 in (12.1 cm) tall.
You will make three flat pieces: a base circle, a back panel worked from the bottom up, and a front band with petals worked upward from a pink strip. You seam the pieces together, then work one border round that outlines the petals and adds scallops to the panel.
Finished Size and Construction
- Finished size: 6 in (15.2 cm) wide at the base, 11 in (27.9 cm) tall with the loop
- Skill level: Intermediate
- Terminology: US
- Yarn weight: Worsted (#4) cotton
- Hook: 4.0 mm (G-6)
- Number of pieces: 3 (base, back panel, front band)
- Layout: back panel flat against the wall; front band curved around the front half of the base
- Piece sizes: base 5.75 in (14.6 cm) across; back panel 9 in × 9 in (22.9 × 22.9 cm) before edging; front band 9 in (22.9 cm) long
- Size before border: back panel 9.5 in (24.1 cm) wide with its pink sc edging
- Border depth: about 0.5 in (1.3 cm) of scallops on the panel and 0.25 in (0.6 cm) of outline on the petals
Materials
Use a smooth worsted cotton, either mercerized or matte. Cotton holds the lace open and stays firm after blocking. Acrylic also works, but the basket will be softer.
- Mint: 70 g, about 110 m
- Pink: 45 g, about 70 m
These quantities include a margin of roughly 15%.
Tools: 4.0 mm (G-6) hook, tapestry needle, 4 locking stitch markers, scissors, rustproof pins, blocking mat, spray bottle.
Abbreviations (US Terms)
- ch – chain
- sl st – slip stitch
- sc – single crochet
- hdc – half double crochet
- dc – double crochet
- sk – skip
- sp(s) – space(s)
- st(s) – stitch(es)
- RS / WS – right side / wrong side
Special stitch, scallop: sk 1 st, 5 dc in next st, sk 1 st, sc in next st. Each scallop uses 4 sts.
Gauge and Checkpoints
Gauge: 16 dc and 9 rows = 4 in (10.2 cm) in mint with a 4.0 mm hook.
Make the base first. It serves as the gauge test for the whole project.
- Base after Round 3: 2.75 in (7.0 cm) across
- Base after Round 6: 5.25 in (13.3 cm) across
- Base after Round 7: 5.75 in (14.6 cm) across
- Back panel after Row 2: 9 in (22.9 cm) wide
- Back panel after Row 7: 4.5 in (11.4 cm) tall
- Front band after Row 2: 9 in (22.9 cm) long
If the base is too big, go down a hook size. If it is too small, go up a size. Get gauge right before you start the walls, because every seam depends on 36 stitches measuring 9 in (22.9 cm).
Part 1: Base
With mint, make a magic ring.
Round 1: Ch 3 (counts as dc throughout), 11 dc in ring, sl st to top of ch-3. (12 dc)
Round 2: Ch 3, dc in same st, 2 dc in each st around, sl st to join. (24 dc)
Round 3: Ch 3, 2 dc in next st, [dc in next st, 2 dc in next st] around, sl st to join. (36 dc)
Round 4: Ch 3, dc in next st, 2 dc in next st, [dc in next 2 sts, 2 dc in next st] around, sl st to join. (48 dc)
Round 5: Ch 3, dc in next 2 sts, 2 dc in next st, [dc in next 3 sts, 2 dc in next st] around, sl st to join. (60 dc)
Round 6: Ch 3, dc in next 3 sts, 2 dc in next st, [dc in next 4 sts, 2 dc in next st] around, sl st to join. (72 dc) Fasten off mint.
Round 7: Join pink in any st, ch 1, sc in each st around, sl st to first sc. (72 sc) Fasten off.
Mark sc 1 and sc 37. Stitches 1–36 will hold the back panel, and stitches 37–72 will hold the front band.
Part 2: Back Panel
With mint, ch 37.
Row 1 (RS): Sc in 2nd ch from hook and in each ch across. (36 sc)
Row 2: Ch 3, turn, dc in each st across. (36 dc)
Row 3: Ch 1, turn, sc in first dc, [ch 5, sk 4 dc, sc in next dc] 7 times. (8 sc, 7 ch-5 sps)
Row 4 (fan): Ch 1, turn, sc in first sc, [ch 5, sc in next ch-5 sp] 3 times, 7 dc in next ch-5 sp, [sc in next ch-5 sp, ch 5] 3 times, sc in last sc. (6 ch-5 sps, one 7-dc fan, 8 sc)
Row 5: Ch 1, turn, sc in first sc, [ch 5, sc in next ch-5 sp] 3 times, ch 2, dc in first dc of fan, [ch 1, dc in next dc] 6 times, ch 2, [sc in next ch-5 sp, ch 5] 3 times, sc in last sc. (6 ch-5 sps, 7 dc, 6 ch-1 sps)
Row 6: Ch 1, turn, sc in first sc, [ch 5, sc in next ch-5 sp] 3 times, ch 3, sk ch-2 sp, [sc in next ch-1 sp, ch 3] 6 times, sk ch-2 sp, [sc in next ch-5 sp, ch 5] 3 times, sc in last sc. (6 ch-5 sps, 7 ch-3 sps)
Row 7: Ch 1, turn, sc in first sc, [ch 5, sc in next ch-5 sp] 3 times, ch 5, sk 2 ch-3 sps, sc in next ch-3 sp, ch 5, sk 1 ch-3 sp, sc in next ch-3 sp, ch 5, sk 2 ch-3 sps, [sc in next ch-5 sp, ch 5] 3 times, sc in last sc. (9 ch-5 sps, 10 sc)
In Row 7 you work into the 3rd and 5th of the 7 ch-3 sps. This keeps the lattice centered over the fan.
Row 8 (decrease): Turn, sl st in first sc and next 3 ch, ch 1, sc in same ch-5 sp, [ch 5, sc in next ch-5 sp] across. (8 ch-5 sps)
Rows 9–13: Repeat Row 8. Each row has one loop fewer: 7, 6, 5, 4, then 3 ch-5 sps after Row 13. Do not fasten off.
Edging Round 1 (pink): Change to pink. Ch 1, then sc evenly around the whole panel:
- Top (Row 13): 4 sc in each of the 3 loops (12 sc)
- Each tapered side (Rows 13–8): 3 sc per row end (18 sc)
- Each straight side (Rows 7–1): 3 sc per mesh row end, 2 sc for Row 2, 1 sc for Row 1 (18 sc)
- Bottom: 1 sc in each foundation ch (36 sc), with ch 1 at each bottom corner
Total: 120 sc. The corner ch-1s do not count as stitches. Sl st to join and fasten off. The panel should measure 9.5 in (24.1 cm) wide.
Part 3: Front Band
Strip: With pink, ch 37.
Row 1: Sc in 2nd ch from hook and in each ch across. (36 sc)
Row 2: Ch 1, turn, sc across. (36 sc) Fasten off.
Use markers to divide Row 2 into five sections: 3 sts (half petal), then three sections of 10 sts (full petals), then 3 sts (half petal). 3 + 30 + 3 = 36.
Full petal (make 3, one on each 10-st section):
- P1: Join mint in first st, ch 3, dc in next 9 sts. (10 dc)
- P2: Ch 1, turn, sc in first dc, ch 3, sk 4 dc, 7 dc in sp between 5th and 6th dc, ch 3, sk 4 dc, sc in last st. (7-dc fan)
- P3: Ch 1, turn, sc in first sc, ch 3, dc in first dc of fan, [ch 1, dc in next dc] 6 times, ch 3, sc in last sc. (7 dc, 6 ch-1 sps, 2 ch-3 sps)
- P4: Turn, sl st in first sc and next 2 ch, ch 1, sc in same ch-3 sp, [ch 3, sc in next ch-1 sp] 6 times, ch 3, sc in last ch-3 sp. (7 ch-3 sps)
- P5–P10: Turn, sl st in first sc and next 2 ch, ch 1, sc in same sp, [ch 3, sc in next ch-3 sp] across. Each row has one loop fewer: 6, 5, 4, 3, 2, then 1 loop at P10. That loop is the petal tip. Fasten off.
Half petal (make 2, one on each 3-st end section): Join at the stitch on the band end so that Row H8 starts at the inner edge.
- H1: Ch 3, dc in next 2 sts. (3 dc)
- H2–H7: Ch 3, turn, dc in next 2 sts. (3 dc)
- H8: Ch 1, turn, sc in first st, hdc in next st, dc in last st. (3 sts) This row slants upward toward the band end. Fasten off.
End edges: With pink, work 18 sc evenly along each end of the band: 1 sc per strip row (2 sc), 2 sc per row for H1–H7 (14 sc), and 2 sc for H8 (2 sc).
Make All Pieces
- Base: 1 (mint Rounds 1–6, pink Round 7)
- Back panel: 1 (mint Rows 1–13, pink Edging Round 1)
- Front band: 1 (pink strip and end edges; mint for 3 full petals and 2 half petals)
Layout (the band wraps around the front; the panel stays flat at the back):
            ( loop )
     /  BACK PANEL, 36 sts  \
    |                        |
  seam                     seam
    | H | P | P | P | H |   <- FRONT BAND, 36 sts
    \_____ BASE, 72 sts _____/
     back: 1-36  front: 37-72
Joining
Side seams: Hold one end of the band against one straight side of the back panel, RS out. With pink and a tapestry needle, whipstitch the 18 band-end sc to the 18 straight-side sc, one to one, through the outer loops. Repeat on the other side. The seams stop where the panel starts to taper.
Base seam: Hold the base under the walls, WS together. Line up the side seams with the markers at sc 1 and sc 37. Join pink at sc 1. Work each sc through one base stitch and one wall stitch together. Work 36 sc across the panel bottom (base sts 1–36), then 36 sc across the band foundation chains (base sts 37–72). Sl st to join. (72 sc)
This round makes the raised pink ridge. Each wall stitch pairs with exactly one base stitch, so the seam stays smooth with no ripples. Keep your tension even and no tighter than the base. A tight seam makes the walls lean inward.
Checkpoint: The front should stand about 4.75 in (12.1 cm) tall and the back should lie flat.
Border
The border is one pink round, worked with the RS facing, over the free top edges only. The border gauge matches the edging: 2 sc per petal row end and 1 sc per panel stitch.
Border Round: Join pink at the top outer corner of the right half petal.
- Front: Work 3 sc across H8, then 15 sc down the inner edge of the half petal. For each full petal, work 20 sc up the side (2 per row end, P1–P10), (sc, ch 3, sc) in the tip loop, and 20 sc down the other side. Finish with 15 sc up the inner edge of the last half petal and 3 sc across its H8. The front totals 162 sc plus 3 ch-3 tips.
- Back: Work across the 48 free panel stitches (18 tapered side + 12 top + 18 tapered side) and make [scallop] 12 times. Sl st to the first sc.
Hanging loop: Join pink at the 6th sc of the back section, which sits at the center of the top edge. Ch 16, sl st in the same st, ch 1, work 24 sc into the loop, and sl st to join. Fasten off.
Why the math works: Each scallop uses 4 sts, and 48 ÷ 4 = 12, so the scallops end cleanly at both seams. On the front, each petal has the same count going up and coming down (20 + 20), so every tip sits centered over its fan.
Final Blocking
- Weave in all ends along the seams.
- Wet the basket, then press out the water in a towel.
- Stuff the basket firmly with a rolled towel so the front band curves smoothly.
- Pin the back panel flat at 9.5 in (24.1 cm) wide. Open each lattice loop and each scallop.
- Pin each petal tip upward so the band stands 4.75 in (12.1 cm) tall.
- Leave it to dry completely, at least 24 hours.
Final Quality-Control Checklist
- The base measures 5.75 in (14.6 cm) and lies flat.
- The base seam has exactly 72 sc and the ridge is even.
- Each side seam has 18 stitches and the band is not twisted.
- All 3 petal tips sit centered over their fans.
- The panel has 12 evenly spaced scallops.
- The hanging loop is centered and firmly attached.
- All ends are secured.
Troubleshooting
- The base ruffles: Your tension is loose or you added extra increases. Recount each round against 12, 24, 36, 48, 60, 72.
- The base cups: Your tension is tight. Go up one hook size.
- The fan is off-center: Check that Row 3 has 7 loops and that the fan sits in the 4th loop.
- The petals lean: Your counts are uneven. Each P-row should lose exactly one loop.
- The panel flops forward: Block it flat again and add a second sc round to the loop.
- The scallops crowd at a seam: Recount the free stitches. You need exactly 48.
Care
Hand wash in cool water. Lay flat to dry, reshaping the petals while damp, and do not tumble dry.
Final Notes
Every measurement depends on one gauge: 16 dc = 4 in (10.2 cm). At that gauge the 72-stitch base measures 5.75 in (14.6 cm) and splits into two 36-stitch halves. Each half matches a 36-stitch wall that is 9 in (22.9 cm) long. The side seams line up because both edges carry exactly 18 sc. The 48 free panel stitches divide evenly into 12 scallops. Check each of these as you go, and the basket will hang straight and keep its crown shape.
Happy crocheting!